Dynamic Machines Challenge Submission - ‘Aliens’

[Vid above: DMC Submission | 2mins loop]
TLDR:
This is my submission for Clint’s aka @pwnisher Dynamic Machines Challenge. The concept is based on H.R. Giger’s work from the movie franchise ‘Aliens’. The chrome balls are eggs in my ‘contraption’ in which they get laid while a curious astronaut wanders too close for comfort.
Made in Blender 2.93 and rendered with Cycles. Compositing in Fusion. Sound design/editing + final render in After Effects.

[Vid above: Creative Process + VFX Breakdown + Bonus Render]
INTRODUCTION:
For those who haven’t heard, the Dynamic Machines Challenge is a 3D render contest where artists are tasked with creating their own rube-goldberg contraption in which a chrome ball enters and does whatever you want it to do before it exits the play area so that it is passed on seamlessly to the next artist’s submission. Contest details here: https://www.pny.com/promo/professional/dynamic-machines
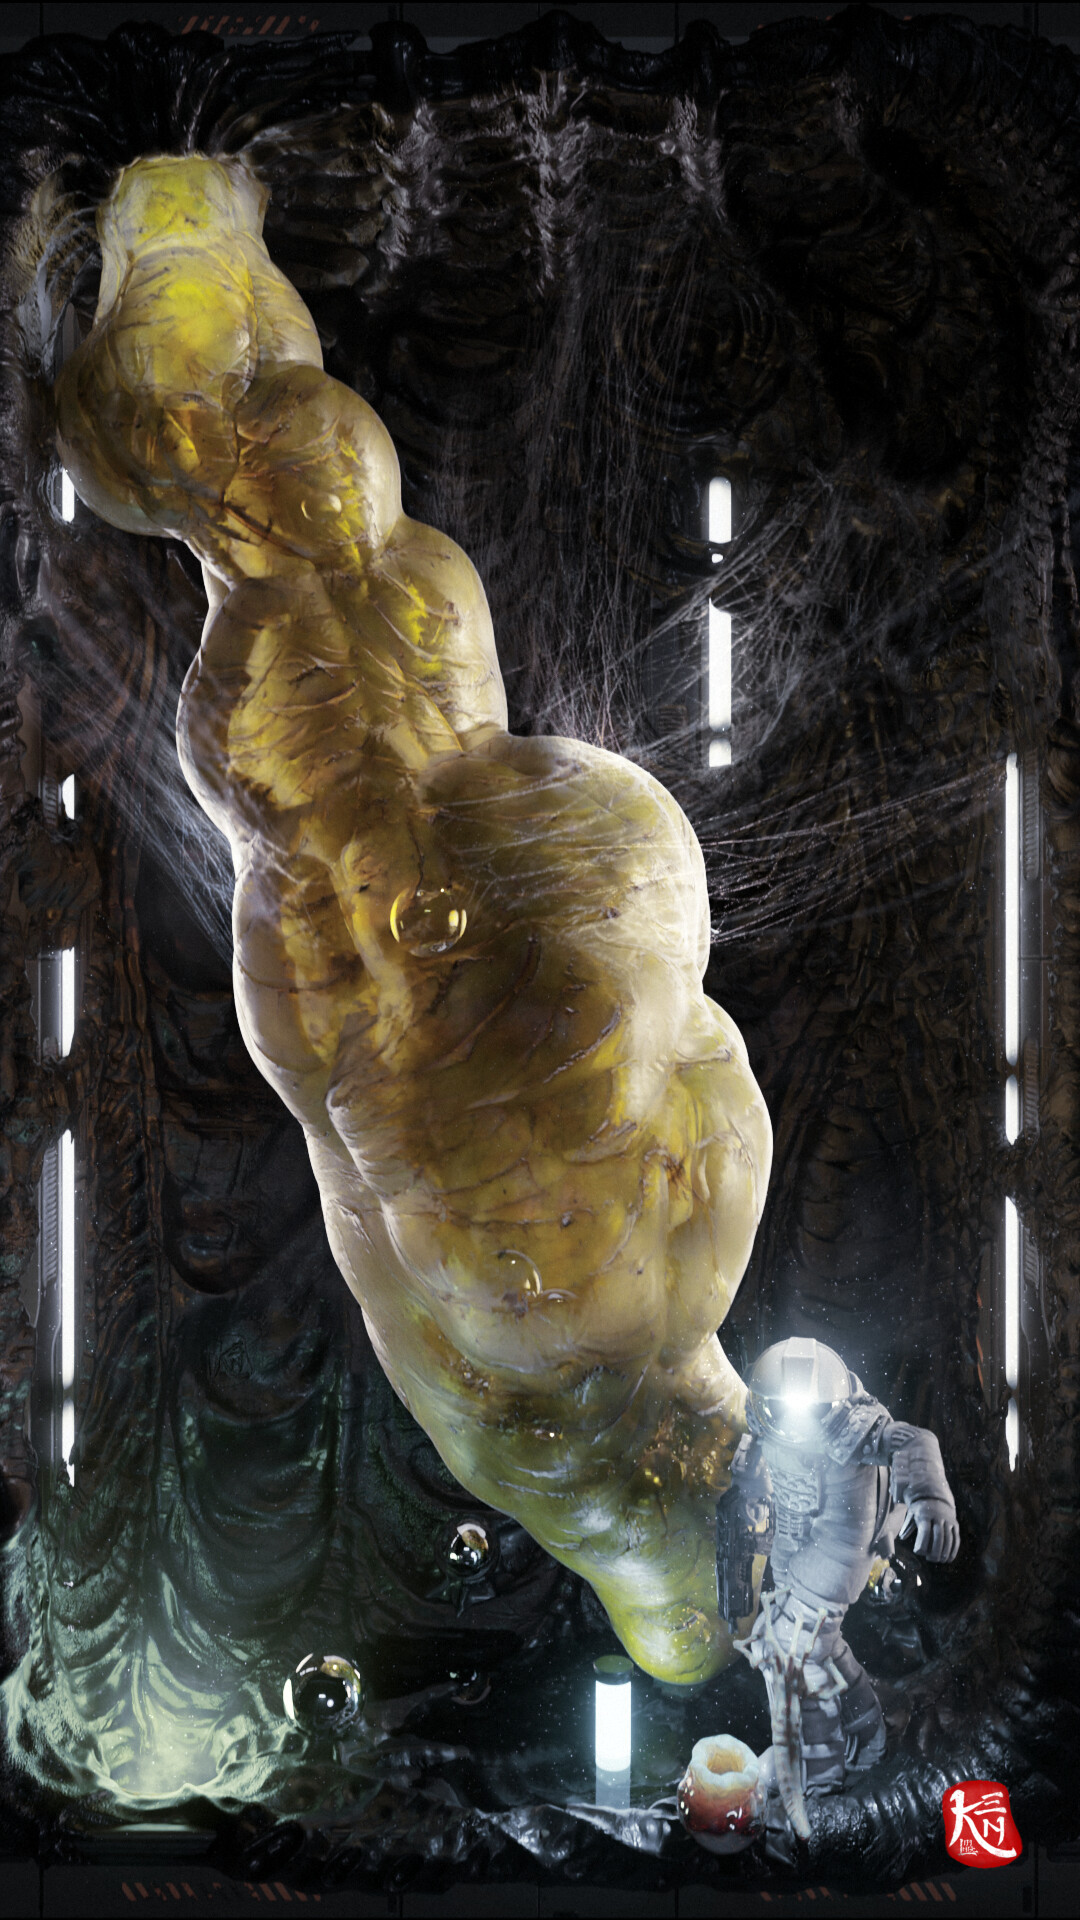
[Pic above: Still from final render]
HOW IT BEGAN:
The most important thing to get right very early on is to have a unique and captivating idea/concept for my submission. Assuming everyone is at the same technical skill level, the only thing that makes your work stand out is the creative aspect of it. Basically, it needs to wow the judges at first sight. It has to be memorable.
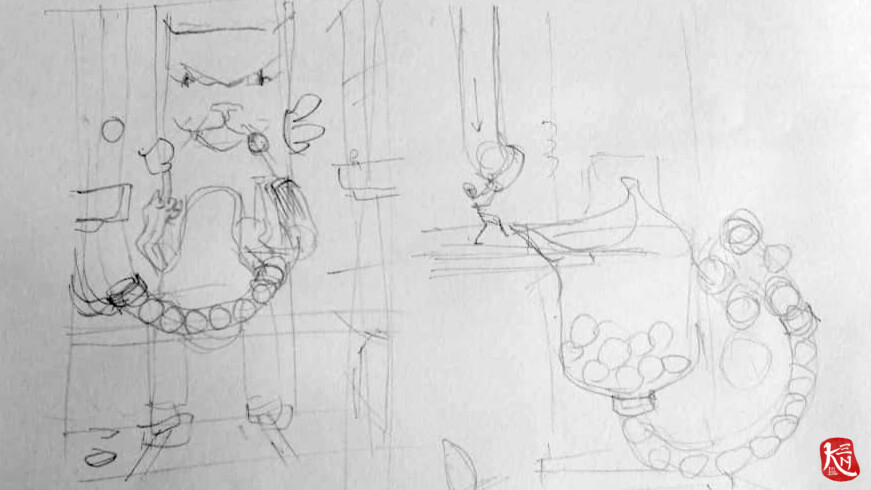
[Pic above: Sketch for a rejected idea]
Initially I had an idea where the chrome ball falls down into a tube which is feeding a series of many other balls as ammo into a mech’s weapon, and fires them at a colossal feline (or is it the mech that is tiny?) as a large hangar door opens dramatically while the camera is panning down. I later learnt that one of the rules does not allow the modification of the box that is provided (no excessive holes and windows), so I had to scrap this idea away. I thought of a few more different ideas and decided to play it safe with an idea for a conventional rube-goldberg contraption until I heard Clint mentioned in one of his live streams that the contraption doesn’t have to be a machine in the first place. This gave me the confidence to pursue the idea that I’ve arrived at now, a concept/story based on the work of H.R. Giger’s in the movie franchise ‘Aliens’.

[Pic above: Clay render]
One of the biggest challenges for me in this contest is to tell a story within 15 seconds, with the ball only present for actually 7+ seconds from time of entry to exit. Having worked in the advertising industry where we constantly have to fit as much info as we can into as little time as possible, I once again leaned on my experience to navigate around this obstacle. I’ve decided to keep everything as simple as possible, and focus on the story telling instead. As a result, there isn’t much happening with the balls in comparison with other submissions out there, but I hope for what I lacked in the action department, I make up for in the story/concept. I didn’t want the ball to just be a ‘spectator’ and go through a very nice scene. Every element has its purpose - the balls are eggs, an alien emerges from one of the eggs and attacks the hero, hero panics and fires aimlessly, punctures the egg sac and spills many many eggs, pushes one of them into the exit. Cause and effect. Action and reaction. Any other elements that doesn’t affect this chain reaction, I left it out of the scene.(For example, I wanted to show past victims plastered on the walls, having a xenomorph enter and land in front of the hero towards the end, overhanging vents as seen in the blockings, etc.)
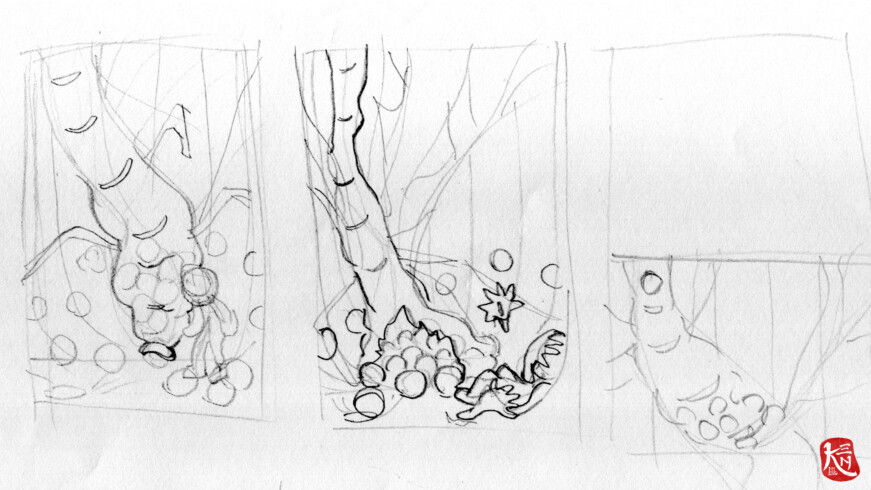
[Pic above: Concept Doodles]
THE MAKING OF:
With the idea set in mind (and on paper), the first thing to do is to have a blocking of the entire animation. This is a crucial step in order to make sure the timing and pacing of the animation is easy to follow for the viewers. Once the key events are blocked out with placeholder primitive models, I then move on to work on the details.
The first thing I worked on is the main character - the egg sac. It was procedurally modeled with a curve, turning it into a tube and then applying voronoi displacements to achieve the organic lumpy look. The displacements projection are driven by an empty in order to create the pulsating animation. Once I’m satisfied with the model, I then rigged it with an armature for more detailed animation of the sac swaying around. There were a few of duplicates for the sac where a couple is used as rigid bodies to store the eggs dynamically, and another one(the one you see on screen) used for cloth simulation where we see it tear and react to the eggs spilling out.

[Pic above: Renderlution]
Next thing on the to do list is the hero character. I wanted to keep it as close to the ones as they used in the movies but I also wanted to save time from modelling the entire suit from scratch. Hence, I scoured online and found this Nostromo spacesuit which is originally a 3D printable stl. I remeshed the model to get a lighter topology and rigged it to have it ready for animation. I initially had done the keyposing in the early stages of animation but in order to get the perfect sense of weight and timing, I filmed myself acting it out and used it as video reference.
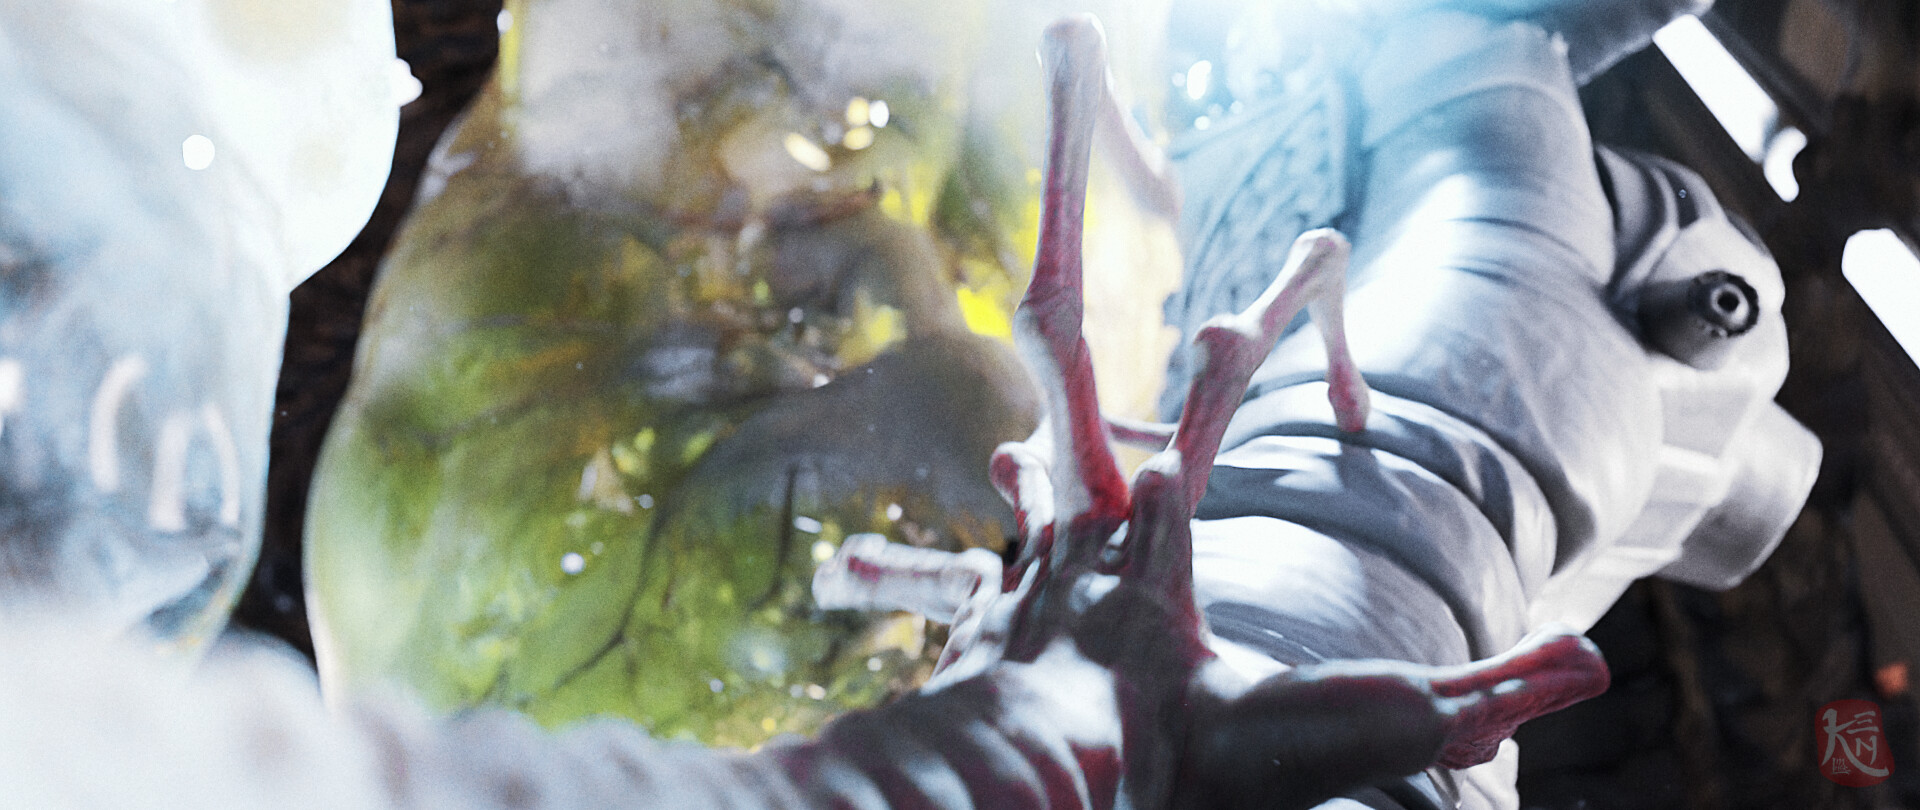
[Pic above: Still from bonus render]
With the main animations done, I moved on to the supporting element which is the hive environment. This is arguably the most enjoyable part of this project as I get to sculpt it freely without having to follow a strict blueprint. I spent most of the time adding details where they are visible on screen, while the details at the parts obscured by the egg sac were kept to a minimum.
The face hugger was the last and final thing I did for this scene. Based on the original creature design from the movies, I made a simpler design with only five ‘fingers’ that resembles a palm (instead of 2 joined palms). As much as I liked the original design, I didn’t want to make a direct replica of it as to not make the viewers draw comparisons and question consistencies for the entire scene (such as the eggs not looking like the ones from the movies).

[Pic above: Another still from bonus render]
With everything in place, it was finally time to render and bring it to Fusion for post work. This is also a very enjoyable process for me as I get to further enhance my 3D renders with compositing. Passes such as different mattes created from cryptomatte, mist(for depth) and AO were output together at the same time as the Cycles render in Blender for use in compositing. Many if not most of the other passes such as volumetric, dust particles, bloom, and the webs were rendered separately in Eevee to save rendering time. There were also a lot of vfx plates for dust/smoke(created with Particle Illusion), water and slime that were composited together to give it an extra edge. To finish it off, I color corrected it to follow the mood of the references from the movies which has a cooler tone all around.

[Pic above: Another still from bonus render]
CLOSING
It has been a blast working on this submission as I rarely get the chance to work on something that I have full creative control from start to finish. It was also a great pleasure to revisit the theme of H.R. Giger’s work which has inspired me (and many others for sure) to become a CG Artist in the first place. Oddly, this is my first time using rigid body simulations for my work, so I’ve definitely learnt some new stuff throughout this challenge. I’ve also made many friends along the way within the challenge’s community and it has been a great honor to work with you guys and offer each other help throughout the competition period. I’d like to also wish everyone who participated the best of luck and that I can’t wait to see the full montage with everyone’s submission stitched together. Until next time,…
“Thank you for watching, save your file, and I’ll see you in the next video!”
TECHNICAL DETAILS:
Made with Blender v2.93
Total frames rendered: 450 @30 fps (Not including other passes used for compositing)
Render details: Cycles render at 1080x1920 with OpenImageDenoiser, 512 samples, motion blur enabled.
Average render time per frame: 7mins (RTX 2080)
Project duration from start to finish (including render time): 3 weeks (roughly 2 weeks for production, and 1 week for post production.)
Compositing software: Blackmagic Design Fusion 16

More renders at my Artstation: https://www.artstation.com/artwork/w62vZg
To check out my other works, head on to https://www.youtube.com/kenliang
(Pls don’t forget to subscribe!)

