Hey all. I know for a lot of you out there this will sound pretty easy to do, but im struggling with it a bit. I need to draw a globe of the earth with all the countries on it and such. The countries all have to have a light purple shade to them and the ocean need to be dark puple. The other part it needs is the grid lines (lat and long) around the whole thing that shine purple, then make the whole thing rotate slowly. If anyone out there could help me with that (as im kinda new) i would really like it, thanks. (Hope that i put this in the right forum topic, if not sorry and please move it to the right place)
I’m currently rendering the animation.
The globe spins slowly and there are textures on the earth too but don’t expect professional quality though.
I’ll upload the AVI so you can see how it goes, hopefully this forum can play AVI files live on the post.
edit: I forgot to include the lat and long lines, but will do the render again after it’s finish the first one. As well as the purple stuff you mentioned.
Wolf.
Done, here’s earth spinning.
(Warning: 4MB video)
http://smg.photobucket.com/albums/v639/Ryu_Kaiser/?action=view¤t=earth.flv
Is this how you want it to be?
WoW, that is really nice, how did you made that?
wow, that is just, wow. How on earth did you do that?
Would you be abke to send me that Blend file?
Sorry just woke up ^.^!
How did I animate the Earth or how did I texture the Earth?
To animate the Earth I set 2 keyframes for the Earth and use Cyclic Extrapolation.
To texture the Earth, I got the earth maps and cloud maps from:
http://planetpixelemporium.com/earth.html
That site has the moon maps too with different resolution sizes.
awsome, how do i wrap thsoe maps around the globe i have made though? Plus how on earth do i make it pruple and have the gridlines?
For the planet Earth, you add a material first (the material will hold all your textures).
Then you add a image texture to your Earth by going to the F6 menu. When adding an image texture, you have to click on the “Load” button in the adding image menus of your texture. Once you’ve added your image (the earthmap1k.jpg for example), you should go back to your F5 material menus.
In the F5 material menu, go to the Map Input tab (should be on the right) and choose the mapping as “Sphere”. Leave the other option as they are, you don’t need to modify them.
Special Step: Now go to the Map To tab and activate the “Col” button if it’s not activated already.
The special step is different for the type of mapping you want. Since the first map you’re going to map is the earthmap1k.jpg (i.e. this is this map where the continents and seas are shown), you map it to the Color channel (which is why I said activate the “Col” button in the Map To tab of the F5 material menus). If you were to apply the Bump map next (i.e. earthmapbump1k.jpg), you would do change the channel for the Map To, to the channel Nor (for normal which is what bump mapping depends on).
Here’s a new modified earth I made with clouds this time (warning: 10MB):
If the top link doesn’t work, try this one (warning: 10MB):
Awsome. Ok i use the black and white image from that site you linked to and made them the purple colours i want. Then using the mapping to sphere it now creates a proper globe map and doesnt repeat itself like it was doing before. The hardest part im finding now is the glowing gridlines. I tried putting another sphere overlapping the first one and adding halos but that hasnt worked

If you want the grid lines this is what you could possibly do:
-
Add a new sphere of the same dimension as your Earth globe. If the new sphere is not the same dimension, you can just scale it to the same dimension. (Hint: Select the Earth globe and press the “N” key will show you dimension of that Earth object).
-
Give it a material and change it’s RGB colours to the one you want.
-
Now near the RGB sliders (maybe the left or the right), there should be a “Wire” button (under Links & Pipeline menu). Also, activate “Shadless” button which is found under the Material menu (above the RGB sliders).
-
Go to the editing menu (F9 menu) and click on “Set smooth”
Now you’re done with the purple latitude and longitude lines.
You should have something like this:

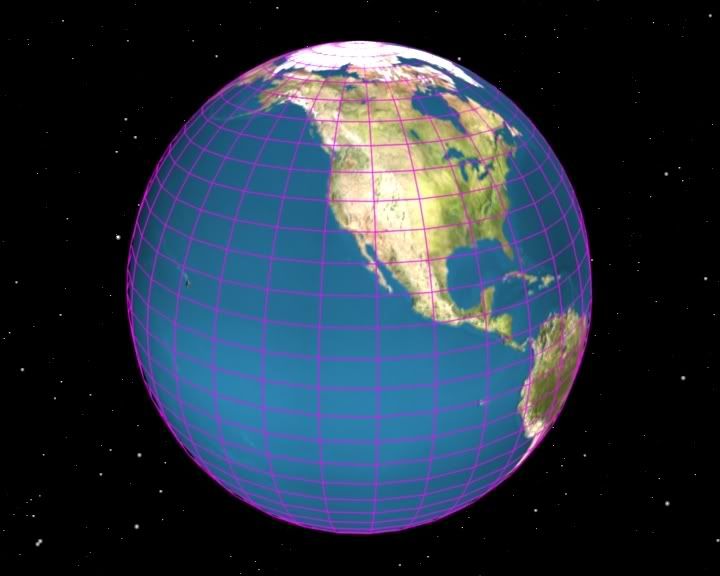
By the way, if you want to make your earth globe look purple, you should change the colour of the earthmap1k.jpg (i.e. the colour map of your earth with all the continent shown in green, yellow and blue) to purple instead of the black&white bump maps.
You can change the colour of your earth map using Gimp or Photoshop. Just go to (once you have the image in Photoshop):
Image > adjustment > colour balance
Then your whole image will become purple.
yeah, thx for your explanation

Wow, looks so good Sammo!
Very smooth wireframes
Thanks very much, I’m proud of it. And that site you got the textures off was amazing, all those different planet textures will be usefull in the future, thanks. And thanks for the help in setting this up, I’ve learned a few things from this little exercise
nice tutorial Wolf, I made an Earth with the maps and everything but I got this funky thing going on, any ideas on how to fix it?
http://img106.imageshack.us/my.php?image=earthmessedupnr4.jpg
Nevermind I fixed it 8-D
I can’t seem to get the clouds map transparent so both the earth map and the clouds map show up, any suggestions?
You need to make another sphere if you want to see the earthmap and cloud map.
What I did was I made another sphere, gave it a new material, set the cloud map to Map To Alpha, and while I’m in the Map To menu (of the F5 material menu), I click on the Neg button so that the cloud is opaque while the other bits of the cloud map becomes transparent.
I then pull the Alpha (the “A” slider under the RGB sliders) to 0 so the cloud map can show through.

Hey wolf how did you animate yours to spin properly? I tried spinning the globe frames but the texture didnt follow so i made a bezier curver around the whole thing and parented the camer to that then parented a spotlight to the camera. It works alright but the globe is jumpy. How did you make yours spin slowly and keep still? I know you said you used Cyclic Extrapolation but i have no idea what or where that is