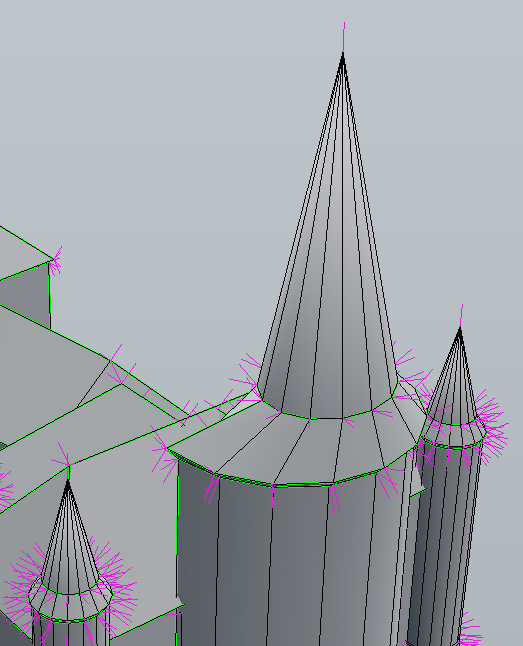
In terms of vertex normals, how can you specify that the tip of a cone be sharp, while making the body of the cone smooth? The shading in the example below is undesirable, because the vertex normals of the cone tips are collapsed into one orientation: pointing straight up.
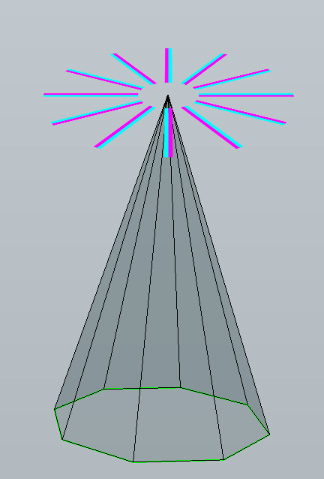
Thinking it out, I’d guess you’d want the vertex normals at the tip to be arranged in a kind of flattened fan layout, where adjacent faces’ vertex normals are collapsed into one, but the vertex normals don’t all collapse into one big super-normal pointing up. I know there are a handful of custom vertex normal tools available for Blender, but what’s the best way to automate this particular configuration? Thanks!
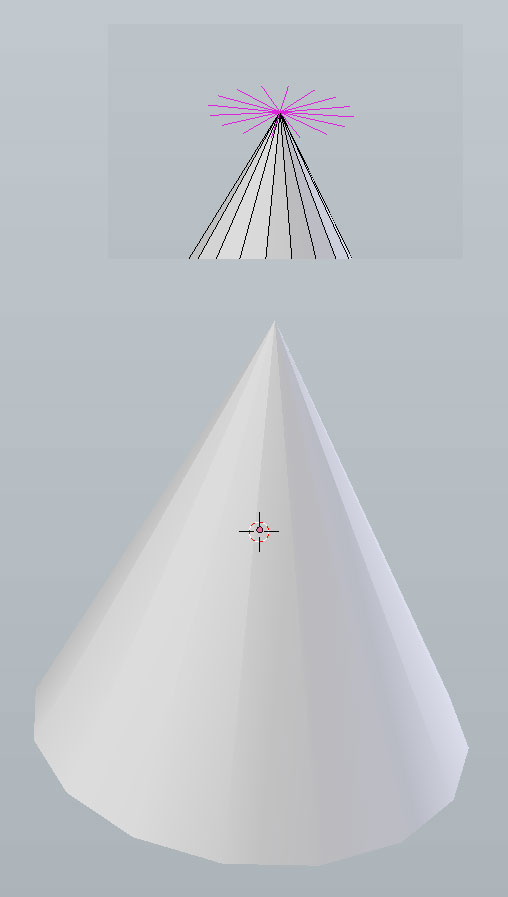
Thanks for the reply. I tried a couple of those methods, and wasn’t getting quite the results I wanted, but then I realized it was because my second diagram made no sense. In reality, the top-most tip of each face triangle has only one vertex normal (i.e., at the cone tip), so you can’t join triangle tip vertex normal pairs together, because there are no vertex normal tip pairs. There’s just one normal at each triangle tip. Damn. Which means it’s impossible to correctly shade a cone with one vertex at its tip, using basic poly modeling? D:
But then how do other 3D apps do it? I’m sure I’ve seen 3ds max’s cone primitive, and it shades as expected.
Unfortunately, it doesn’t seem to help. Blender seems to have trouble generating smooth shading for quads set up in a conical way like this. The more the quads deviate from being radially parallel to the Z-axis (or the more triangular / less quad-like the faces are?), the more Blender wants to create a faceted transition from quad to quad, instead of a smooth one.
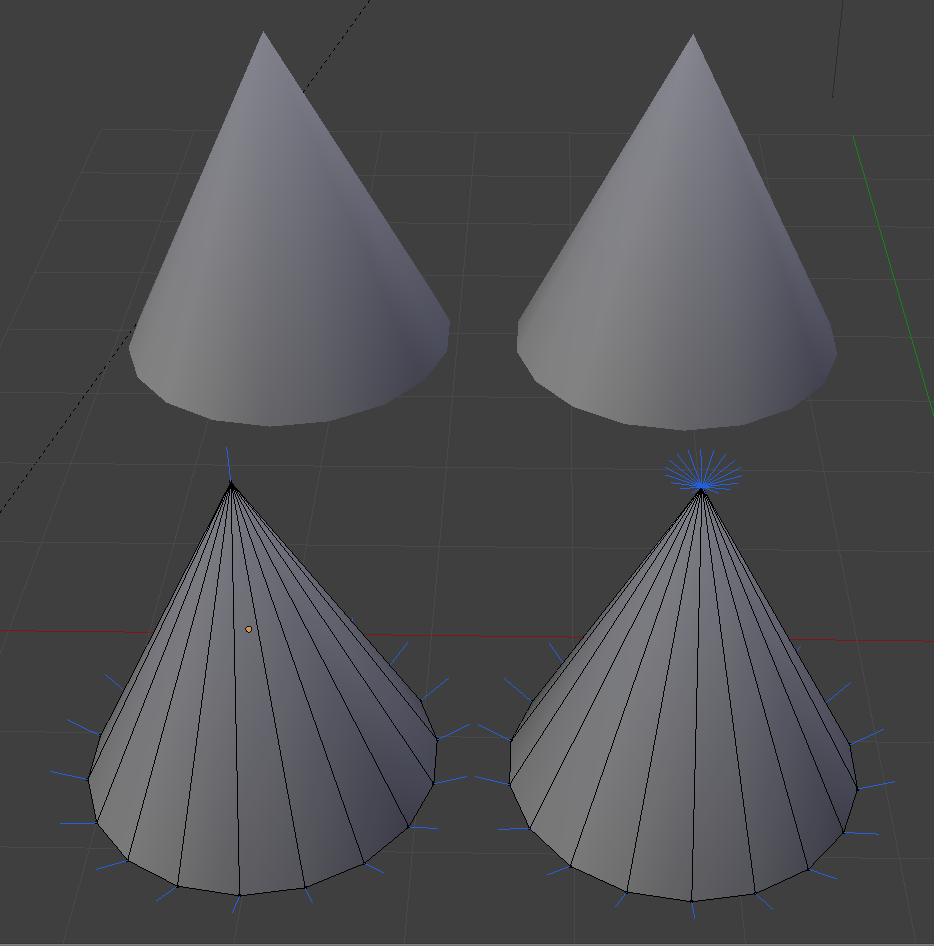
In this first example, the conical shape shades badly. The cylindrical shape, with the same merged vertex normal pairs, shades well. The cone’s shading doesn’t improve if I move the verts inward (shades crappy at its tip, shades fine on bottom). Also doesn’t improve if I cap the hole. Wish I still had 3ds max around to test how it behaves instead.
From seeing past threads on here, it seems like the answer is to make your polys less long to correct the shading, whether you’re using legit triangles for the tip, or you’re using quads, and capping the tip. (I guess this is why subdivision gives you better cone shading too.) Good to know, but a pain in the ass to edit without using a subD modifier, especially when the conical shape is part of a larger mesh, instead of just being a standalone thing. Also apparently other 3D packages have this problem too: https://blenderartists.org/forum/showthread.php?216070-Truncated-Cones-Don-t-Smooth!
EDIT: although as people in that thread point out, it’s not just a matter of long polys, because very long but perfectly rectangular polys on a straight cylinder shade just fine. Something goes wrong w/ shading when those long rectangles become trapezoidal instead.
I dunno if I’m an oddball one in this… I select the point’s vertex, then hold down control while changing to edge selection. That selects the fan of edges around the cone. Then W and S, to subdivide those edges. Results in a loop that I then slide a hair’s width away from the point vertex. Maybe still not as ideal by these standards, but now the odd shading is confined to an area that is too small to notice on most renders.
Also I believe some of the cone shading problems here relates to the terminator artifact shading problem though. (PITA if you ever want to do some dramatic strong side-lighting on a curved surface.) Just has to do with how normal weighting plays into render calculations, which has already been demonstrated to some extent.
I do nearly the same as Paul… i just bevel the top tip first ( really so tight ), for get quad all along, then i add a loop close to the top… it correct the shading…at least… visbily…
Basically the same i will do for correct shading on long cylinder. Something similar as for control subdivison surface .
Hey, I was going to comment on your original post when you posted, but I thought it was a trick question, but you realized that in post #3. I always add loops to that dang cone, 4 usually does it, but adding 1 at the tip does seem to help.