Elara - Female Head Creation

Sry for the long time between posts but i like to have plenty of time available to work in blender, and not every day you get that time :slight_smile:

Anyways here is my progress, flipping back and forth between the last render and the new render…i think i improved the face for the better, but ill let you guys be the judges.

after tinkering with the brows, the combing was messed up, and i didnt want to fix it until the eye brows were in a “perfect” position. looking at the reference i think i might need to reduce the thickness a tad.

I reduced the chin and pulled in some verticies above and in the back of the jaw were it meets the ear. - that was my interpretation of your comment, FXR. Any more ideas?

also decreased the number of children in the hair system…

decided to include the raw render without composite…

Attachments


DDD

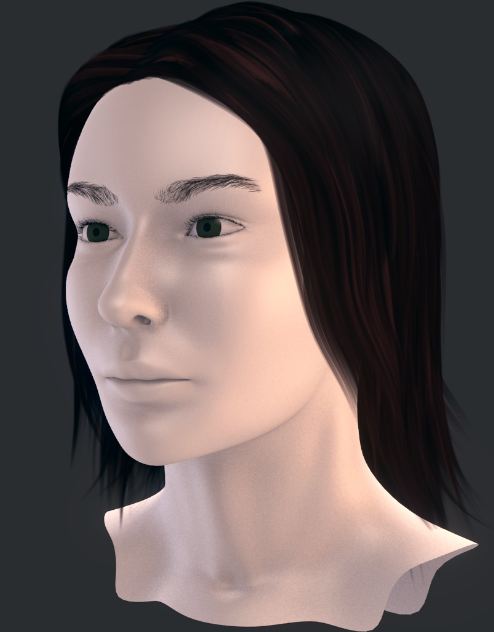
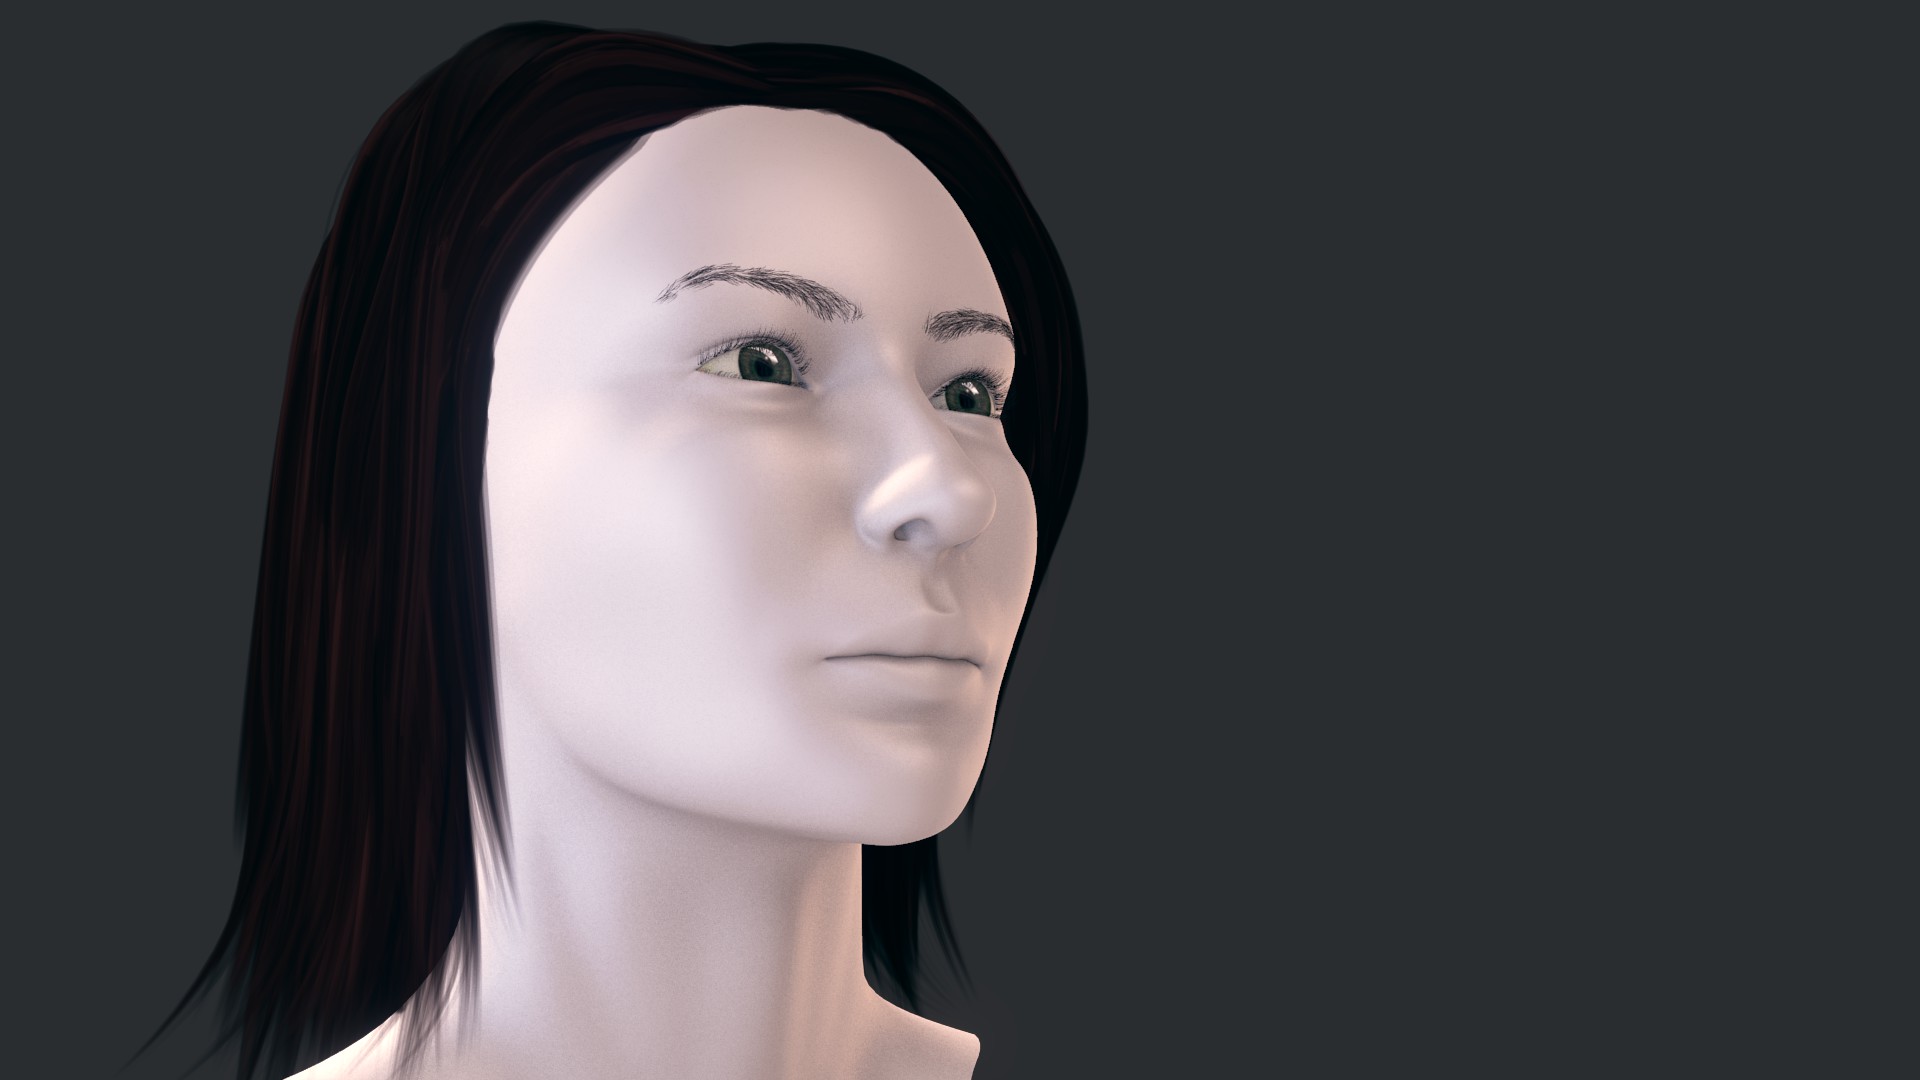
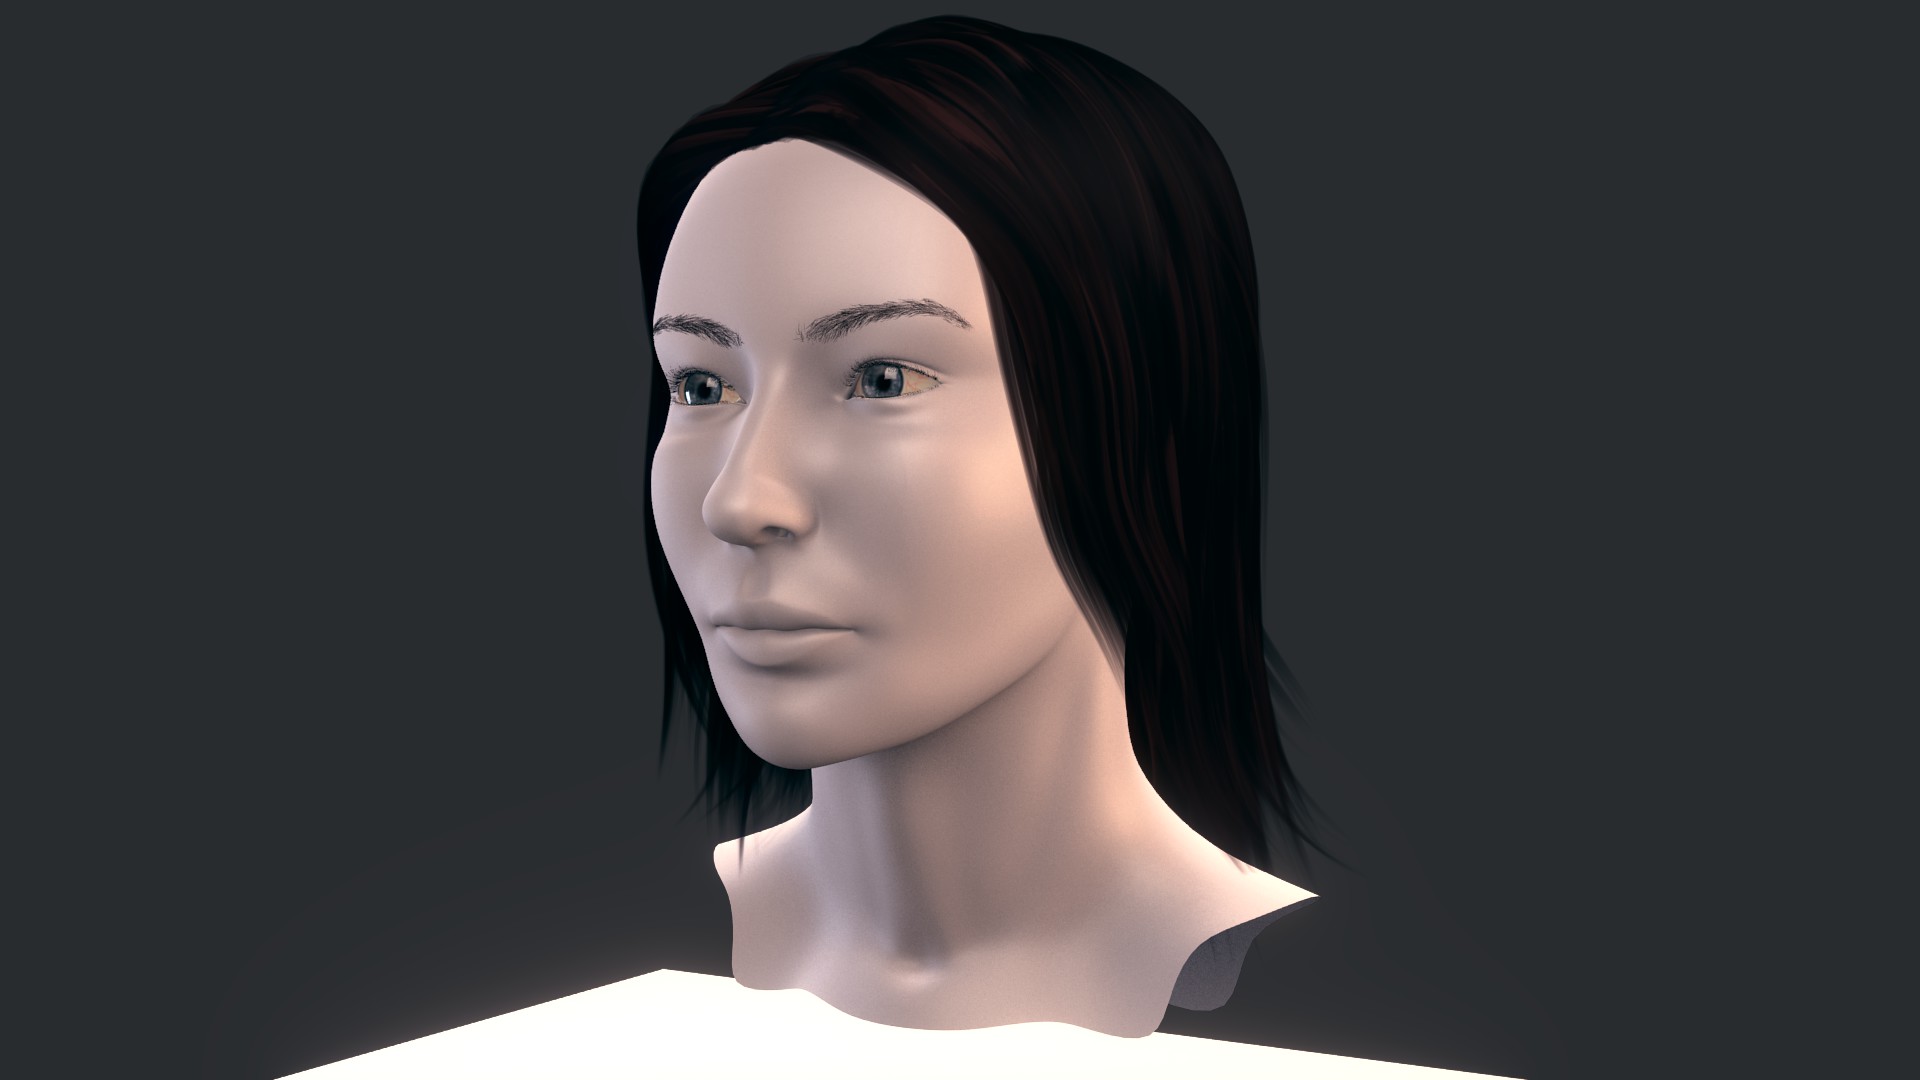
Face mesh is overall more angular and slimmed in the cheeks. It can use a touch more reduction in the cheek region in line with the corner of the mouth.

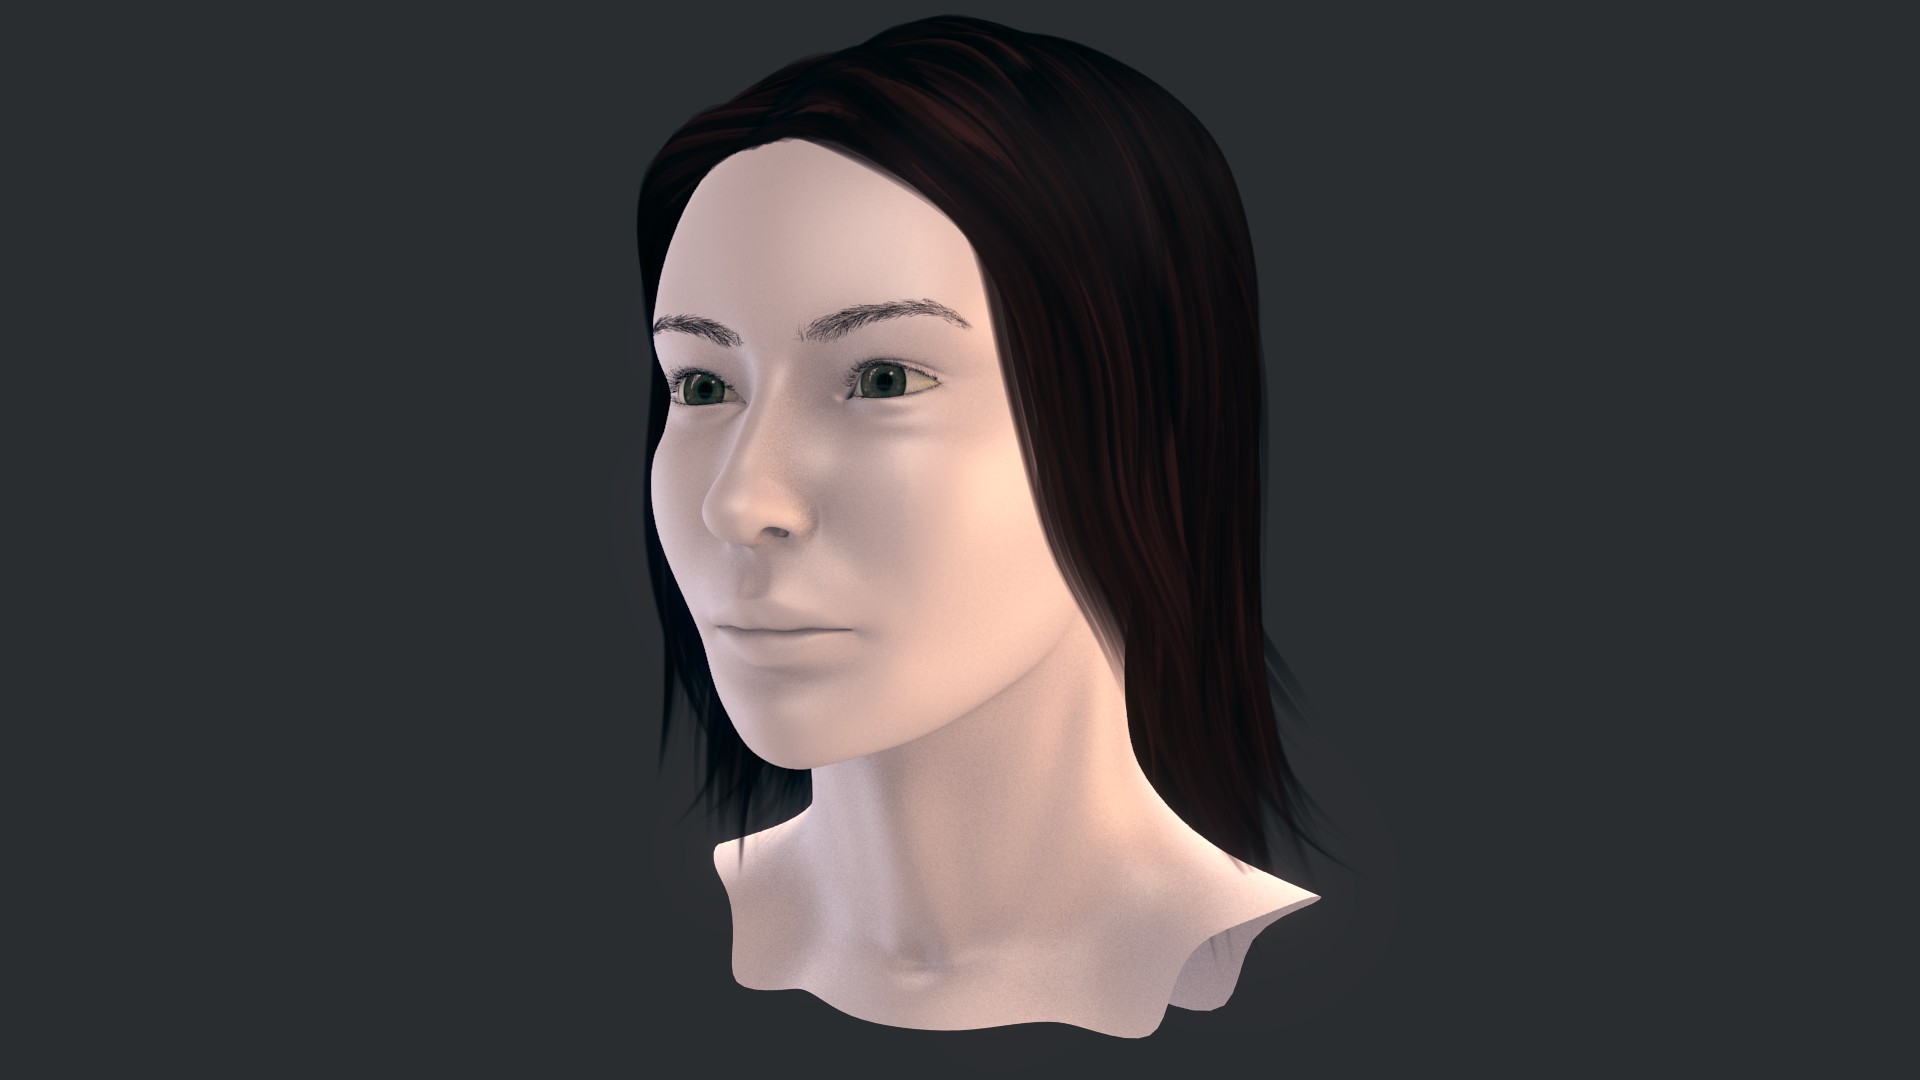
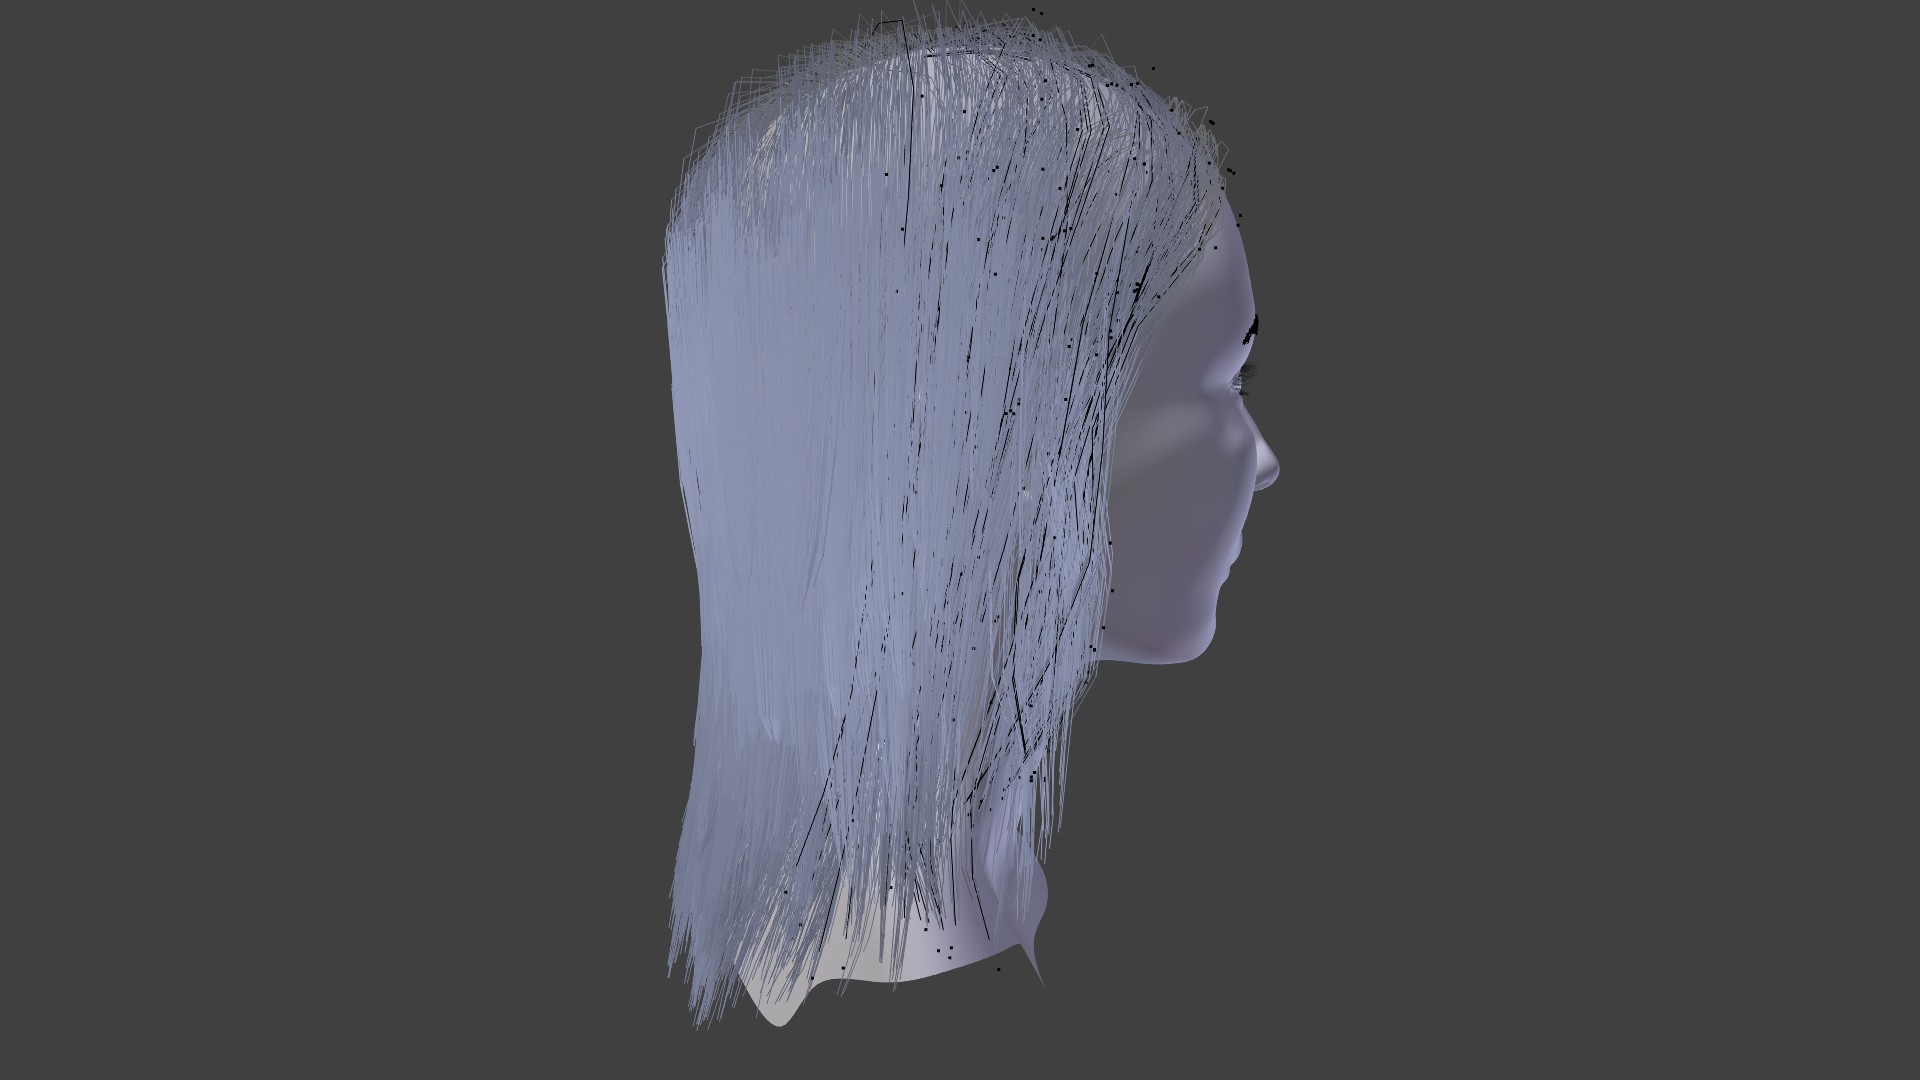
Hair - The hair actually has good flow and great variation of strand length in the back of the head. The hair texture has nice variation of color to this point.

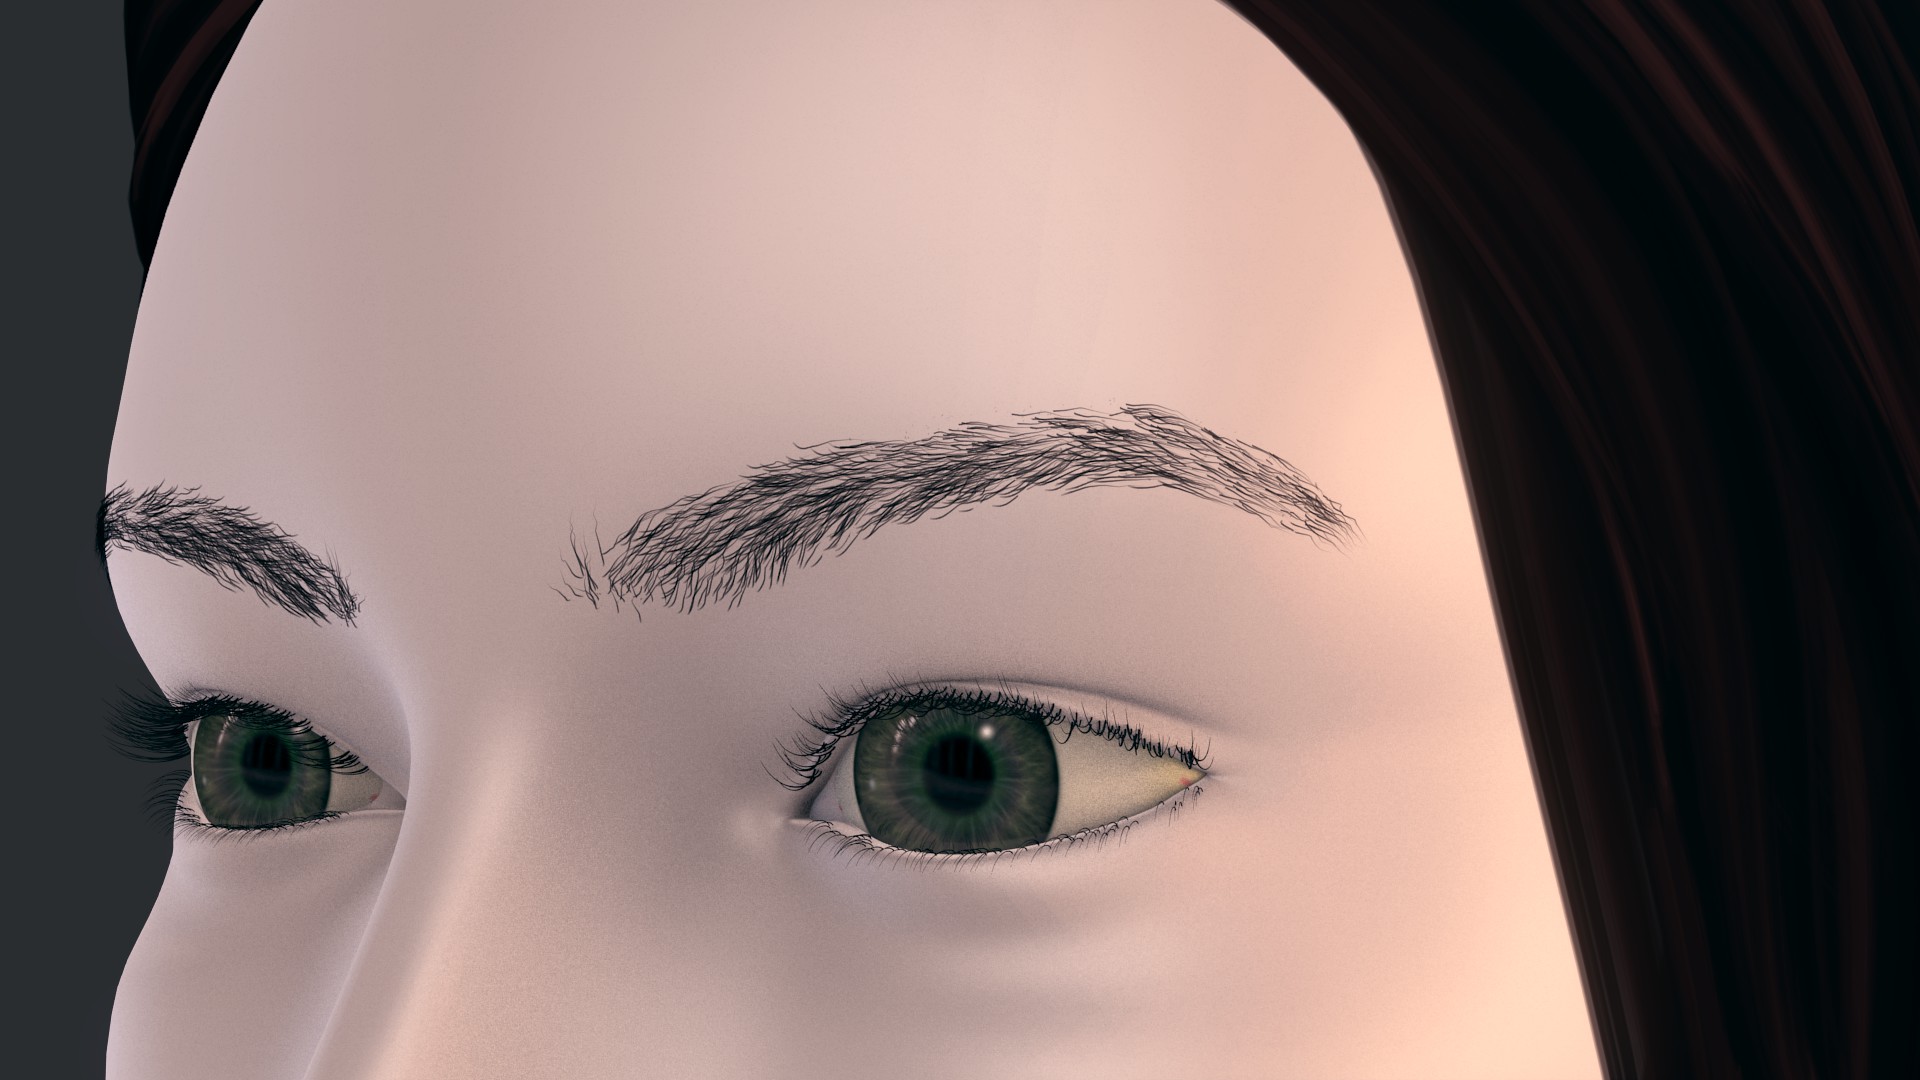
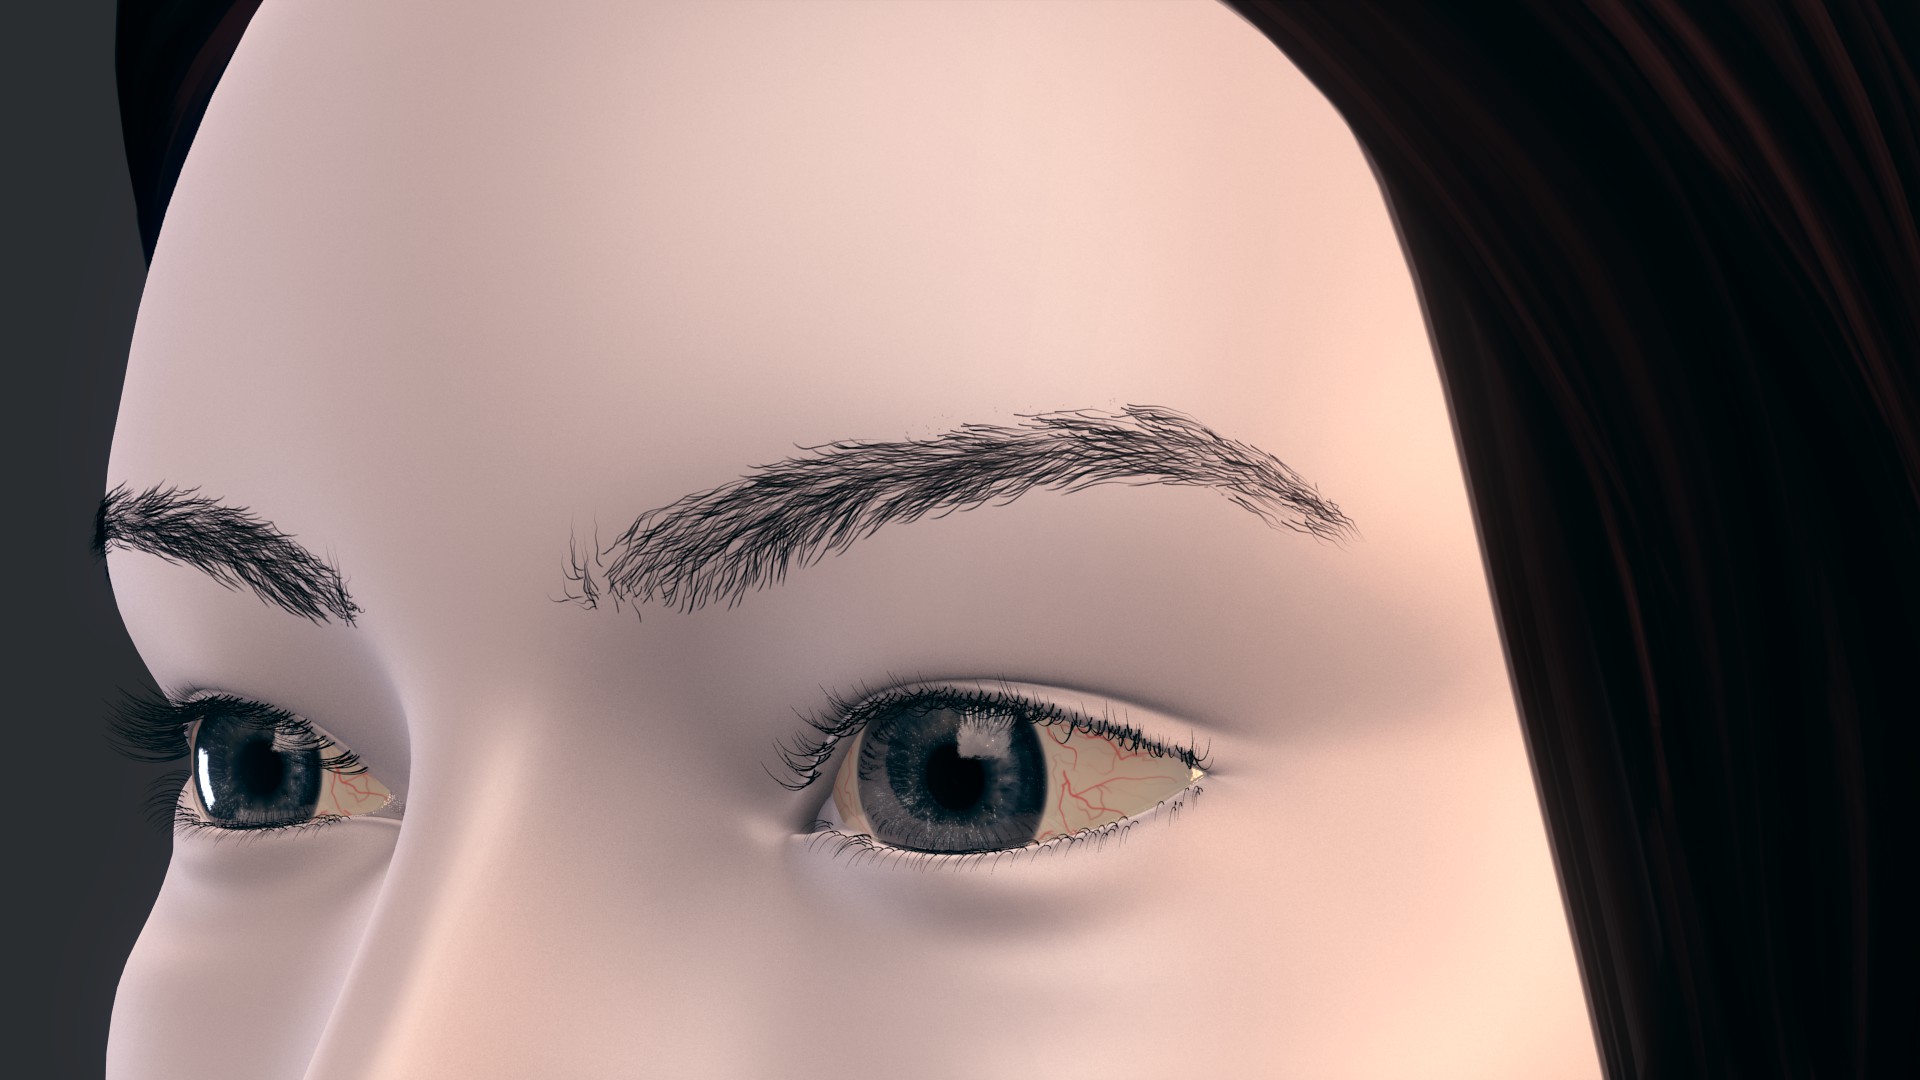
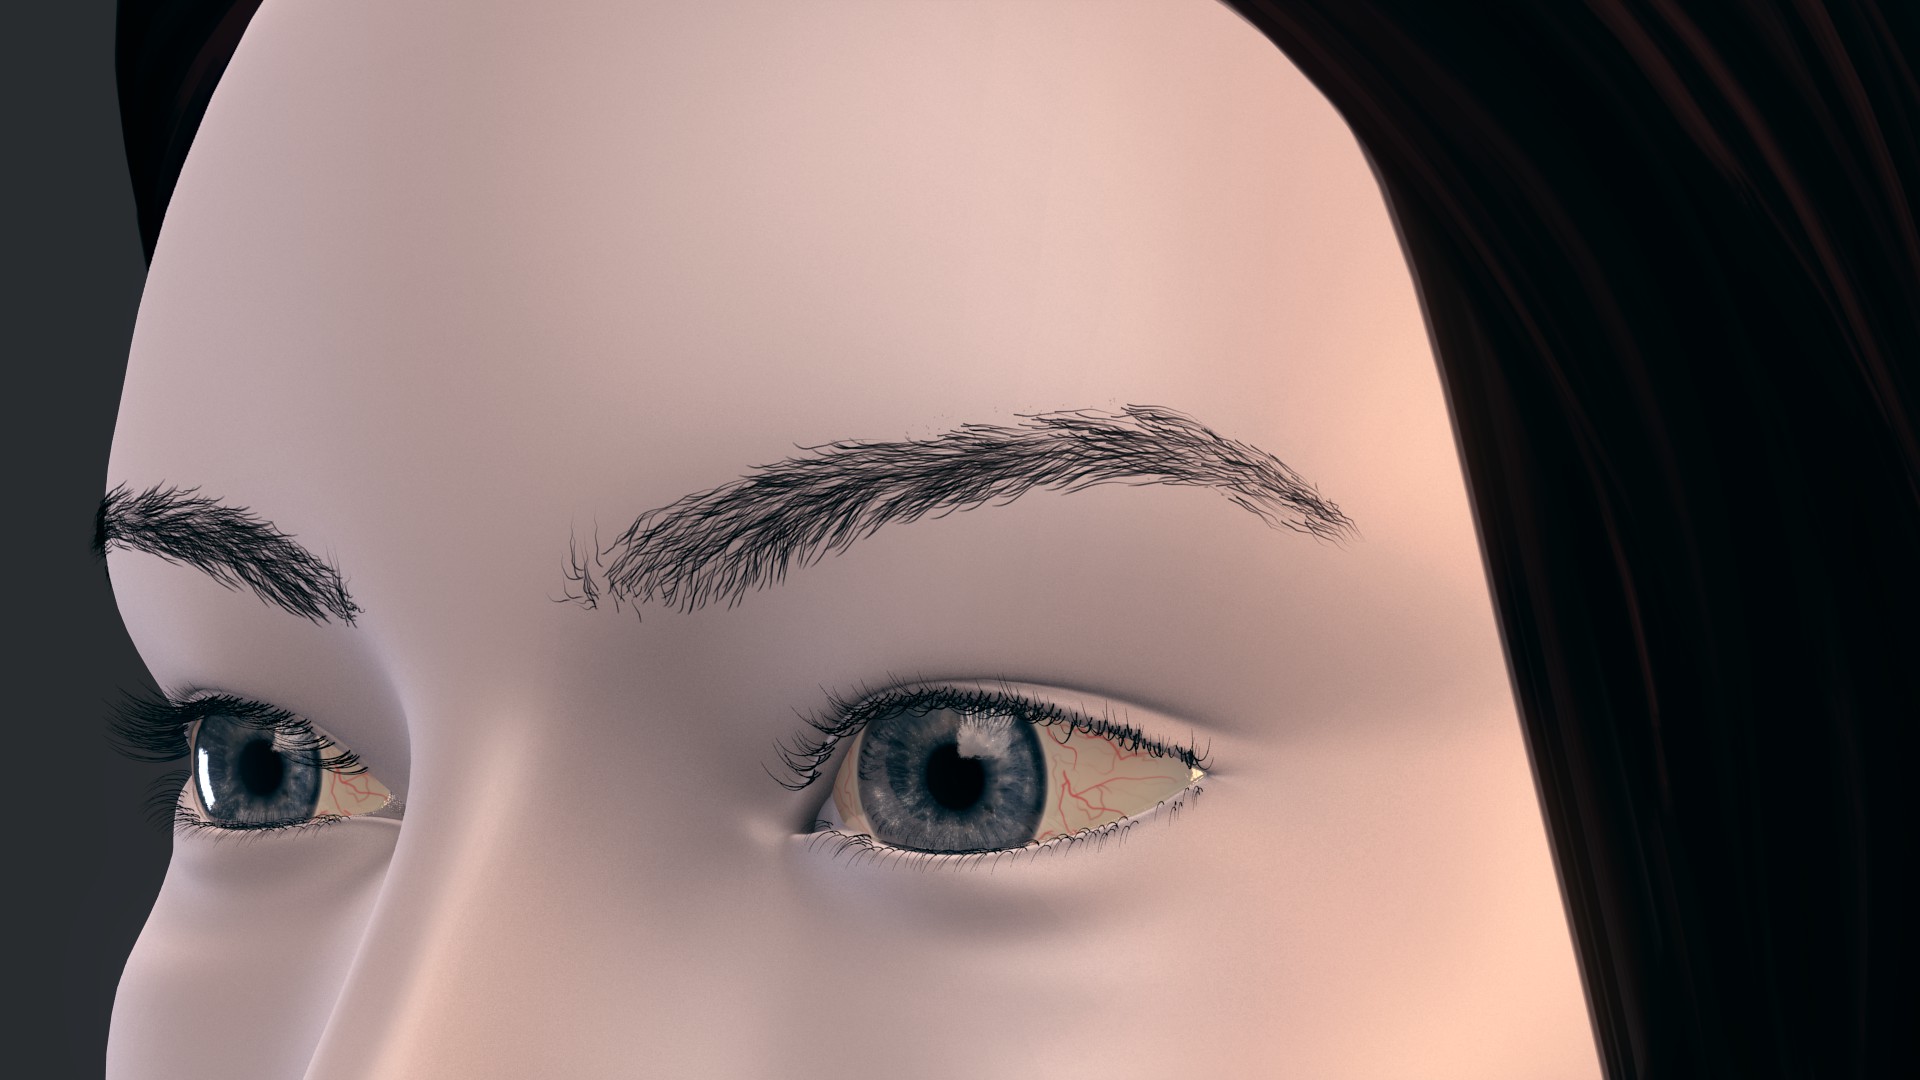
Eyebrows - about the right height above the lids. They are still a little full in relation to the reference. But they look good and when the actual hair color is applied then you’ll be able to decide whether to trim 'em down or not.

The mouth - Not certain if you worked the bottom lip but it appears more tapered towards the corner of the mouth. Seems to be spot on.

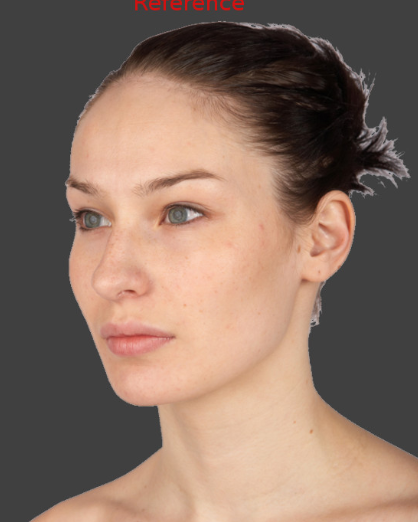
Nose - seems fuller at the tip and appears more elongated, matching the reference pic. Nostrils are better, less pinched, but they need to be a bit more full. One small correction, the nostril opening however, needs to be tilted down some. Look at the reference. The adjustment is simple. Select the surrounding poly faces or verts around the nostril, and still using a small amount of proportional adjustment, rotate the selected group downward.

Nose bridge - Needs slightly more thickness, particularly in the region between the eyes.

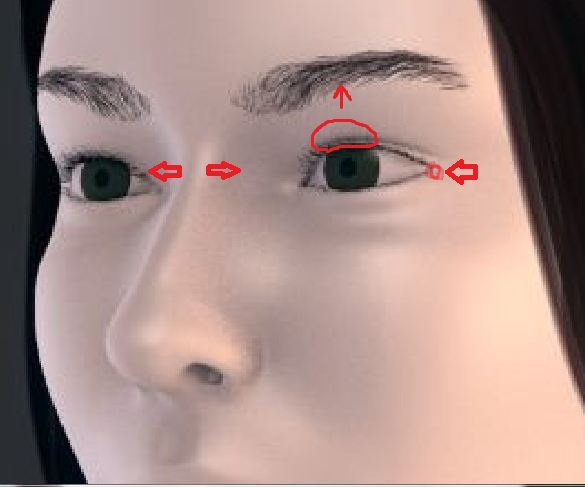
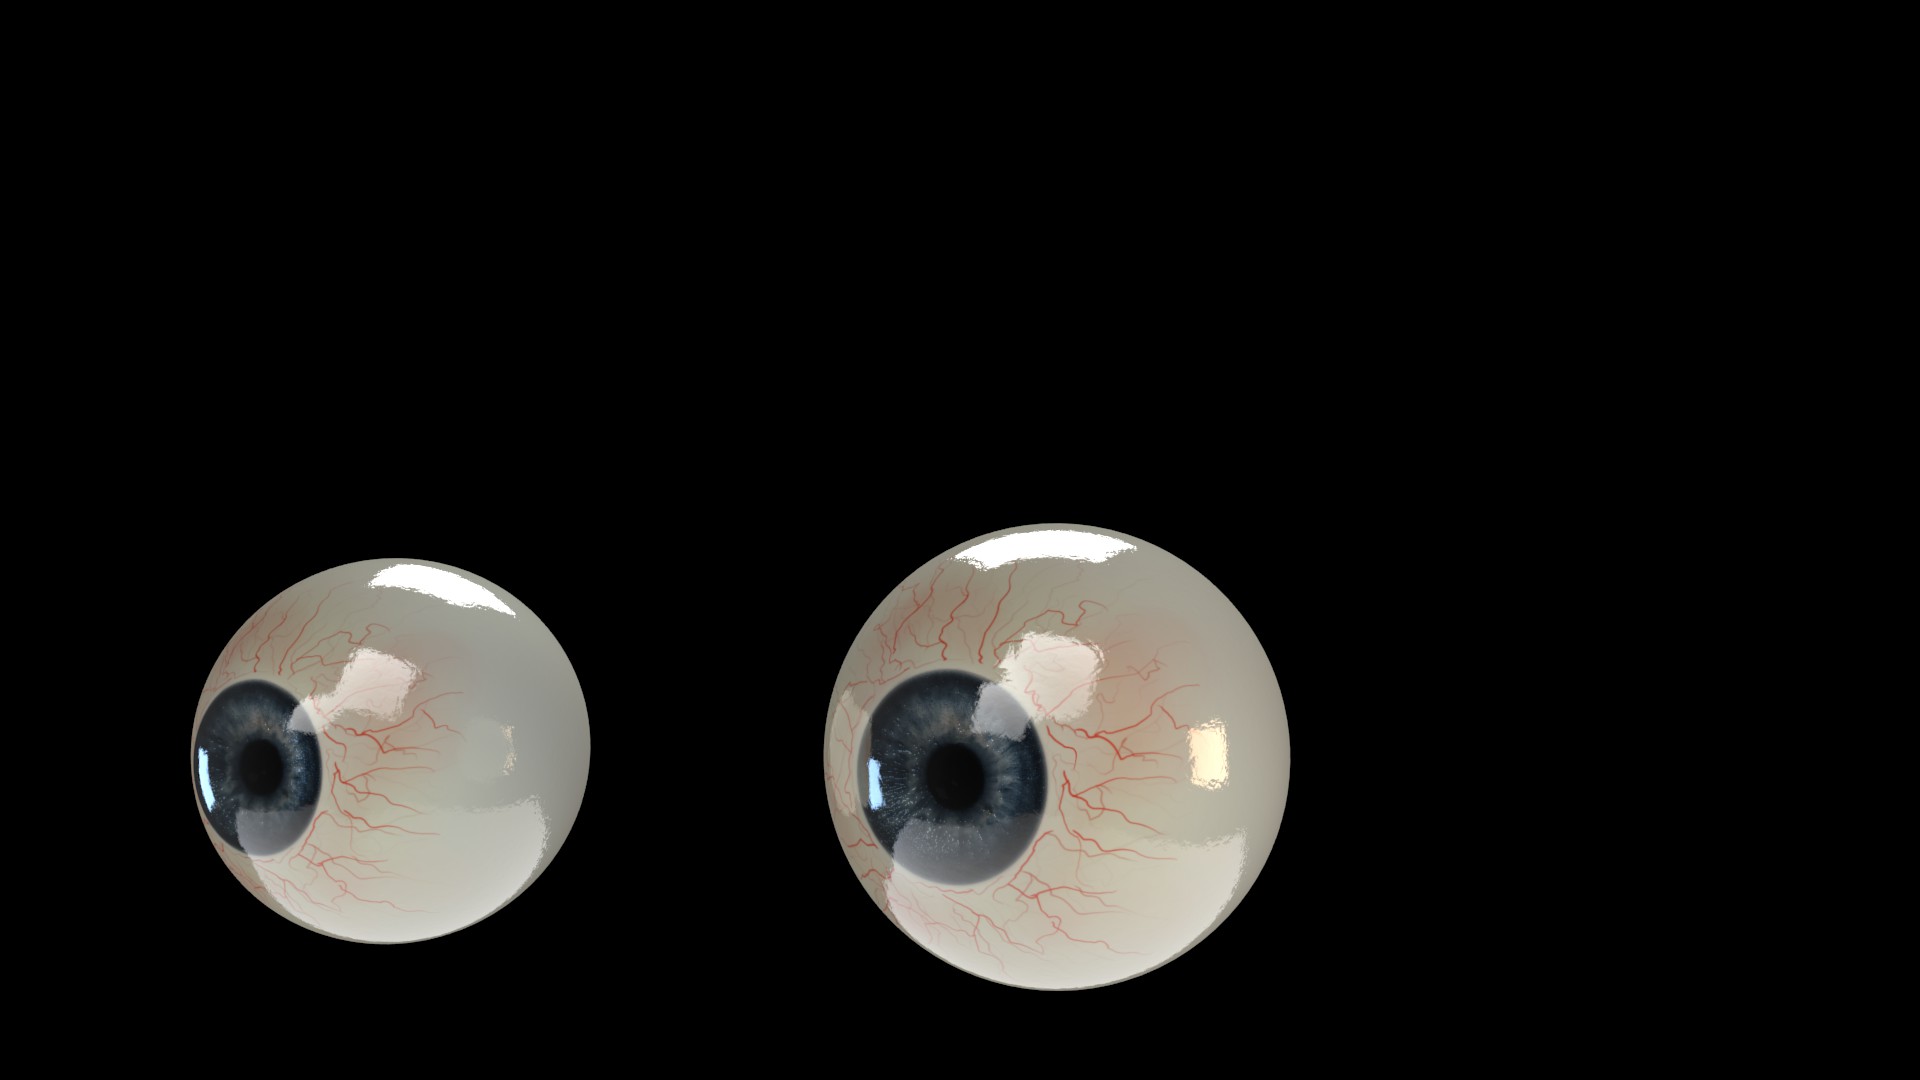
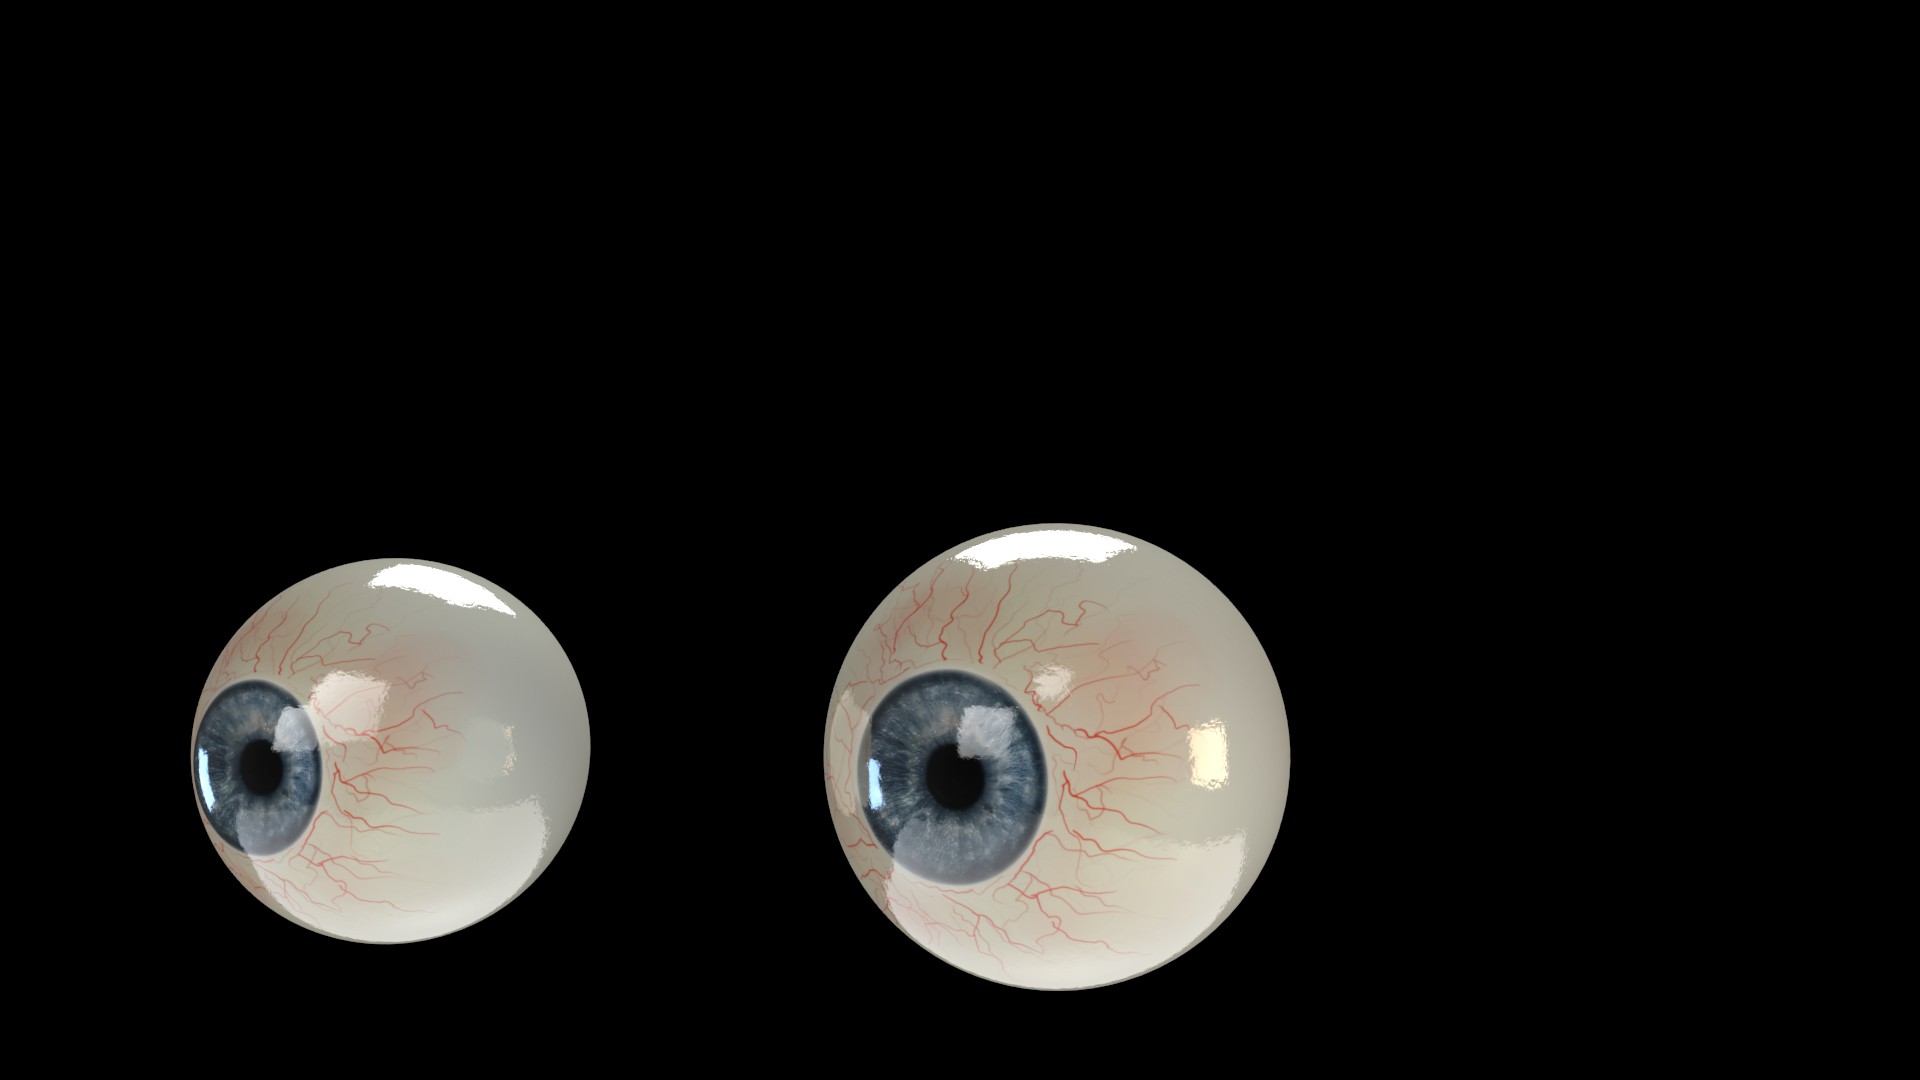
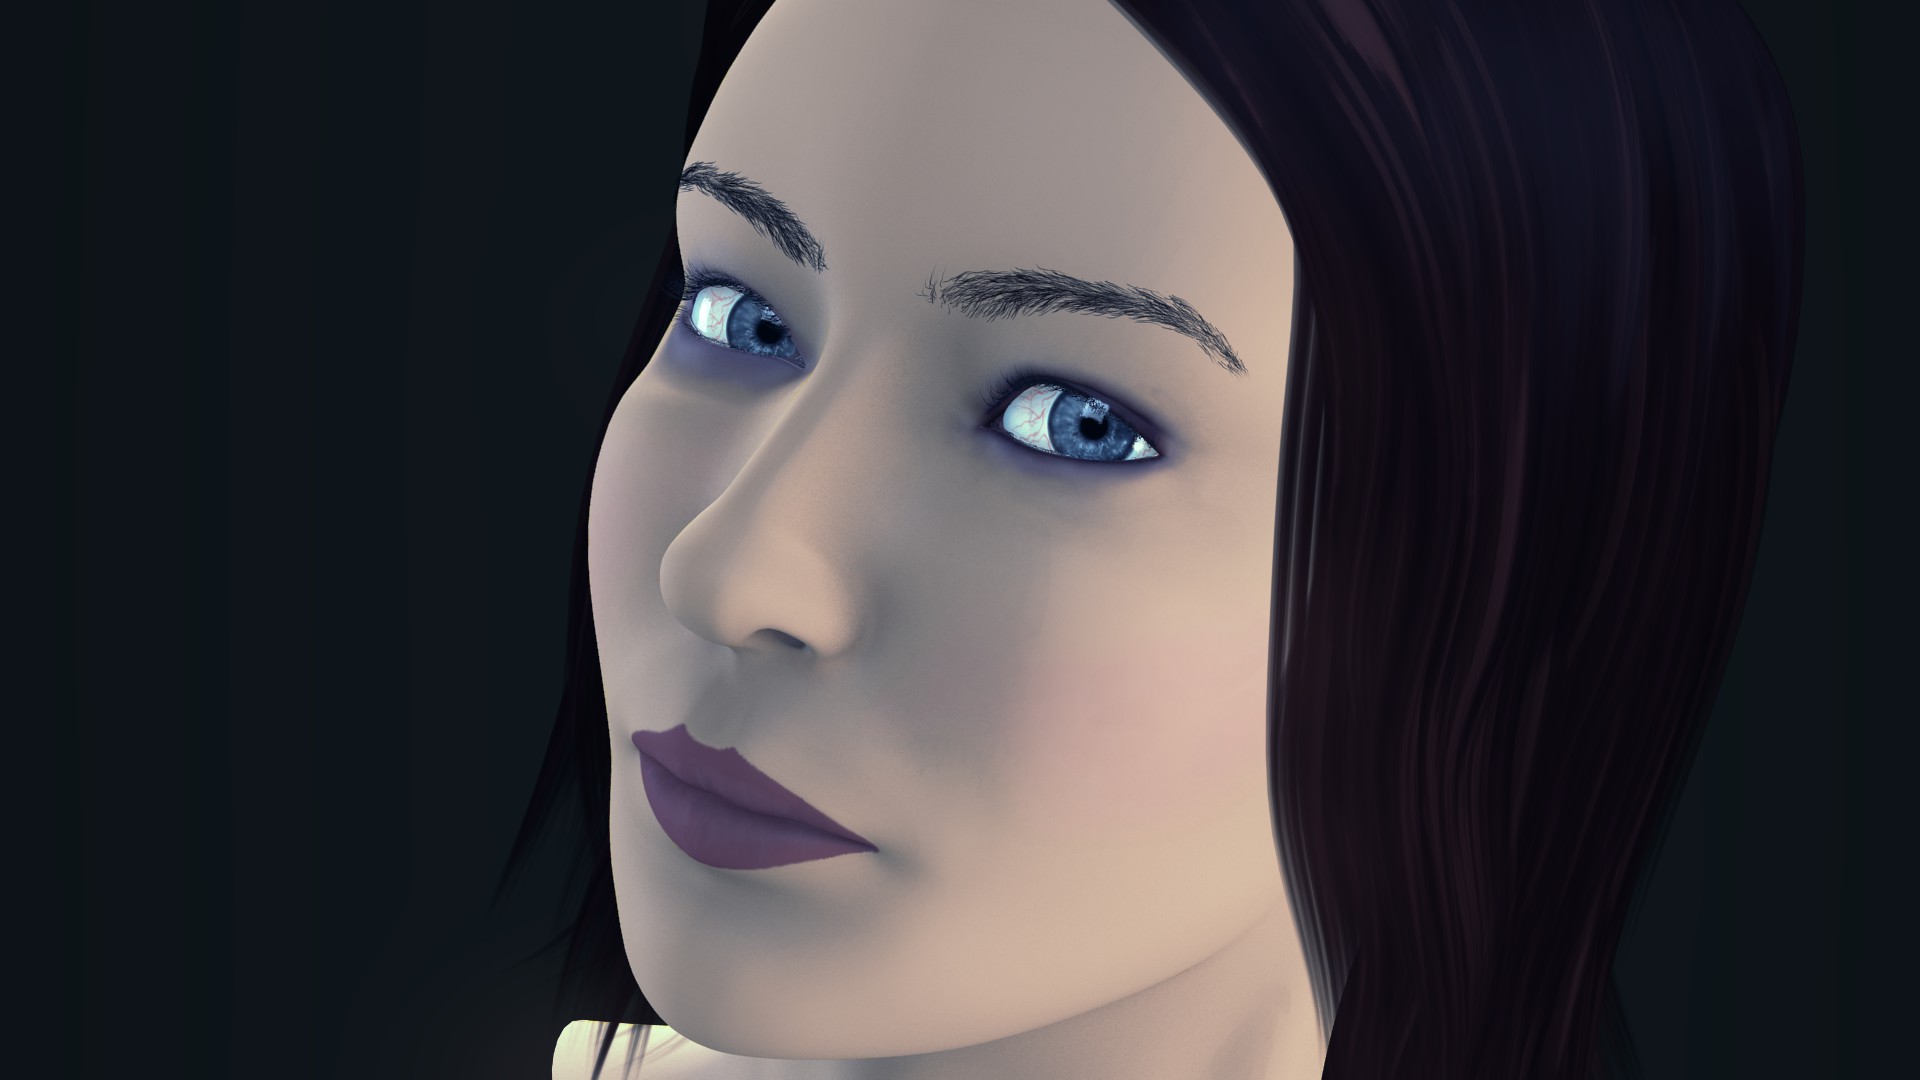
Now the challenge … the eyes. The eyes and mouth are the hardest to replicate. (The lashes are great by the way. )

The cornea size appears to match the ref pic’s. The lower lid has close to the right angle and has the slight bulge below the line of the lid. However, the eyes need to be more open. The top portion of the upper lid directly above the pupil and cornea, needs to be raised.

That means, (again) using the proportional editing tool, select a few verts in the that region of the lid. The proportional radius should include the region of the eye immediately above the lid but not any polys of the eyebrow region.
By raising this area the eye will be opened wider and create a more enticing slant of the upper lid downward towards the outer corner of the eye. See the reference for perspective.

Lastly, the outer corner of the eye is too widely spaced. Needs to come in a touch.

Good training and outcome so far.

Attachments


ok before tinkering anymore with the eye region i added in an actual eye rather than the perfect sphere proxy.
the eye is made up of two meshes one for the eye ball itself, the other for the cornea/a glossy shell.
Cornea follows the following shape: http://upload.wikimedia.org/wikibooks/en/c/c3/Cornea_Curve.jpg and is scaled slightly more than the eyeball
Upon rendering however i ran into a problem. when rendering the eye by itself, it came out just fine, minus the glossiness. However when the shell is added the whole render turns out way too dark even on full transparency. Anyone know what is going on?
(I made the textures quite a bit ago, and i am planning on reworking them later.)

after the real eye mesh was added in the eyelids needed to be adjusted to compensate for distance the cornea was further from a perfect sphere.

and of course i expanded the nose bridge, rotated the nostrils, raised the upper lid slightly and brought the edges of the eyes closer in(slightly).

“The mouth - Not certain if you worked the bottom lip but it appears more tapered towards the corner of the mouth. Seems to be spot on.” yes i did work on the mouth, thanks for the advice

for the full render i left the proxy eye on one side for comparison (the new eye is rendered without the glossy shell)

Attachments


You’re closing in on the target

As to the darkness of the outer shell of the eye, there is a general color shader, or a light and darkness shader attached to the materials (not certain where it is with cycles) By adjusting the slider for intensity you should be able to lighten the material or texture as needed.

thanks mate, you were a great help. you got a good eye; anything else you see that needs fixing/improving?

btw i am using blender internal to render this. i got a default material with transparency turned on and alpha brought to 0 on the shell and it darkens the whole eye

Figured it out, even though its is a little weird… all i had to do is disable traceable on the glossy shell. The weird thing is that the mirror and transparency ray-tracing still happens, which is what i want. So here is the updated eyes, i also combed the eyebrows.

I added an hdri to the world to get some reflections on the eyes.
i think if there are no more critiques on the actual shape of the head, i am going to UV unwrap and start texturing.

looks like i might need to fix the right side hair again…

Attachments


My last comments. Like I said, you’re zeroing in.

Eyes - At first I thought you needed to raise the upper lid, however, that is not the case. What is needed is the tear duct region needs to be lowered. Meaning the tear duct and part of the lower lid to a point just beneath the pupil of the eye, should angle the lower lid downwards towards the nose, creating a more elfin like look to the eye. It will open the gaze. see ref pic,

Cheek - Still needs reduced a bit. I colored in the area that needs slimming.

jaw - The jaw sits too low in relation to the jaw line in the reference picture. The jawbone needs angled up to a point where the jaw muscle sits even with the corner of the mouth. Draw a line from corner of the mouth outward. It will intersect the jaw in the reference picture.
The girl in the reference picture has a more angular jawline tapering to the point of the chin.

If you do these three, I think you’ll absolutely be inside the target zone.

Attachments


Alright so here is the render with the tweaks, i also tweaked the hair and brows a bit, going to try to redo the eye texture/materials now and move on to the skin… any help here would be great (links to tuts, tips, etc)

I am also not entirely happy with the hair material, i t seems more plastic to me as there is no distinction between the individual hair strands towards the top. i do love how the tips of the strands turned out.

Also decided on a name - Elara.

Attachments


I’ve made 50 some character meshes. And with each, I tried to capture variations in hair tone, and create a reasonably accurate looks for each. It created some provoking challenges. So much that at times, I wanted to pull out my own. However, with the help of the UV tools I found a way to simplify the texturing and improve a hair texture’s look

The fix - Once the hair mesh is seamed in the 3d window and unwrapped to the UV side, I’ll take one more step - I square the mesh up. Meaning - straightening and aligning the UV hair mesh pieces, North and South, East and West, into an orderly X/Y boxlike grid. This way, you’re not restricted/confined by the initial, unwrapped geometry of the hair, which can be somewhat confused - small crunched polys here, and stretched oversized polys there.

The hair box grid then overlays nicely onto texture maps. Moreover, I can further cut the UV box mesh into long linear islands, which can then be stretched across the map as desired, further increasing resolution of the existing hair texture. In this manner, islands can be stacked on top of one another, to maximize a texture map.

Now … Is it a pain in the ass to do? At the very first, yeah. There is a natural apprehension to messing with the UV grid. And once I took a breath and started, it took a couple of hours or so learning “how to realign” the natural unwrap of the hair into a manageable grid. But the process of itself is simple.
By comparison once I got my workflow sorted, I can tweak even a complex hair mesh in 30 minutes.

The effort, though, is worth it. Texture resolution can be significantly enhanced, while mapping will nicely follow the geometry (critical as discussed in the other thread). Really helps with curly hair

So, just to be clear at the moment the hair is made of particle systems.
i am not sure of how your hair mesh would look like for each “hair strand” to be uv mapped into a square of hair (image is amazing btw, dont know how i would use it yet though)

i watched a tut on cg-masters (http://www.cgmasters.net/free-tutorials/polygon-hair-modeling/) and understand how they made polygon hair and i also have this tut bookmarked (http://www.paultosca.com/varga_hair.html), i am guessing your way is somewhat close to what those tutorials teach.

also the hairstyle that i tried to replicate is this one here: http://www.thehairstyler.com/hairstyles/formal/medium/straight/red-solid-cut-hairstyle-with-side-part?ref=salon_hairstyles#.T_3wopH-2IY

i am however more concerned about the skin texture/materials atm, i’ll refine the hair after.
just want to say again that i appreciate your help so far, tvm! and nice 50 char models, anywhere i can see them?

there is a really great hair tutorial written by someone in this forum…
[video]https://vimeo.com/40034415#at=0[/video]

I made the hair meshes of poly’s to simplify production, and weighting for animation. That and I don’t know a thing about particle hair. It seemed like a cludge getting the particle hair built and then animating it. But … that’s the way it is with anything at the start. someday though, maybe.

As to how the hair mesh grids out. Take a look at the hairmesh file that tfrank created. He is still working on. I only uploaded it to demonstrate how a polygon hair mesh can be UV’d in an orderly fashion. Also I’m only leaving the file up a short time as it is his property.

No drama on the help. You’ll do it for someone else when they need it.

@peter18, ah yes i believe that was one of the tutorials on particle hair that i watched, thanks anyway :slight_smile:

@FXR, interesting approach, didnt think about that. (didnt see the .blend before, must have overlooked it)
as far as building the hair, the only frustrating part is when the hair strands dont go were you want them to (“extreme”/“unusual” curving…not sure how to explain it), other than that, you just comb the strands, try it out sometime. :slight_smile:
this is what it looks like in the view-port

Attachments


The hair to this point looks good. Nice lines.

As to texturing the face, I would map out the lips first. Also I’d do them seprately from the rest of the face. The lips, like the hair I was discussing, should be gridded out. That will result in uniform sized quads.
The reason being then you can make a textured box with a gradient from light color to dark, and the mesh will overlay it neatly for an even flow of texture.

I am not sure i understand, what do you mean by “gridded out”.
“you can make a textured box with a gradient from light color to dark, and the mesh will overlay it neatly for an even flow of texture.” again not sure what you mean

" I’d do them separately from the rest of the face." would that not make them seem “separated” from the face. i would think that the difference in texture would create a sharp line.

you’re correct, it will make a clear line of demarcation from face to lips. However, I have to break off, now.

You’ve gained plenty of headway and experience. Good luck.

Ok so i changed the eyes, what do you guys think?

Attachments


Another update, i think i like the new ones better, you can see more of detail on the iris.

Also a quick skin texture test render - lots more work needs to be done here.

Attachments


More work on the texture: Left eye, and lips, as well as a composition introduction.
Need to add an actual skin texture (right now its a solid color), do the texturing for the other eye, and touch up the current textures. Also Bump map still needs to be generated.

But hey what do you guys think so far?

Attachments


Looking good! Sweet eyebrows.

This video have some interesting tips about face structure, maybe it could help you to improve this model. :wink: