Elbow and forearm crease bloated deformation

Hey there fellow Blenderers!

After few projects I’ve decided I wanted to move foward with my blender skills to rigging and encountered issue that none of the similar solutions might have help, therefore I’ve hit a wall.

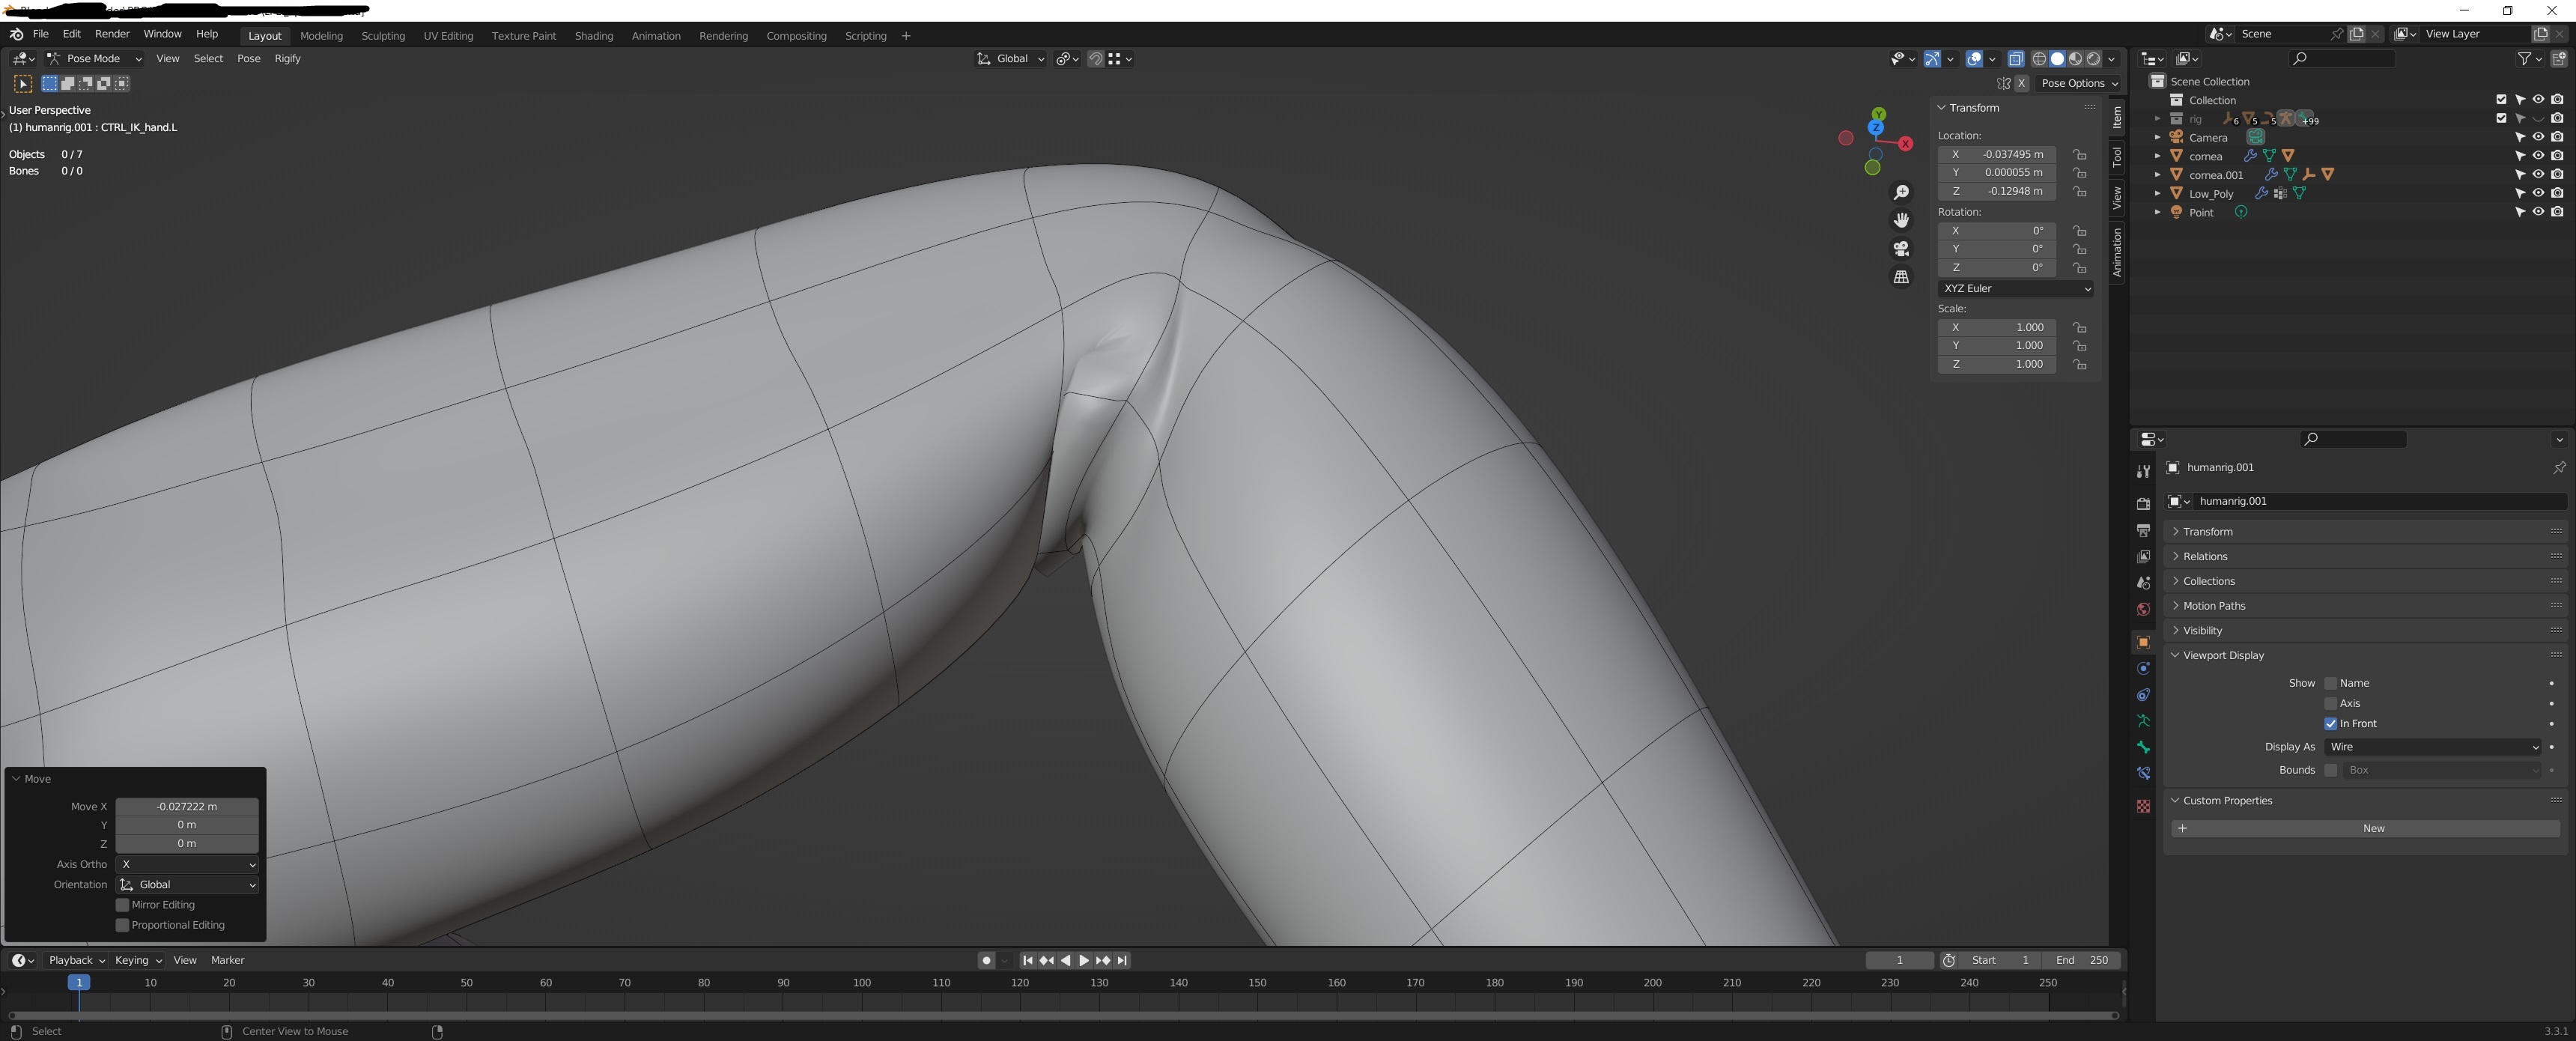
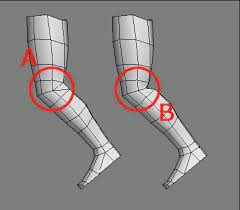
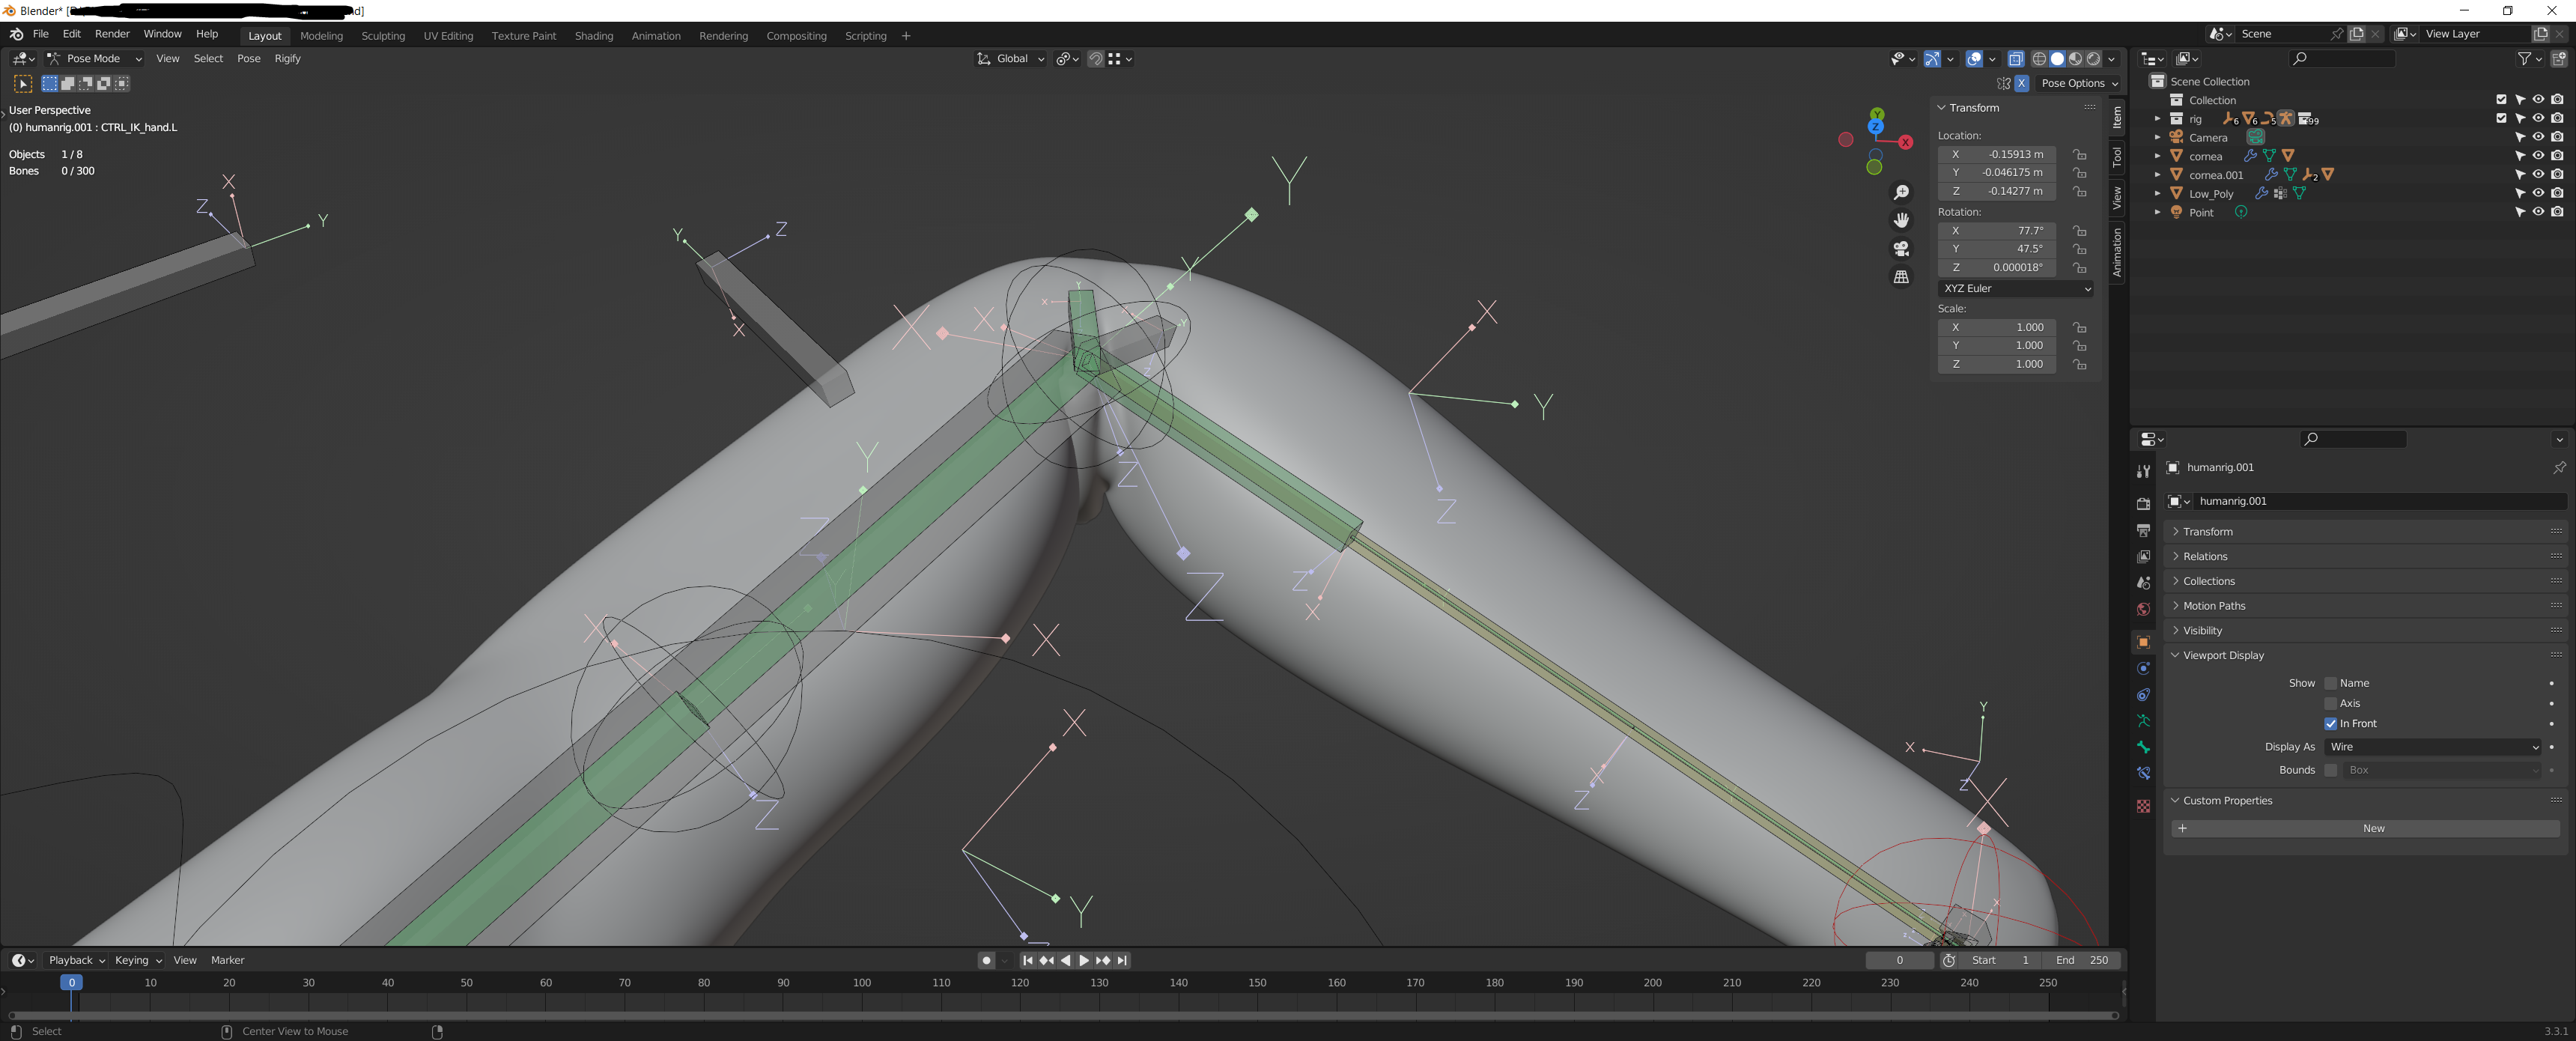
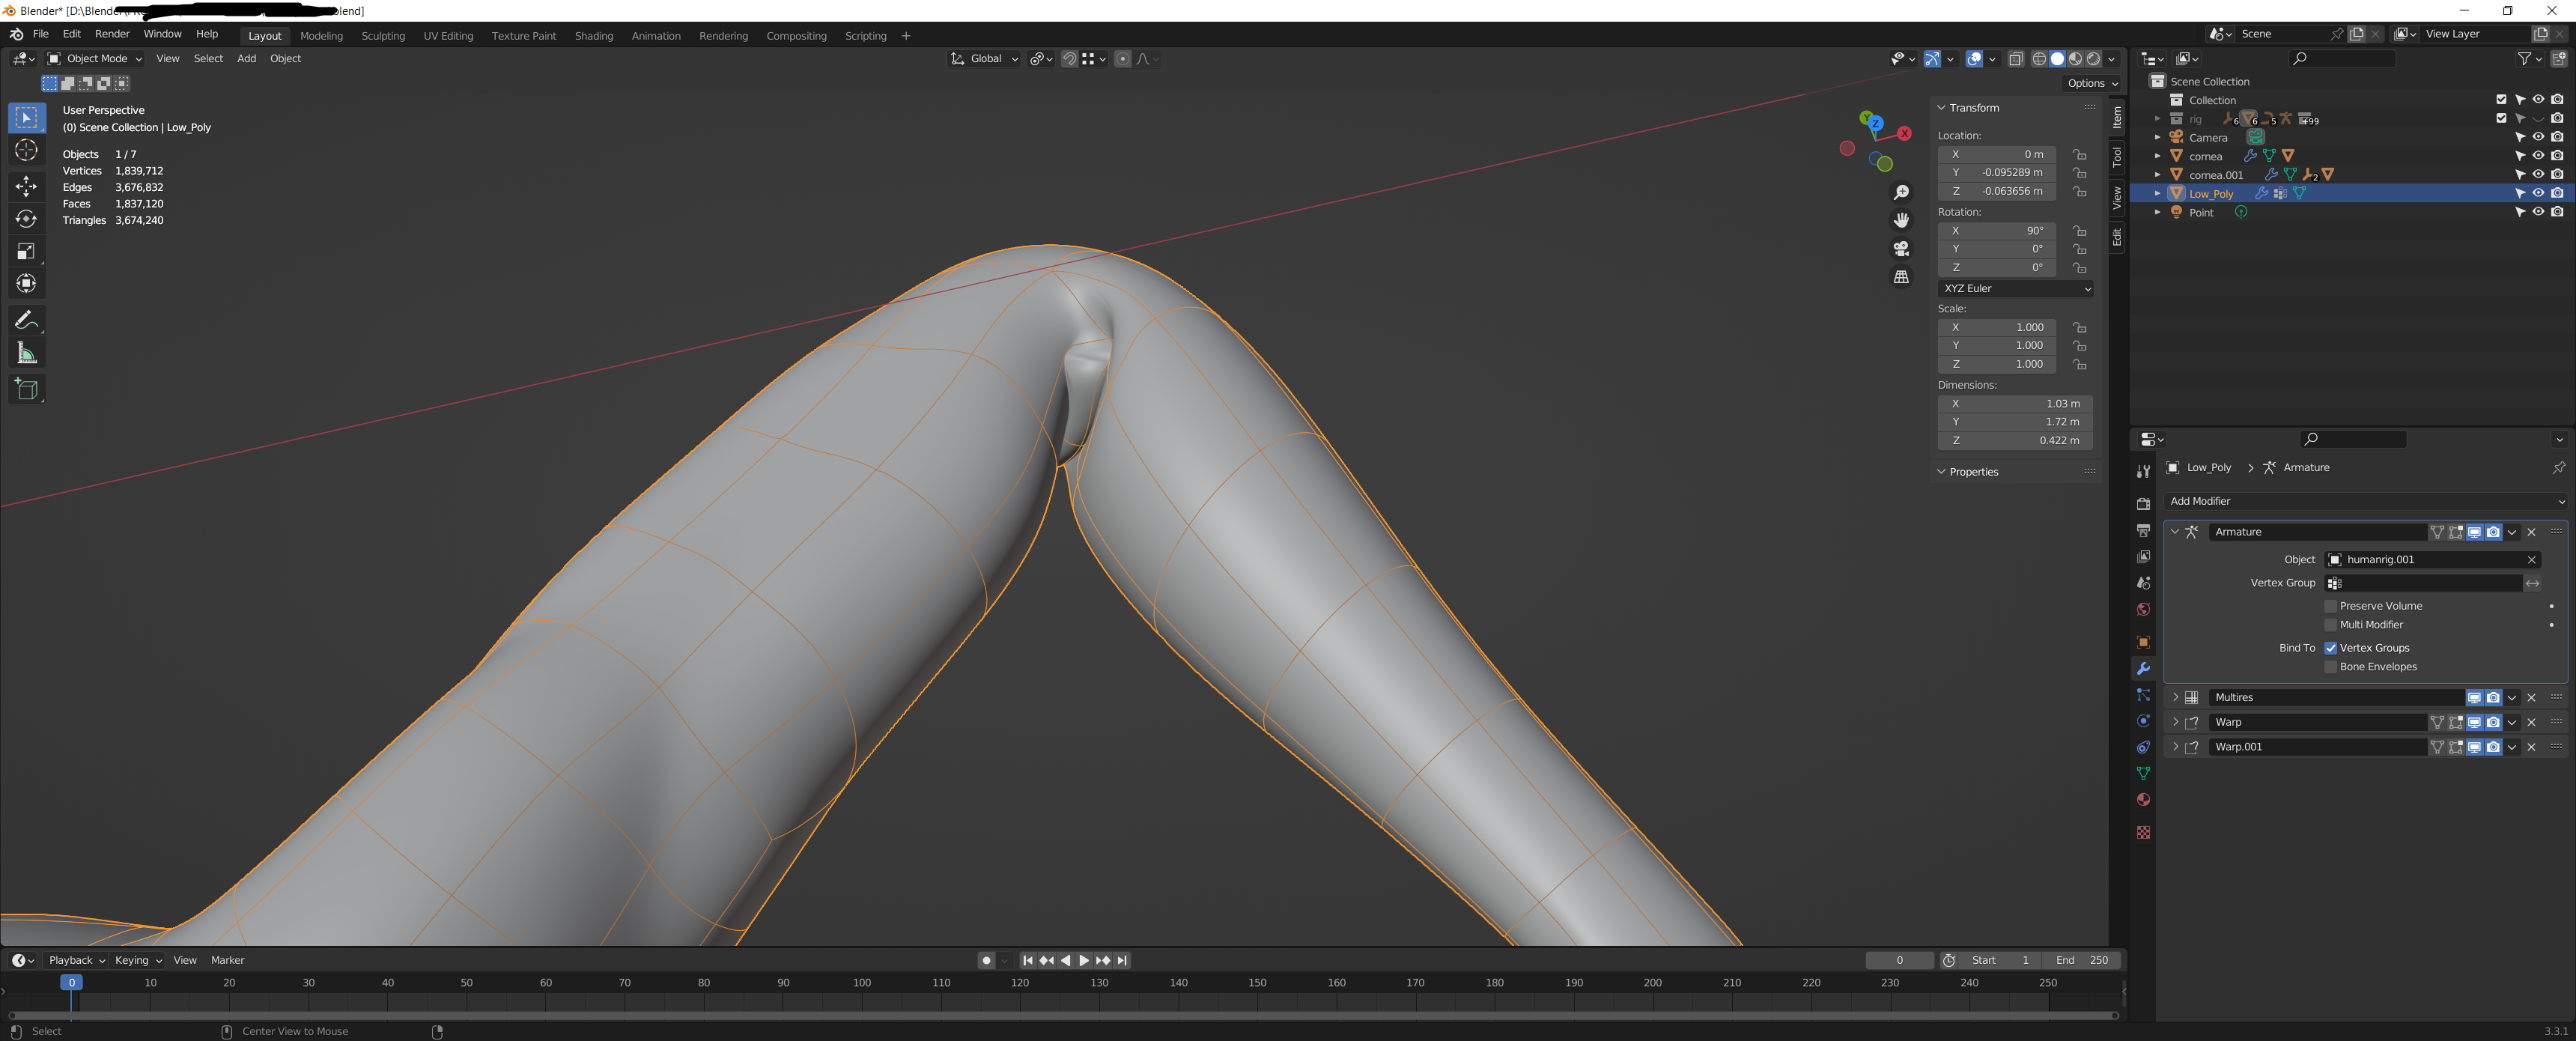
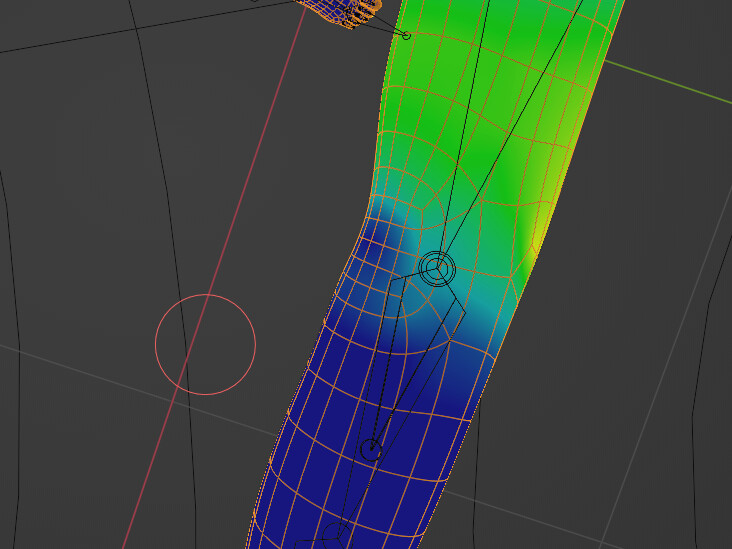
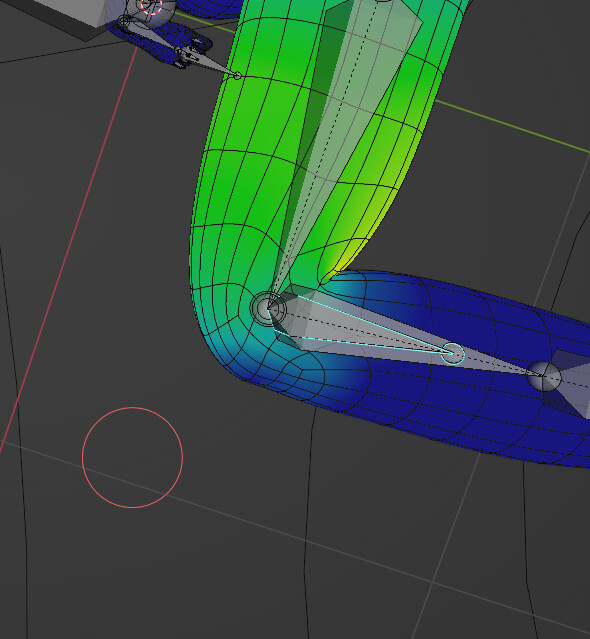
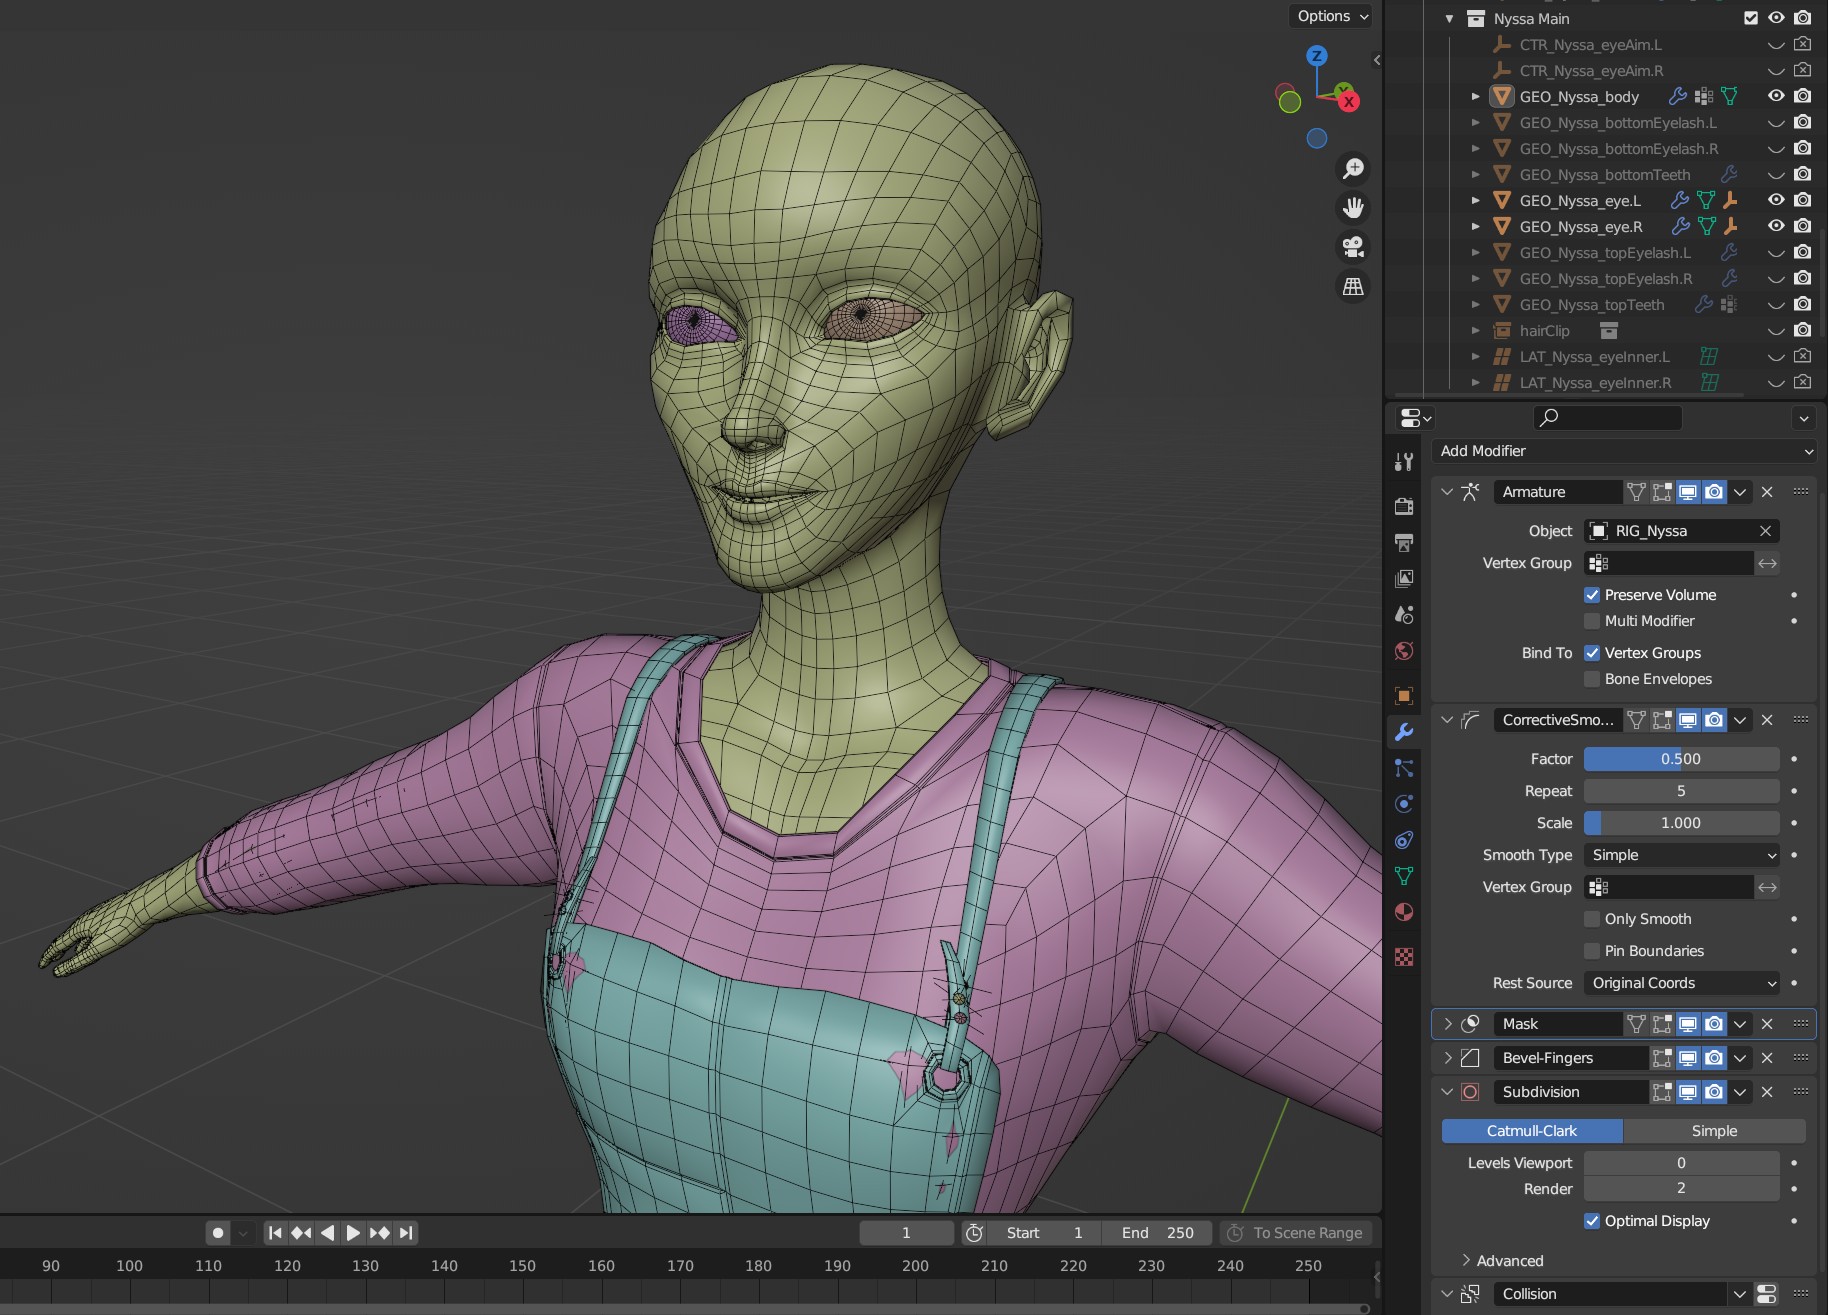
I’ve created a rig for my retopologized model and by my own with help of various YT and tips from here, however my crease in opposite side from the elbow seems to now deform incorrectly and creates a bloated area visible in higher subdivs on multires everytime the elbow is bent. I’ve tried creating retopo with face in front, with additional edge loop, weight painting differently, assigning weights via vertex group and for each edge loop manually instead of weight paint, joint moving closer and further from the elbow itself, changing order of modifiers - If multires is above (1st in stack) the armature, then it is deforming semi good, but the rest of the model suffers from sharp edges across whole surface. If it is after the armature, then model is shaded without issues, but aforementioned bloated area is created whenever joint is rotated. I’ve looked here and around the internet (google, google images of topology, YT) and could not find the solution. Could anyone help me please to resolve this, as I’m trying for quite some time and started to lose hope :sweat_smile:

In advance, I’m sorry if there was same topic, but if so, I was unable to find it.

Here are screenshots of mentioned issue


You need better elbow topology- just parallel edge loops like that won’t cut it. You should probably go for double diamond topology- check out Dikko’s character modeling for animation videos

I know Dikkos tutorials and do have tried his approach with 2 edge loops around the elbow ( this is the topology at 1st screen). I don’t see there any double diamons - what I would assume will be 5 ngons, right? I’m not fluent at 3D naming yet :sweat_smile: If yes, then at the 2nd screen there are 2 ngons on both sides of the elbow and yet the deformation is not quite there.

image
Topology on 2nd screen is something like that. Please tell me if I understand this correctly as double diamond

Also as this might be misinterpreted in the 1st post that I’ve only retopogolized on my own. I’ve created rig and retopology so this also might be a rig issue


so here is pose view of all bones there.

Edit.

or if you referring to this kind of topology, then no. It still does not resolve the issue


A few things, first is bone placement, too far forward or too far back, etc. Rigify is great for that, since you can test, even adjust weights and if still not right, adjust the metarig and re-generate and keep all weight painting.

Second, using automatic weights is the starting point, not the end point. After that you need to bend and paint adjustments (carefully), till things start to look better.

Third, Corrective Smooth modifier, various value adjustments and then likely some weight painting to control exactly where and how much is applied. It is possible a single model will have more then one of theses.

Forth, there is of course the main placement of edge loops. So for the elbow you of course have the front part more spread out, since the elbow only bends in one direction, so there’s less mesh getting smashed together. While the actual elbow is more closer together, as that then gets way spread out as it bends.

Fifth, if all else fails, there is always shape keys.

He’s what mines currently looks like without any shape keys.

My base mesh was also made follow Dikko’s tuts, keep in mind there is no sculpting or multires or anything like that, its base mesh, armature, corrective smooth and then sub-div.

I suspect your main problem is one of basic workflow, starting with that multires.

1 Like

What does your weight paint look like?

The topology looks OK, so check Bone Placement and or weight-paint…

Here is one of mine…

This might be multires/subdiv issue as on lower res this does not occur, although I plan to use subdiv with baked disp/normal textures and don’t want to see those bad deforms on my final model. Also I am not fully aware of full pipeline in means of workflow to creating models. Even tho I had some fun with blender, I’ve never rigged or animated model fully or without issues hidden behind the cam of final render, therfore I’ve might screw something up along while doing those.

In case of weight paints. As I mentioned in 1st post, I’ve tried to paint it in various ways. Including this edge, excluding it, leaving 50/50 for rotating bones, smoothing those areas as well, completely removing and adding them manually, including it only for elbow bone. In every case bloat still was present, but I will try topology that I see on added screens as they are similar, but slightly different.

In the end I can also share the blend file as it is around 40mb - I do have other files where same base mesh is more developed and heavier, but it also have mentioned issues so I pressume there must be in mesh, rig, modifier or weight paint itself.

At the moment my money is still on that multires being the issue and/or whatever those wrap modifiers are doing.

Edit: When you doing the weight painting, you have the auto normalise option checked, right? That keeps all total weights to a value of 1.

Yea. I’ve done weight polishing with and without autonormalization in both cases this still occurs.

However I’ve done some more testing and took my base mesh, used rigify and applied multires( in reverse order as well). Issue did not occur, so I’ve tried rigify on this model, and yet bloating was creating with elbow rotation.

So as I’ve tried one more thing. I’ve cleared parent from mesh, applied multires, then apply rig with autoweight - cool, no issue. Then I unsubdivided mesh with multi res to same level as before and applied armature again. No issue. So this MUST be correlated with multires modifier itself, right?


Its the same model, same rig. Only difference is that I’ve applied multires → armature → multires with unsubdiv → amature

It’s possible I’m missing something here, but I’m really not sure why you are even using the multires modifier. I’ve always considered that as a means to create higher level detail in sculpt mode on a base mesh.

One would then bake that detail to a normal map and the like and then basically remove the multires modifier, apply a rig to the base mesh, add a sub-div modifier to smooth things out at render time and apply the normal texture (from the multires sculpting) as a material to add a bunch of detail back without needing a crazy high poly mesh.

Basically if rigging/animation is the goal, then multires is never present, it’s a means to an end half-way through the production process.

At least that’s my understanding of the usual workflow, but I maybe wrong.

1 Like

I’ve tought they could be used interchangeably - as some use it without creating textures, but true, I’ve seen those for still renders. Anyway I thought I will have same issue for subdiv, especially when applying baked textures for subdiv model does not always looks the same as multires on same subdiv levels imo.

As I mentioned I’ve never done anims before and don’t know full pipeline therefore I might have some misconceptions about correct usage of modifiers and, this might be rookie mistake, but I’ve thought that denser meshes are go to for semirealistic anims.

So thanks for tips and help!

It is, but that is usually achieved with a sub-div modifier around level 2 and then any more details are bump/normal maps or if it really matters, a displacement map using adaptive sub-div based on distance to camera.

In general the base mesh (the one that is all connected to the rigging, etc) is usually as light as possible. Allows for easier weight painting and faster interactive display with sub-div turned off.

Here’s my latest test animation with a fairly basic base mesh and a sub-div at level 2 to smooth everything out.

Here is what the modifier stack looks like for the main body, with the model with all sub-div turned off.