Hi, how can engrave a line (bezier curve) on a sphere surface? like doing the black line on a tennis ball…
thanks.

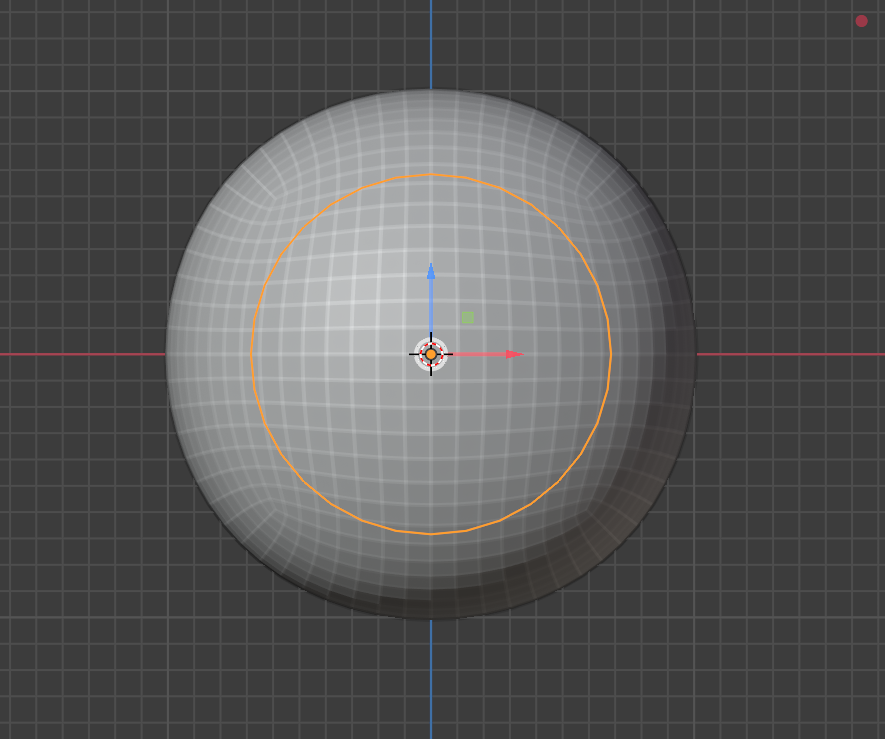
have the curve lying on the surface iof the ball, by mean of changing location of its control points.
convert into mesh and join the two objects.
in edit mode select all and go into face, intersect knife. choose self intersect.
delete any part that is above the surface of ball.
hope this work for you.
You want to get something like this?

I know. The shading is awful. That is the problem then “engraving” on a curved surface. Have to do cleanup by hand.
Hi, yes, exactly. Anyway, how did you make such a precise line? with the curve on the stroke or with a bezier in edit mode? thanks.
Sorry for the delay.
My workflow in this case:
- Start with the default cube
- Add Subdivision Surface modifier with four (4) levels Viewport - apply it
- Add Cast modifier with shape to sphere (should be default) - apply it
- Go to front view (Numpad 1), add a Circle, rotate it on x-axis by 90 degrees, move in front of the “cube”, scale it to the desired size, apply scale.
- Select the circle, go to edit mode, select all vertices in the lower half and delete them.
- Select the two lower vertices and extrude them on the z-axis down below the “cube”, connect them with “f”. Back to Object-mode.
- Select the circle (should already be selected) and shift-select the “cube” and tab into edit-mode.
- Do not change the view! Select “Mesh” - “Knife Project” and select “Cut Through”. Now you can rotate the view around the cube and check if it is the desired shape. If not, go back two steps (ctrl-Z), adjust the position of the circle and try again.
- Then you are happy, then go to “Select” - Select Loops - Select Boundary loop. duplicate the loop (Shift-D) and separate it with “P” - Selection. Tab back to Object-mode.
- Select the separated loop, tab to edit mode, select all vertices, right-click and select in the menu “Loop tools” - Relax, change the Iterations to 3 (so it gets a smooth shape). Additionally I select Loop Tool - Space to distribute the vertices evenly without loosing the shape. Back to Object-mode.
- Convert the mesh to curve. In “Object Data Properties” scroll down to “Geometry - Bevel” and adjust the depth as you like it. Convert the Curve back to mesh.
- Select the cube, add the Boolean-Modifier with difference, select the object from step 11 as the cutter, apply the modifier. In my case, the cutter is still active, so I hide or delete it.
- Almost finished. Apply smooth shading with auto-smooth.


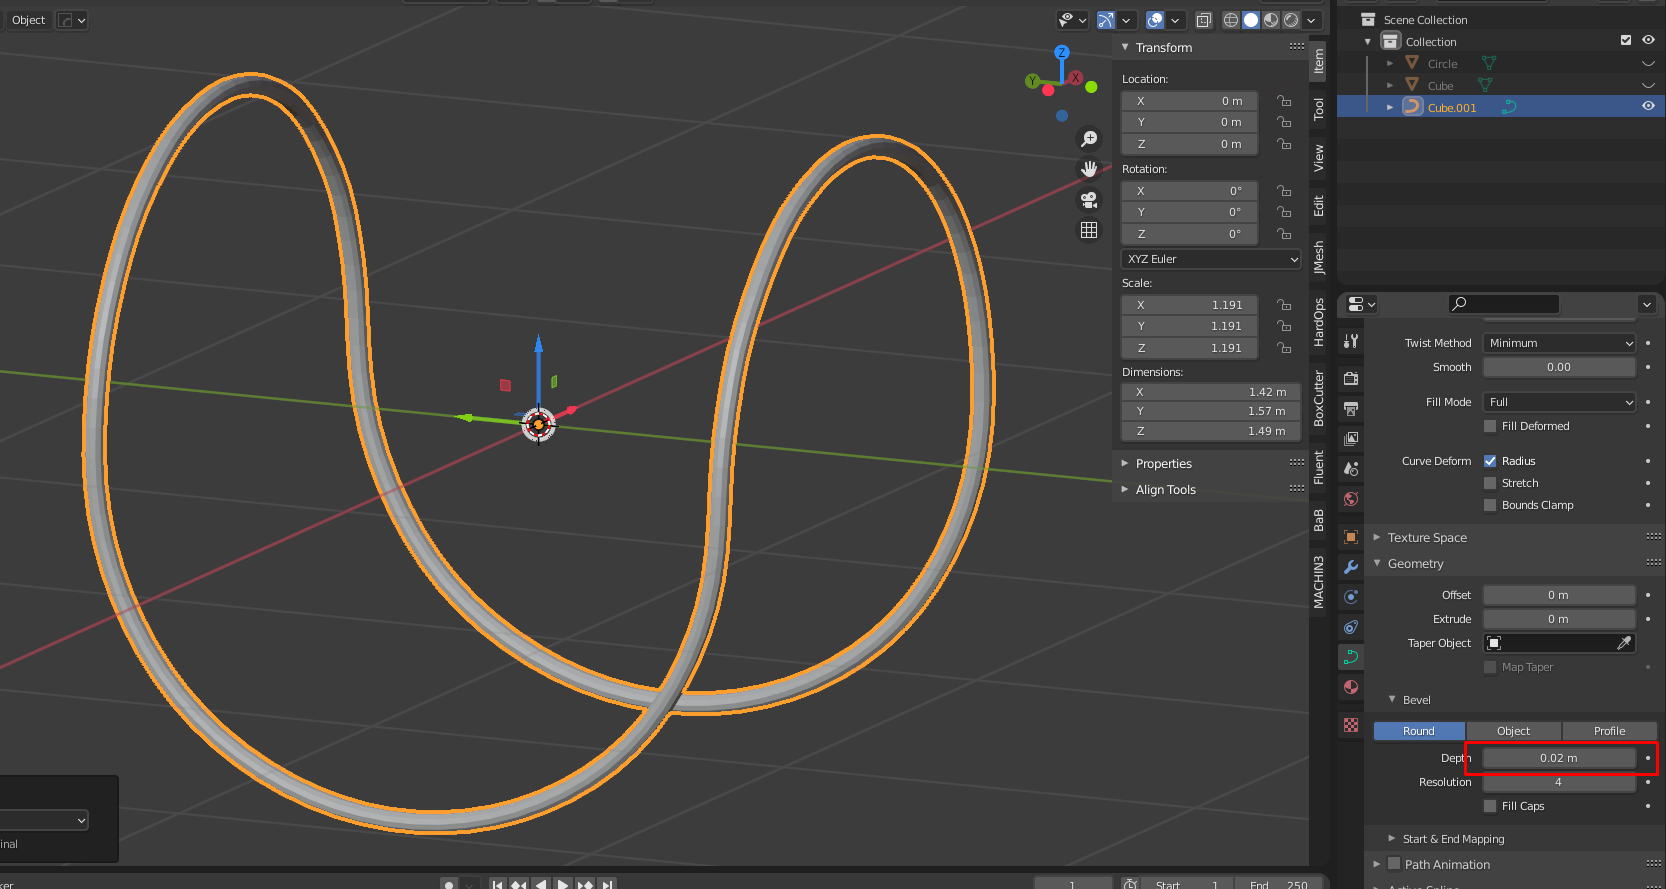

You will have some shading issues, add Subdivision modifier and/or adjust the geometry (moving around vertices).
Hope I could help a bit.
1 Like