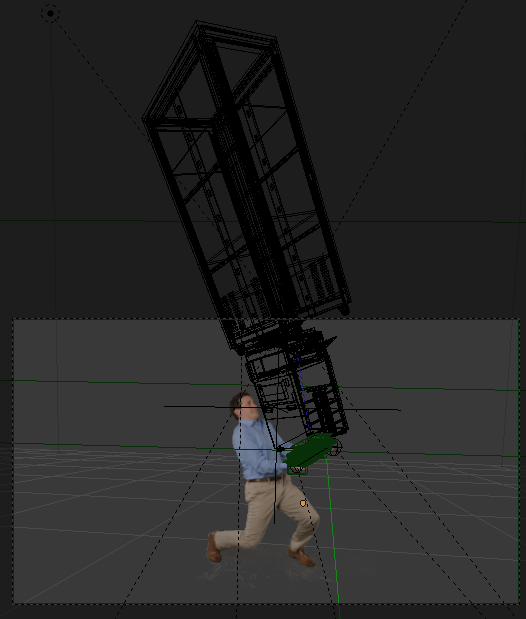
Bit of an odd one here. I’ve got some footage that we shot which I’ve tracked in Blender (Camera and Object), I then used the tracking markers to parent some objects to my persons (live action) hands. However, at certain points of the animation, the CG objects go outside the view of the camera which I’ve tracked in.
I need a way to expand the rendered view of the camera without moving the tracked camera back in space (that affects the track and the footage no longer matches the movement). I also cannot change the zoom of the camera to a wider lens, because that affects the field of view which changes the look of the footage too much.
I’ve tried changing my render resolution (Render Panel) and that helped at first (my render view from the camera got taller), but at some point that stops being effective and the image doesn’t continue changing the way I need it to. I’ve also monkeyed around a little with the aspect ratio (doesn’t help and I image will cause other problems down the line).
Using the render border tool doesn’t work because it clips at the top of the camera.
I’ve also tried duplicating my camera (parenting it to an empty) and then raising it up in Z Space to render the top out and then stitch
Matt,
Go into your camera’s settings (select the camera, click the camera icon in the properties panel) and under “Lens” you’ll see a “Shift” parameter. This will shift your image without changing any of the perspective (it’s commonly used in architectural renderings, but it’s also useful for exactly what you want to do here). So in your case, you probably want to render your default render (as you posted above – fun-looking project, by the way), then up the Shift-Y value until it matches up with the upper edge of your frame.
One catch here is the number. As far as I understand it, a Shift-X of 1.0 will do a perfect tile on the right side of the frame, but the Shift-Y needs to be a proportional number, or how high it would be assuming the width of your image is 1.0. So if you’re using a 16x9 image, you’d enter 9/16 = .5625 as your vertical shift, and you’ll get a perfect tile. In theory.
In the past, I’ve overlapped the renders by 20 pixels or so, then matched them up afterwards in AE and cropped the image back so they line up that way.
A while ago, I used this technique a lot (when I had to extend the boundaries of a shot with a motion-tracked camera). I looked around for a script that did this automatically, but couldn’t find one. It seems like a smart thing to automate, but probably isn’t used nearly enough to justify the time figuring out the code.
Thank you, that looks like exactly what I needed!!! I figured there must be a way, but was racking my brain to try and figure it out (I’ve never had to do any architectural renderings before).
Yes, this has been a fun project, especially since they let me come up with the creative and direct (this time).
If you’re interested in seeing the final, I’ll try and get the clients permission to post this project when it’s finally done (to BA) and I’ll link to it here once it’s done