Hey, I am currently working at a company that requires me to use maya curves for any tube-like geo. I have been doing all my modelling in blender and Im wanting to transfer the curves into maya. The only format that I know works is alembic however theres some weirdness going on when I try bring the curves into maya. A bezier curve for example will just crash maya upon import. A nurbs curve will import without crashing however if its just a standard nurbs curve created from the shift+A menu, it wont show in the maya viewport. If I extract edges from geometry in blender and then convert them into a nurbs curve before exporting as an abc then it seems to work fine in maya.
I know every program handles curves differently but is there is any method/addon that is guaranteed to transfer any curve from blender to maya?
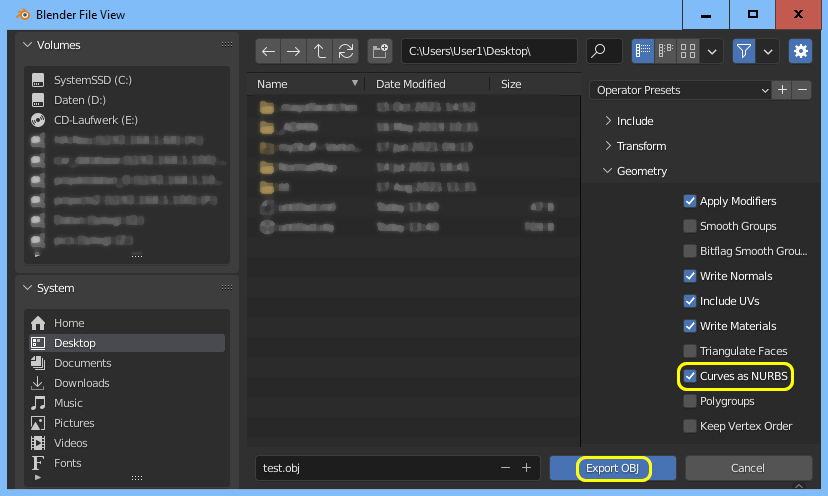
I found a workaround with OBJ as export format.
These instructions are considered for Blender 3.0 and Maya 2020. Some steps may differ or don’t work with other versions.
Also this is meant for Bezier Curves. If you start with a NURBS curve in Blender only step 2 matters.
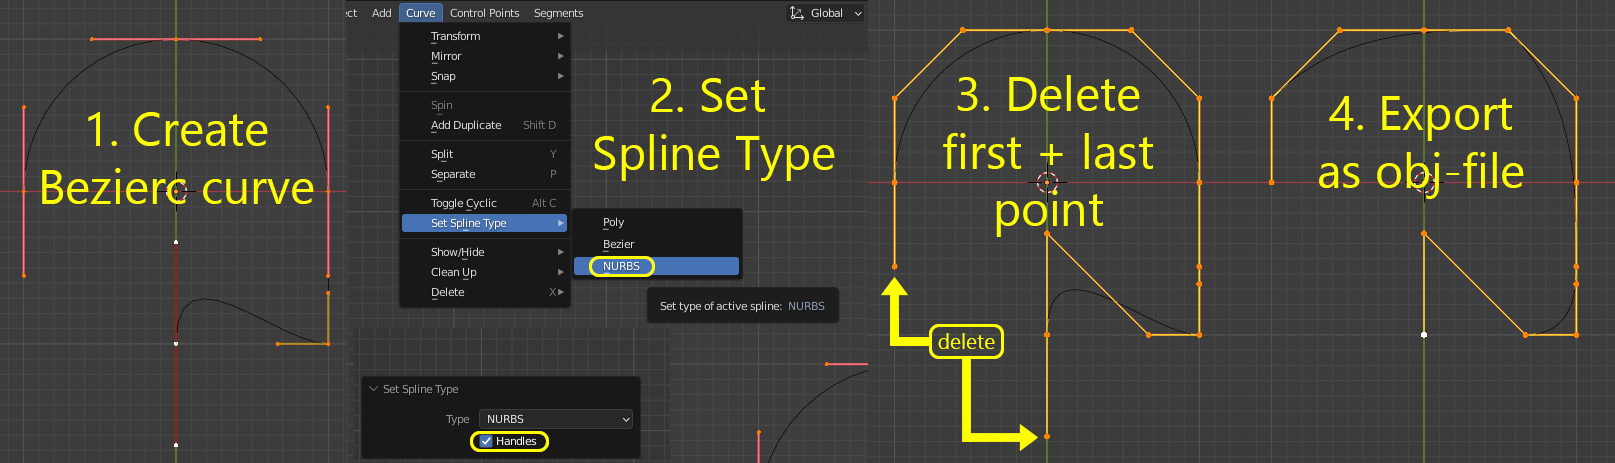
Step 1: Convert in Blender
Select your curve and switch to edit mode
In the Viewport menu “Curve >> Set Spline Type >> NURBS” (also available in the right click menu)
make sure to activate the “Handles” option in the Last Operation Menu, which appears in the lower left of the Viewport
Select the last and first control points and delete them (don’t worry that the curve looks bad right now)
Some Notes:
The deletion of the first and last control points in blender is necessary because for Maya these Bezier handles are not in use and therefor don’t need to exist when converting between NURBS and Bezier.
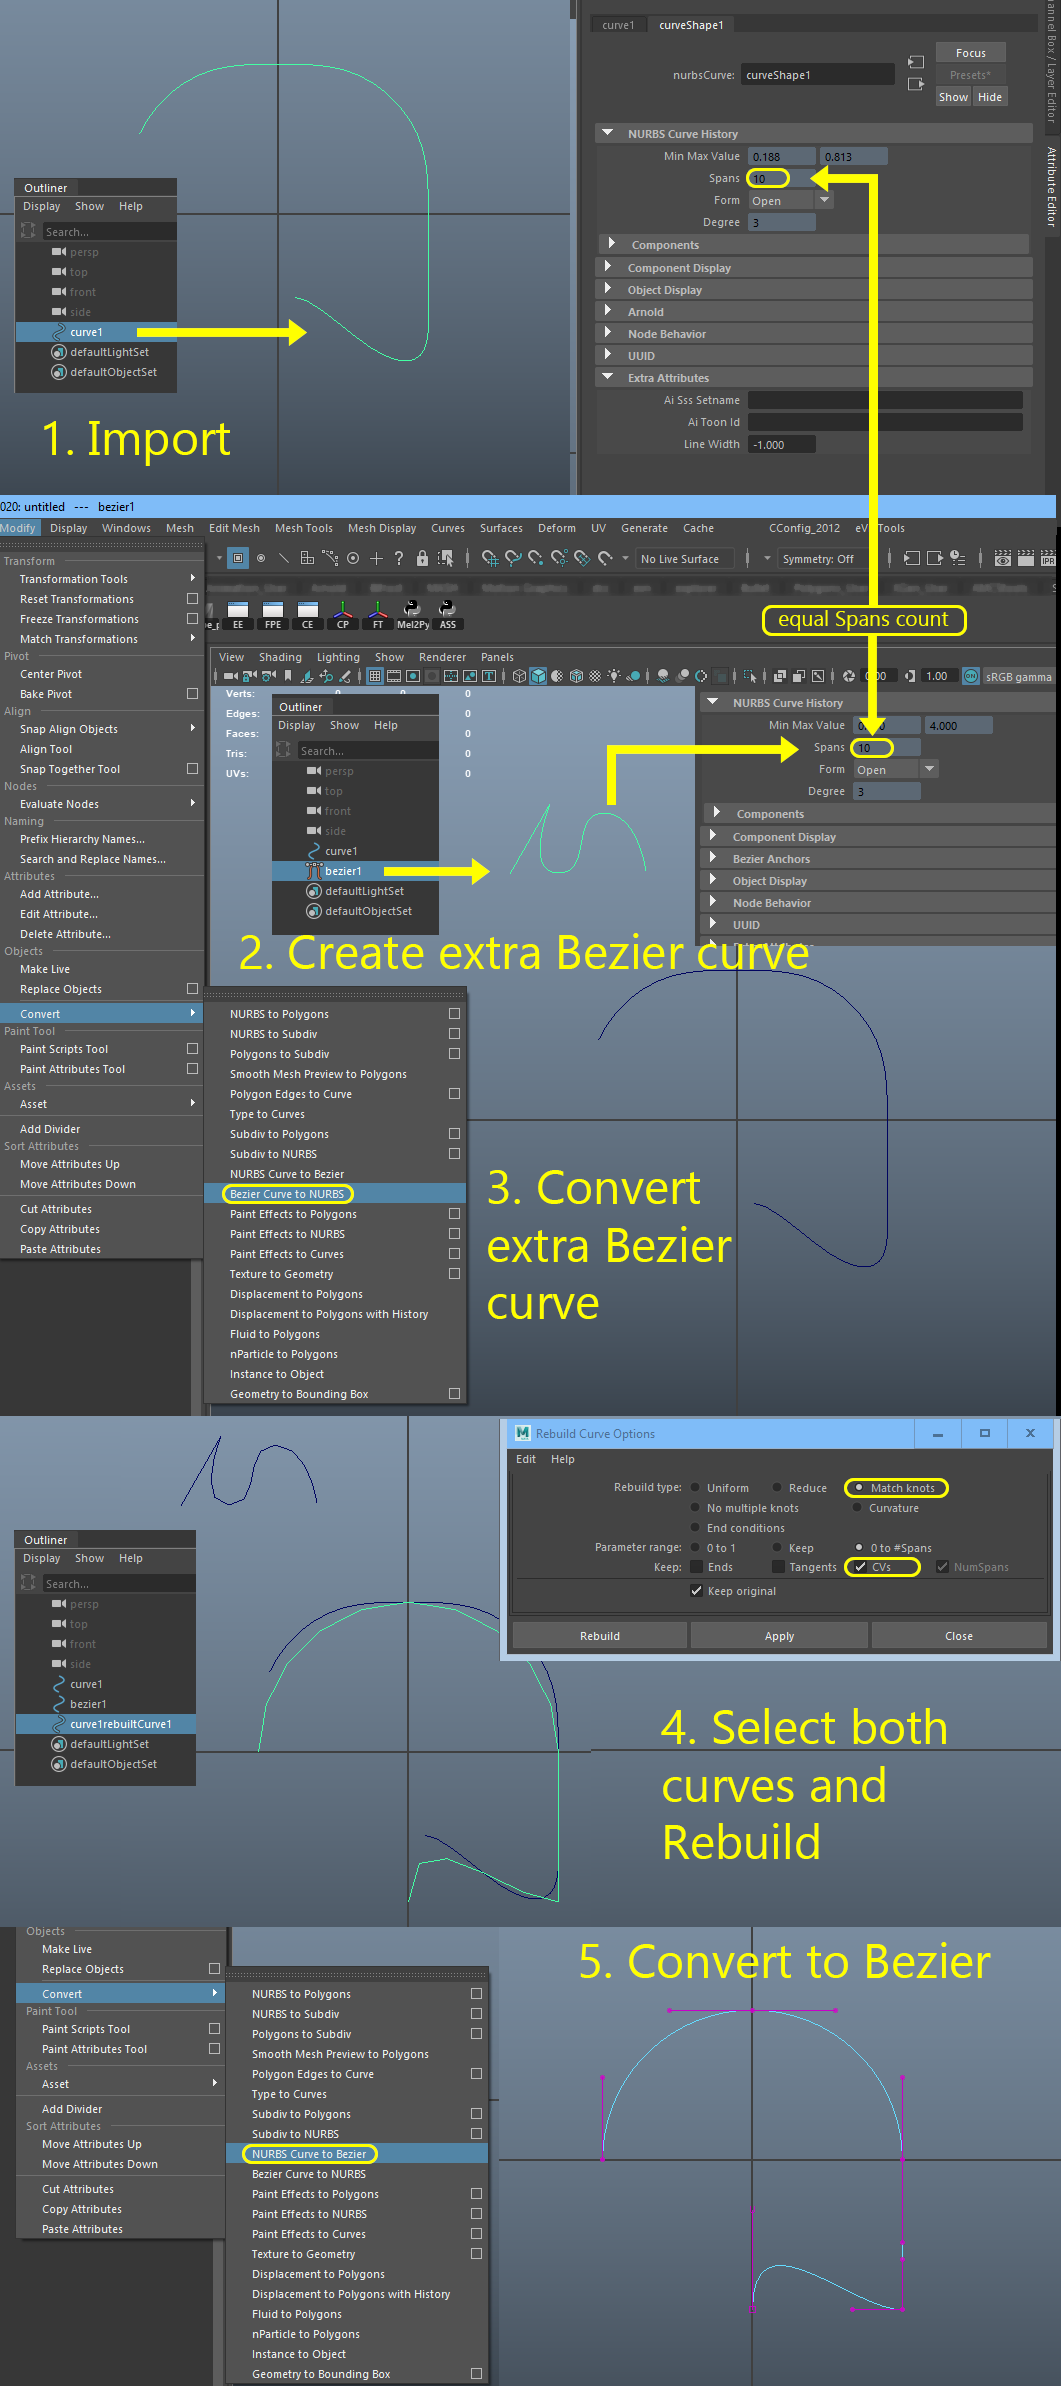
I think the extra curve and rebuild is necessary because there is some variable in these curves inaccessible to the user. It is most likely the equivalent to the Bezier checkbox in Blender for NURBS curve under the active Spline tab in the Object Data Properties - because if deactivated, the curve looks like in Maya when imported. (the active spline tab does not show up if the curve can gets deselected in edit mode, it may happen when you delete vertices. Select one control point in edit mode)
Personal Note:
It is insane to me that Autodesk is making money with this piece of software. I invested 3 days for this janky workaround.
Well it’s 2024 and this does not work unfortunately. maya instanty crashes.
If I export obj curves from zbrush it works fine
There currently seems to be no way to export curves from blender to maya which is a real pain as I prefer sculpting particle hair from blender as its more fun to use than xgen
Hey, I actually found an addon to export poly curves to Maya. You just need to convert them in Maya to cubic and it works perfect. I’m away from my PC right now but will upload the addon here for you tomorrow. It’s a life saver.
oddly enough i jsut got it to work. converted the new blender hair curve system to nurbs curves, then exported as obj( curves as nurbs checked) and it actually worked
not sure if it was the particle curves that were not working, will do some more research