I found a workaround with OBJ as export format.
These instructions are considered for Blender 3.0 and Maya 2020. Some steps may differ or don’t work with other versions.
Also this is meant for Bezier Curves. If you start with a NURBS curve in Blender only step 2 matters.
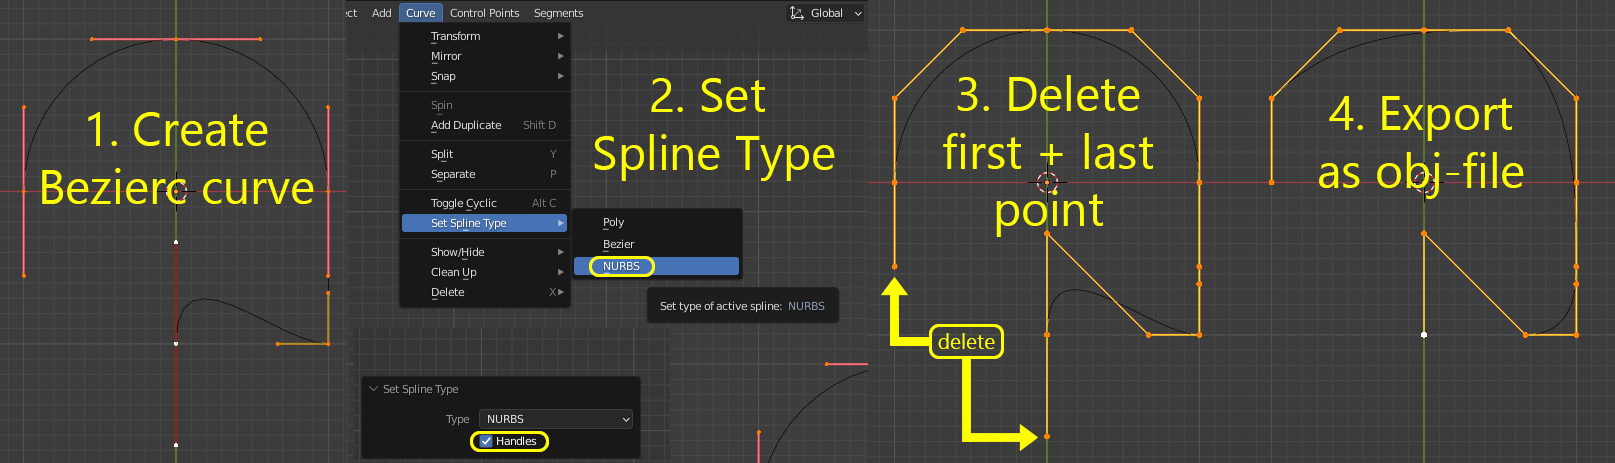
Step 1: Convert in Blender
- Select your curve and switch to edit mode
- In the Viewport menu “Curve >> Set Spline Type >> NURBS” (also available in the right click menu)
- make sure to activate the “Handles” option in the Last Operation Menu, which appears in the lower left of the Viewport
- Select the last and first control points and delete them (don’t worry that the curve looks bad right now)
- go back in Object Mode
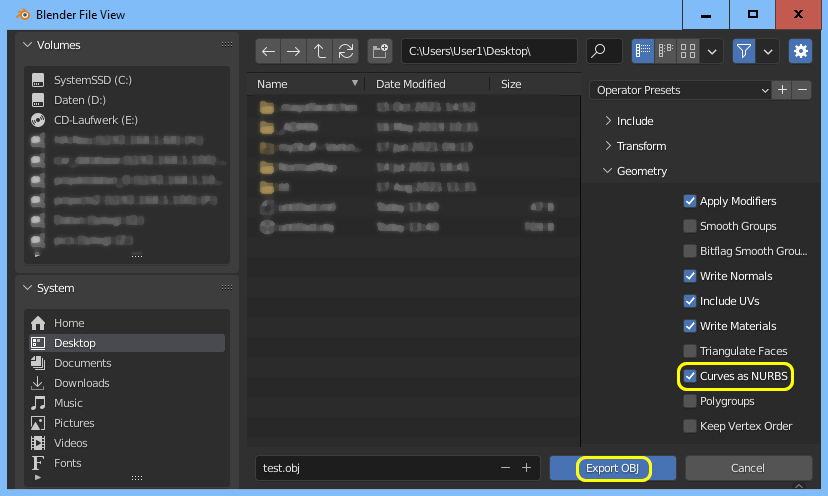
Step 2: Export - Import
- In the Blender menu “File >> Export >> Wavefront(.obj)”
- In the Export options open the tab “Geometry” and check the “Curves as NURBS” option
- Press the Export button
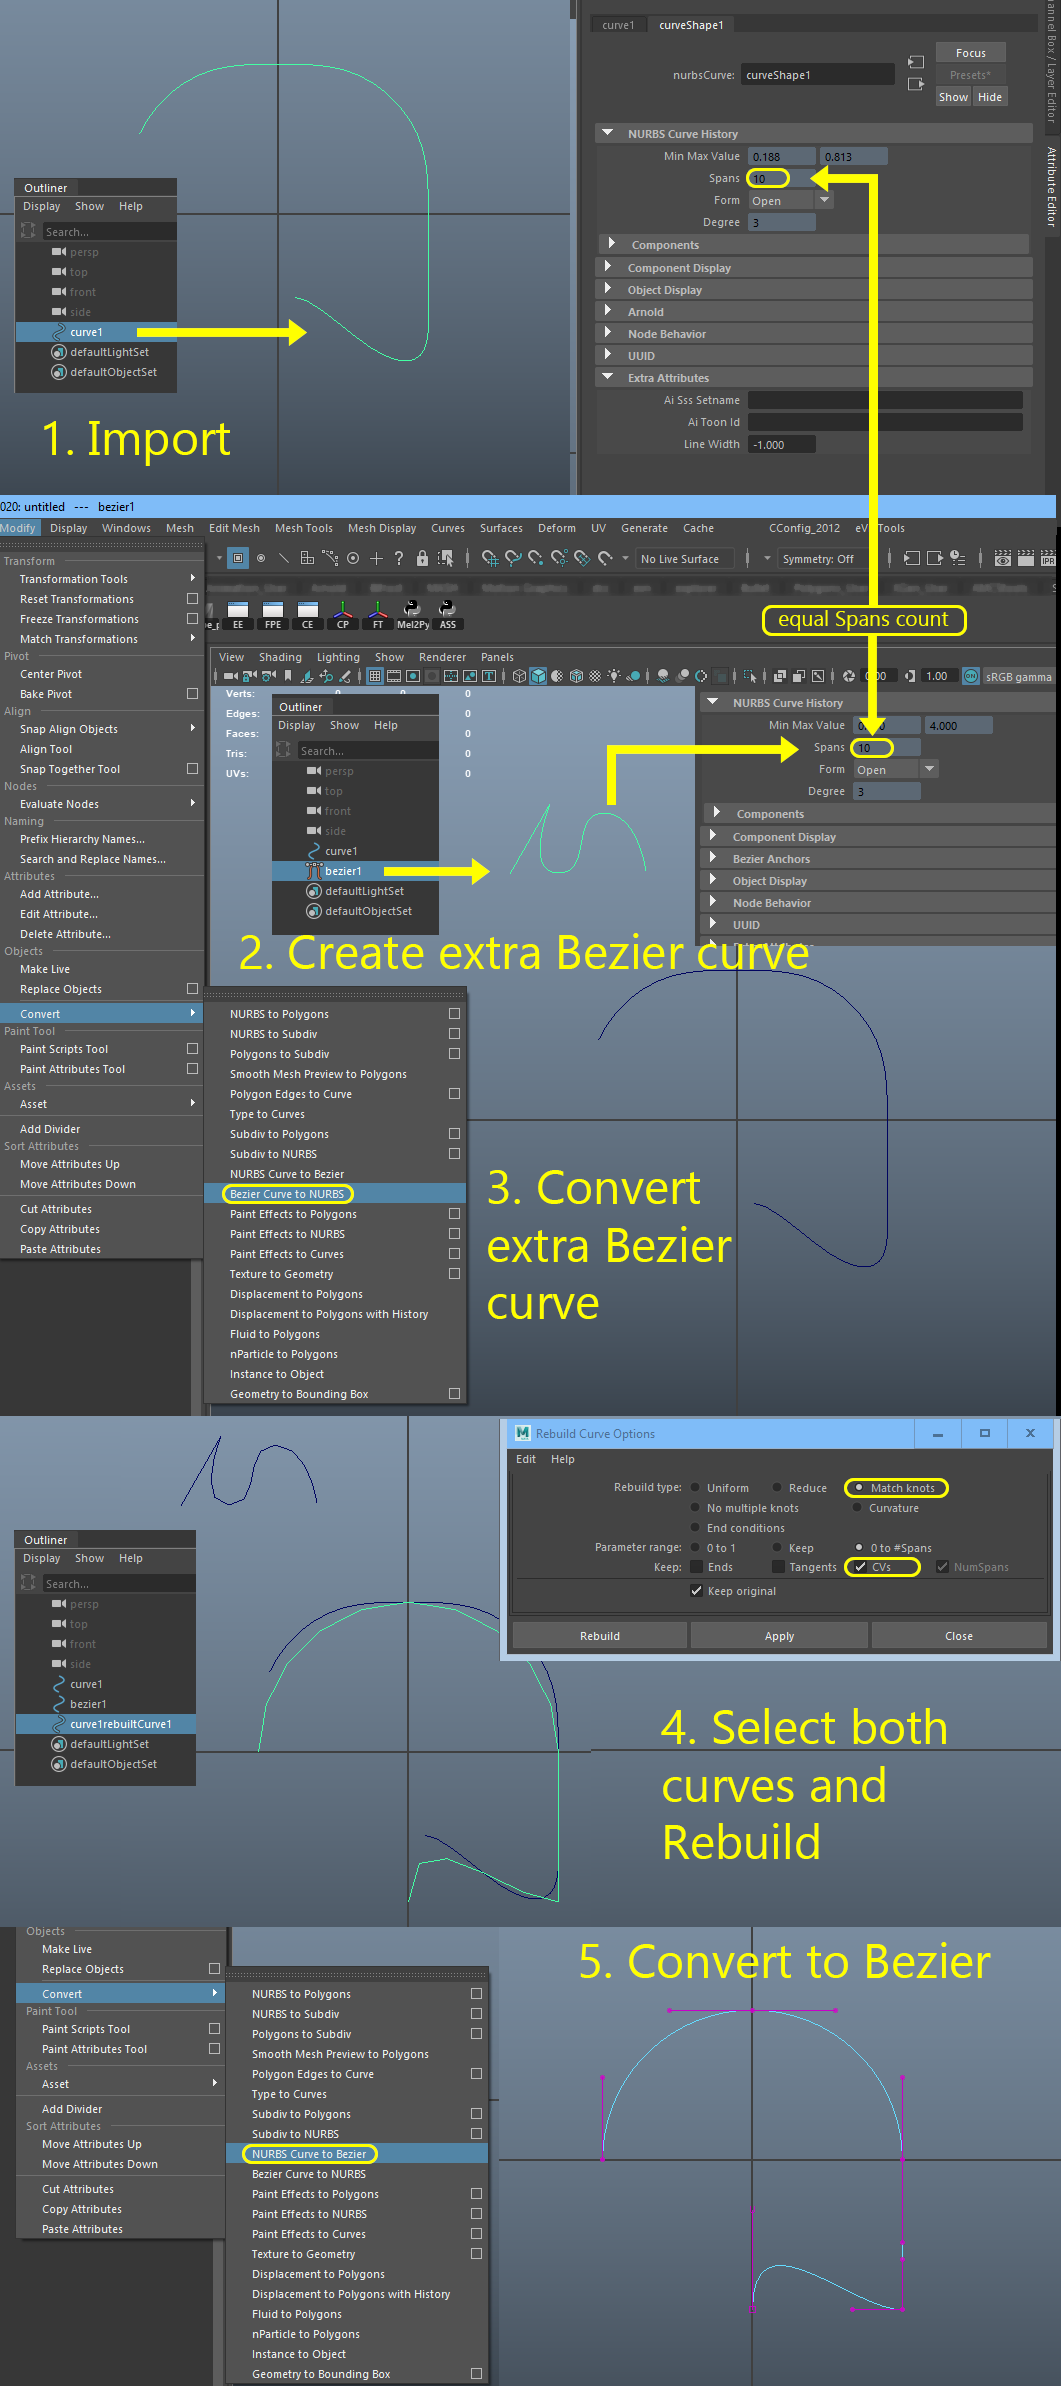
- Import the pbj-file into maya, your NURBS curve should be visible now
Step 3: Extra curve and rebuild workaround
- Select your imported NURBS curve and look for the Spans count in the Attribute Editor undder the “NURBS Curve History” tab
- In the Maya menu “Create >> Curve Tools >> Bezier Curve Tool” and draw a curve with the same Spans count as your imported curve
- you should be able to see the Spans count rise as you draw when you leave the Attribute Editor as you selected your imported curve
- the form and handles of the curve don’t matter
- Convert the created Bezier curve to a NURBS curve
- in the Maya menu “Modify >> Convert >> Bezier Curve to NURBS”
- or in the Viewport select the curve hold Shift + Right Mouse Button for a radial menu that should have the opertaion “Convert Biezier to NURBS”
- First select your imported curve then your created curve and in the Maya menu “Curves >> Rebuild Curve [Options]”
- the options is the square in the menu list next to the Rebuild operation
- Rebuild type: Match knots
- Keep: CVs
- Select the Rebuilt Curve and convert it to a Bezier
- in the Maya menu “Modify >> Convert >> NURBS Curve to Bezier”
- hold shift + RMB → radial menu → convert NURBS to Bezier
Some Notes:
The deletion of the first and last control points in blender is necessary because for Maya these Bezier handles are not in use and therefor don’t need to exist when converting between NURBS and Bezier.
I think the extra curve and rebuild is necessary because there is some variable in these curves inaccessible to the user. It is most likely the equivalent to the Bezier checkbox in Blender for NURBS curve under the active Spline tab in the Object Data Properties - because if deactivated, the curve looks like in Maya when imported. (the active spline tab does not show up if the curve can gets deselected in edit mode, it may happen when you delete vertices. Select one control point in edit mode)
Personal Note:
It is insane to me that Autodesk is making money with this piece of software. I invested 3 days for this janky workaround.