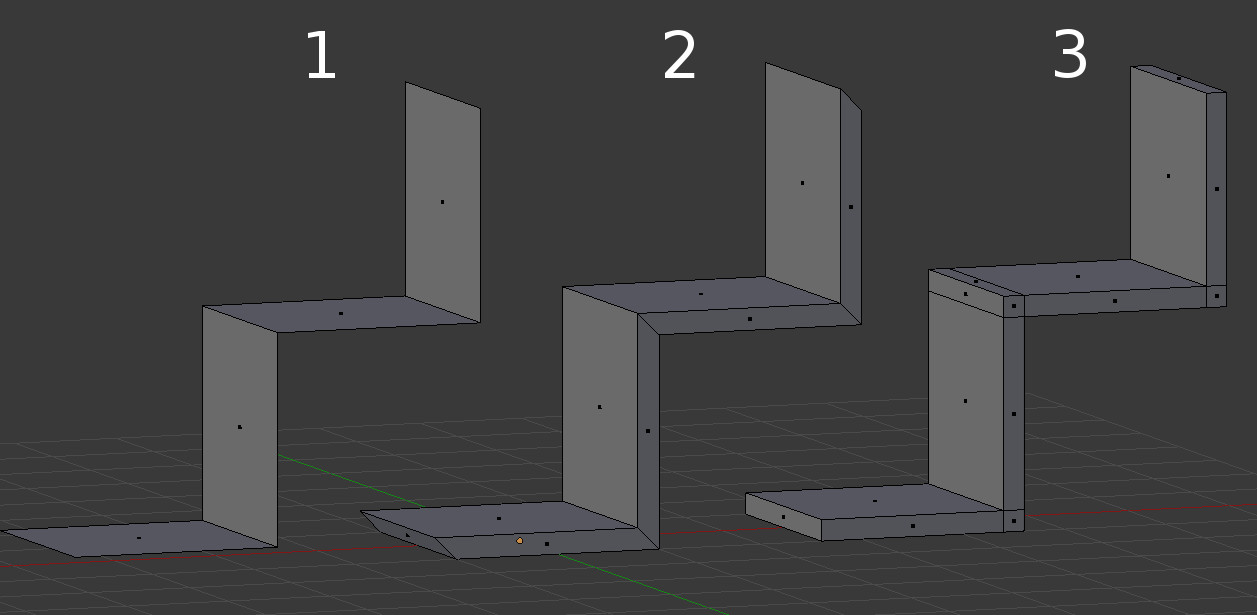
I’m a blender enthusiast but with limited experience. I want to extrude a series of vertical and horizontal planes (stair like). I tried extruding the usual way in blender but the result is not what I wanted. The figure illustrates better what I trying to do: I want to extrude the planes in 1. The usual way with the E key results in the the mesh in 2. However, what I need is like the mesh 3. I have much more planes in my real mesh, so… is there an automated way to do so?
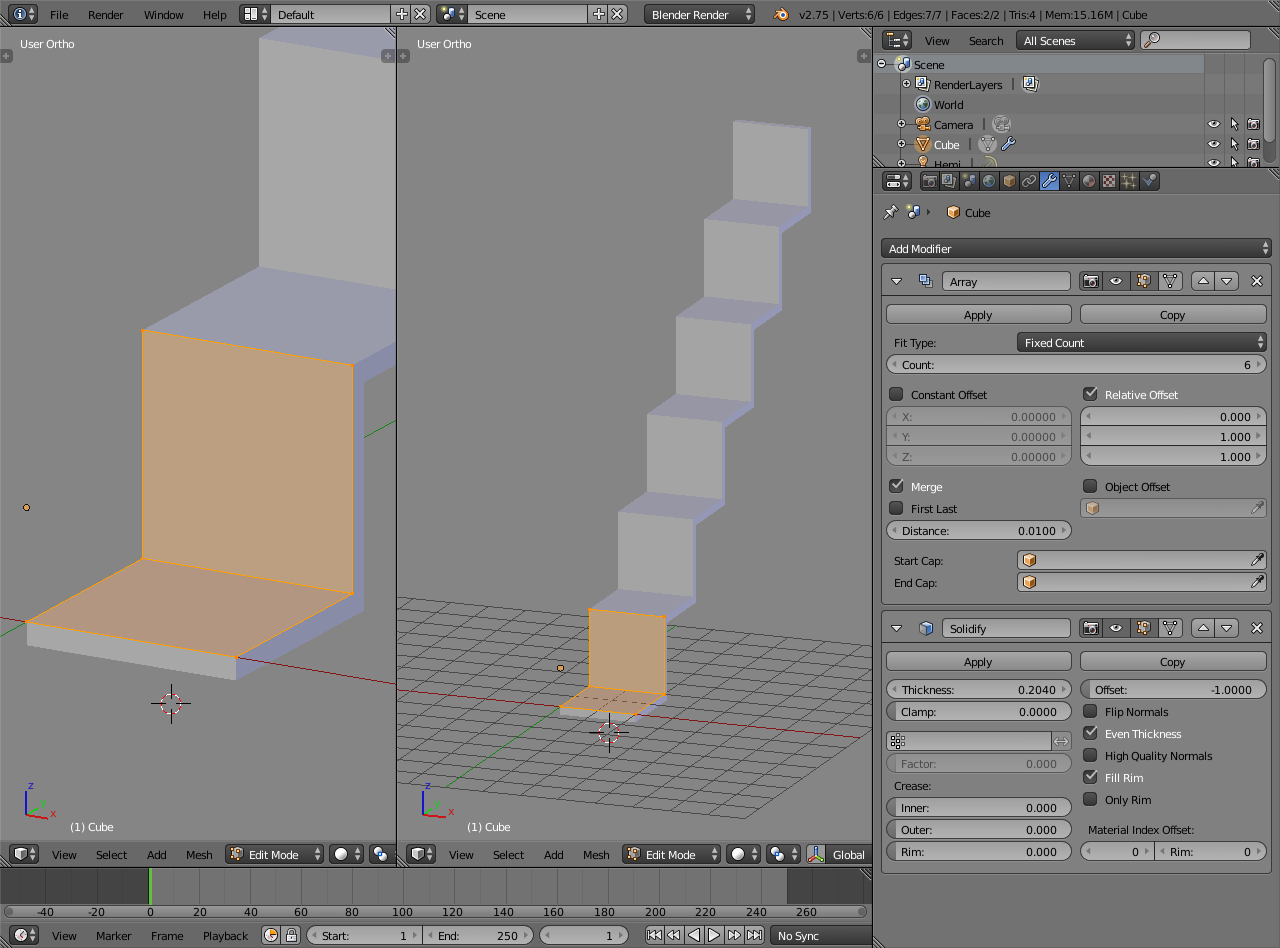
Thanks for your fast answer. I just tried the solidify but I’m getting almost the same results as in the extrude. The only difference is in the extreme edges.
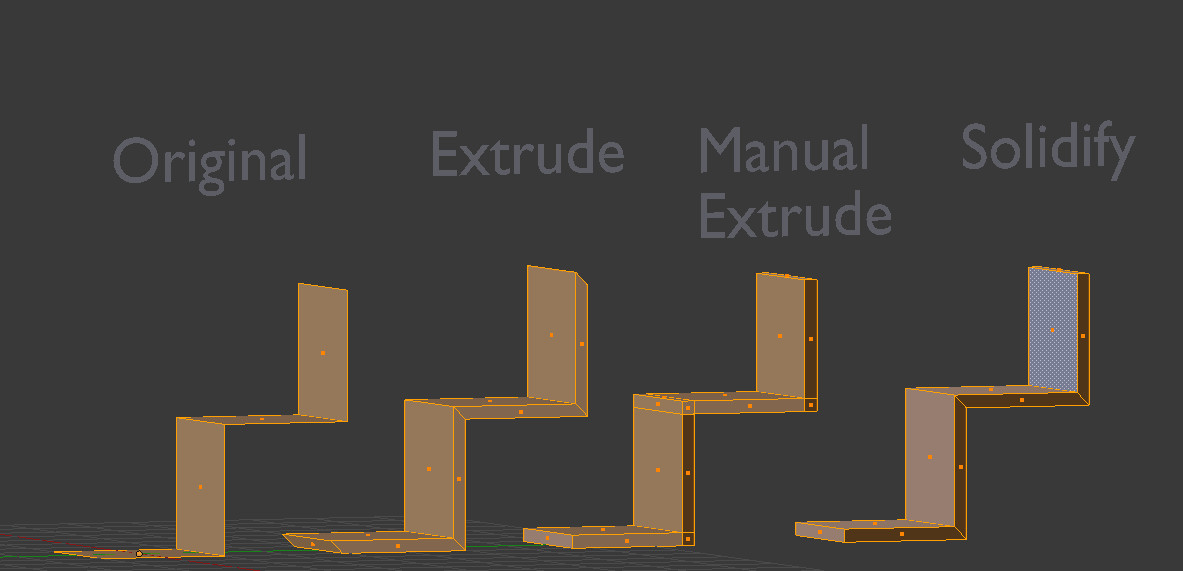
I think it would actually be better if the edges were slanted like in the solidify result(Correct me if I’m wrong)
because it would be easier to do edge loops.
The slanted edges would be ok for me if I wouldn’t need to extrude further. But I want to extrude also some of the small faces in the “manual extrude”.
You would have to do the manual extruding. Instead of starting with a base mesh for the stairs, you would start with a rectangle and extrude a volume in a zig-zag fashion.
An alternative way is to do the zig-zag extrude starting with just a single edge to make a 2D profile, then you use another extrude to finish the shape.
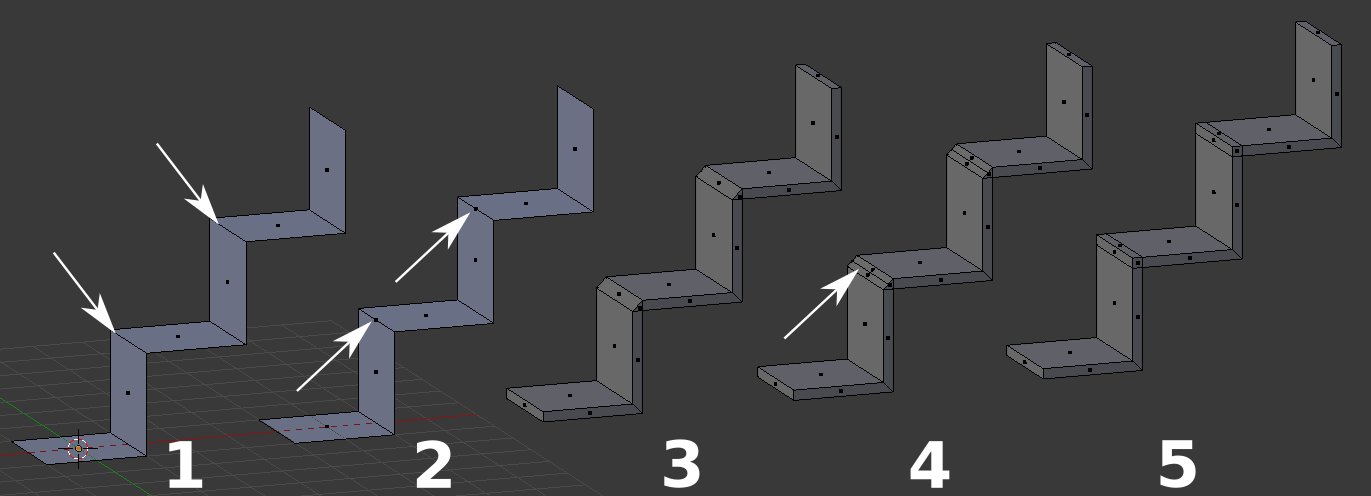
I accidentally discovered one way to do what I wanted. I bevel one edge with a negligible amount but it was enough to create a new face that will “solidify” as I wanted. It does not work in every edge as in the “manual extrude” version, but for me is enough.
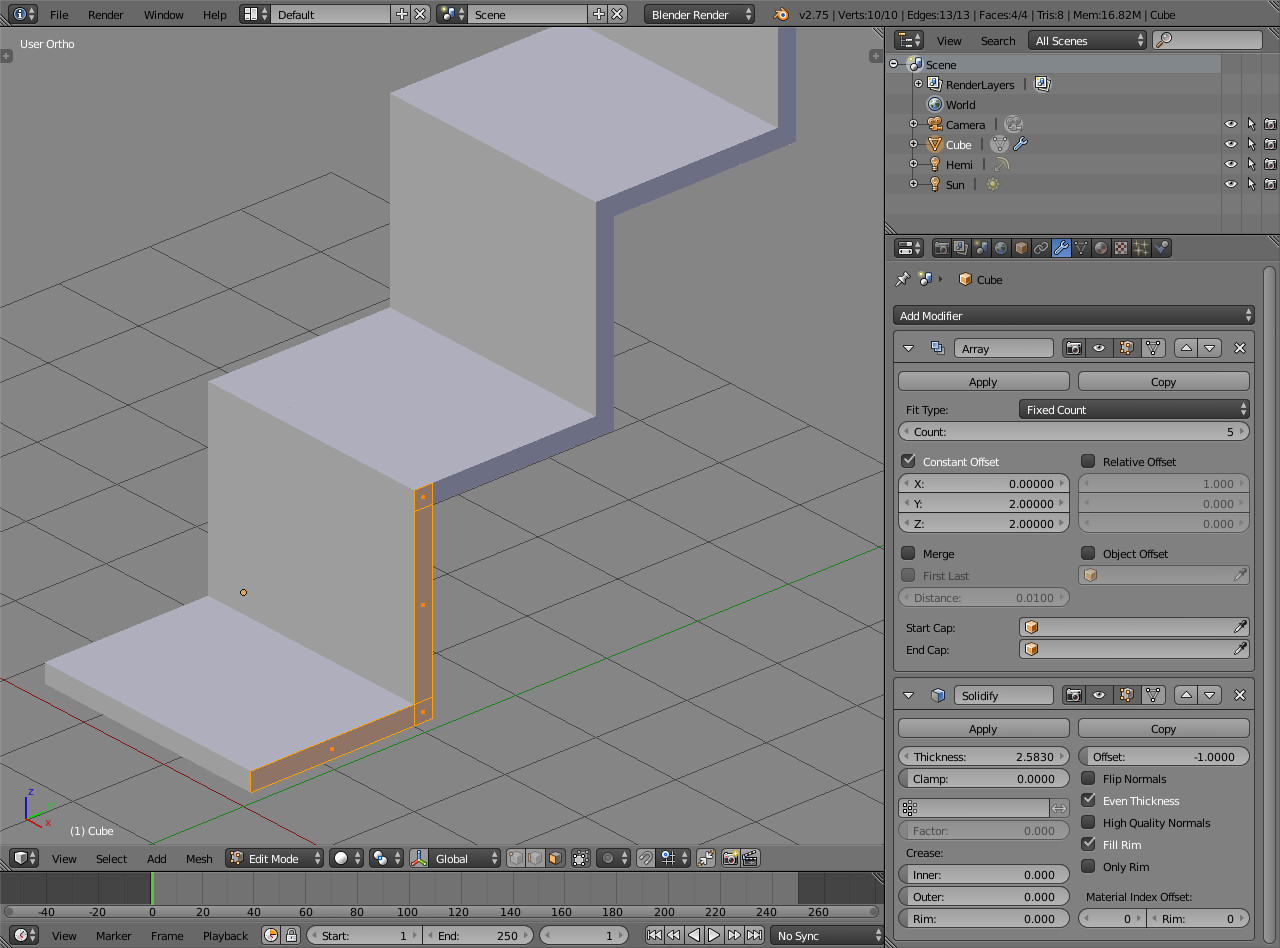
In the figure you can see how I did it with more detail. I selected the edges as shown by the arrows in step 1. Then bevelled with a very small amount (like 0.0000001) and it was enough to create a new face like shown in step 2. In the step 3 I have used solidify with a -0.2 thickness value. and removed the doubles (ctrl+v, remove doubles) to eliminate the face created in step 2. I have added a new edge at the middle of the created face (ctrl+R; step 4) and then moved in the Z and X axes by 0.1 (step 5).
If the mesh is already created, like in my case, maybe this can save some time… Maybe is not very orthodox, but it seems to work! If it has to be created from scratch, than the other ways described in the thread are much better!
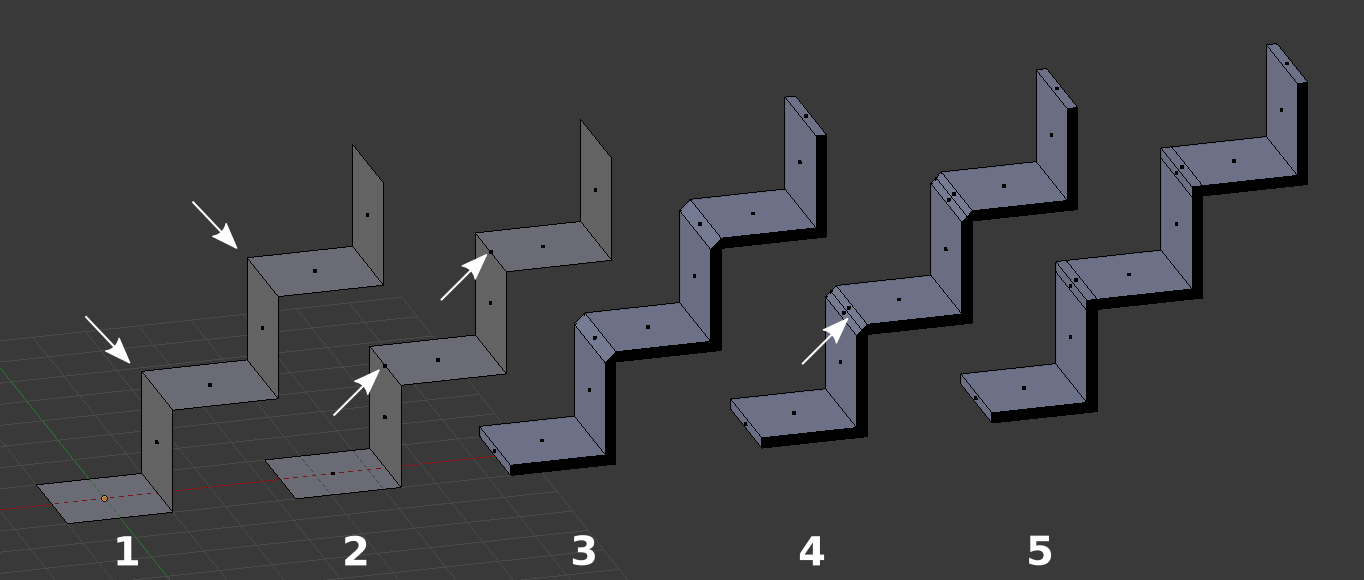
UPDATE: Figure with normals recalculated as suggested in post #11
The technique would be easier to see if you only recalculated the normals before showing step three (which from then on is darker because the normals are now pointing inward).