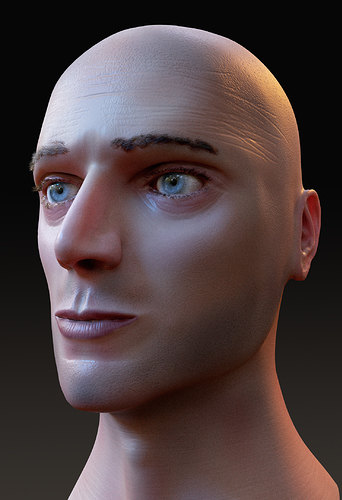
Made with Blender 2.8, textured in Substance Painter.
nice work !!!
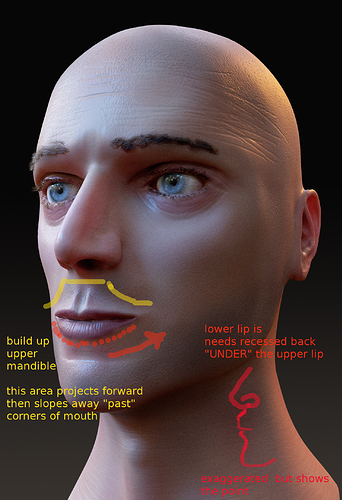
Eye balls are great. Skin is very good. Chin is a little jut jawed. As well mouth is very pursed, like he sucked on a bitter lemon. And there is no underlying volume or mass behind the upper lip. Which is the area of the upper teeth.
Doris used to relate - picture the mouth and chin region being like cylindrical.
Try to find a good photo reference. They are a huge help when you try to do realism.
I will skip the jaw and mouth as FXR already said about them.
Too many wringles on the forehead and they are too thin. Also people don’t have wringles on their temples.
Something with the ear is wrong. Probably the placement. It’s hard to tell with this point of view.
Good job on the materials!
On photo references, get plenty, but finalize to about three or four for main sculpting effort. Keep the others though for those odd angles that reveal clues about subtle curves and geometry.
Also take the photos and de-saturate them. Make them grey scale. And either brighten highlights, or increase shadowing to show curves and planes better. Not too dark where details disappear.
below are suggestions
Thank you for your help!
Last point … you’re using a perspective camera. But I think the focal range is likely too small, like at default setting of 35.
I recommend increasing the focal range to from 65 to 90mm. Even try 110mm. At times I’ve used as high as 180 and 210. Personally, I use Ortho view, instead of perspective. But that’s users choice
Play with those render settings. Also When working “general facial forms” , use a lighter render setup. Like 100% but with only 50 samples. Cause you’re establishing the general forms of the face.
Dont worry about fine detail like skin pores and wrinkles. That’s icing on the cake…
Turn off those details if youre using a normal map or a bunp map. Or if you’re using a multi res modifier, drop down to only a level 1 or 2, tops.
Super last - when working at the general form level do your test renders in grey or red madcap or clay sculpt. ensure you increase the shininess, as that accents the forms better.
If the geometry looks right as a basic sculpt then when you lay in the texture map, it will be that much better.
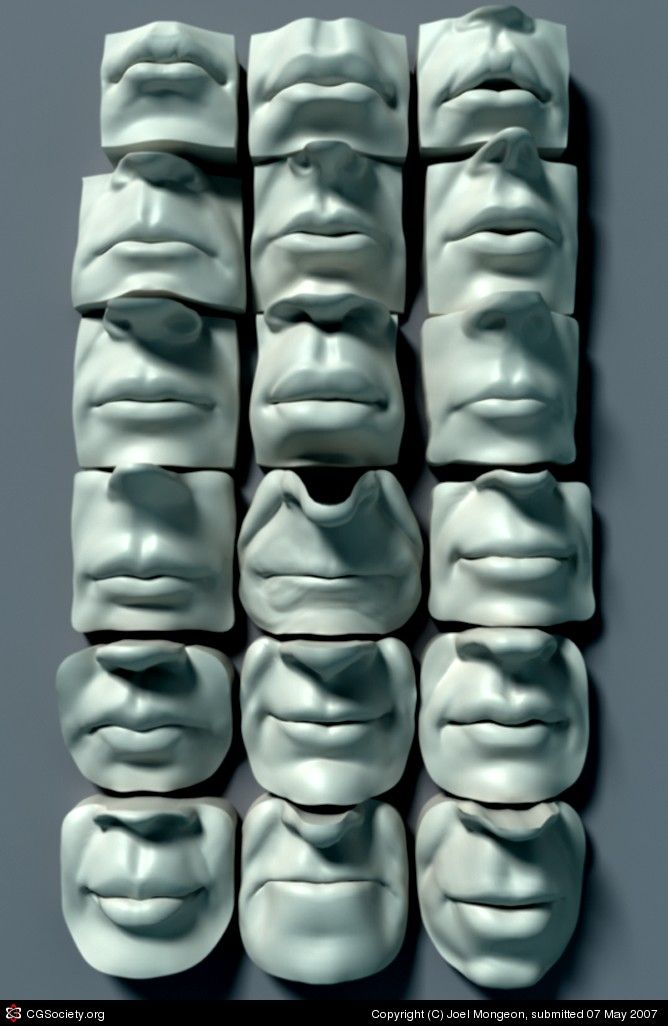
Some examples. Note the shadowing. Which shows which parts are more prominent.
And that’s the last of my unsolicited advice … Swear.
Super Duper absolutel Last piece of steerage —
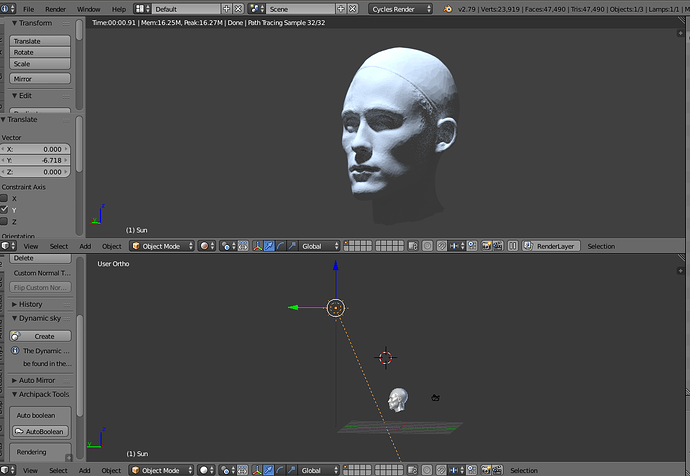
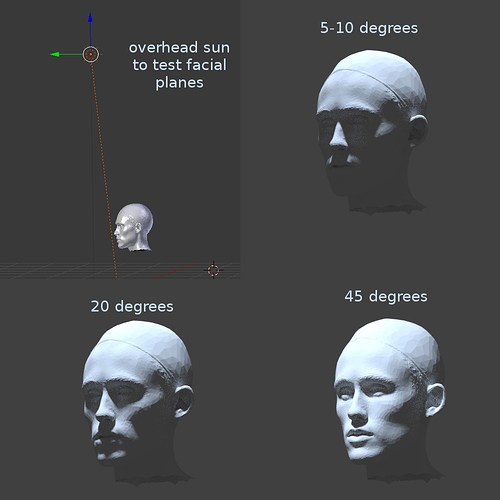
easy method of testing facial forms and their relationship to the rest of the face, via shadowing Using one overhead sun. Set up one window to render your test mesh. And a second working window so you can control the sun in relation to your work.
Use grey scale and light “Cycles” render settings for fast feedback, My setup only uses 32 samples so it’s almost real time.
just move the sun in the work window, in stages, from nearly overhead to a forward angle of 45%. That way you can observe the shadowing effect in “the grey scale rendering window”
Note: – This subject head is also “inclined slightly down” however. Yours is more face upright and forward. But the principle is the same.
Thanks for sharing these tips! Very interesting read, I agree with you! Especially the part that if it looks right as a basic sculpt you’re heading in a good direction.
