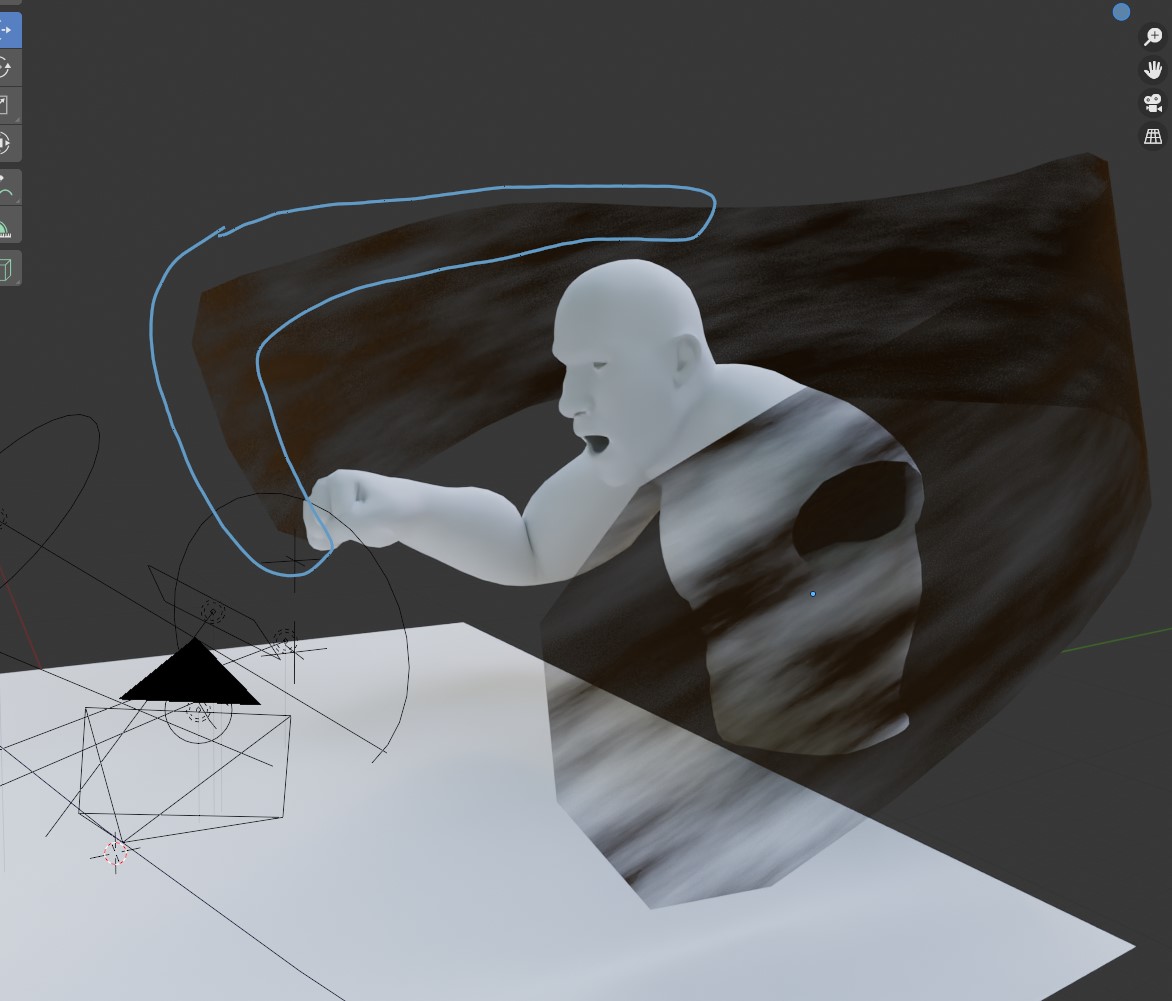
Kinda works, but can’t have that geometry edges so visible…
Is there a way I can smooth those out completely ?
Or if there is a better way to do this vortex sand effects
thank you
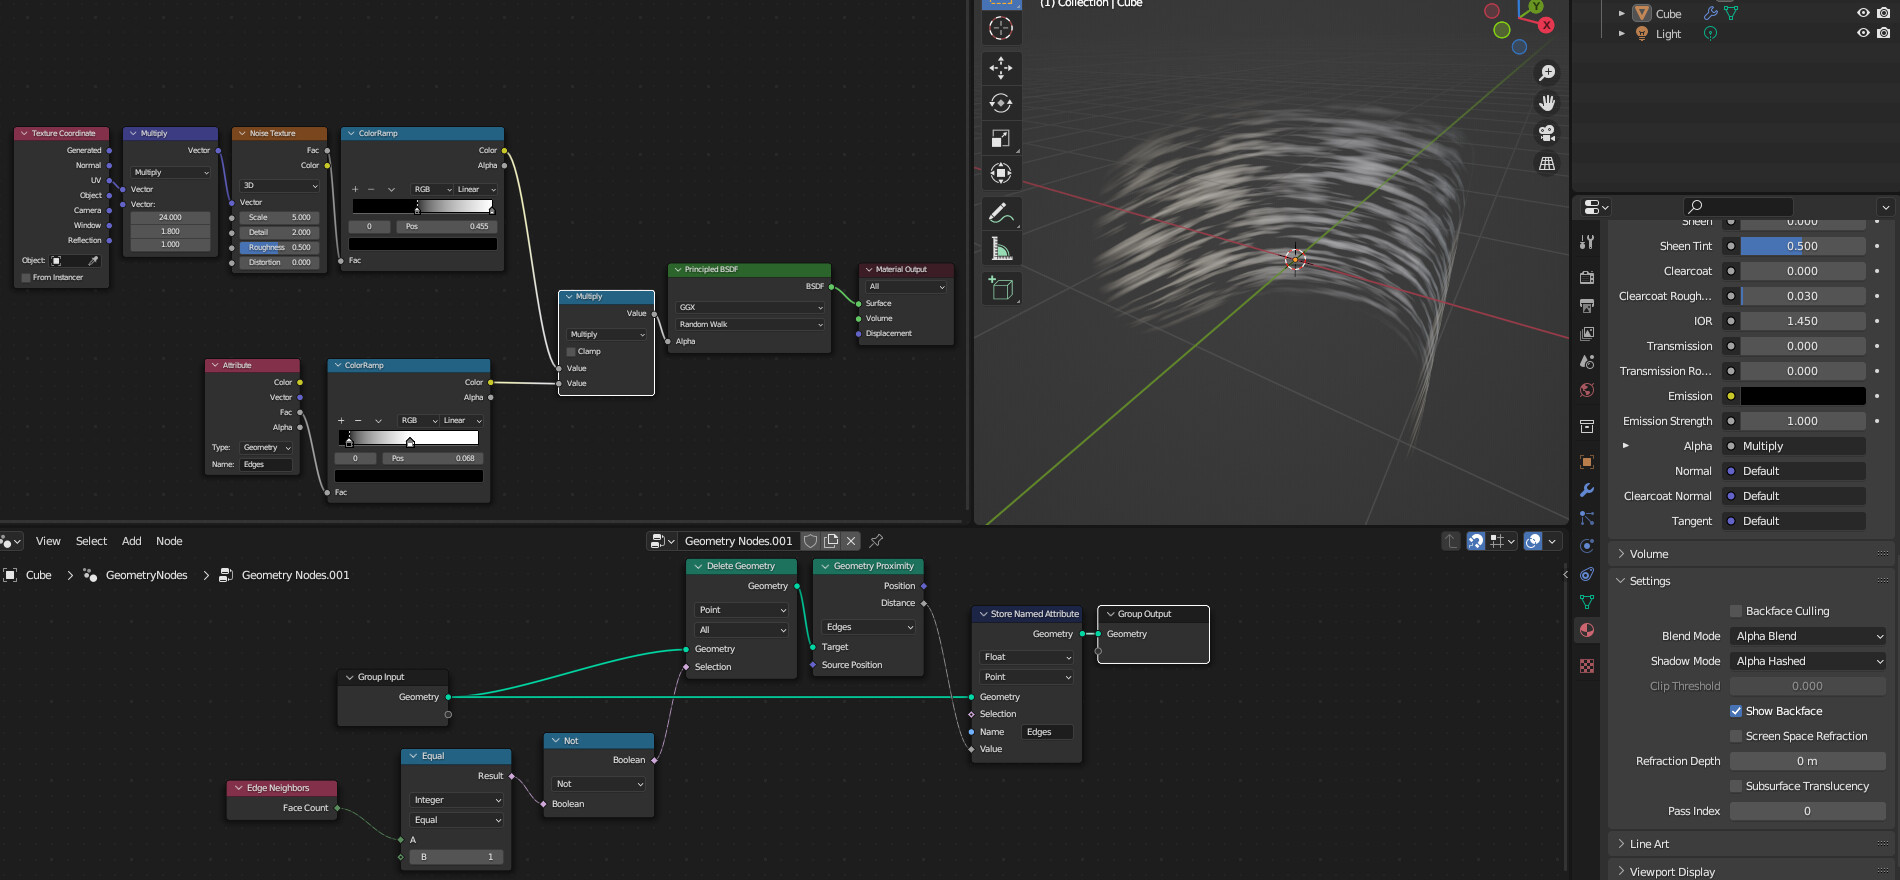
Proximity should be in Edge mode, and you’re missing the whole Attribute input node + Color Ramp bit in the Shader Editor (which should be multiplied with your existing alpha).
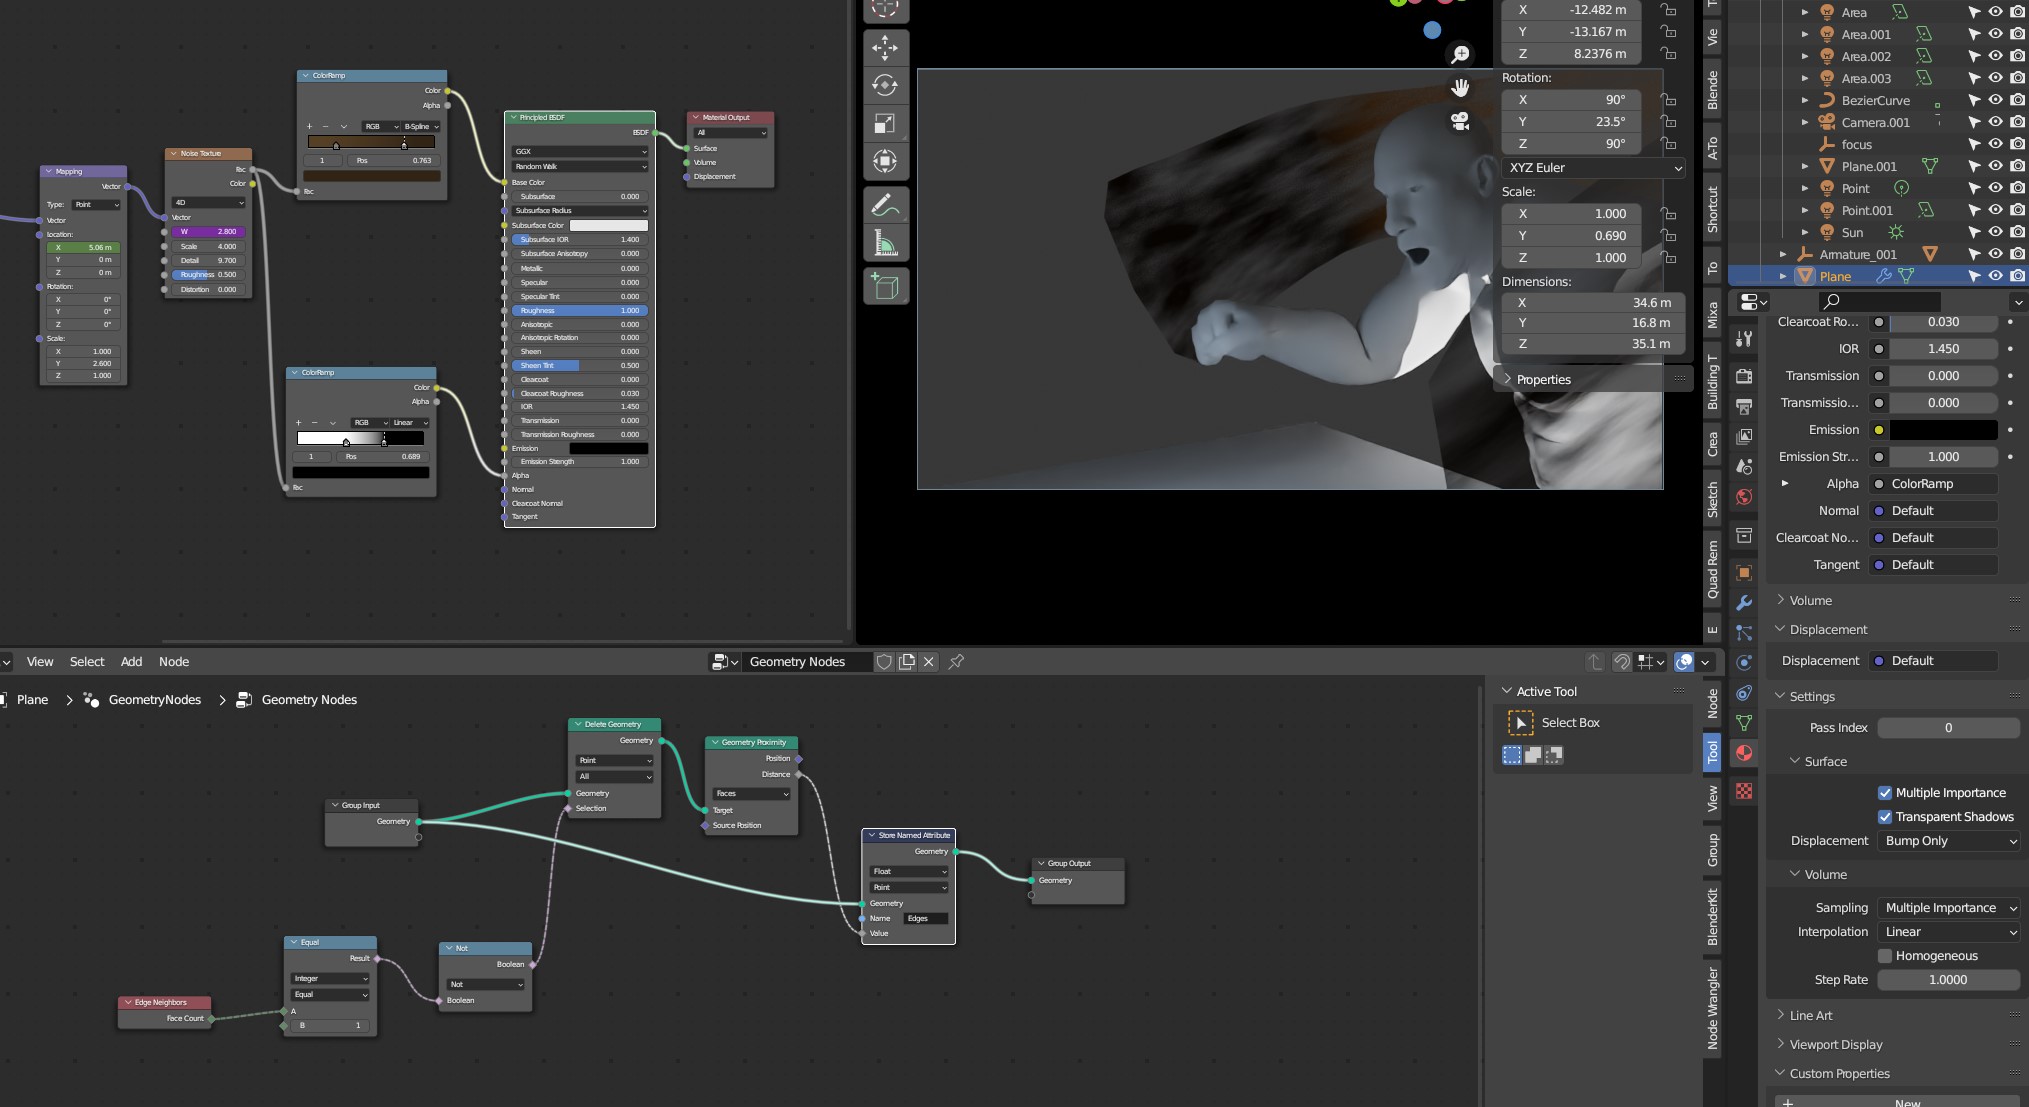
…looking at your screenshot, your dimentions are enormous (~30m), so maybe add a Multiply node before the color ramp to change the effect of the falloff. Also, ensure that you have enough geometry for the Geometry Nodes to work … i.e. if you’re using a Subdivision modifier, then apply it, or make sure the Geometry Nodes modifier is added after it.
I mean, thank you for showing me the solution, but you’re not really helping me, being mysterious and all, I really don’t get where the “edges” attribute comes from.
I posted because I needed help and to know how to make this, if you only showing me a screenshot but not explaining the process, how am I suppose to understand it or learn it ?
I selected the edge and store it/set it in a vertex group , is that correct ? called it edges.
Then followed what you did in geo nodes and shading node, but literally nothing happens.
Bear in mind that the help you’ve received so far is a gift to you, someone took their own valuable time and went out of their way to give that time to you, for free. There’s only so much we can do- eventually, you have to be able to figure some things out yourself
I know, in fact I’m super thankful for it, but I still don’t understand it, screenshots is cool and all, but if I don’t understand the process step by step, can’t do anything with the screenshot.
thanks.
No… I was initially saying that there are many ways you can approach this - If you’re using vertex groups then you don’t need to do the GN setup… similarly, if you’re doing it with GN then you don’t need vertex groups.
Since you don’t want to do the GN route, then see if you can make the Vertex Group method work for you.
Hint: You’ll need to Smooth your weights and initialize a new Color Attribute by going in Vertex Paint mode and setting Paint->Vertex Color from Weight.
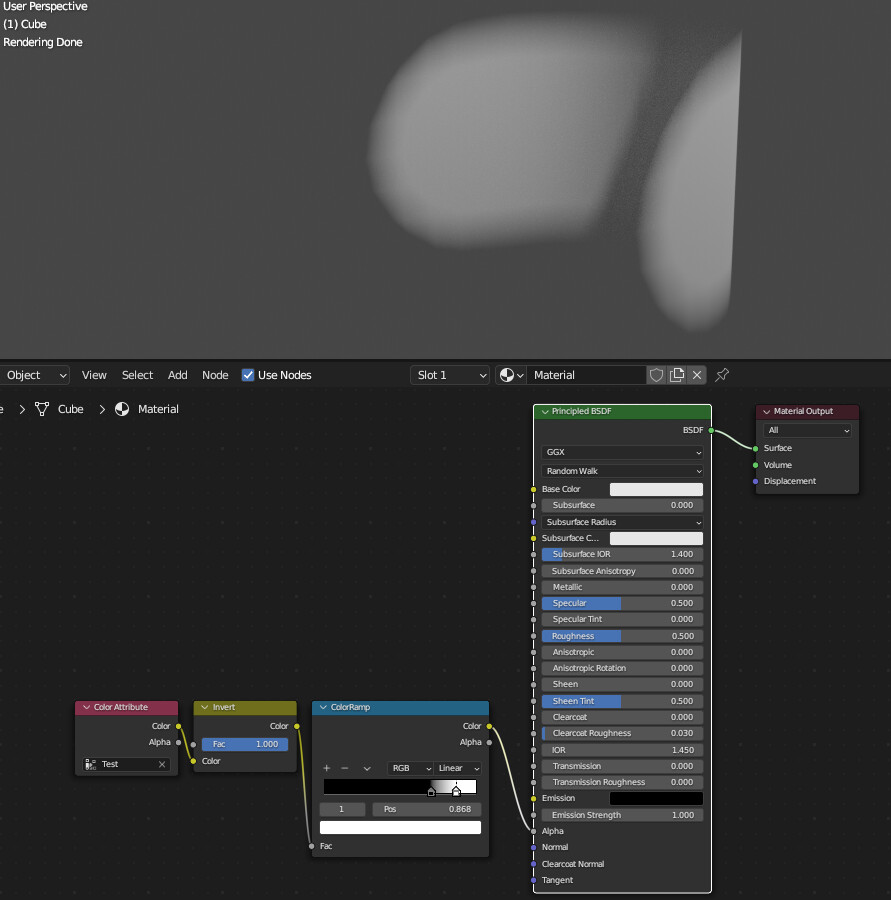
Final setup should look something like this (This is without GN, just using a Color Attribute I called “Test”):
Ok, so I guess I was doing both methods at the same time ?
I rather go with geo Nodes to be honest, vertex groups, painting and all that doesn’t really feel ok for what I have to do. because I’ll have to copy this item many many times…
So for the geo Node one, that attribute “Edges” where does it come from ? is the outer edge selected and stored in a vertex group? that’s the bit I don’t get in the geo Node setup.
But I really rather go for the geo Node setup at this point.
Also, I just re-tried again, and I get nothing in the viewport
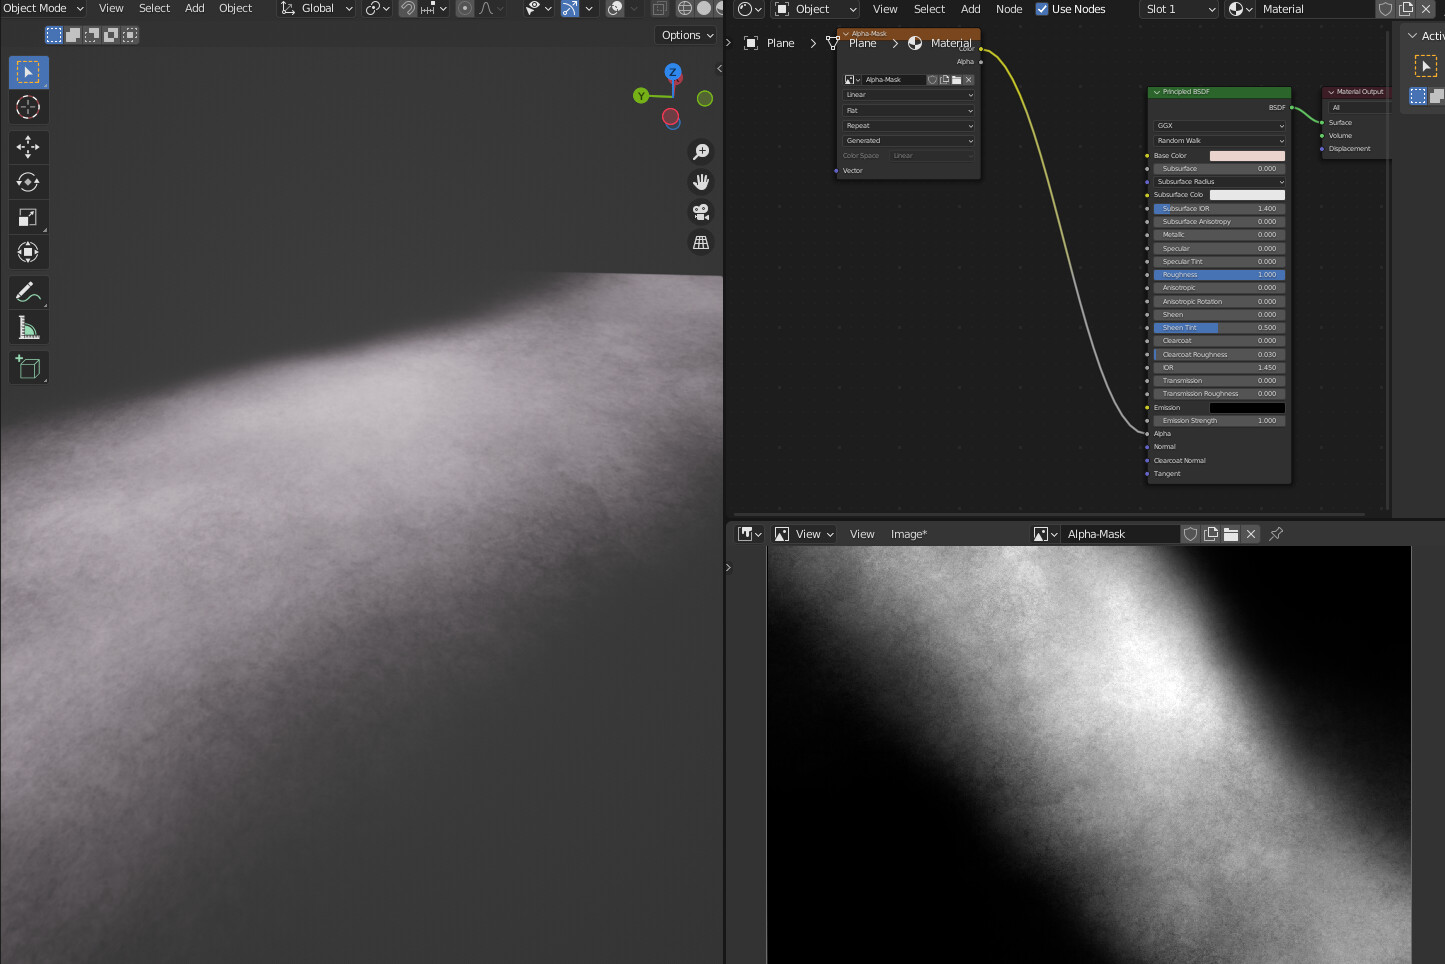
An easy solution would be to add in an Alpha-Mask, which you can paint in Blender…and use a grunge texture to paint BLACK along the edges you want to fade away…
Watch some Youtube on Texture Paint…and make something such as this…
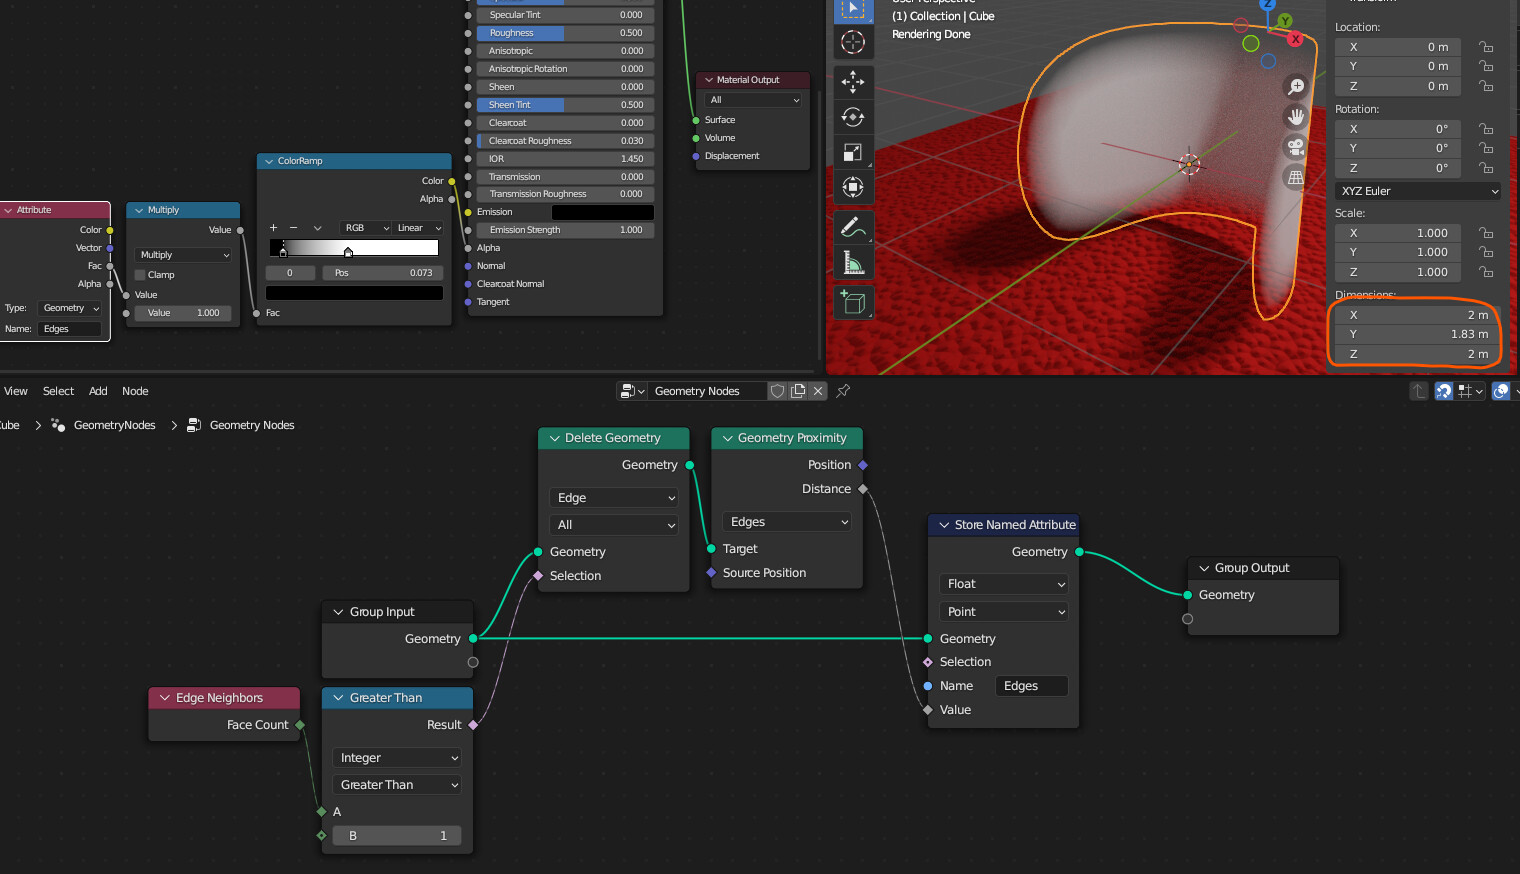
Attributes are not vertex groups, though can be very similar. They can also act similar to Vertex Paint - like in this case.
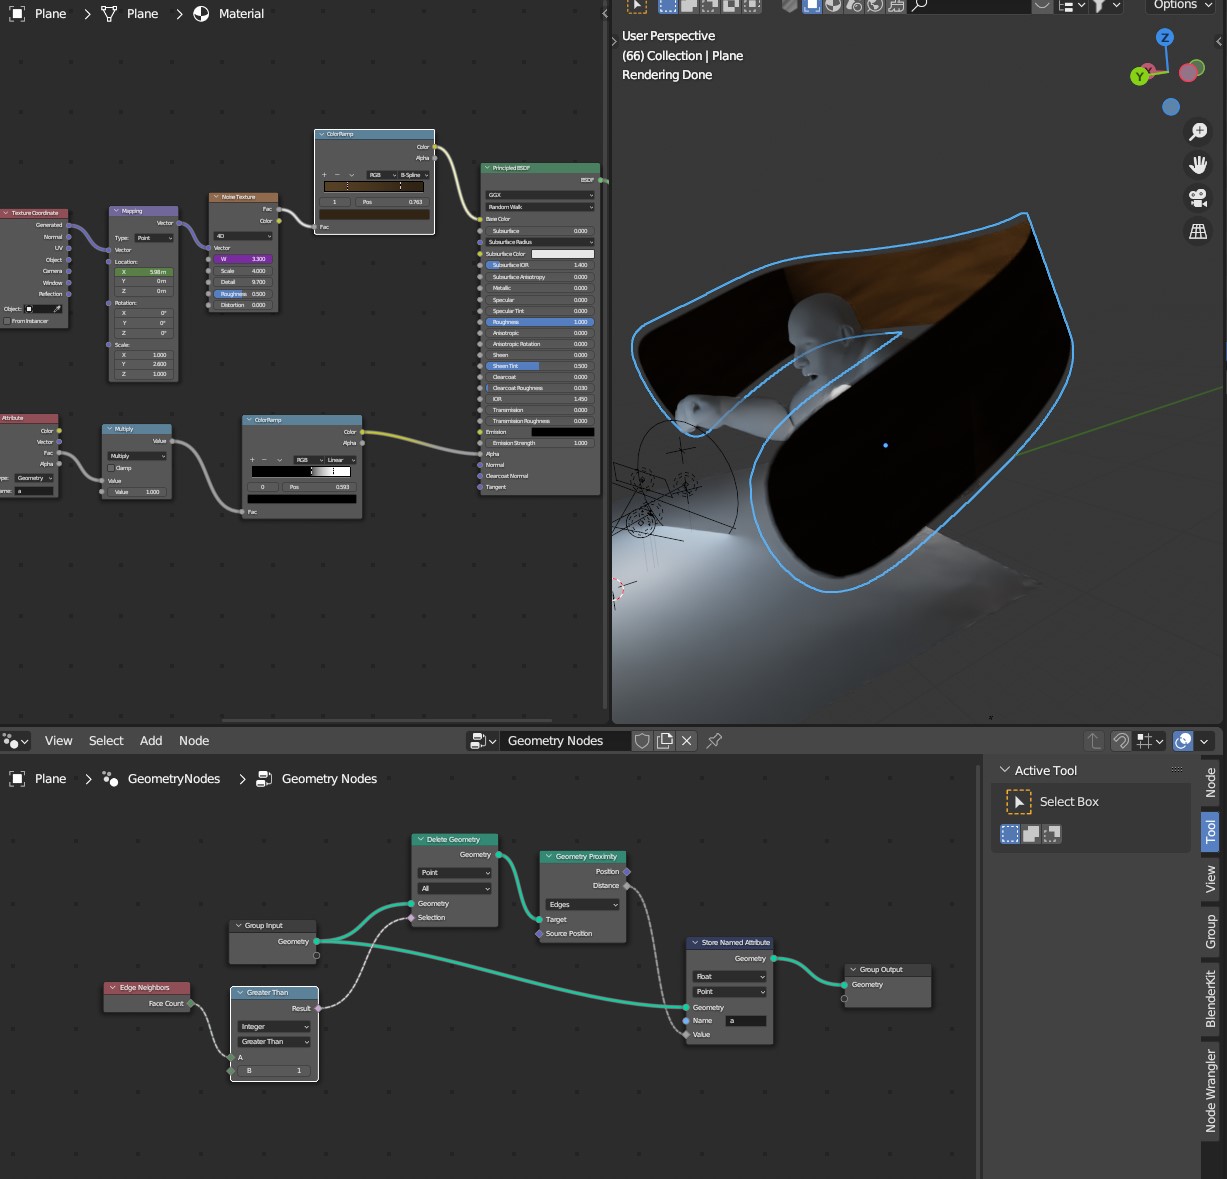
In zeroskilz’ method, we select all the edges that have only one neighboring face - they are borders of the mesh. Then, on the original geometry, we get the distance of EACH vertex to the closest edge of that border. “Store Named Attribute” stores that distance, a float value, as newly created “Edges” attribute (if no attribute with that name existed before) on every point of the geometry - and we get a gray-scale mask. Much like vertex paint, though it’s probably not clamped to [0, 1] value at this point (until it gets to Color-ramp node).
Yes, I’m doing that, and it works, only issue I’ve got now is that there is no actual alpha transparency on the brown noise texture, that’s all
thanks man, now I do understand it