School exams over and I had been planing this for a long time.
So this this my second modelling attempt with blender, also a car. (Since i am here to learn modelling cars in the first place, so i can make my own later)
The first one was a chevy camaro from a tutorial .
This one is from scratch and I chose it because camaro had sharp lines so I wanted to be confident with curvy bodies.
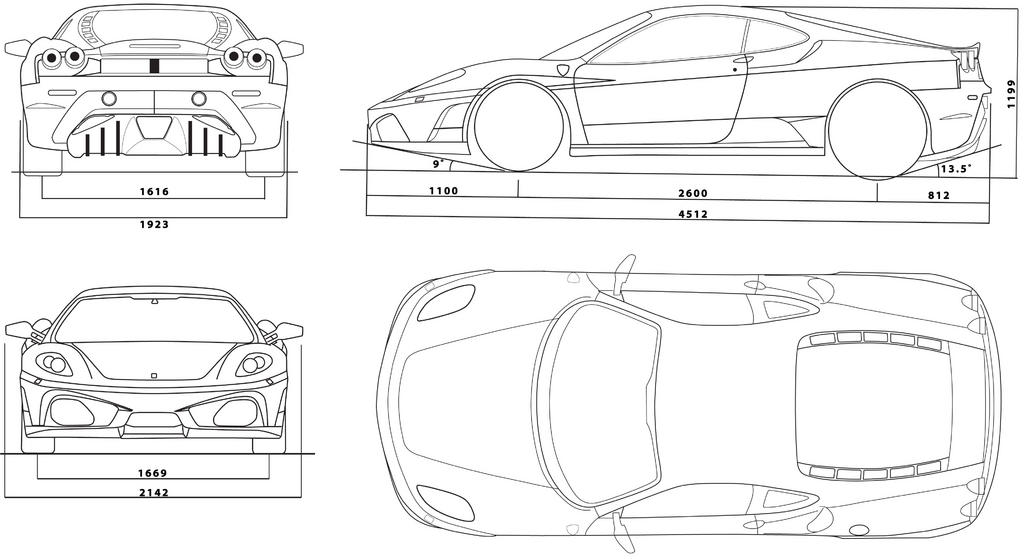
I knew i would be difficult since i have terrible blueprints (Scuderia was a limited version) but now i have run into serious problems.
The curves around the headlight is what I am talking about.
I know there is definitely something wrong but can’t get what. So I really need help on how to fix it.
I plan to detail this one with interiors, so it will be great if I can pull it off.
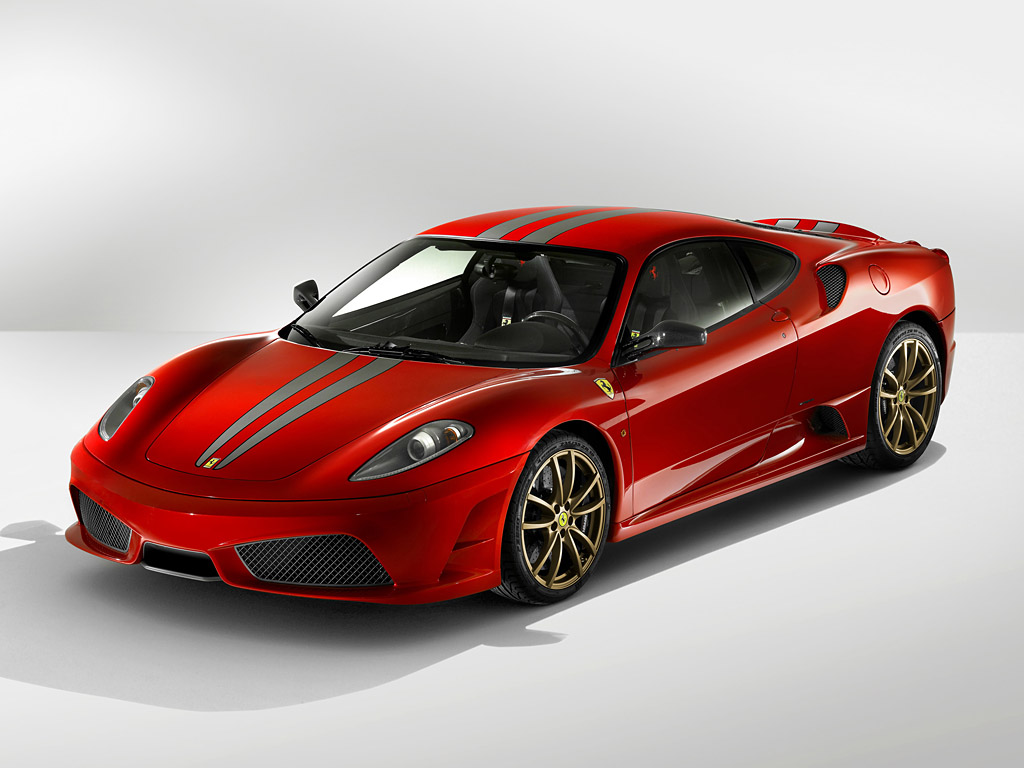
I have attached an image of the car for comparisons.
Spent 2 hours on this
Just assuming I will get some help from the guys here on the problem area (around the headlights), I started with the front bumper.
Will finish it tommorow after a good nights sleep. Please help with the bonet though ( see first post)
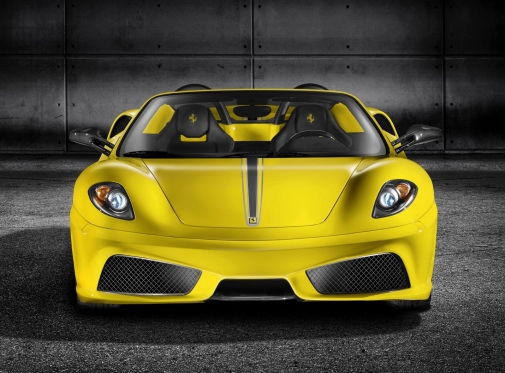
My scuderia dreams have been shattered and i will now model the spider version of F430, since i have better blueprints for it.
The only con is that i will have one less reason to continue in case i run into an problems.
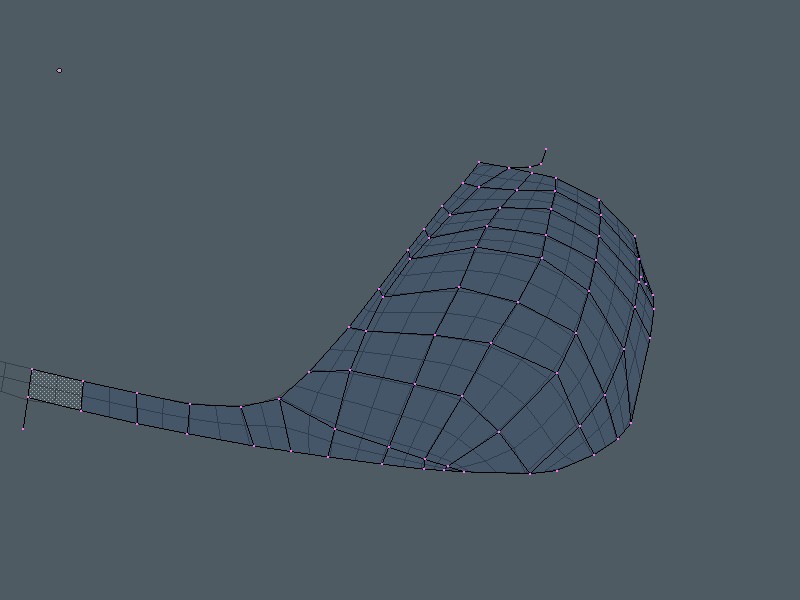
in here near the bottom you have to keep it simple.
the closer the pink dots are together the tighter it gets so keep them wide apart to keep it smooth.
Now about the headlights… they’re not hard to do, you just need to understand that in blender you first make the holes and only then fill the space around them.
You have to model always thinking in the holes, when I want to make a object the first thing I always look for is the holes: “Ok, I need to start making the radio, where are the holes!?” :yes:
Then what you do is make the contours of the hole and right after extrude the line to make it good for Sub-surface… a little hard to explain but maybe this picture helps
P.S.: Do not try to copy exactly the location of the vertices’s because I made them randomly, it’s just for some reference and I’m not saying this is the better or the only way to do it, it just my way.
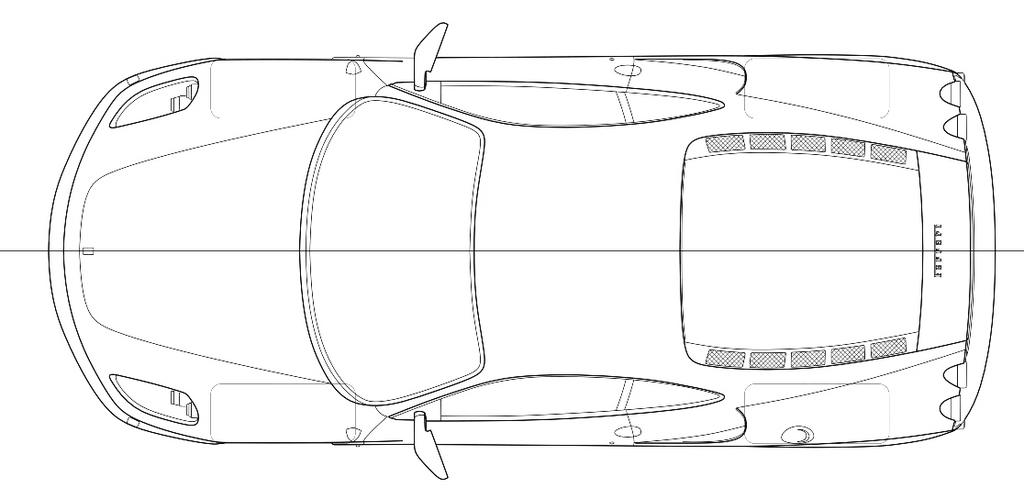
Radialronnie- I tried those blueprints, but they are incorrect. For example just compare those with the top view of F430 blueprints attached .Since there are only cosmetic differences in the front and rear bumpers, windows of both are supposed to be same but you can see they are not.
Proportions were wrong too.
As i said in my second post i will now model the F430 with interiors.
Rogper- no problem with making holes. i wanted help on getting the curves around that area right.
And i cant see any image in your post.
The problems with getting the curves is that there are no lines in the blueprints that can help define those curves and unless you see the car in real life, it is difficult to get them right.
please don’t advice me to go see a ferrari F430 spyder:D
Hey cool to see somebody else just starting in blender. I also just started in January and just got done with a tutorial of a women’s face. Now I think I will try to model this car. Maybe we can learn together :D! Quick question when you take the blueprint how do you split them? For instance do you measure them out and then cut in photoshop or gimp or just use the same image multiple times?
Humm! Well, I guess you have to look to allot of reference images from different angles and try to make it as similar as possible… it will never be perfect
I think I now realized what you want to do
Ok, you want to project the circles of the headlights in your already existing geometry, could it be it!?
For do that you use the Shrinkwarp modifier. Doing it so, you can project any object to the geometry of the other.
To try make a circle (a new object) above the hood, add a shrinkwarp modifier to that circle and insert the name of the hood object in the text box “Ob:”… if everything run well your circle should now be projected in the hood geometry.
In top view you place the points arround the place of the headlights, apply the modifier, join the two objects, delete what is extra and conect the points.
Thanks everyone!
I have changed my volatile mind again, so its back to scuderia version by shuffling between radialronnie’s and my blueprints.
Cosmetic differences between a normal F430 and the scuderia version are:-
Front fascia, rear diffusers/exhausts ,interiors, and a bit of the sideskirts.
Hope i can pull it off.
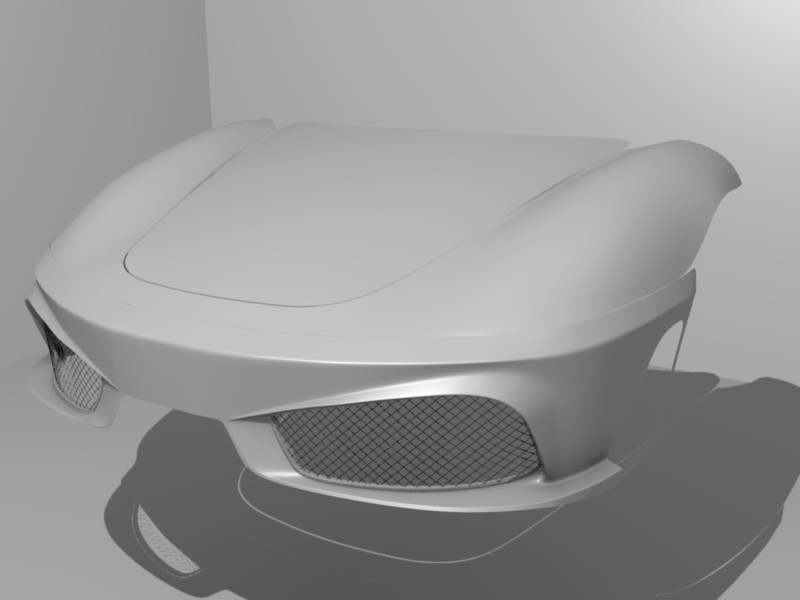
Spent 2 hours working on the front fascia, this is what i came out with. Please point out the smallest of mistakes because it becomes difficult to evaluate one’s own work at times.
By the time you read this i would be busy with the headlight area.
Thanks rogper! for showing the way
Thanks for the link, but it seems the dude missed a step he has his top view going along the x axis long ways and the y axis short ways. I am having issues cutting my images evenly but I think I will still try his approach. Thanks again!
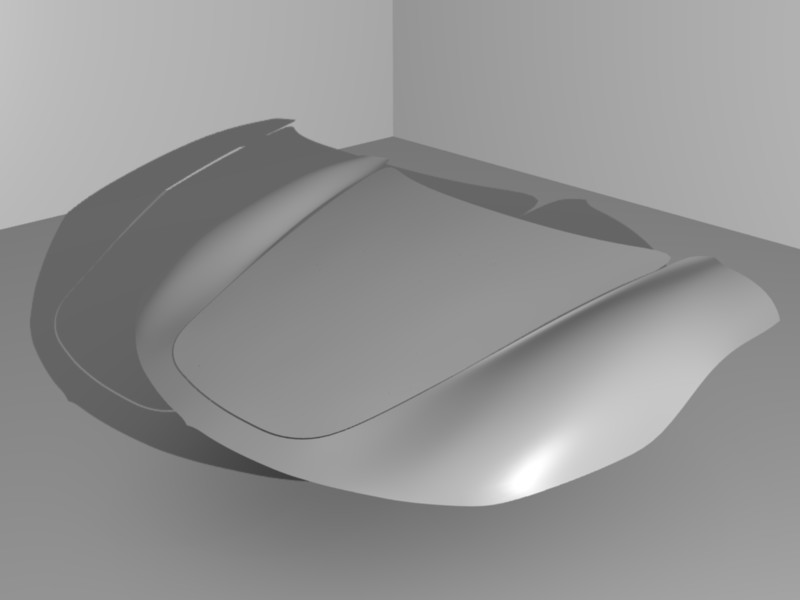
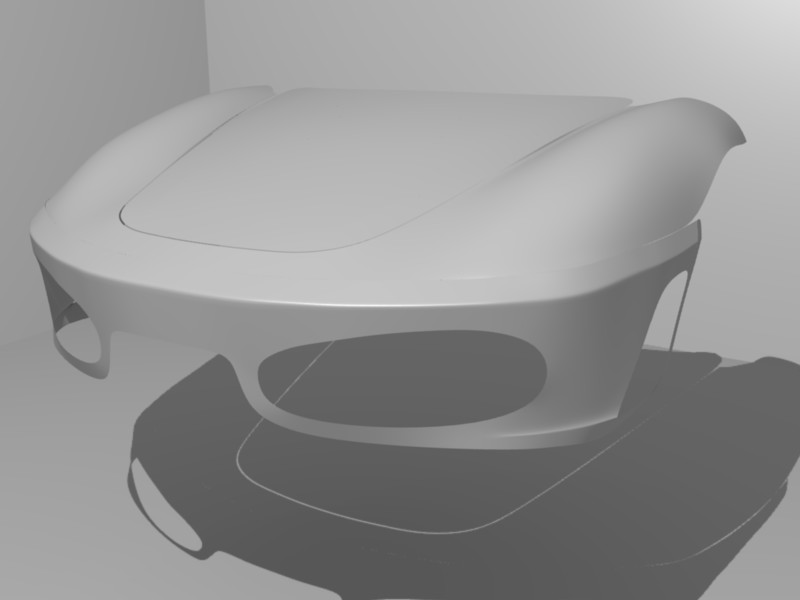
Finally!!!
I think i’ve got the bonnet right, used rogpers advise.That’s the way I’ve done my earlier model but this time i thought I would Generate a high poly mesh and cut holes then.
Didn’t work though.
This was the first time with the bonnet that I knew what I was doing.
Looks easy from here
Did the first render but cant see much though. just did it to feel good.
Like always comments are more than welcome.
Whoops! I didn’t notice this post earlier.
Sure we can learn together! I haven’t done anything organic yet but we can help each other out with this one.
Tell me if you still have a problem with blueprints. I have my own ingenious way of doing it.
Maybe I’ll write a tut somewhere down the line.