I don’t have anything to contribute to the technical part of the discussion. But I want to say how great the rivets look on the hull. That amount of detail! Is it the same technique that you used for the kamikaze back then?
Hi Minoribus,
thanks a lot for your comment. It is 80% the same technique. But on this one, I have done more brushes for rivets (on the kamikaze on it was based only on photos  and it was a very “basic” rivet shape). And I use 8k textures for each part, with a better final render I think. I will change a little bit my workflow, I’ll train to explain it next step. Thanks again, very appreciated !
How I do rivets and other bumps for aircraft just briefly explained:
Create a Plane and use your UV Map as the Texture for it (the one where you see all your unwrapped edges in 2D. You can create this image in the UV/Image editor).
This plane you can use as reference in your 3D Viewport (textured view mode) to place all kind of 3D stuff on it.
To place rivets, design your rivet pattern for instance with edges or planes that you subdivide.
Each vert will be a rivet. The faces can be deleted or kept, doesnt matter.
Then use the dupli verts to place the Rivets on each vert. You can also use the curves and the curve + array modifier to place them, or anything else. I use also curves to design the grooves, and fill them with a bevel object.
These 3D Models you can now just Bake onto another plane with the same size of your UV reference. This baked image you can use as your normal map and voilà - thats it!
This is a very fast way to create a comlex and editable Normal Map, which gives you a lot of control while creating and also afterwards. For me, the workflow to do this with 3D objects in Blender is much simpler than painting.
I am planning to create a detailed tutorial for this, but for advanced users this quick explanation should be suffiicient. I put quite some brainwork into this process, until i was satisfied with it. In the end it sounds simple, but that was the main part of the work: KEEPING it simple.
Greetings
Hi,
@@centauri: thanks for sharing your technique. Very interesting. But in my own workflow, it is not a problem to make bump map in 2D in PS. I need these textures to make diffuse and specular maps based on the same definition of panels, lines and rivets. I am not sure that in my case your process will be faster, as I will have to reimport all UV maps with rivets etc… in PS to rework each part. If I correctly understand what you mean of course ![]()
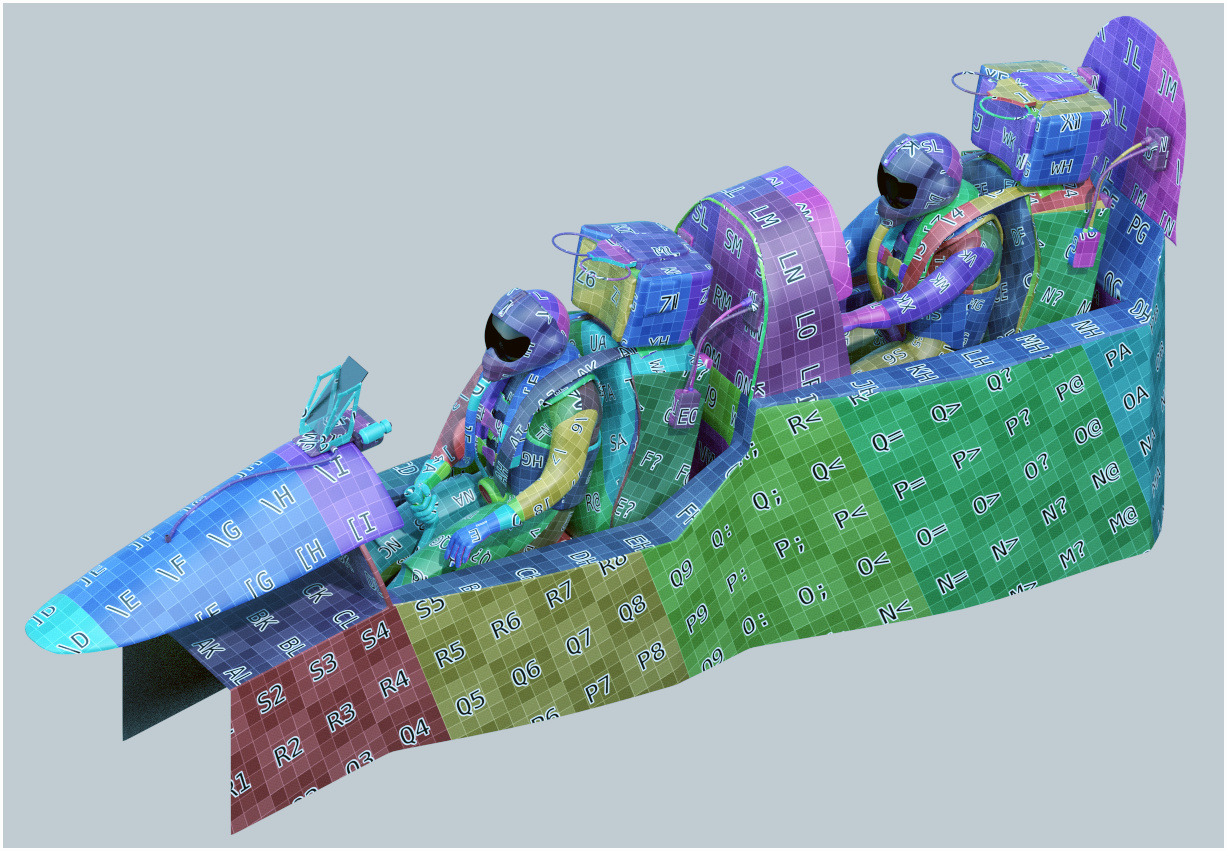
Quick update, try to change my mind working on the crew and the cockpit yesterday evening. Main parts are unwrapped (one 4k texture for the crew, one 4k for the seat and one other 4k for cockpit). I hope I will have time today evening to add details on these parts, even if it just have to sound credible from a relatively “far” distance.
Thanks,
2 Likes
Hi,
not much time today. I hope I will be able to begin textures for cockpit tonight. Just few screenshots for “motivation” 

1 Like
Still keeping me interested. 
I think that this is turning out great, love pic 2
Shaun
Hi,
@Speed7: thank you. I hope you will stay interested.
Just playing with color and camera to change my mind from UVs
1 Like
Hi Pauljs, I testet your method and I must say, it works really great!
For the brush size I dont agree (or misunderstood): my brush size on the actual image stays the same, regardless in which zoom factor I paint. This would be indeed anoying, to keep the same view distance in order to keep an equal rivet size. Maybe we used different settings, although i cant find anything related to that.
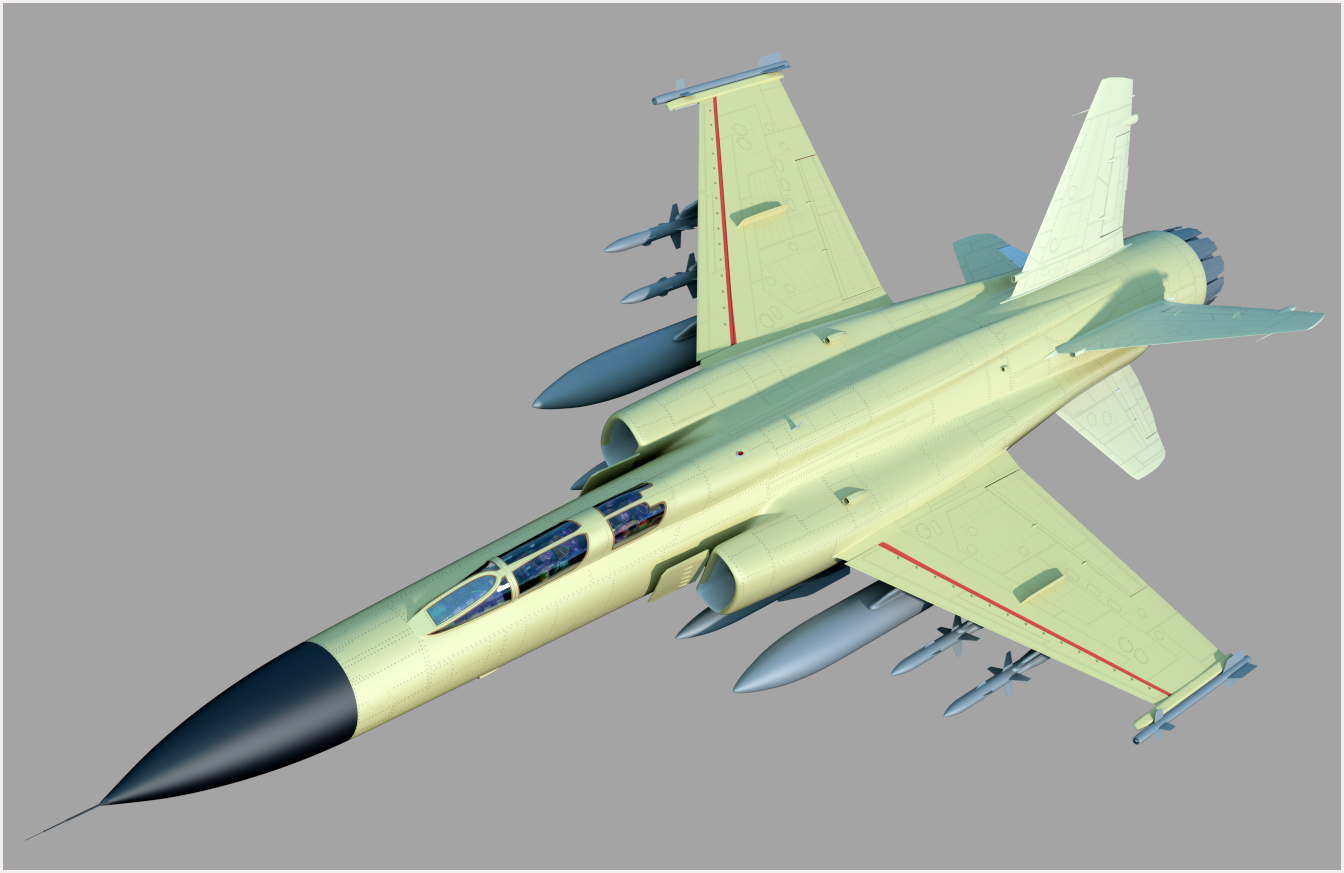
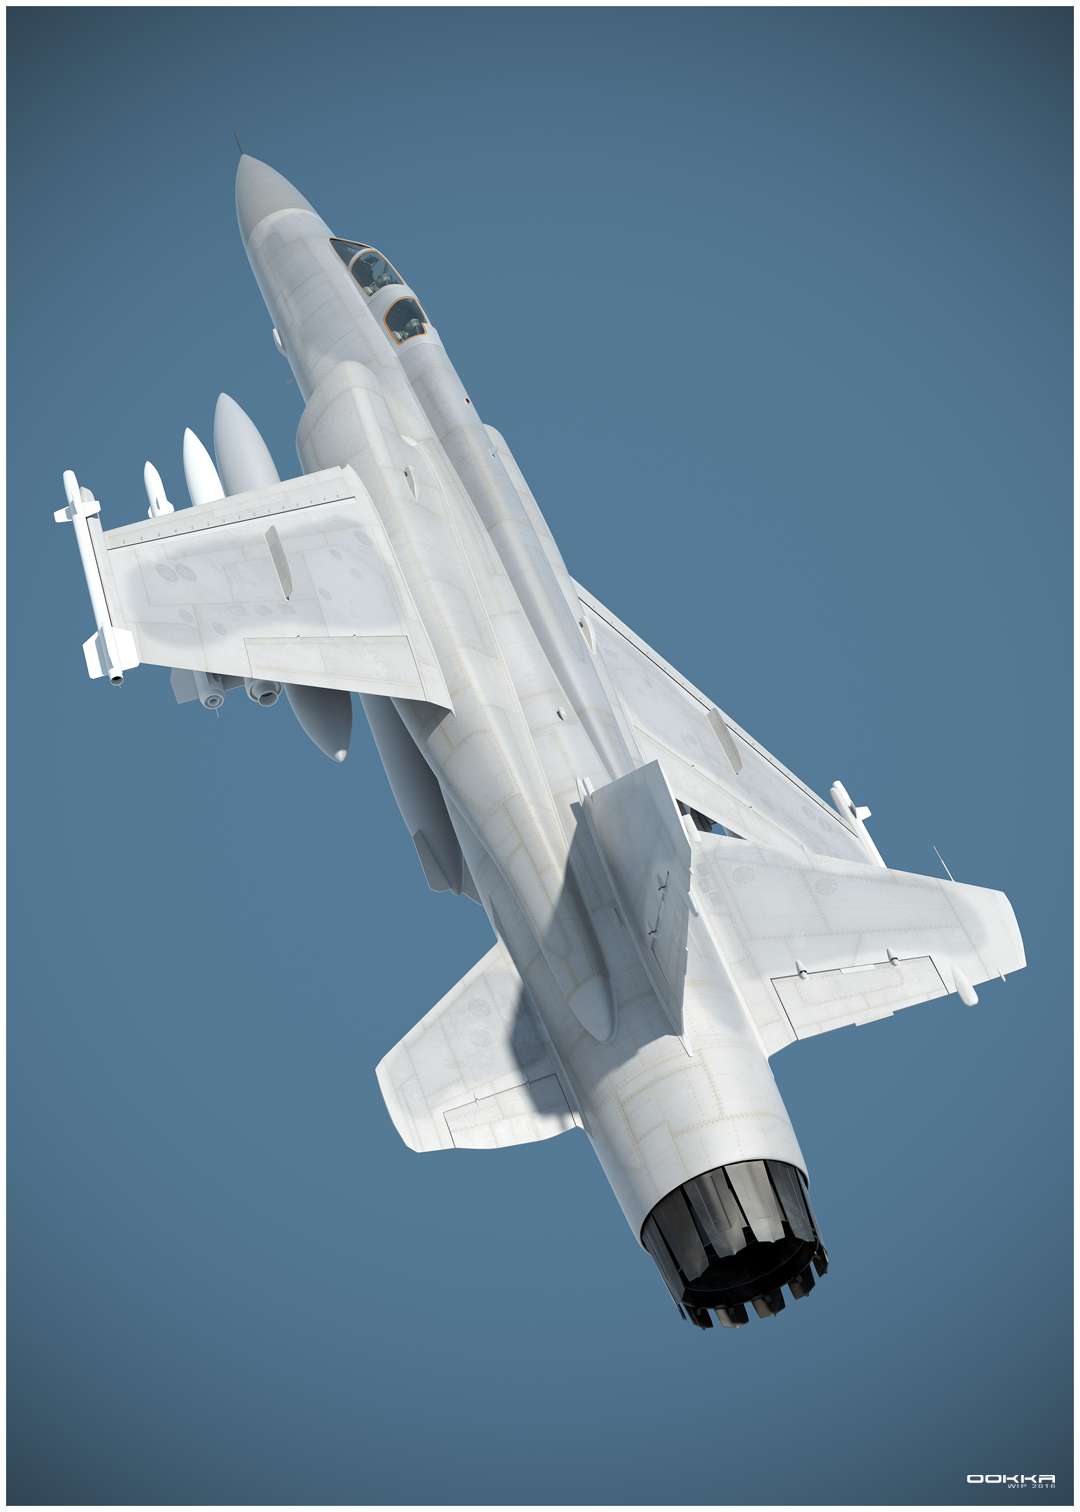
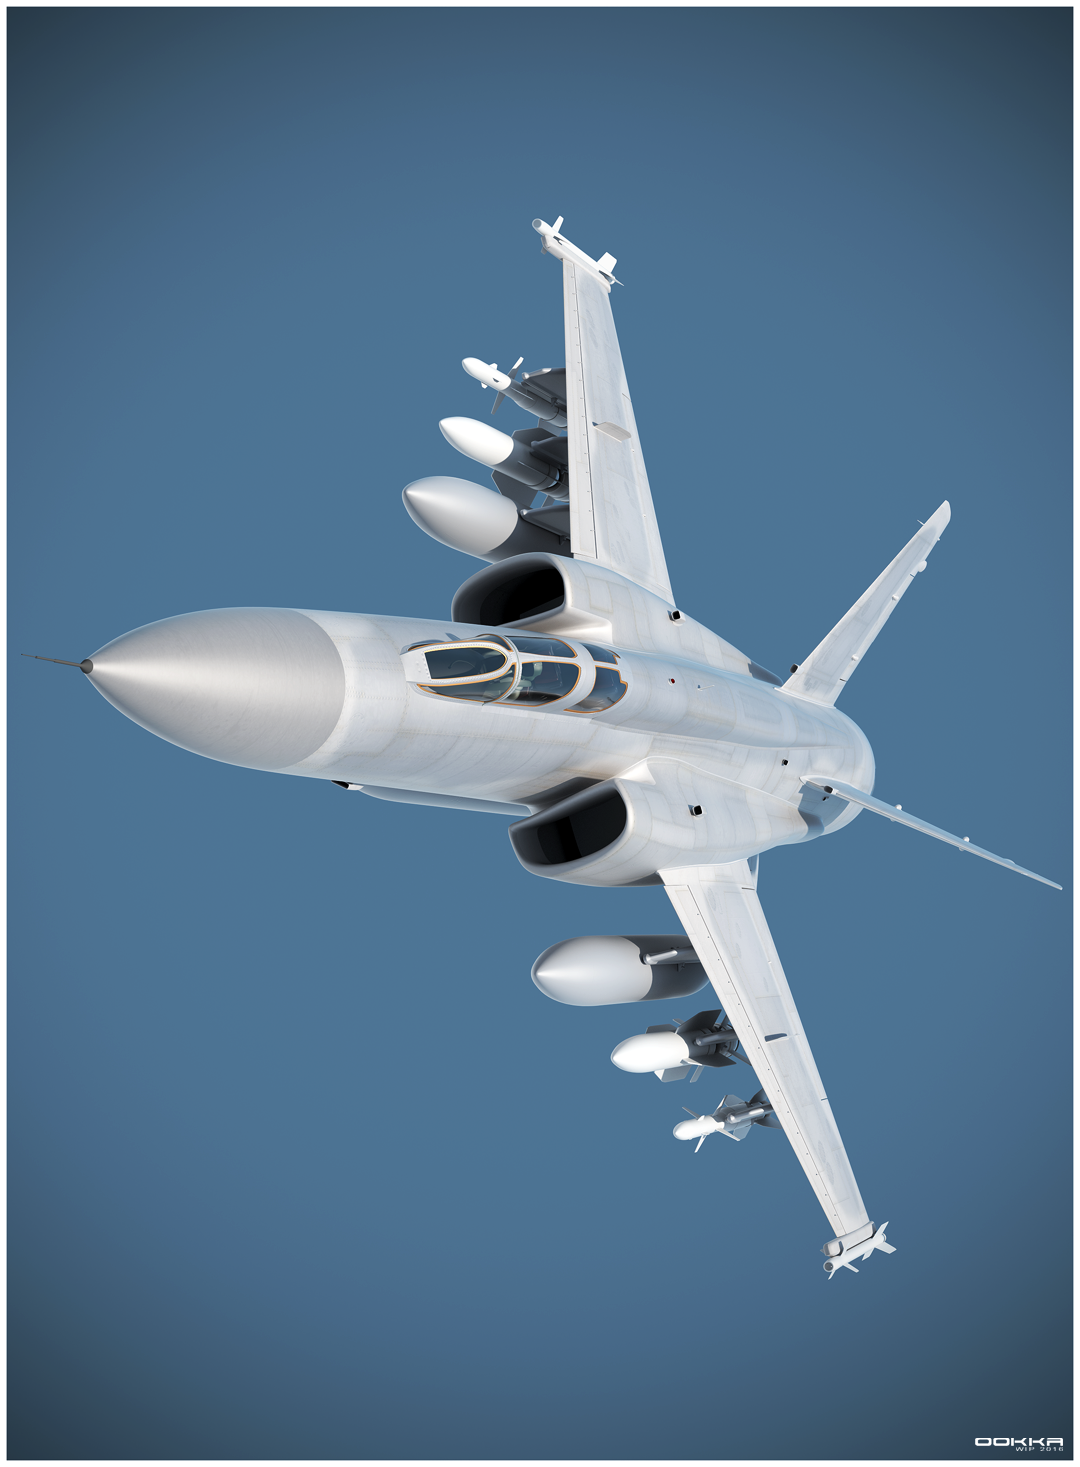
This camera angle is nice. Interesting how this angle visually shortens the nose compared to #25, though.
Hi,
@minoribus : thanks, you are right, I think the point of view clearly modify the size and the shape of the whole plane.
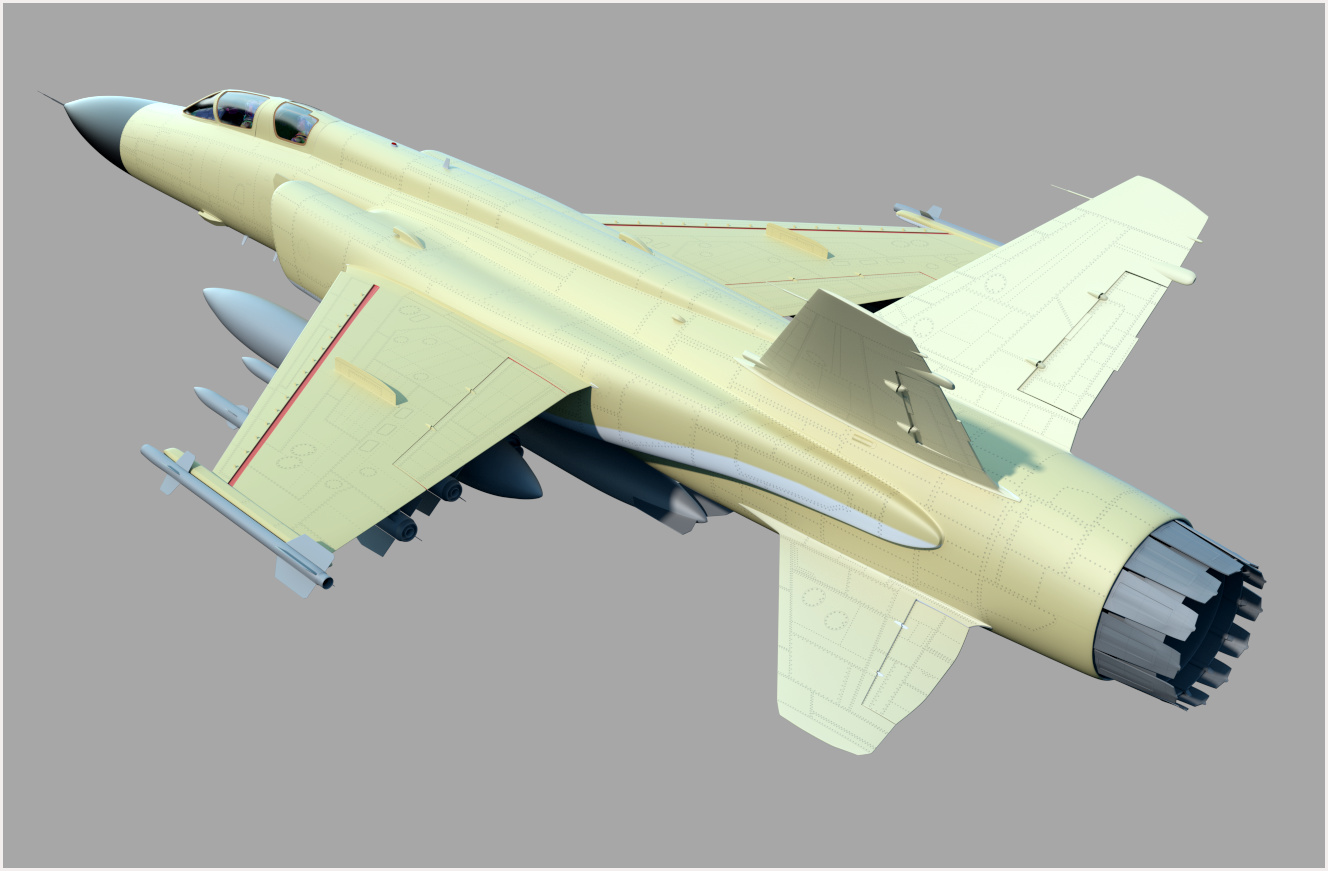
I have started diffuse maps (about 5% done…). There no or just beginning bump maps, no specular maps. Blender crashed on the very last tile, after 11 hours of render. So here it is some low res… Still a VERY long way to go.
Thanks


1 Like
Hi ookka
Just had a look at all the pics you posted and I have changed my mind a bit, I think the 1st pic in post #5 really makes this plane look aggressive.
This is coming on really nice.
Shaun
Hi,
@Speed7: thanks a lot, I agree with you, the 1st of post #5 was a better “render” view than the others (they are “texturing renders”).
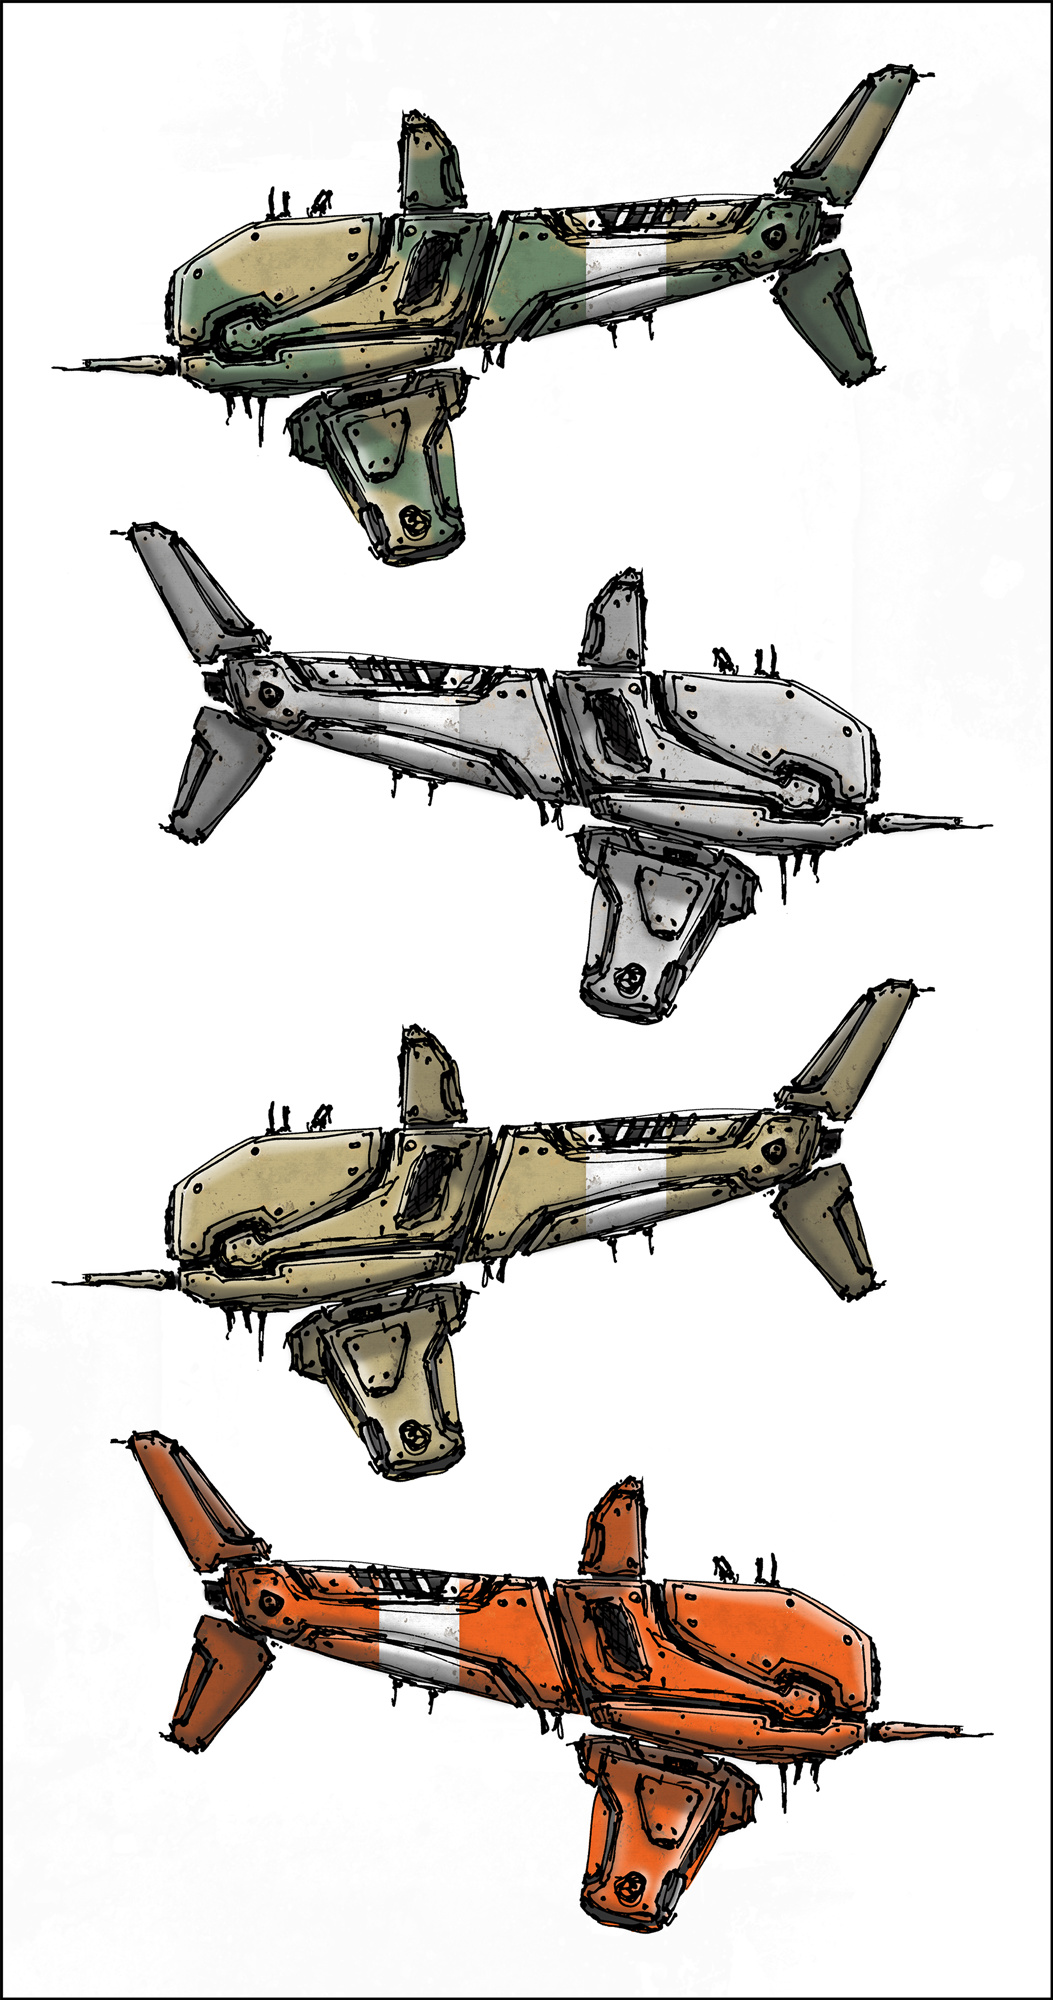
No time to work on it, just 10 minutes of drawing and less than a hour to get something on PS. So - off topic mode - a quick test/concept for a future hard surface practice :
I always wanted to model a plane. This one looks great! Gj!
hi,
@@blendertender18 : thank you, I hope you will start your plane ![]()
So still a lot of things to do (diffuses, specular and bumps map are in progress or even not started for maybe 50% of the plane). I have to texture interior, cockpit, missiles, supports, crew, etc. I have made some renders today in order to check some parts of the plane and its textures.
Thanks for C&C or viewing !


1 Like
Looking FANTASTIC.
Nice!!! Only thing, I think a bit of dirt in the engine spaces etc. would be of great help in the general appearance of the model
Hi,
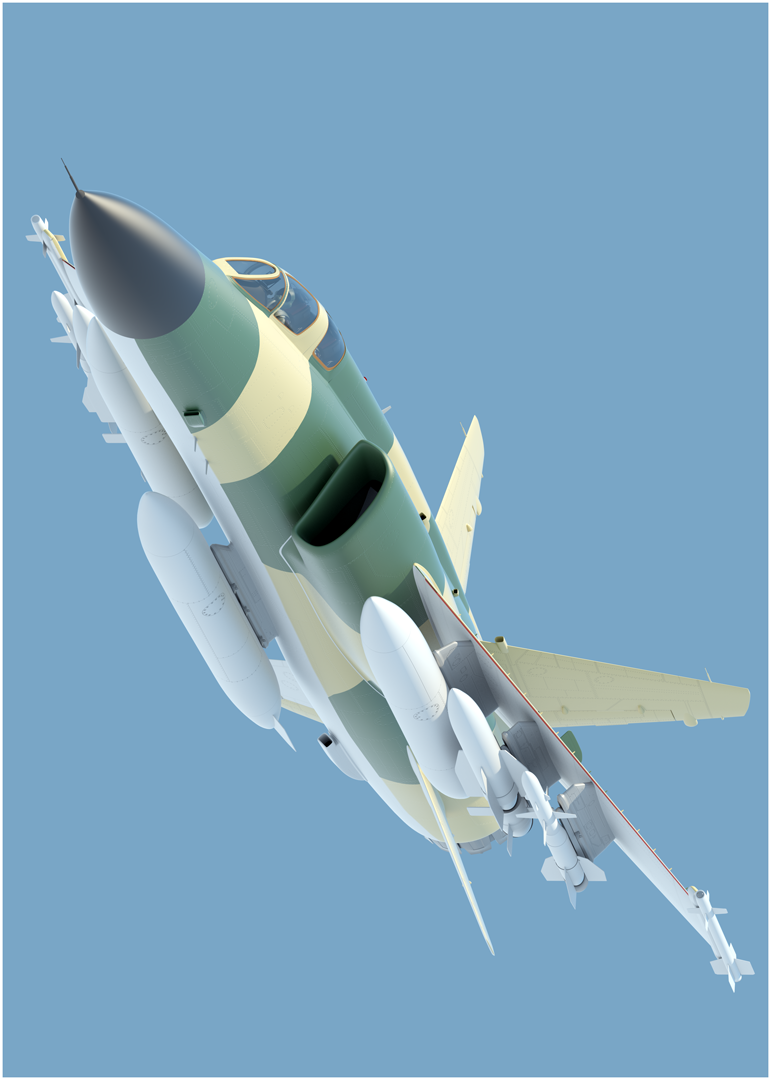
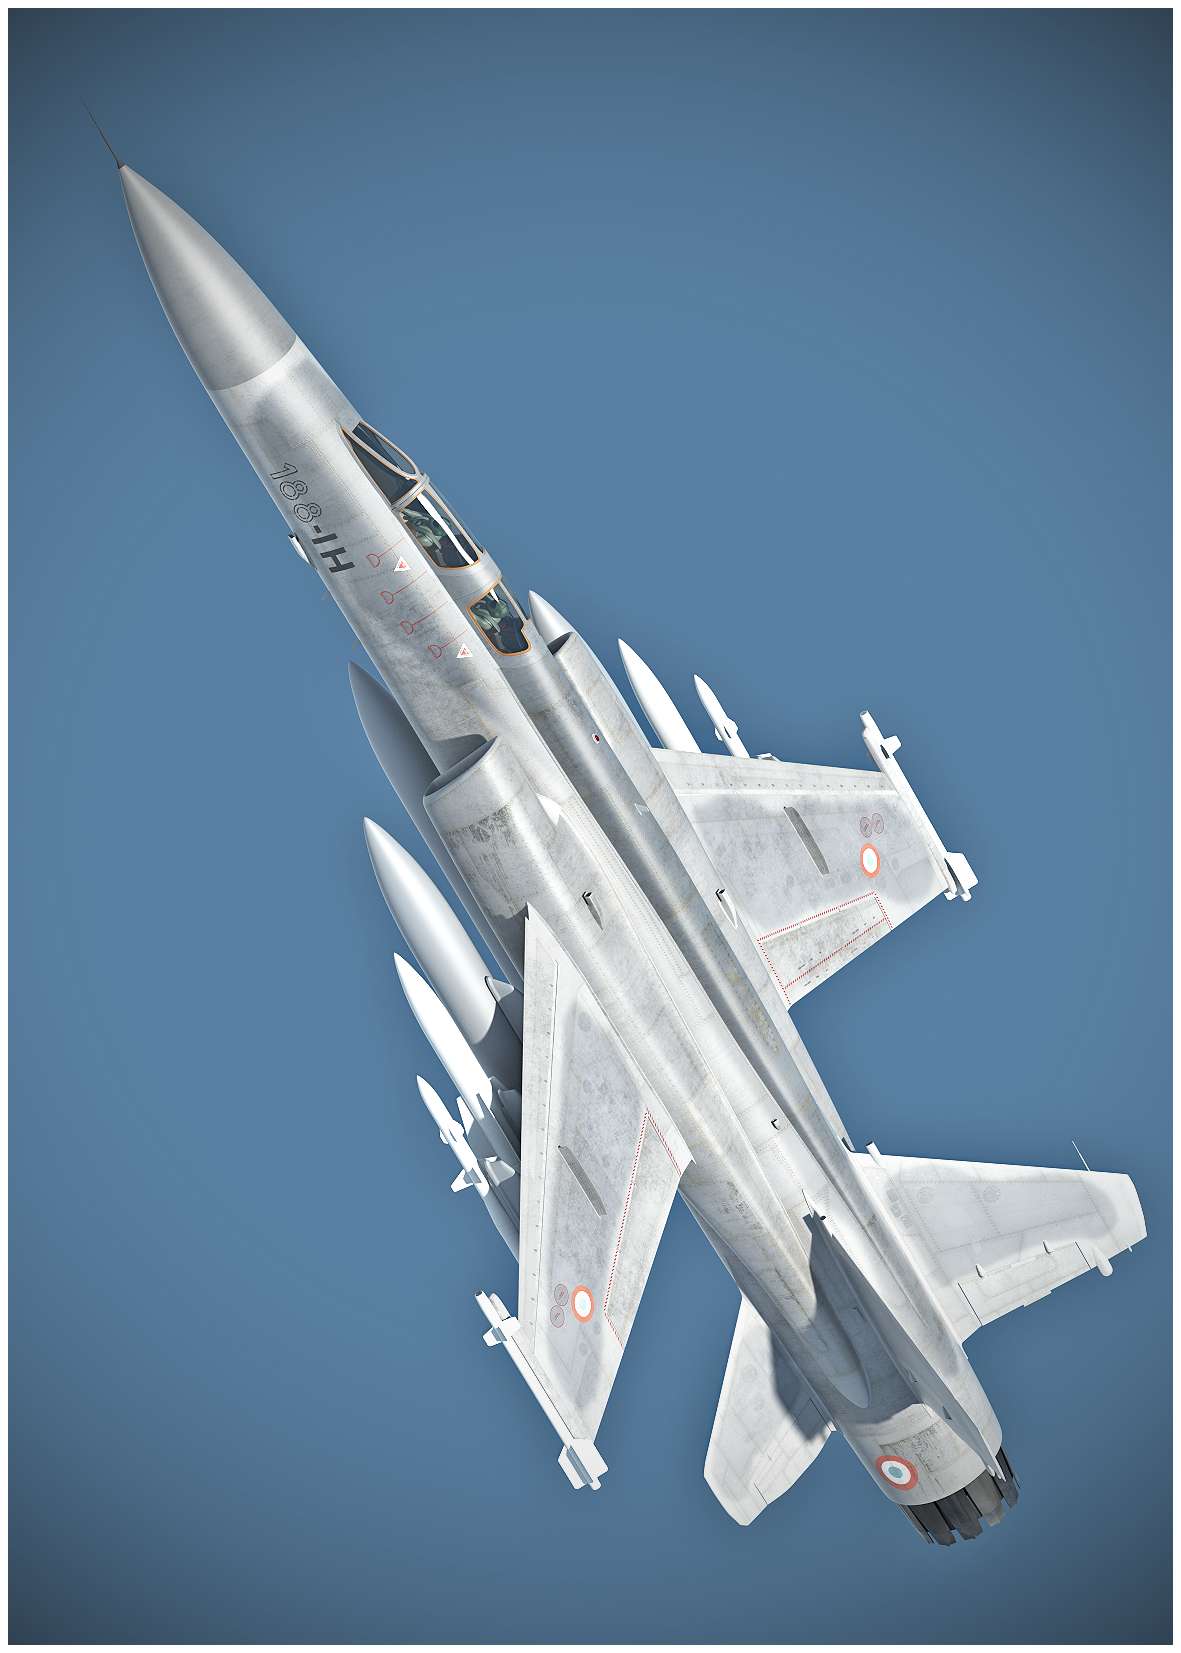
still working on diffuses and trying to get some tests on French markings and weathering. A too sharpened and burnt working render to get an overall view of the tests on weathering and markings…
1 Like
looking good with the textures. cool model.