The title maybe is not very clear so I’ll break it in more clear parts.
Enable rendering with object ID, material ID or cryptomasks
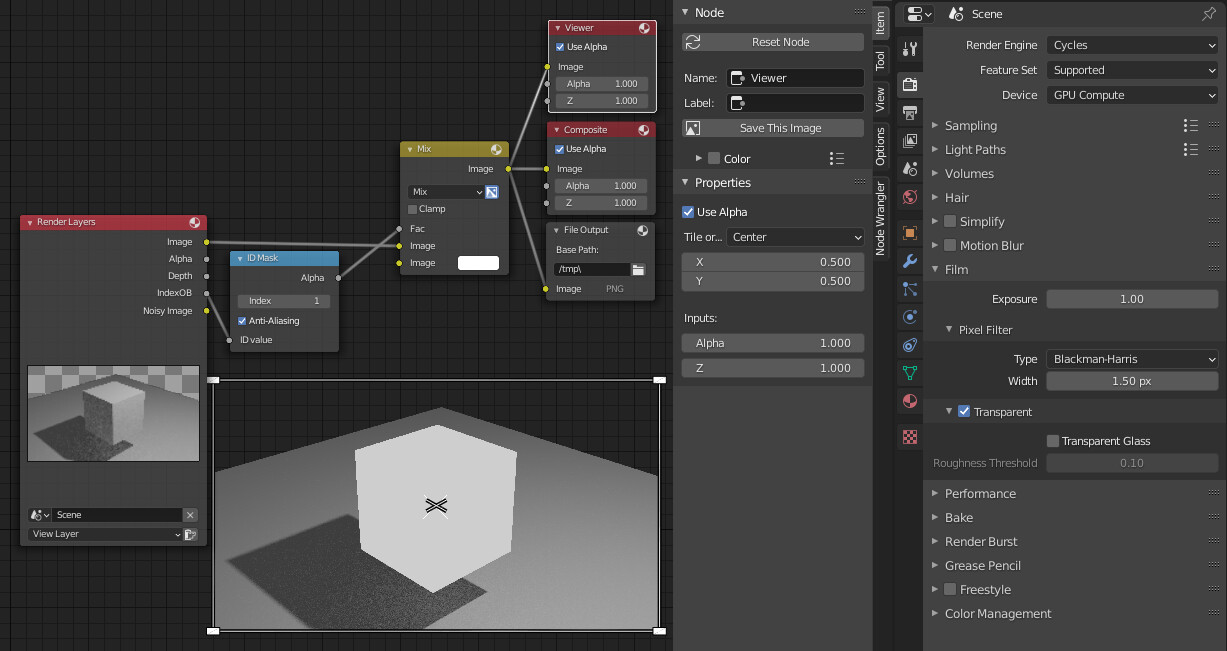
Use ID mask to filter wanted/unwanted part of the image. And now I think is my problem. I use mix node to factor I plug in ID mask, first colour input is the rendered image, second colour input I set up white
Create the output node with all different IDs I need.
Click render and after finishing render go to output direction.
A quick example of my setup is below. Anyone can say why is it not working? Insted of transparent space where the cube is I have white fill.
Good evening, @MArtur! Sorry it has taken this long for you to get an answer. If I understand correctly, you want to be able to change your Object ID value to cycle through your objects and output an image with that object transparent in the file output?
If that is what you want, the reason your original approach didn’t work was because of your choice of the Mix node. I can’t exactly say the reason why as those blending modes are some black magic defined mathematically by Adobe (the Blender manual has a page on the Color-Mix node, but it refers to the glossary which refers to the Gimp mix nodes which only lists “Hard Mix”, and still that is only defined as TODO). But…What I expect is happening is that alpha is not considered when using the Mix mode - or it is additive. Where you are trying to mix the bottom value (the white image input) with the render using the object as a mask, you won’t be able to lower the alpha value of the cube using the Mix mode. I’ve come up with two options - one that is much easier, but the output isn’t as pretty, and the other that is slightly more difficult, but it has cleaner margins. I’ll show the methods here and upload the .blend files, as well.
Method 01 (cleaner): Manually subtract the alpha of the object from the overall image and insert that alpha back into the original image:
Method 02 (easier): Use the Alpha Over node and an input with zeroed out alpha with the ID Mask node as the factor:
wow, that looks what I needed. Thank you very much, that looks like something I needed. I have finished the project I wanted to use it by manually selecting a white colour in photoshop and creating a mask. But I’ll test it in my file anyway. The result wasn’t perfect and I needed to correct the borders in most cases. To be honest I posted it on some Facebook group and I was annoyed by peoples advice saying to use bsdf transparent or holdout. Thank you very much. Especially that you took your time to even do the videos.