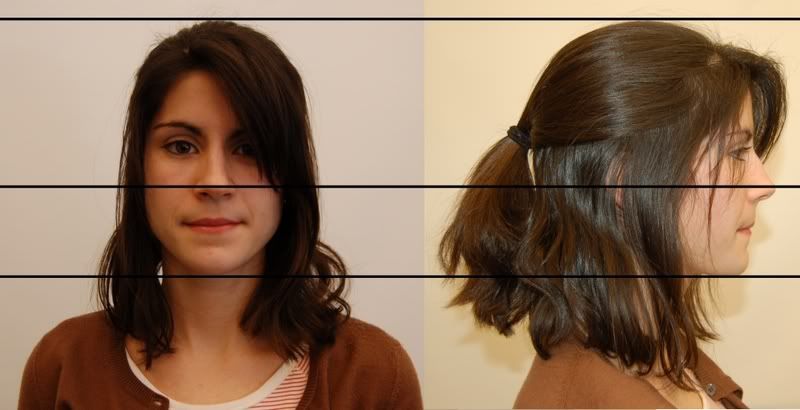
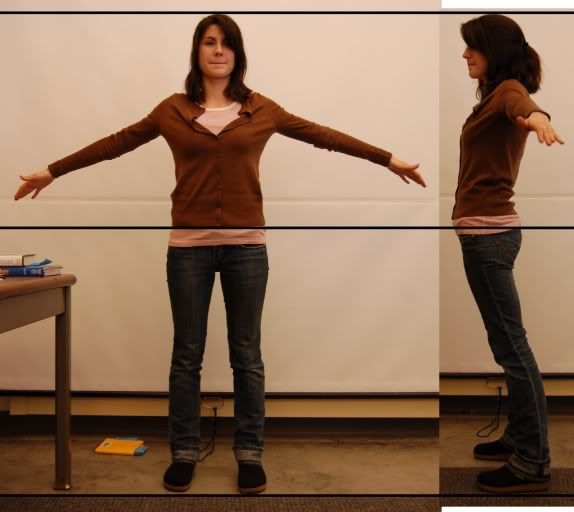
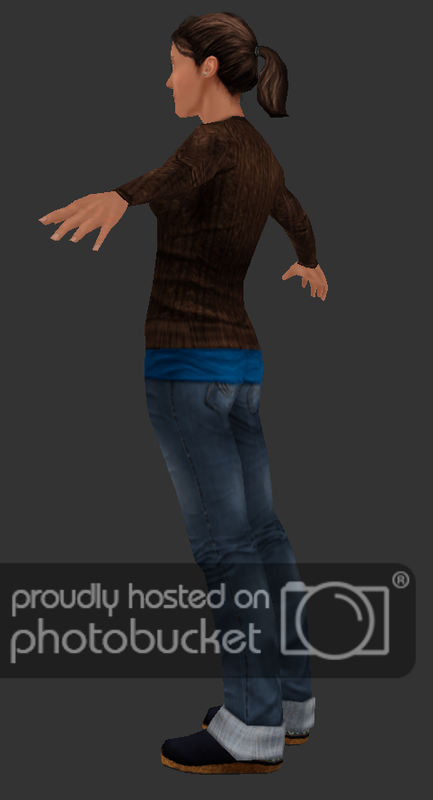
Following up on my Classmate 1 project, I created this project. I learned a lot from the original, but even more from this one (including that the GIMP can be a touch unstable…). This was created under a much shorter time schedule than the first classmate, so I didn’t get enough time to get in as much detail as I would have liked. Like the other project, this one was to create a game ready character modeled after a human being. All of the textures were created from scratch as well using no photo reference. I cleaned this mesh up a lot compared to the last one, but it is significantly higher poly, and there are some issues with it.
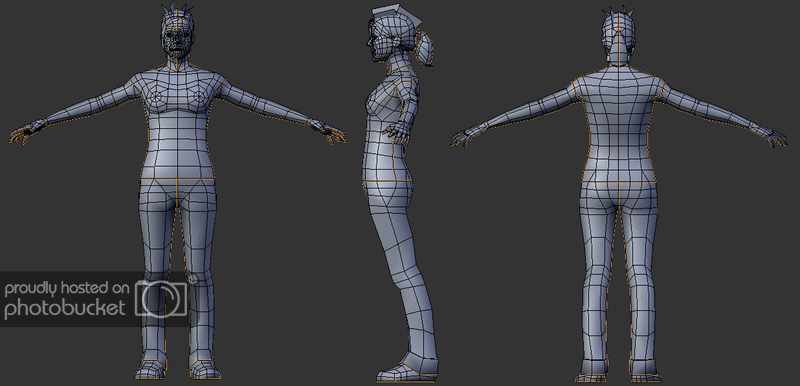
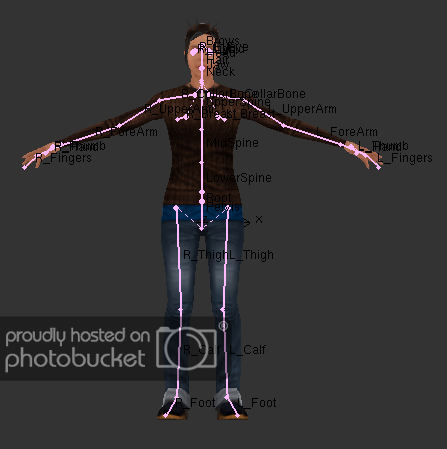
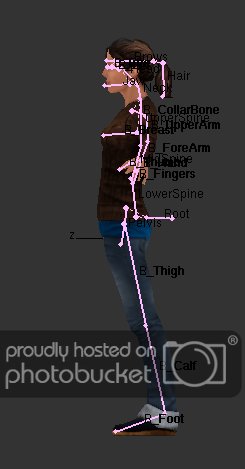
Tris: 2953
Textures: one each - 1024x1024, 512x512, 256x256
I would love to find someone to host some of these files so that they can be used educationally further down the road. If you’re interested in hosting them, let me know.
Yes, we can notice the improvements on this one, you’re “growing fast”
You next model will be “top”!
Anyway, these ones are already very good!
Bye and thank you for sharing the files.
Thanks Mathias. That was the hope. It was really good to do to stretch myself, and I learned a hell of a lot in the process. To be honest, I think every aspiring character artist should try it once. Really teaches you about the subtle things that sell a character.
Andro: Yes she does know. They’re rigged so that if she bends backwards they don’t look freakishly large. And to be honest I’d rather not talk about her in that way. Keep in mind it’s a real person so please show respect. It took some cajones to agrre to and follow through with the project anyways.
Very nice, looks perfect for a game made in crystal space, or even the Blender GE.
For only 2953 polys I’m impressed. The first model you did is also very good.
I bet shes very happy with it. It would be interesting to see yourself made into 3D, especially in this much detail, and so realistically.
The hair is probably done best, i haven’t ever seen hair done so well using the plane technique.
Look forward to seeing what u do next!
edit Just downloaded the demo file, so forget about how i was saying it ‘could’ be used in the GE, its awesome!
Im feeling inspired to continue with one of my older projects now, ill look around for the .blends and hopefully finish a model i was working on.
Thanks AD-Edge. It is a decent poly count but I see a lot of areas on the face that could be reduced. I suppose as I improve my topology, I’ll get better at that. Also, it’s funny you should mention the hair, since that’s what I’m actually most critical of personally. I literally created it an hour before I showed it at a presentation, so I’d love to put a lot more work into it. The demo was my attempt at some animation (never my strong suit), but I did create some decent interaction with the character I think. Good luck on your older project as well. If you ever want to continue the Grubs project, let me know and I’ll send those models I made along to you.
@ All: Just curious, if I were to create some in depth tutorials on character art (modeling, unwrapping, texture painting), would people be interested in utilizing them? I’d like to gauge interest before I plow ahead.
I’m siging in for a tutorial. (noting sinster:) In my opinion it’s very good project. It’s screeming itself for a tut. btw don’t know if you noticed that but she (your model) looks much older as a 3d than on reference photos.
Yeh i havent been doing so much on that lately, had a few other projects on the run, but feel free to send the models, it would be good to see them in the game, and might inspire me to get working on it again. :yes:
Id personally be very interested, i know the basics of modeling/unwrapping/texture painting, but its not to the standard that your doing. Id really like to be able to do stuff like this sometime, so tutorials would be awesome.
Its probubly the one area of my 3D work atm that ive been looking to improve.
@andro: You’re right, she does look a tad older in 3D. As far as the tutorial, it won’t be based on this model, but rather, something new, since I’ll have to begin again from scratch if I’m going to document the process. I currently have 3 ideas for characters.
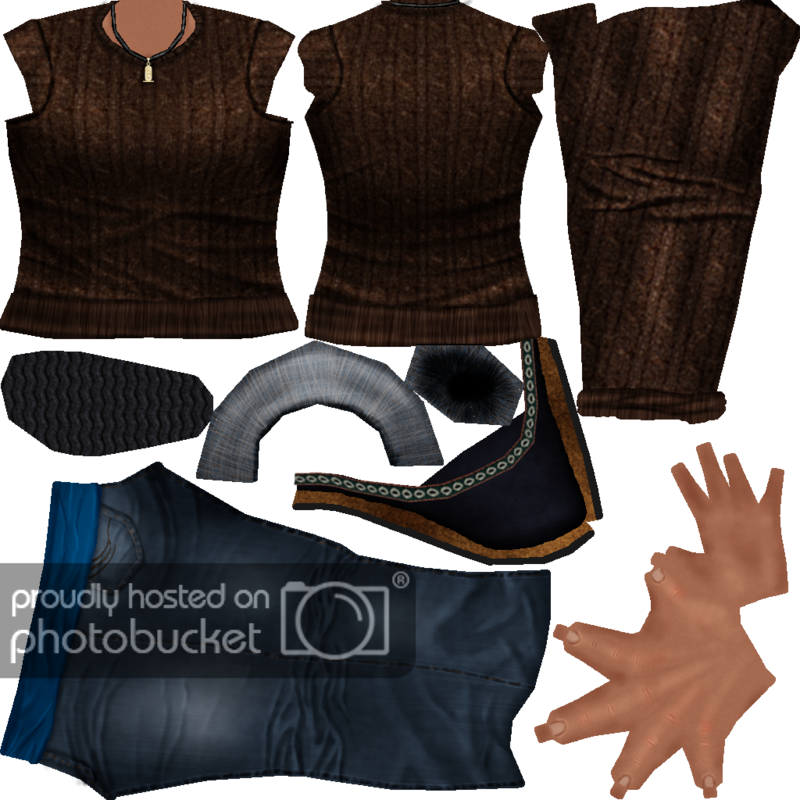
@guru: now that you mention it, the skin is a tad rosy. As far as software goes, I don’t use anything special. I suppose I’m just pretty careful to match my shading at the places where seams intersect, plus, I tend to create the seams along edgeloops that would be actual seams in the clothing. My workflow tends to jump from the GIMP to Blender, then back to the GIMP of a very quick basis (once per minute is probably a safe bet) which allows me to quickly see how my shading lays out on the 3D object. As far as getting rid of scenes caused by mip-maps, if you look at my blend file it shows the textures I actually used (the ones above are cleaned up), where as my base, instead of white, I use several stacked, blurred images of the entire texture so that there are no obvious gaps. Seems to to do the trick. Otherwise, I would love to get Body Paint to deal with the seams. It’d be really easy if Blender’s texture painting tool wasn’t so rudimentary and supported layer editing as well as a clone stamp tool.
@AD-edge: I have a tiny amount more to do on the models (they took a back burner in recent months), then I’ll send them along. As far as the tutorials are concerned, they would be much less about simple “how to use X tool”, and more about technique and how to effectively convey physical phenomena in a texture map.
@All: seems like a decent amount of interest. You can plan on seeing a tut from me by the end of the summer at the latest.
U know u should set smooth and let the ears and eyes sort of “look” smooher. Very pro. But it looks slightly like something that i do not like: Low poly game character. Soory but that’s because of he edges on the ears and nose and eyes.