Hello all, It’s been quite sometimes since I used a 3D application. I’m trying to enhance my 2D skills and anatomy knowledge during my spare time :spin:
Anyway, I’m taking a “small” break, and yesterday in the evening, I’ve got in mind to create a little stylised Knight.
The idea, is to have a low poly character, rigged and animated at the end (idle, jump,run). Rigging under Blender is something I still have to learn.
Anyway, here is my model already modeled. I still have to clean the hands. (Bad topology at some points).
Here is my modeled knight. I will perhaps create the sword after. Not sure, I’m afraid It’s going to complicate my animation, but what would be a knight whitout his sword ? :eek:
Thanks for your comment, I followed your advice, and It’s true It’s looking better now with the shoulder dropped a bit. A part from that, I have something to ask, something I’haven’t found yet under Blender. While working on my model, I figured out there are uselesses edges on my fingers.
But, the model is already unwrapped, so If I delete these edges, with " X -> Delete edge loops". It totally destroy my UVS.
So is there a kind of “Preserve uvs” function in Blender ? There is such an option in 3Dsmax. That’s why I ask.
Here is a paint over to show you what I mean.
By the way SolarLune, I’ve just seen you had a blog about BGE and tutorials, I’m looking for it, I’ll need it in a near future, thanks to share your knowledge, that’s useful. :yes:
It seems there is not a preserve uvs option inside Blender so…
Besides this, before going further, I’m checking how I should add edge loops for the animation. As It’s going to be a game model. It has to be optimized as well.
I always have doubts on the way I have to do this correctly. I started with the website of Ben mathis, and I found some explanations ->
So, I’ve set this topology, the first one you see on his tutorial picture for the knee and ankle. But I’m hesistating for the others joints such as fingers and etc… I’ll perhaps, surely add a second loop for the fingers such as the second exemple of the picture.
You can have as well the Blend file if you want to have a look.
If someone experienced could help me with this. I’ve created some characters, but that’s always something I’m not sure how to do.
Hello, It’s been a long time since the last time I worked on it, but I 've tryed to manage my time lately to open Blender again and start the texture of this little guy !
Hello all, I 've kept on texturing him after my dayjob. I think I won’t go further, I don’t want the texture to be too much realistic. :no:
If ever I want to tweak it a little bit, I still have the possibilty to do that later anyway. Next, I should rig him. And if the courage is there, I’ll do some basics animations such as idle/run cycle for exemple.
Still working on this, I used rigify and I’m now on the point to understand correctly the weight painting tool under blender. At least, the way to use it effectively ! I still have to tweak the weighting though.
Having fun doing it ! That’s the matter.
I’ll rig him as soon as possible. Here is a little pose quickly done of him jumping !
Thanks Kastoria, I could finish the rig and solve some issues, so thank you ! :eyebrowlift:
Now, If ever I’m enough motivated I’ll animate it, not sure It’s for now though.
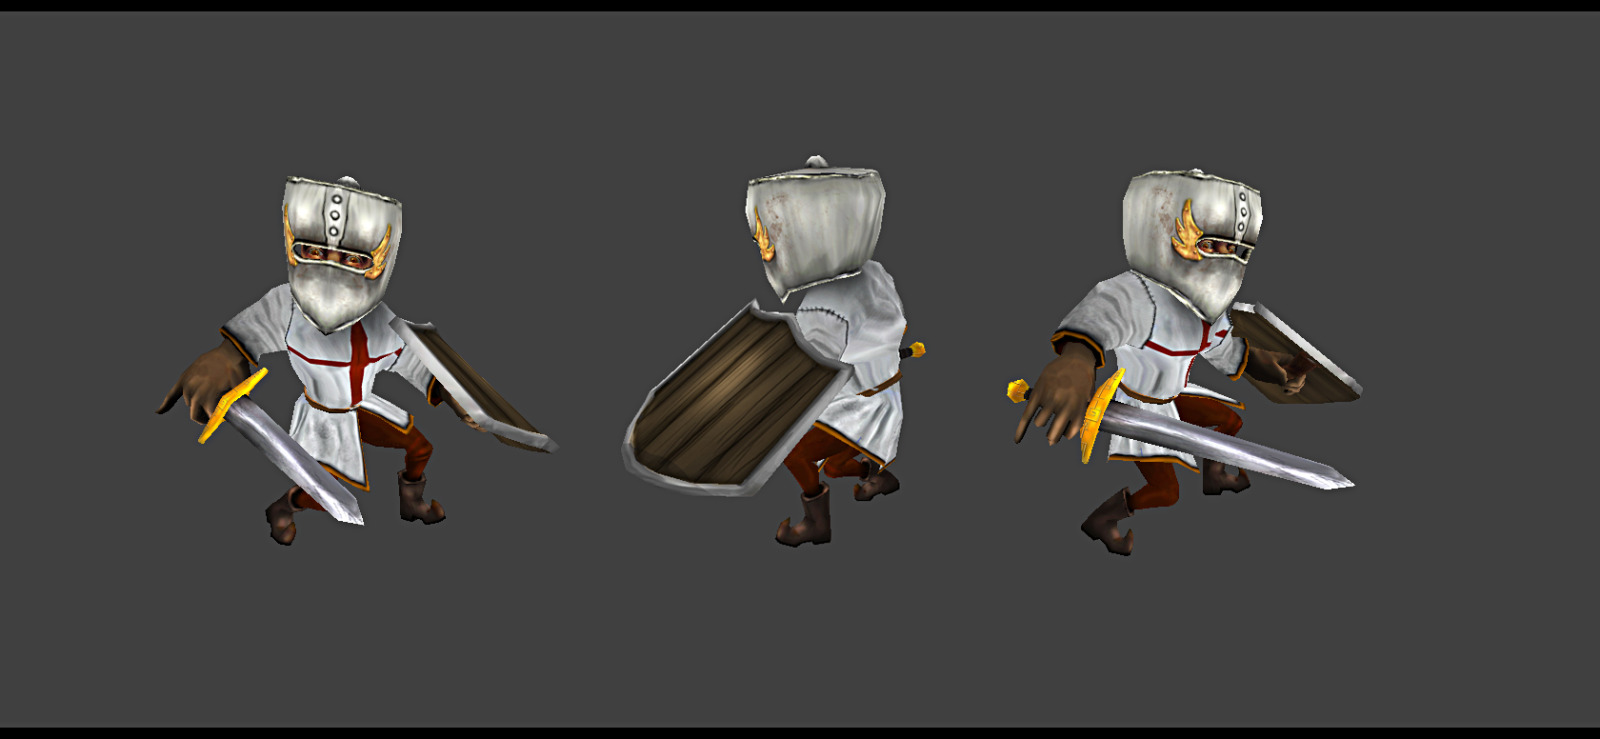
Here is the final model 2x512 (one for the body and the other for the shield and the sword).
Firstly, I unwrapped the modem, then I baked the ambiant occlusion.
After that’s It’s mostly a texturing job under a 2D application such as Photoshop and the painting tool of Blender. That’s the first time I use that one, It was on of the purpose of this project, painting inside Blender and learning to rig. I just played with the different brushes “soft, draw, smear…” and the different mods.
I’ll probaly put the model to dl !
Edit: Model put in the finished project with the link to download it.