I know, I know, another “this is my first car model” thread.:eek: Let me start by saying I am admitedly an average at best modeler, and even worse at materials and texturing, so I expect the crits to be, shall we say, quite honest. So fire away!
This is the beginning of my attempt at modeling a 2005 Ford Mustang GT. I happen to have one in the driveway, so I’ll be taking my own reference pictures and running outside every now and then to see how far off I am from the real thing.
I am not expecting photo realism or completely accurate modeling on my first car attempt but I would like you all to point out any and all flaws you find. That’s the only way I’m going to learn. So, here is the tire, rim and brake rotor as it sits so far. I am going to model this as it is in the driveway, so there will be some rust, scratches and other imperfections. This is not intended to be a showroom car. It’s my daily driver.
The rust material/texture on the rotor is temporary until I have time to put a proper texture there, and I still have to model the hole and valve stem in the rim. The sidewall texture is one I found online and does not match the tread. I also have to do some research on how to reduce noise in the render, which was rendered in cycles at 1000 passes.
BTW, I’ll be 50 this December, so this may take me a while to finnish!:yes:
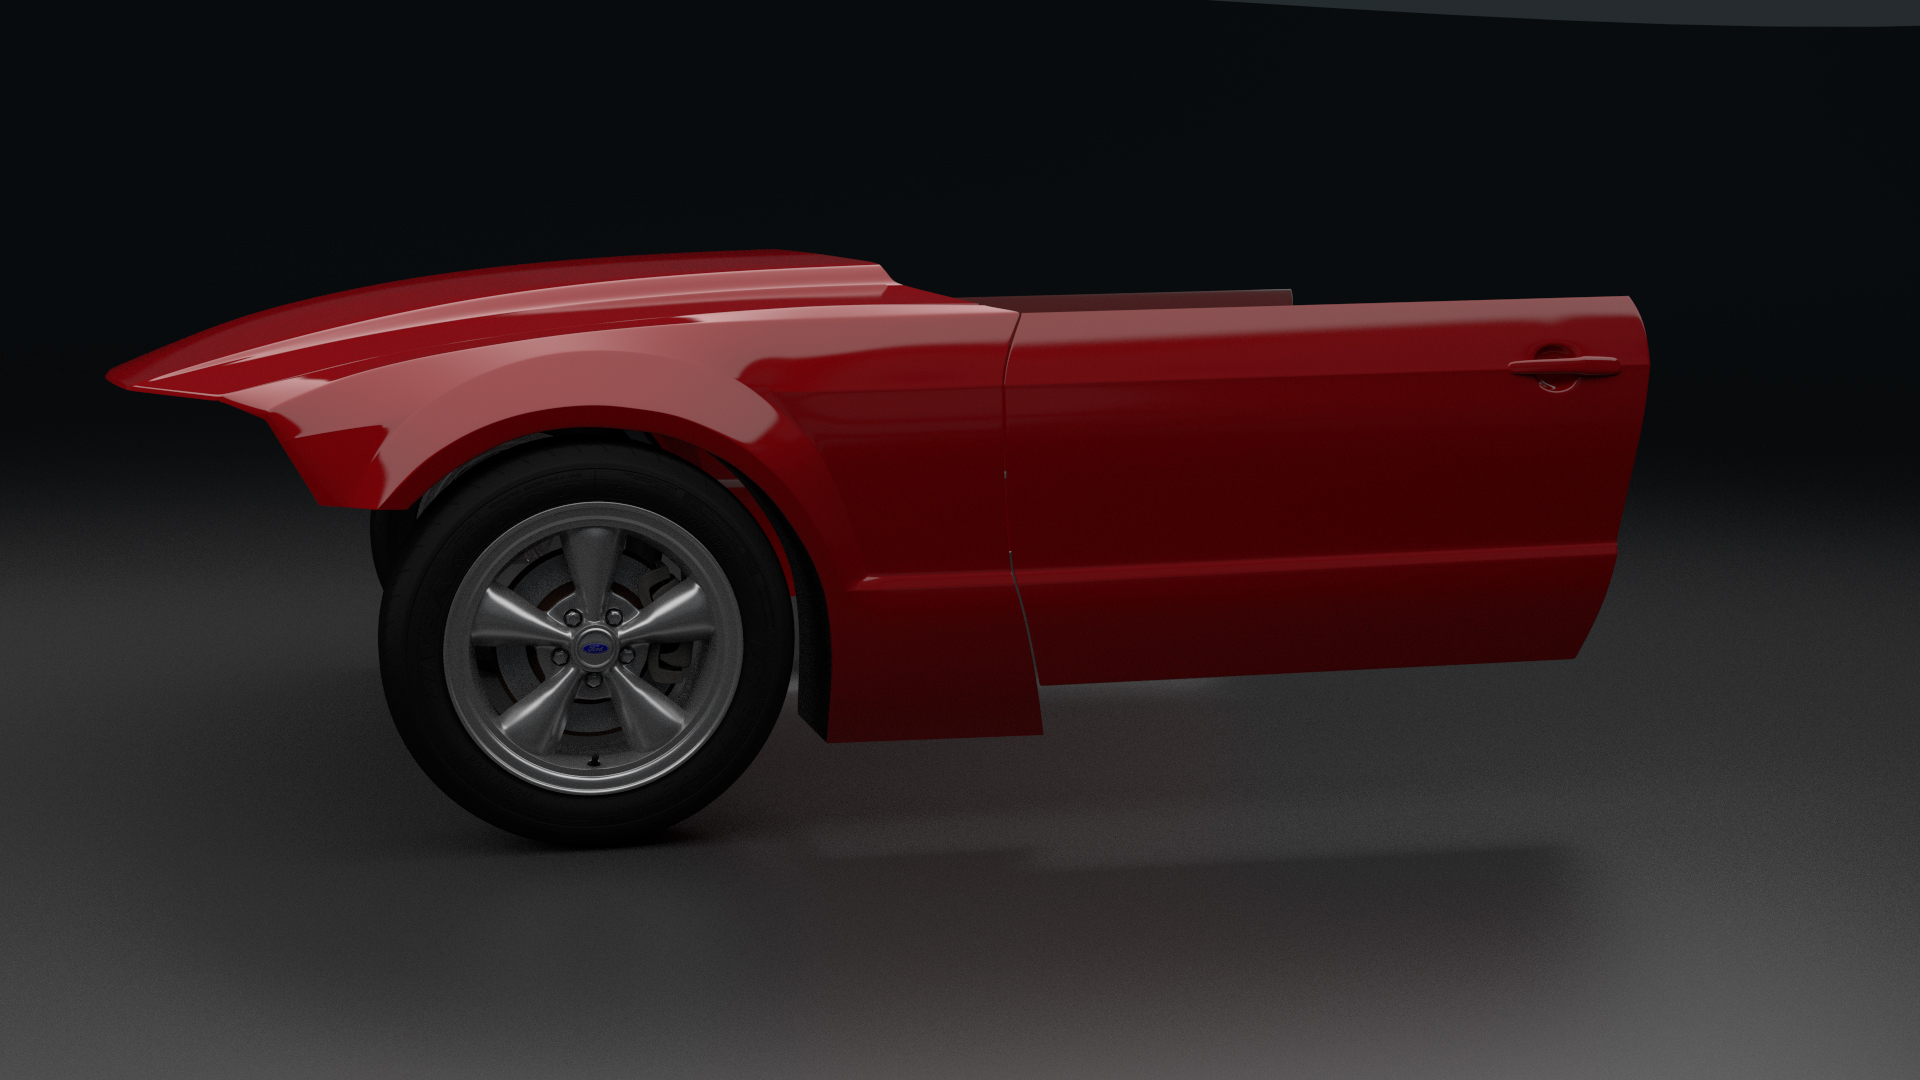
UPDATE: Working on the rear end. Still need to tweek the bumper to body seam and clean up some edges on the bumper too. Next is the tail lights, exhaust exits and spoiler on the trunk. Any advice on modeling and texturing the tail lights would be appreciated. I don’t want them to be just textured planes. I want to model the reflectors and other innards.
I’m really not looking forward to modeling the front end. Getting this far has taken me forever.
I know the rear brake caliper is facing the wrong way. I appended the wheel from my tire .blend without creating two different groups with the differences first. I’ll fix that later.
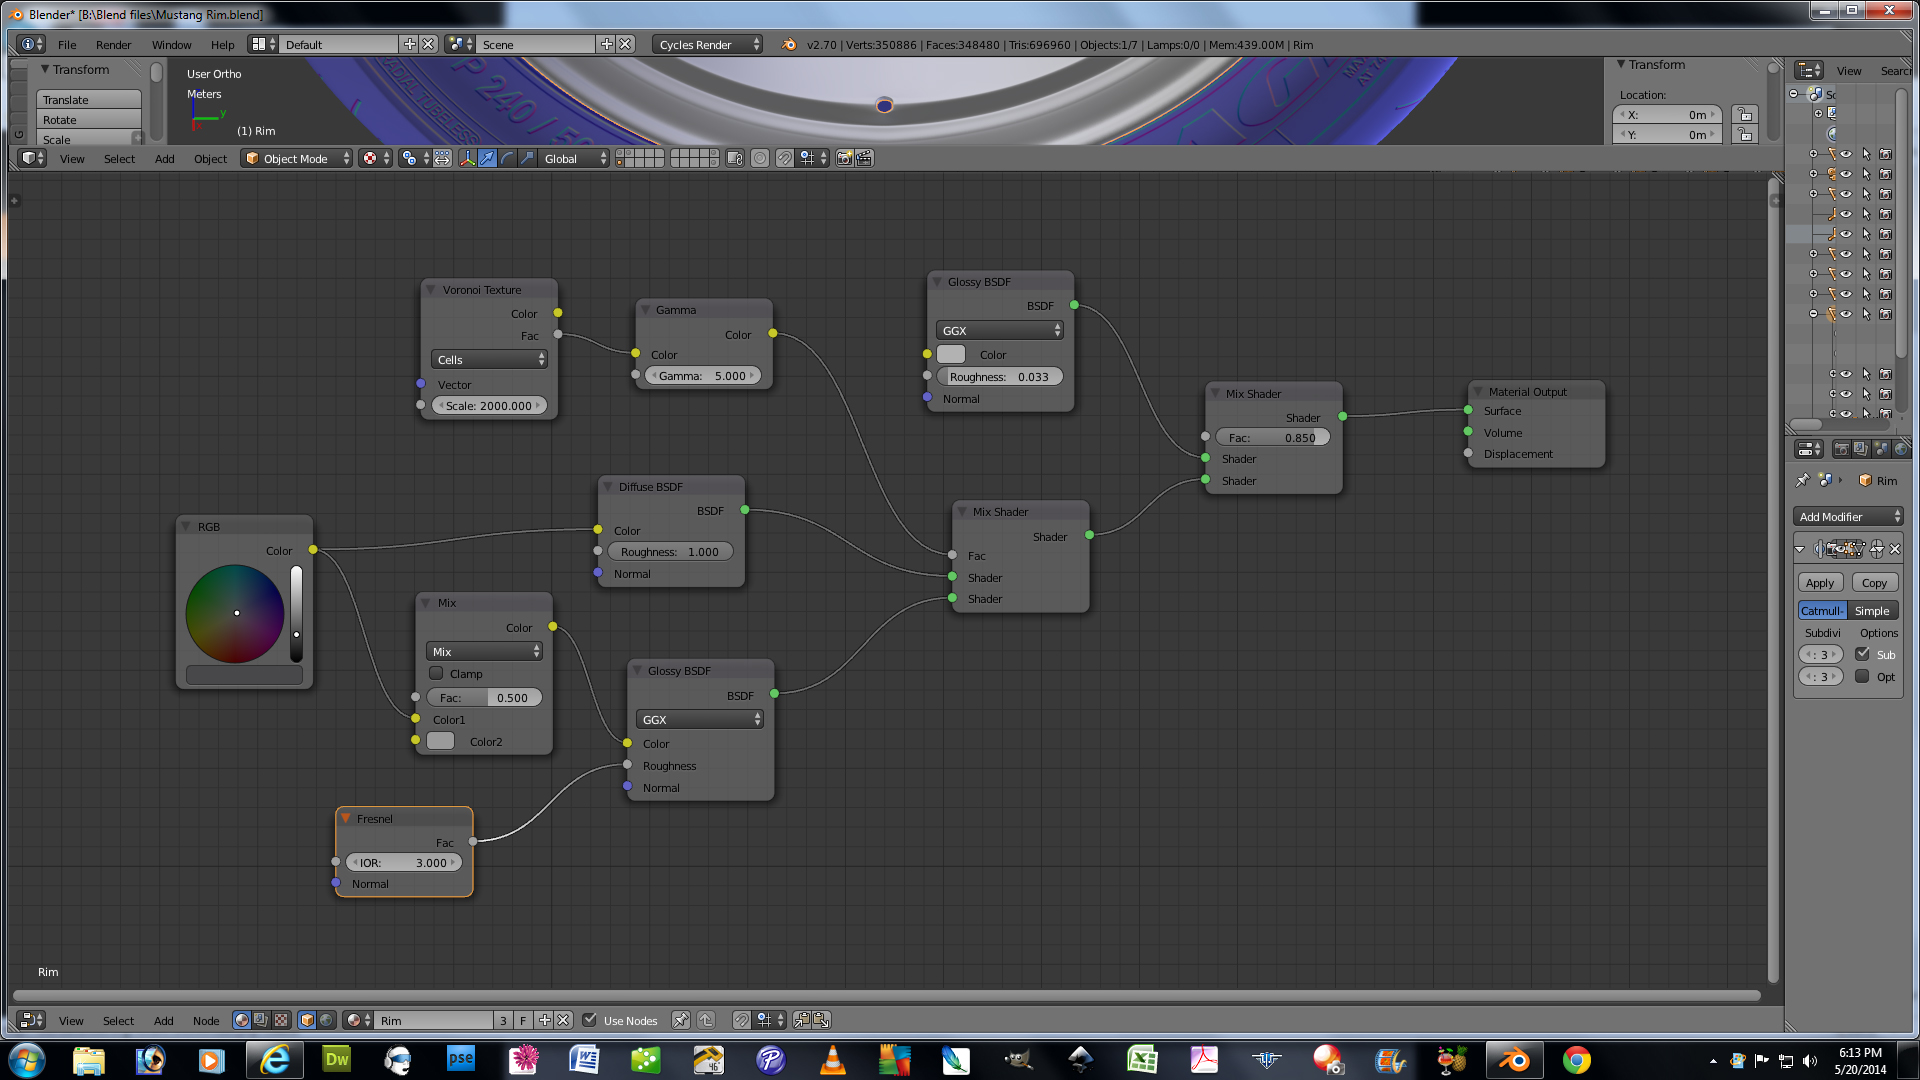
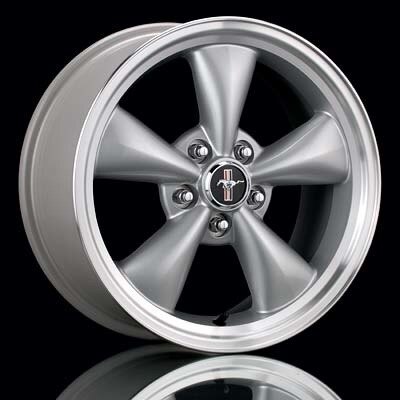
This is actually really good. I assume you’re going for these rims: http://www.tirerack.com/images/wheels/svt/swap/svt_05_mustang_gt_ci3_l.jpg in which case your spokes look a tad thin. Also the rim material could be improved slightly using a Fresnel node! It also looks a bit matte (maybe it’s just the lighting) As for the tire, you might want to find a different sidewall bump map, as this one is very overused.
Excellent start though! And a very early happy birthday!
I used a reference picture for the rims and everything lined up, but I will definitely take a closer look and make changes.:yes:
I do have a Fresnel node, but I just found a car paint shader online and tried to tweek it a little. Maybe my tweeking took away from the effect. :o I’ll look at that too.
I know, the sidewall texture is overused, but I am in need for a tutorial for making my own in GIMP or Photoshop CS2. I have Faulken tires on my Mustang and haven’t had any luck finding textures for them and my skills in GIMP and Photoshop are worse than those for Blender!
Thank you for the comments and suggestions. I really do appreciate it.
Looks spot on, sir! It must’ve just been the camera angle in the previous render that made me think otherwise. Keep it up! I can’t wait to see some work on the body
Very impressive. The bump is so overused and I dont think is right for the car, but great modeling and otherwise great texturing, very impressive for your first car.
Yeah, I know it’s overused. I grabbed it just to have a texture. Here’s an idea. How about you do a tutorial on creating sidewall textures. Not just a quick random text texture, but a complete start to finish texture. I for one would greatly appreciate it! My skills in Gimp and Photo Shop are horrible.
Thanks for the feedback, I appreciate it.
BTW, Goldenfrog and ThorntonStrolia, you both have awsome modeling and texturing skills.:yes:
I just so happen to already be working on one XD. lol It will hopefully happen today or tomorrow. We will see. I will keep it as short as possible while still explaining my process.
I just so happen to already be working on one XD. lol It will hopefully happen today or tomorrow. We will see. I will keep it as short as possible while still explaining my process.
Ok. Got the valve stem in and did a little work on the brakes. I’m tired of working on the wheels, not that they are finished, so hopefully the next update will be the start of the body.
Adding noise to rubber material,like graining, will improve definitively the material. Just in my opinion, rim´s material tends a bit to look like glossy plastic, much more than metal. Bolts look perfect.
It’s looking great! I think one thing stands out to me: the tire needs to be more glossy. It feels really matte right now. The tire valve looks super good. You know it’s a serious car modeling thread when the modeler makes the valve. The hole you cut in the rim for it looks great too, doesn’t mess up the flow of the mesh at all. Props!
Ok, here is a render of what I have so far. Cycles, 500 samples. Followed a Jonathan Williamson Blender Cookie tutorial for the paint shader. He used the shader from someone that posted here on blenderartists. Sorry, he didn’t know the screen names of who he got it from, so I can’t give credit either.
Man, this took me for ever. I can’t keep up with you young guys and gals!
I don’t know if I’m going to work my way towards the back of the car or work on the front end. I might just work on the door next. That will be easier than the front end for sure!
Thanks for the compliment, I really do appreciate it! You’re right, no school for me but that doesn’t mean I have all the time in the word either.:spin:
Work, family life, and life in general take up 99% of my time but I wouldn’t change it for anything. I have two girls in High School and another in Elementary school and a wonderful wife, so my time to Blend is limited.
You will find that as you grow older, priorities change and almost always for the better. Have fun in school but work hard as well and you will be amazed at the opportunities that will come your way. Ok, that’s enough old person talk.:yes: I might sneak downstairs and blend for a few minutes.
That’s looking stunning so far. The modeling looks quite clean overall!
You probably already know this but I’ll tell you anyway haha: it’s usually best to keep as low-poly a base mesh and then subdivide it to get your high-poly mesh. Forgive me if I’m wrong, but I’d say your base mesh is just a bit too high-poly, judging from your level one subsurf images. Obviously it’s personal preference, and working with a higher-poly base mesh will give you more control down the line, but I personally find that low-poly keeps curves looking smooth and neat.
Thanks for the advice on the subsurf. Yeah, the base mesh IS to high poly, but I’m to far into it now to go back.:eek: Hopefully I can keep things smooth. And one thing. Don’t assume I know something, because I probably don’t!:no:
Here is the latest. I’ll work on the rocker panel next. It’s back to work for me tomorrow, so it may take a day or two before I can get to it. The door handle is just a rough-in and will get a little more detail to it too.
I posted a wheel wall tutorial timelaps to the tutorials section. I uploaded to youtube as 1080p but it is played back as 480p so IDK what happened but hopefully you still find some use out of it.


 Not just a quick random text texture, but a complete start to finish texture. I for one would greatly appreciate it! My skills in Gimp and Photo Shop are horrible.
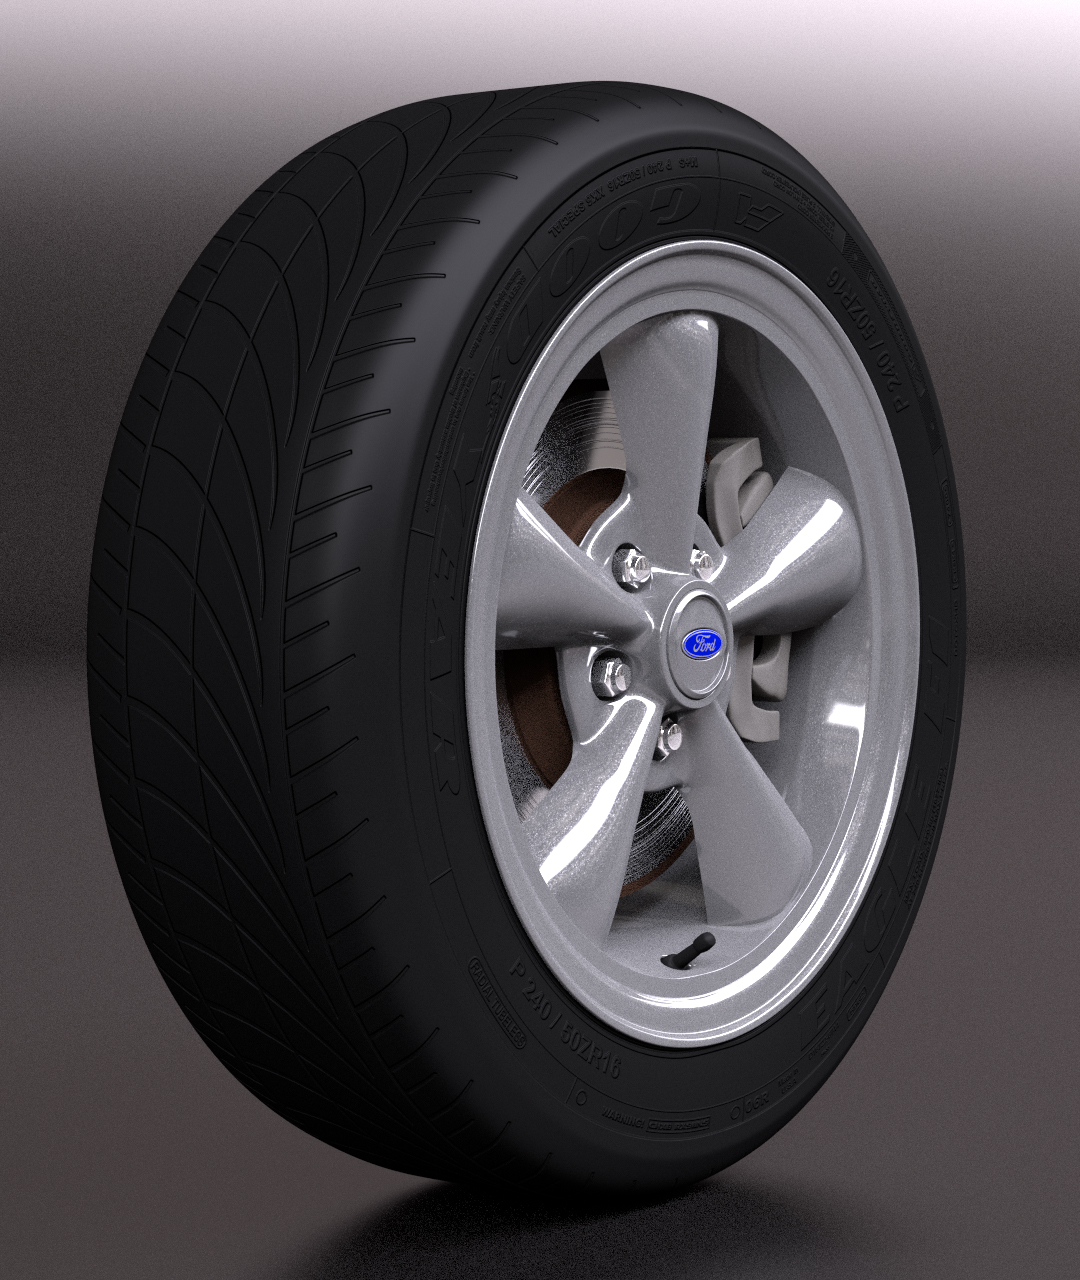


