Its kind of hard to tell what your problem is without a blend file but I’ll try anyway
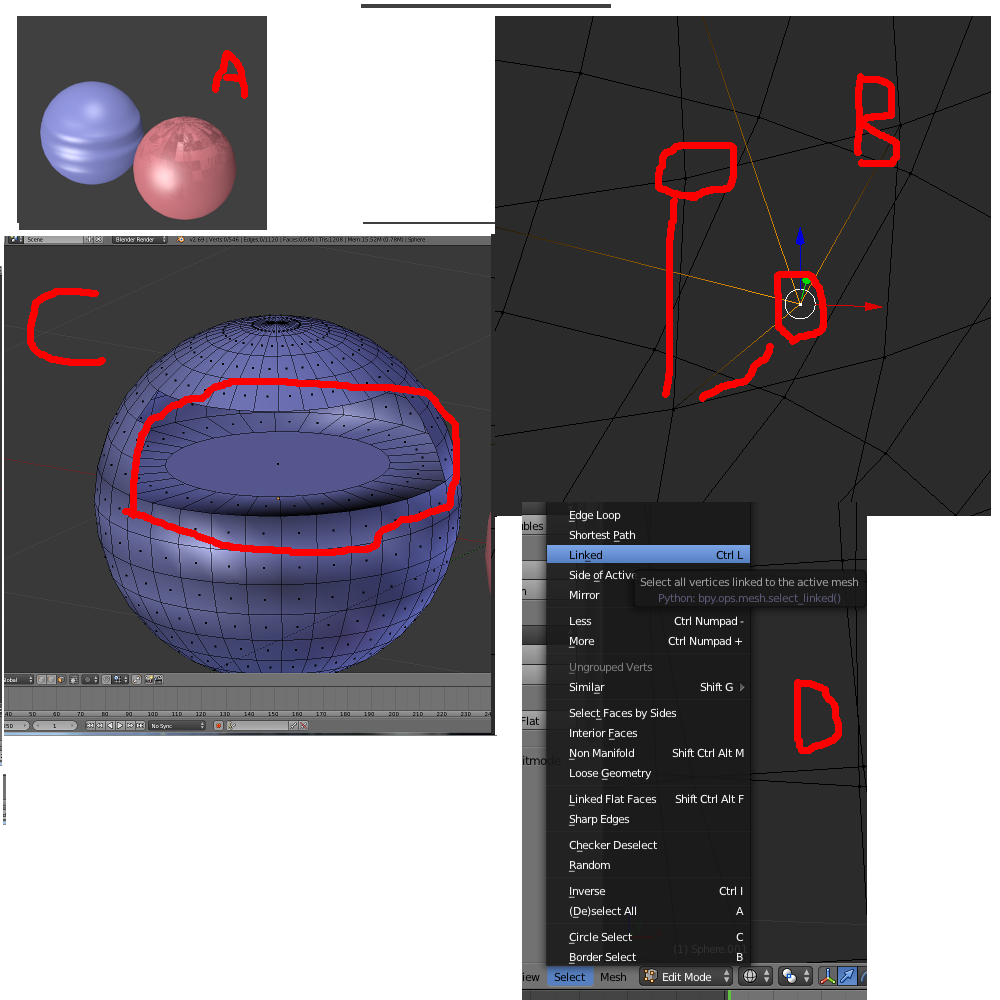
(please excuse the poor quality of this gimp copy paste)
These are problems I commonly had when I first started modeling.
Figure A shows two rendered spheres both perfectly round but with common mesh issues.
The pink sphere has a double mesh both sharing the same space hence the artifacts at its top, the blue one has internal mesh parts that screw up the normals.
In figure B I selected the pink sphere and went into edit mode and used the z key to show mesh view. If you look at the really badly and not so straight red lines you can see the mesh sort of intersects. The circled vertices where actually sharing the same space.
The two ways you can correct this is either
1- press A to select all the mesh and press “remove doubles” in the tool bar, this will merge all vertices that share a common space (default value is 0.0001 or something in blender units). I don’t really recommend this though unless you are sure about the location of all the vertices, as you may merge vertices that you don’t want to.
2- The other way is to select one vertex of one of the dupe meshes and follow step D, press the G key to grab and move the dupe mesh out of the way (or use the gizmo if your like me) and check to see if they move together or one stays behind.
If one mesh doesn’t move then its safe to just delete one of the meshes, if select linked grabs both meshes, then they are connected by at least one edge. No easy solution here, just keep looking for the rogue edge(s), use edge select to select and remove them.
In figure C I’ve hid the faces showing the inside of the sphere, meshes should be understood in the same sense as being like bubbles, they cant have internal walls unless you have a bubble inside a bubble.
Anyway the best way to fix this is to just hide faces or use z for mesh mode or toggle limit selection to visible option, its right of the vertex, edge, face select buttons, it looks like the default cube with 7 white vertices.
Delete the internal mesh parts that are creating problems. Again, this is more or less like hide and seek.
Make sure to save your work before operating!
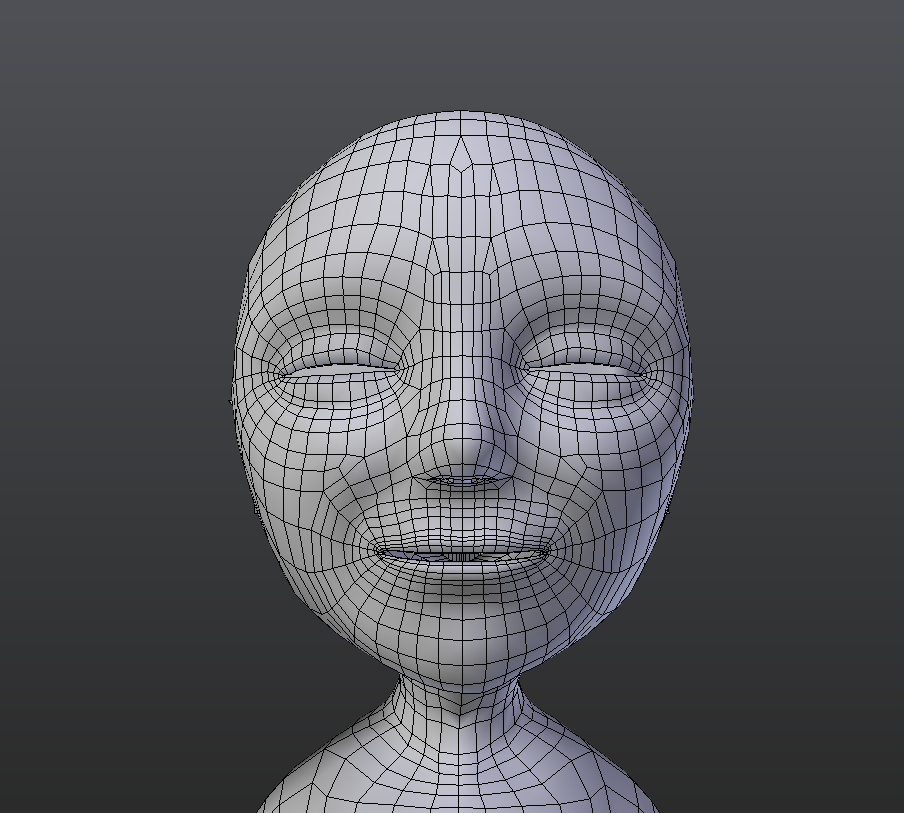
As for your mesh topology, it doesn’t look too bad, the triangles on the forehead may give you problems if you have to animate that area, but if your not going to flex those areas much I wouldn’t worry about it too much for your first attempt.
I noticed that you have a lot of edge loops, are you using a sub surf modifier? If your not then I might suggest that you look up some tutorials on it. It makes your meshes so much cleaner and easier to work with by at lest 50%. Most professional modelers use it to keep the mesh more manageable. It takes a while to get use to using it but its worth the effort.