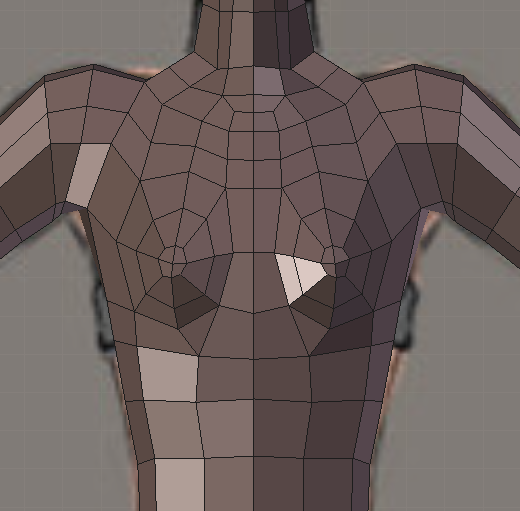
Hi there. This is probably my first post and and almost my first attempt at modeling a character from a blueprint. I have looked at some tutorials on youtube and started my own test. This is the result so far and I am eager to know what you think about topology. I am quite proud myself but my biggest concern is those 2 vertical lines just next to the centerline. I had to add them to get distance between breast but as you see when they come up to the throat they are just very tiny. Should the go to a triangle instead of going around the whole character?
Yes. Divert to a tri in a spread out unimportant area. You could do it at the current top of the neck and below the belly button. Sometimes you need tris. Keep it up and post updates.
Thanks guys for the posts above. Really makes me wanna keep making this model better. I will look into topology with some triangles to see if I can fix some lines. I usually add a sub-div modifier to see how it looks like in high res. If something looks of I know there is something strange in topology. For example, the vertical lines I mentioned before adds a very sharp area in high res mode so will take care of it Thanks again
Thanks for all the input. Here is the latest topo. I got rid of the bif vertical line by making 1 tri and looping up the clavicle. So far it looks a bit better
Now you come in to the opposite problem, you now have 2 poles. Poles are verticies with 5+ edges coming from it. You will have to decide what looks best, tris or poles with looking at how it subdivides. Keep up the work.
You’ll need another loop at the knee for smooth deformations, and you’ll have problems with that shoulder. You need a loop running across the chest, around the outside of the shoulders (imagine her arms at her side) and across her back. Right now that loop goes across her chest then heads down her arm. The elbow doesn’t seem to be modeled yet, but you’ll need three edge loops there, too, just like at the knee.
You can also use extrusion instead of loop cut to add geometry to specific areas. Instead of extruding and moving, extrude and then scale down in the same place to add more vertices. It keeps lo-poly models a lot cleaner than making giant loop cuts every time.
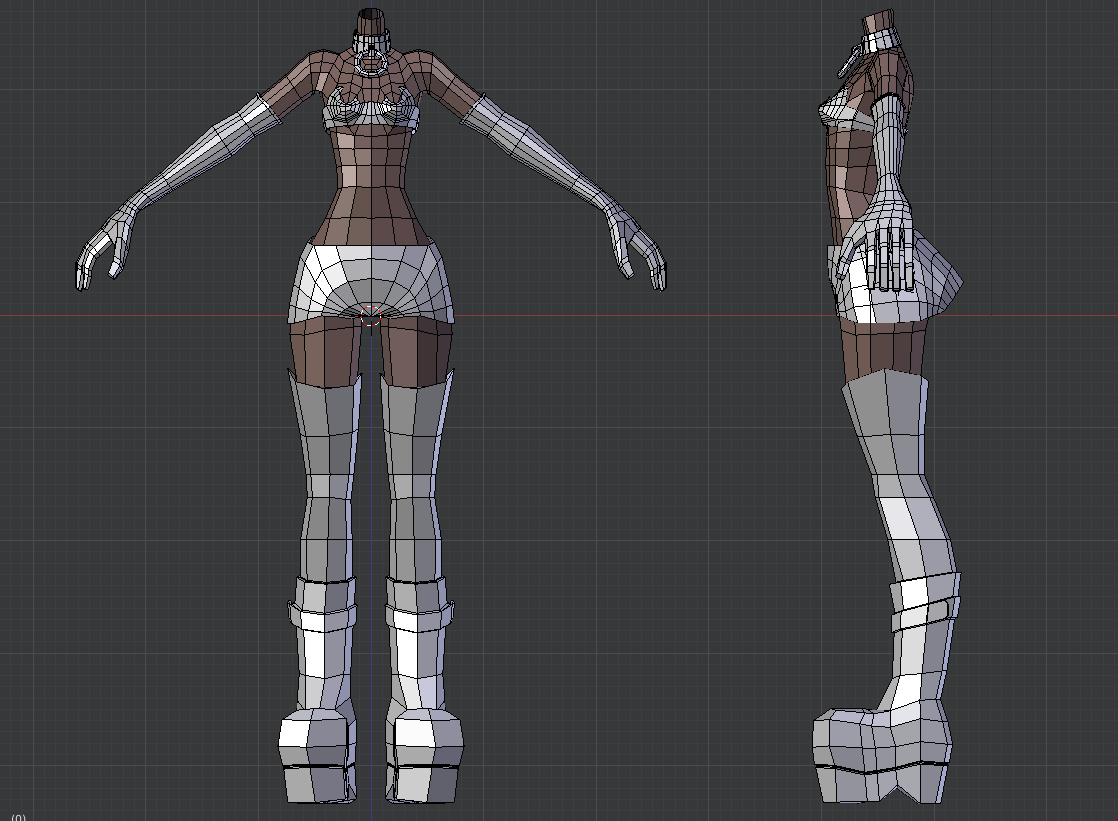
Ended up with this. Pretty satisfied. I was first thinking of adding bellybutton further down and in some way jpin the lines in some way but this works now. I have one issue now. The arms end with 8 vertices and I started modeling a hand. The hand however is 14 vertices so they do not connect. I wonder how to fix it. The model has bracelets so I might hide the error with bracelet Is there an disadvantage to this when animating? I cannot see an error if I do this I guess
[ATTACH=CONFIG]402014[/ATTACH]
If you really want your vertices to match, you can select that entire line along the arm and make an edge loop to get 7, then subdivide once to get 14, but you’ll end up with a lot of polygons. You can hide it with a bracelet, but what if you want to make a character who doesn’t wear one? And after 5 or 6, it will look odd if they all wear bracelets. You can do a lot of triangles, but then animating it won’t look as good as it might deform weirdly. There are many ways to approach this, but each I believe has its own set of drawbacks. I look forward to your progress.
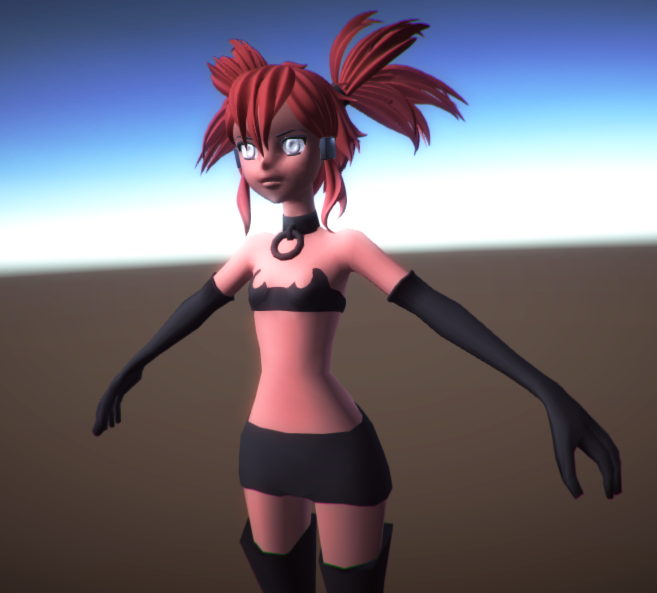
Latest progress The dreaded head is still left. That is really difficult because now edgeflow really is important I have borrowed head from blendswap so far to look at but really want to try myself
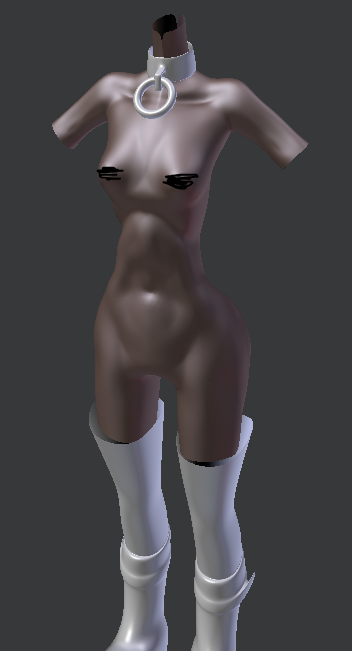
Started to try sculpt to and here is the first result. Don’t know about some nude policy so there are no nipples
Hey I recognized that head from Daniel Kreuter’s tutorials. I found them to be quite helpful in my opinion. Anyways, your model looks good and I’m glad to see an update to your progress. One thing is that I think the neck looks a little long.
Yeah it is probably because I just pasted the full body, removed everything but head and neck and placed it there Yeah I need to go trough the tutorial but he did the head in a strange way I think. Starting with alot of flat lines in grids etc. I will see if it works for me

 Thanks again