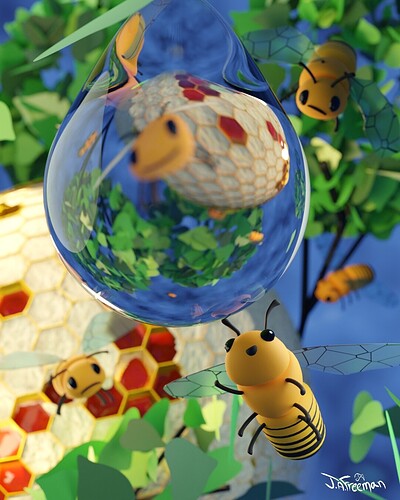
What will happen if the bee gets too close to the raindrop…may find out in mini animation I am working on. I added a little depth of field to this image compared to last, I think this works better? Would appreciate any thoughts on how this or the first image could be improved…I did aim for colours to be quite saturated, but should I have toned down any areas?
I’m looking forward to the animation. 
Personally, I like the colors. I also like that you added depth of field to this one.
You have a really simple yet fun style going. I like the expressions on the bee’s faces. Cute! Color and lighting look good too. Looking forward to more! 
Thank you, though wouldn’t look forward too much, it may be a while before I reach Disney standard  . Not sure if I should have added more or less depth of field…with the bee magnified behind the raindrop, I was torn whether to make clearer or improve depth of field for whole image and watch its face disappear completely.
Thank you, think I need to work on improving the detail and textures in some areas, while still aiming for a bright family friendly style.
I like the amount of depth of field for the bee behind the raindrop. It seems like it should be a bit blurry like you have it and it would be a shame to lose it completely. Just remember to “Bee Positive” ( ) about getting to Disney quality. You’re already well on your way.
The only thing I can think of right now to increase the depth of field for the rest of the image and leave the bee behind the raindrop the same would be to make a single-user scene copy of your original scene and then click the “indirect only” button in the outliner of the new scene for everything but that one bee. Then in the original scene, click the “holdout” button for that bee. Make sure each scene has “use for rendering” checked in the view layer properties. This way, you should be able to give the camera a different depth of field for the original scene than the one in the new scene.
Then in the compositer, combine the two scenes together for the final render using two render layer nodes (each one set for a different scene) and an alpha over node.
Also, you would be able to animate the depth of field property for the new scene to merge it back to the same setting as the original scene if needed for an animation.
I merged scenes together for my Christmas UFO Animation this way. Having different scenes allowed me to render the starry night background in Eevee and the original scene in Cycles. I also had layers in the original scene that I used the “holdout” and “indirect only” buttons for. Hopefully I explained it correctly. It took a long time to figure it all out for my animation and it has been a while since I did it. 
Thanks for suggestion, have not separated scenes before, will try and see what I can come up with.
I featured you on BlenderNation, have a great weekend!
Many thanks, has made my day 
I have created short animation for this now, which can be seen on my Instagram account if anyone is interested. For some reason I can’t upload this or another couple of animations to the Blender Artists site. The upload process reaches 100% and then get message saying upload failed. Would it be because the animations are MP4 format?
