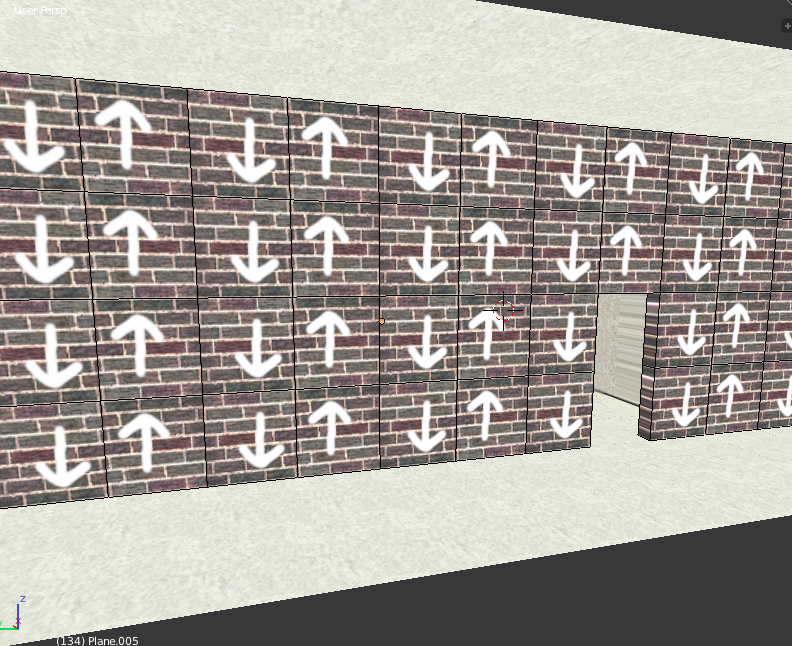
After extruding and loop-cutting the new faces, the UVs got messed up (U and V must be <1 and >0 for the game I’m creating a level for, that’s why I used so many faces). I drew some arrows on it so you can see what I mean:
I would like them to show in one direction. Is there a fast way to do this? I have been selecting the wrong orientated ones to rotate them. However, that’s quite nasty work.
Thanks in advance.
Have a nice day,
Hi
I’m not too sure how it’s all got flipped like that, but you can fix it pretty easily just by remapping the UV coordinates.
Make sure you select the entire mesh in edit mode and select everything, then press Ctrl+E and click “Mark Seam”, then with it all selected, press U and Unwrap.
Now depending on how many faces your object has, you’ll need to scale it to a different value to my example. You should basically get your entire object now fitted into your single tiled texture. So you just want to scale it to however many objects your longest side is. So in my case it’s 3.
Thank you very much for your reply.
However, I’m trying to achieve something different. I am using texture sheets with tiled textures. All of the mesh’s faces have to be on the same coordinates with the same rotation. I used the Reset function for now which seems to flip it all over.
Ah right sorry. I’m not too good with the UV editor, so I’m afraid that’s kinda the extent of my knowledge concerning little tricks. I’ll keep watching this because it’ll be interesting to hear how it’s solved