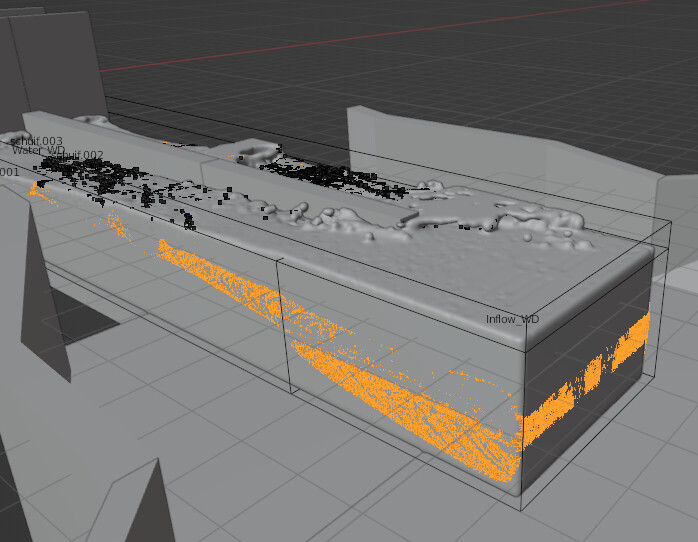
Somehow the water source is very turbulent, which I don’t understand as it just emits water with the same flow rate as it flows through the culvert system…
Hi, my apologies for the late response. I just had a chance to take a look into the code a check out what is actually happening with Constrain Fluid Velocity option.
This option doesn’t actually truly constrain the fluid to a single velocity within the inflow, it’s more of a ‘hint’ for the simulator to keep velocities near this value. Ultimately, the solver can override the final velocity. What I think is happening, is due to a side effect of how the solving method works, velocities within the inflow will tend to oscillate around the target velocity. This will lead to turbulence.
Lowering the turbulence emission rate also sounds like the bubbles in other places are also reduced, which doesn’t seem like the fix I’m looking for 
Something that is more of an advance fix could be to adjust the minimum turbulence threshold in the advanced whitewater properties (Min/Max Turbulence). For almost all situations this value does not need to be adjusted, but may help in this situation.
The bubble particles are a large contributor to the foam layer, so another workaround could be to increase the bubble buoyancy coefficient so that they rise to the foam layer quicker.
These insane amounts of bubbles that are generated make it also a bit difficult for rendering (it just stops on “initializing”, but I fixed it by just not rendering the bubbles (foam is most important anyway), which is a good enough of a fix for now with deadlines and all.
By default, particles can take a very long time to initialize for render. If bubbles are not needed in the render, disabling from the render like you have is a good idea (or lowering the display percentage).
If you’re open to using more experimental features in Blender 3.1 or later, point cloud objects are much more efficient for rendering in both speed and memory usage. In many cases, you can render 10x the amount of particles in the same time while using less memory and are quick to initialize. We have some example scenes to show how to convert the whitewater objects to pointclouds (more info).
Hope this info helps!