Looking great James! I’ve used Lieros script for RB particles, but it has been awhile, but it’s the only thing I know that is available.
Just wondering… were the muzzle flashes done in AE?
Oh, the shooting video effects looked so real, James ! if you used an existing gun model for this, you almost would not see the difference… How did you do the impact holes at the wall ? Did you actually made geometrical holes into an object or just (somehow) with textures ? Sorry if this sounds dumb… but earlier i intended to cover this with my destructability editor or fracture modifiers (except for the motion tracking of course) but for this youd need a small shard size and many shards… I like the muzzle flash as well.
Hi James, first this video is very good. It’s unbelievable how real the gun appears. I can’t imagine how many hours of masking and keying that took.
And second: I would not have noticed the sphere hull which is used for the collision of the shells if you wouldn’t have mentioned that.
The only thing I noticed is the everlasting cartridge belt. At that speed of fire it would went through the gun in under a second.
But awesome work! If it was made with Blender you should post it in the finished section to gather your well deserved five stars for this 
harley - Thanks! Yes, the muzzle flashes for that video were done in After Effects, using the Video Copilot Action Essentials 2 kit. Likewise, the muzzle effects for this upcoming video will also be done in After Effects, but without using any stock footage; instead, I’m using a tutorial by Independent VFX on using fractal noise to create convincing muzzle effects. It’s a little more work initially, but then you’ve got flares that look different than the standard VC ones everybody uses (and steals!).
I saw your short video using Liero’s script sometime last year, I liked it very much! It was one of the things that helped me consider using the script as a tool for this.
scorpion - Thank you! Actually, the holes in the walls are a 2D effect in After Effects. You just have to do a 2D track on the footage, and then composite in some pre-keyed footage of various types of charges (dirt charges, dust charges, some are just fireworks going off), and then place a graphic of a hole in the wall underneath the charge at their corresponding frames. You’re right, it could be done in 3D, but it would be quite a lot more work to get it looking good than the 2D workflow requires.
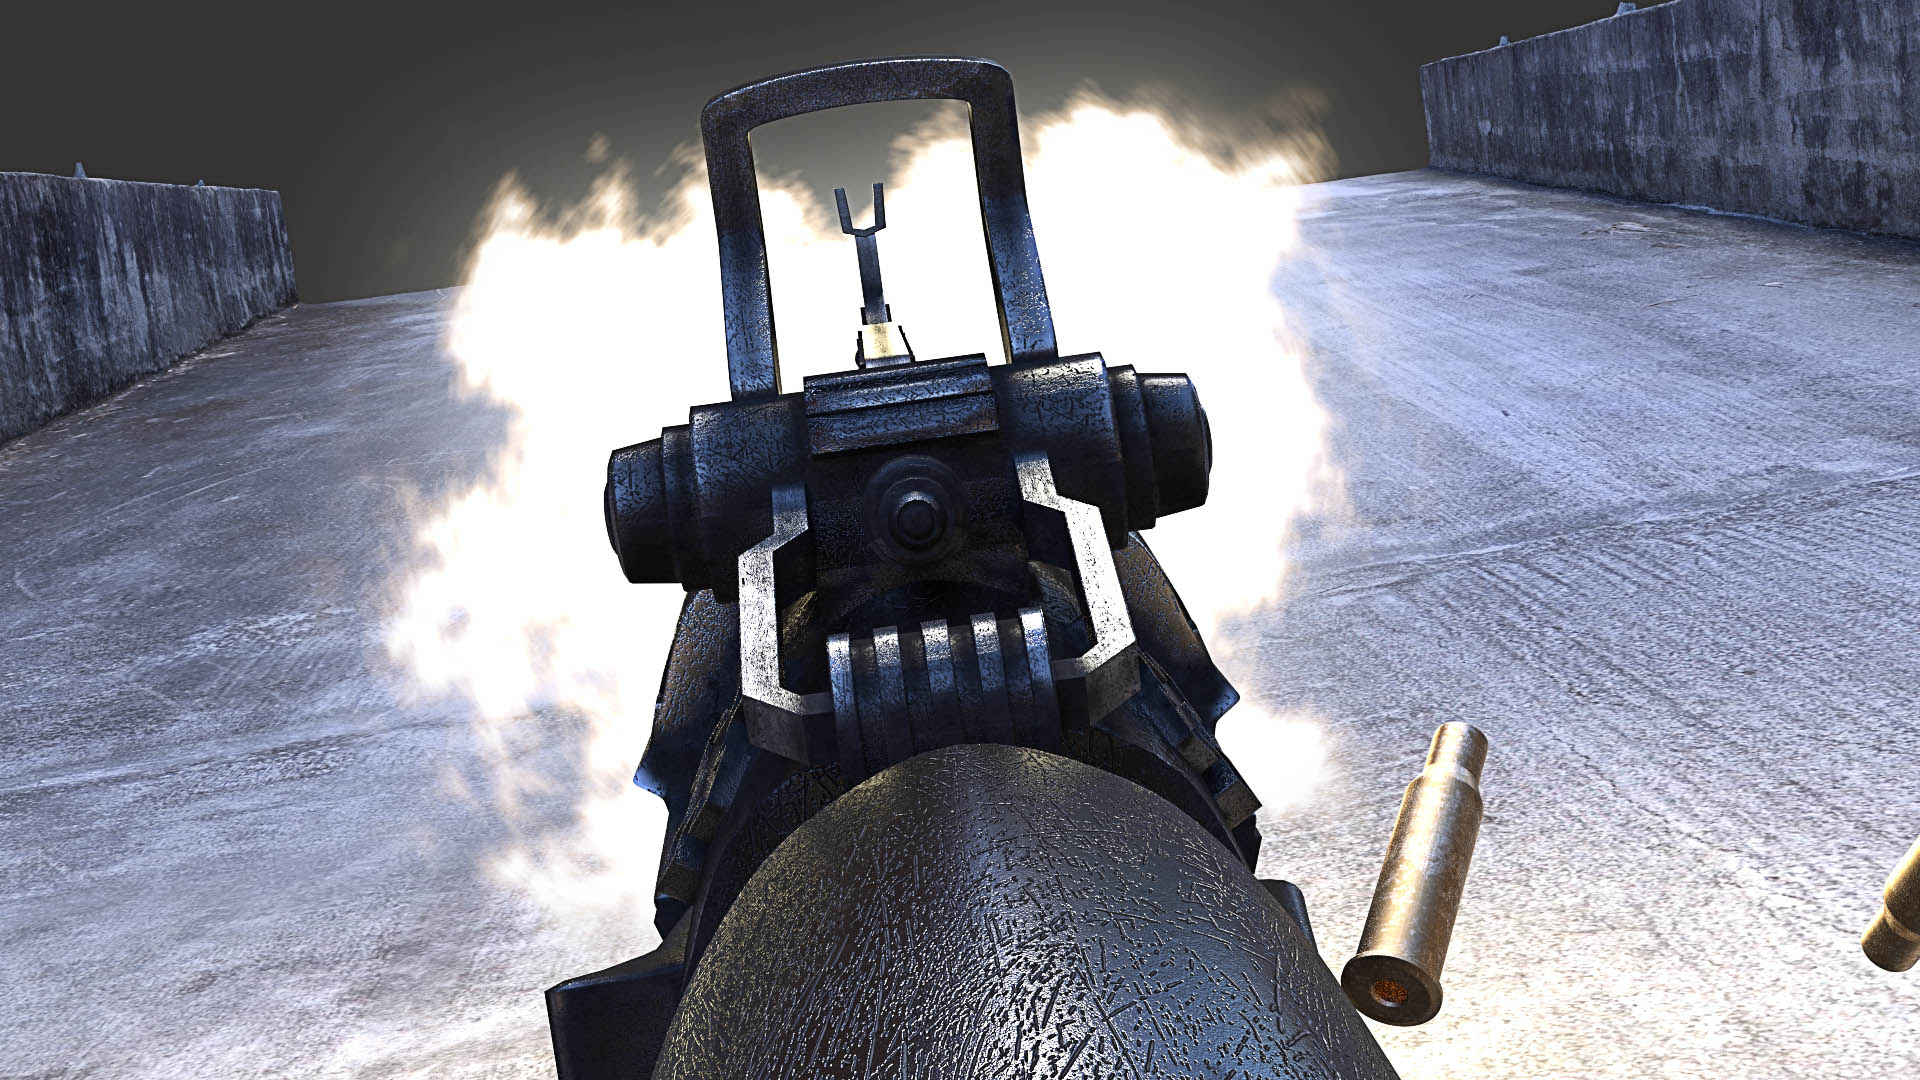
minoribus - Thank you for the kind words! I may not have explained everything properly, but the gun in this video I’ve shown is a real thing (a real prop, anyway). So no tracking or masking required, thanks goodness! I have a video showing the behind-the-scenes here:
I agree with you about the cartridge belt, it looks cool but it never changes! I would like to create a more advanced gun rig in the future that has controls for both dynamic swinging of the belt, and an effect of shortening the belt as ammo is fired.
I would also like to start moving into incorporating more physical prop-making into our films, such as futuristic suits and props that look real. I will always be using Blender for our films, but sometimes creating a physical thing saves you so much time and headache working in post. Plus, it’s cool to have something real that you can hold or wear!
For anyone looking to get into prop making, the 405th web forum is a great resource to look into: http://www.405th.com/forum.php
minoribus - Thank you for the kind words! I may not have explained everything properly, but the gun in this video I’ve shown is a real thing (a real prop, anyway)
Awesome work anyway, James, and after seeing the making of I’m even much more impressed by all the work this took. Thanks for sharing that.
Thanks, minoribus! I’m hoping to have more BTS type of videos in the near future.
I received the first generated mesh back from the workstation in Algeria! This is the mesh in Blender, before any cleaning or retopology. It took over 20 minutes just to import the OBJ!
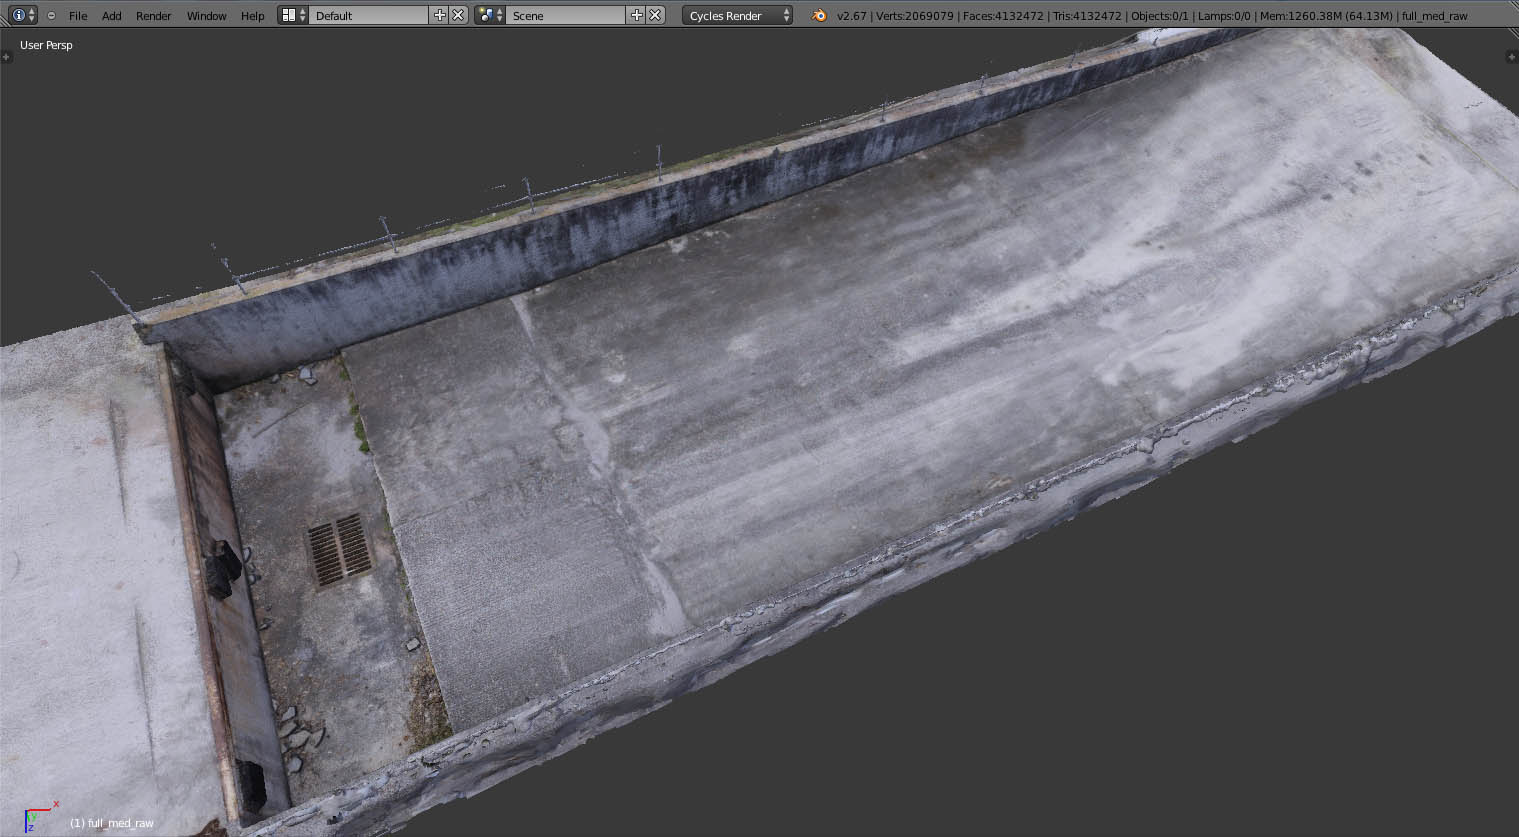
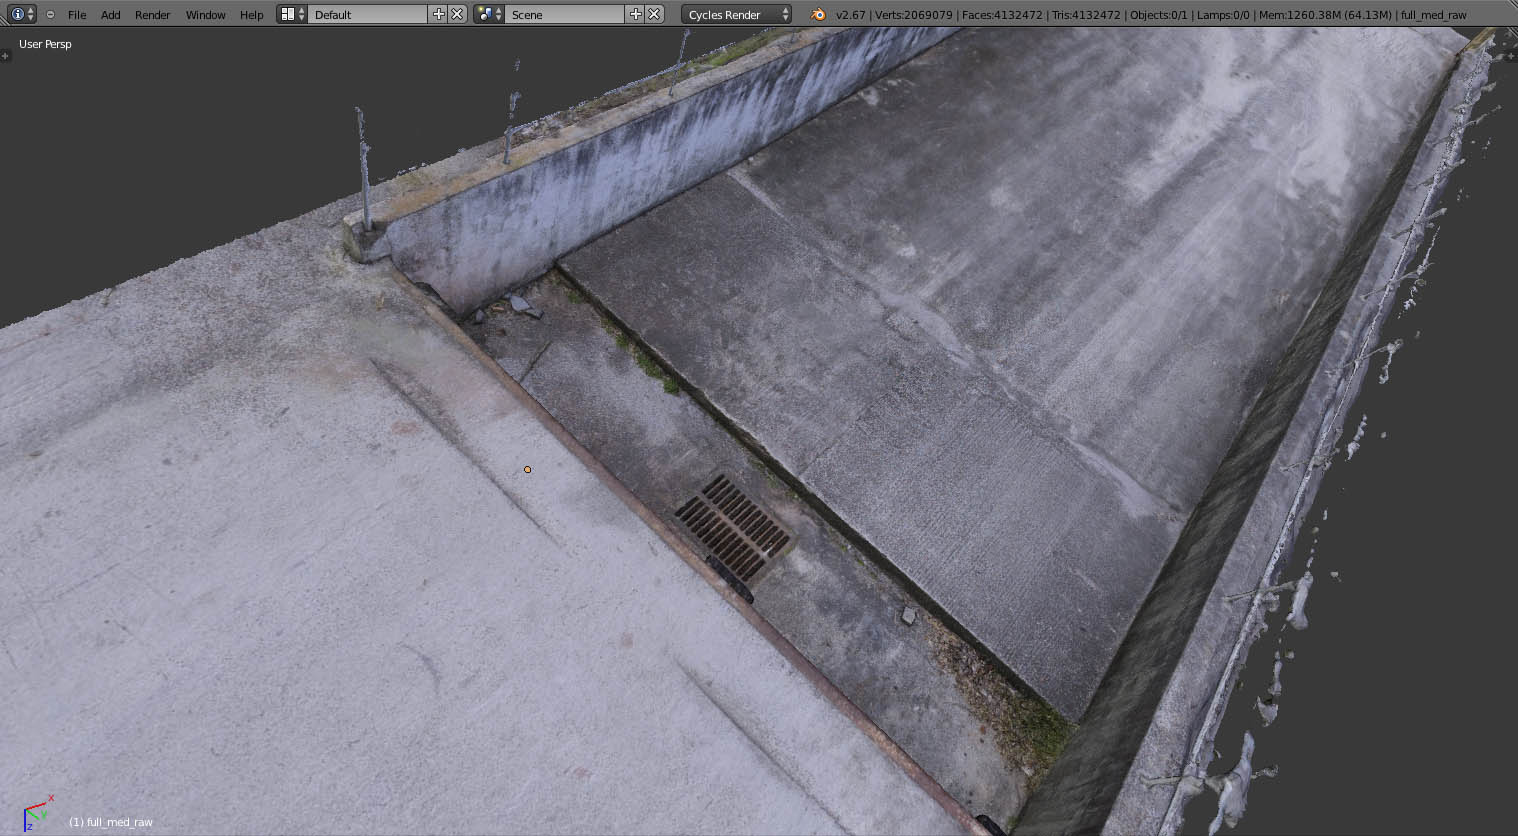
As you can see, it’s about 4 million faces (it was 8 million before I quickly trimmed off the excess I knew I didn’t need). Blender lags like crazy, so hopefully it won’t take more than a few hours to get a lower resolution model created. The texture map here is 4096, which should be enough for everything but close ups.
All of these methods you’re using are really great, and it’s appreciated that you’re sharing your methods. This last couple renders are looking awesome without any cleaning up or anything. Looking forward to more James, and glad to hear you’re feeling better now.
Thanks, frobenius! I was hoping I could just use the decimate modifier to create a lower poly version, but that didn’t give me clean enough results. So I’m retopologizing it by hand. I think I’ll go ahead and upload this environment to Blend Swap as well once that film is completed.
I’m planning a video tutorial on hard surface texturing in Blender, using the dirtmap script, and showing the node setups and how everything works. It won’t be a long tutorial, but just 5 - 10 minute overview to explain the steps involved and show what can be done with it.
And thank you, I am feeling a lot better!
That’s a very detailed texture with its 4K. It would have taken a long time to make this by hand, and perhaps it would have been next to impossible. So your work is really paying off. Outstanding environment.
I agree, I’m not a good modeler at all, and would never have been able to create a mesh with detail like this even if I spent weeks on it. That is one of the great advantages of having a program like PhotoScan; I don’t even have to UV unwrap the model, it will do that for me.
It turns out, I was able to use the decimated version of the mesh after all. Initially, it gave me a mesh with normals facing every which way; even when I tried recalculating, they didn’t get any better. But I found a tickbox (something like “keep normals on the inside”) which helps a lot. It wasn’t perfect, but the decimated mesh not only looks more detailed than my hand-retopologized mesh (using shrinkwrap), but it’s also less than 150,000 vertices and looks good enough to not require baking a normal map.
Admittedly, it would be ideal to have a mesh that has fewer verts, is manually UV unwrapped, has a normal map baked, etc. But I don’t have a lot (or in some cases ANY) experience with those things, and there is another phrase that has been going through my head lately: It doesn’t have to be perfect, it just has to get done!
I decided to create an 8k texture for the environment mesh, just to have the option for CU shots. I can always switch to a 4k for wide shots. I’ve also been working with the particle shells today. Look for a video update this weekend!
I had a deadline for another video get pushed up for completion way sooner than I expected, so no video update last week (hopefully this weekend I’ll have time to render one out, though).
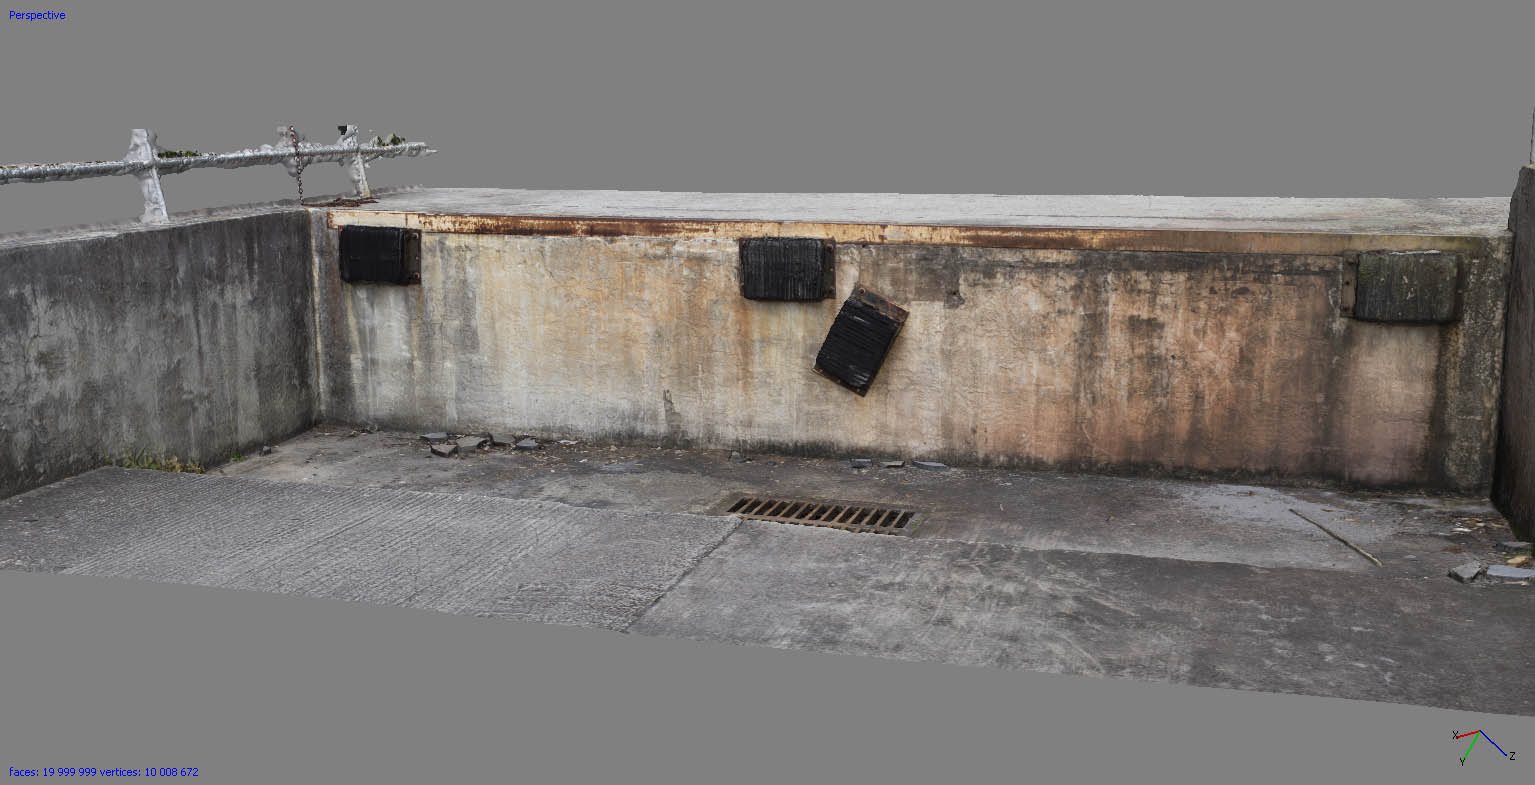
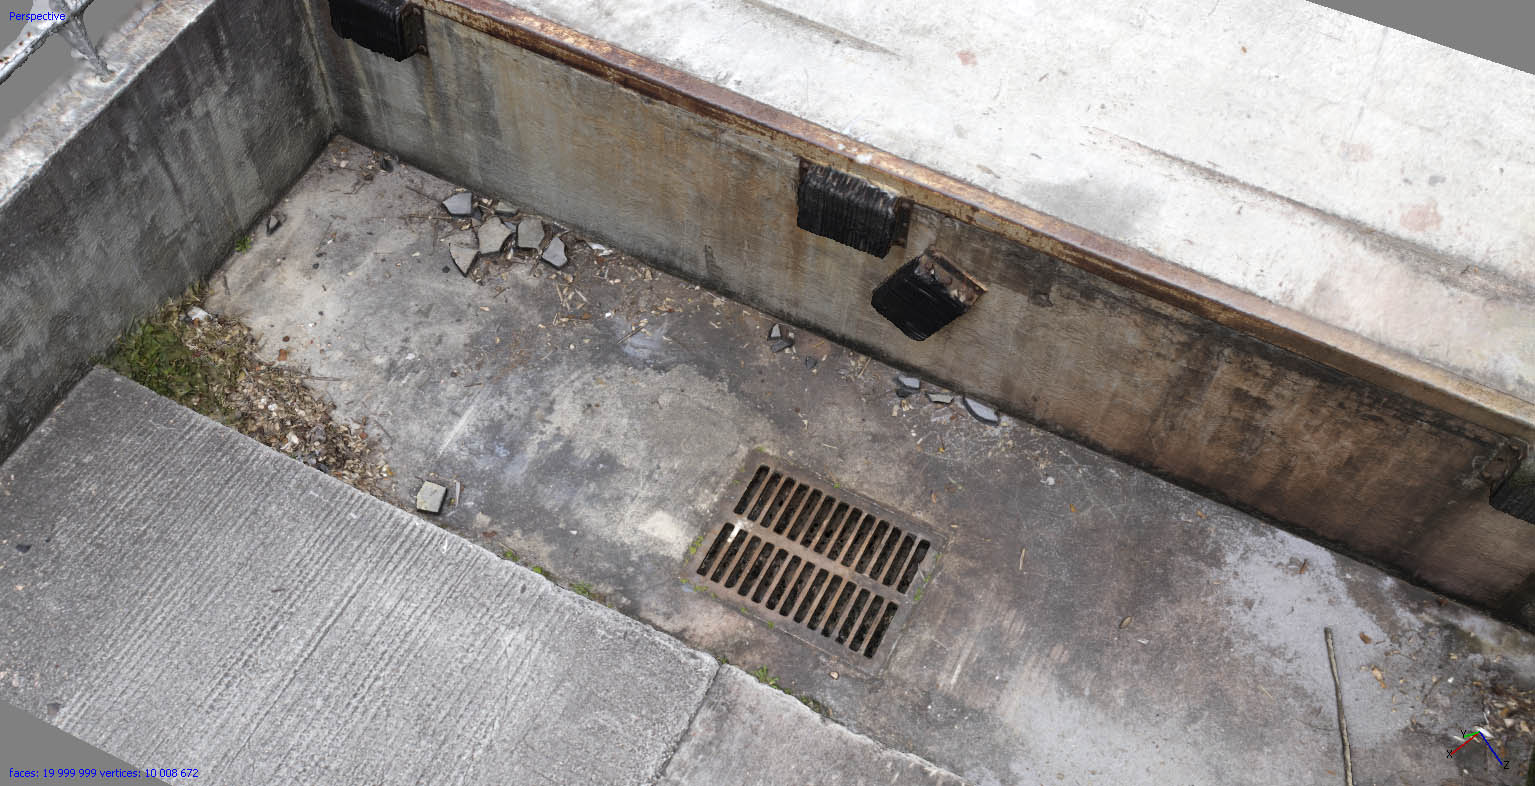
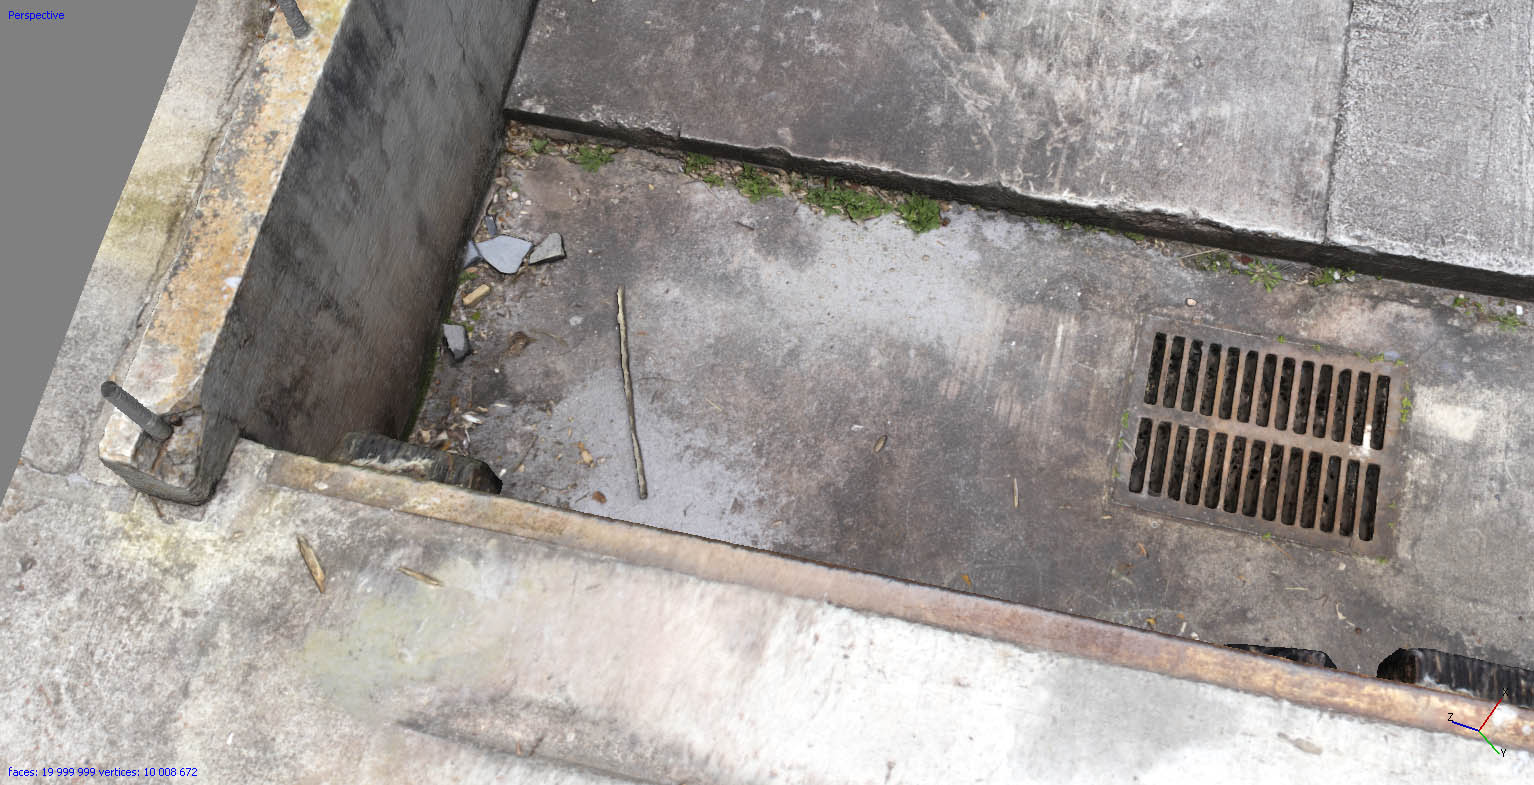
Some good news, though; the high resolution mesh has come back from the workstation in Algeria. All 20 million polygons of it!
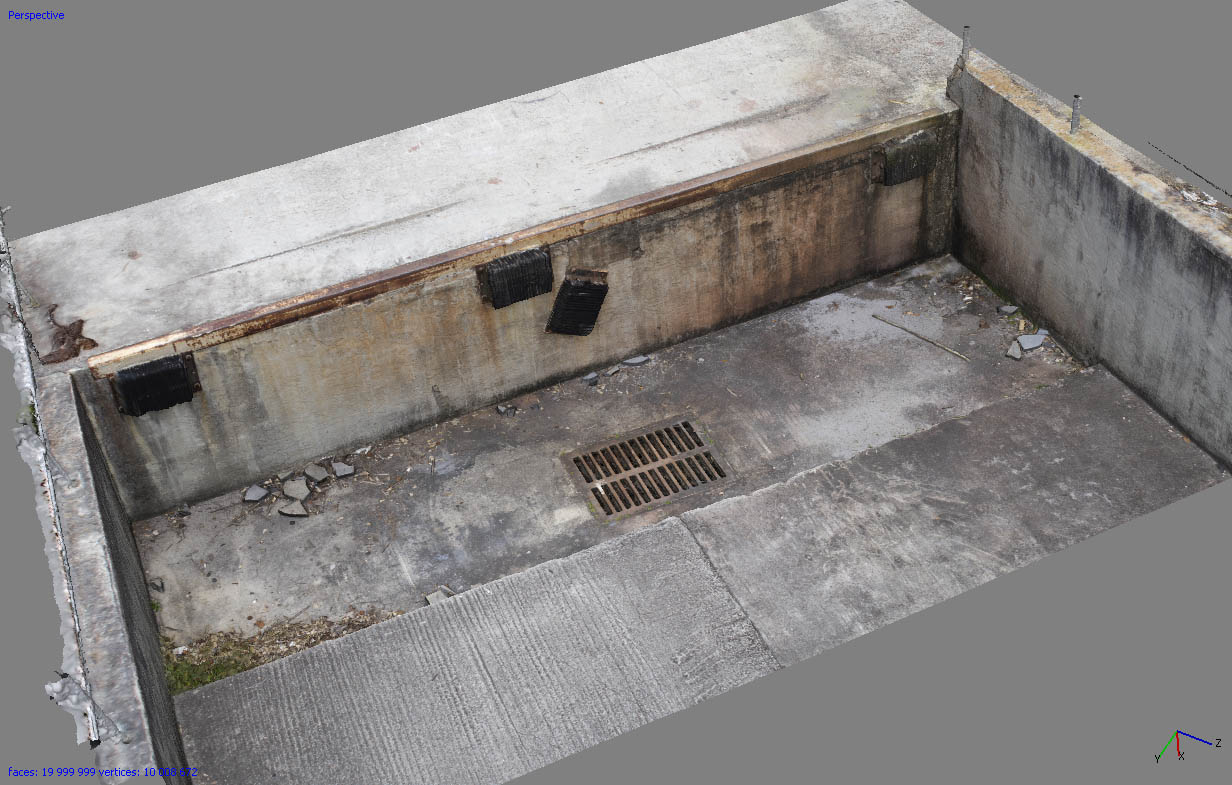
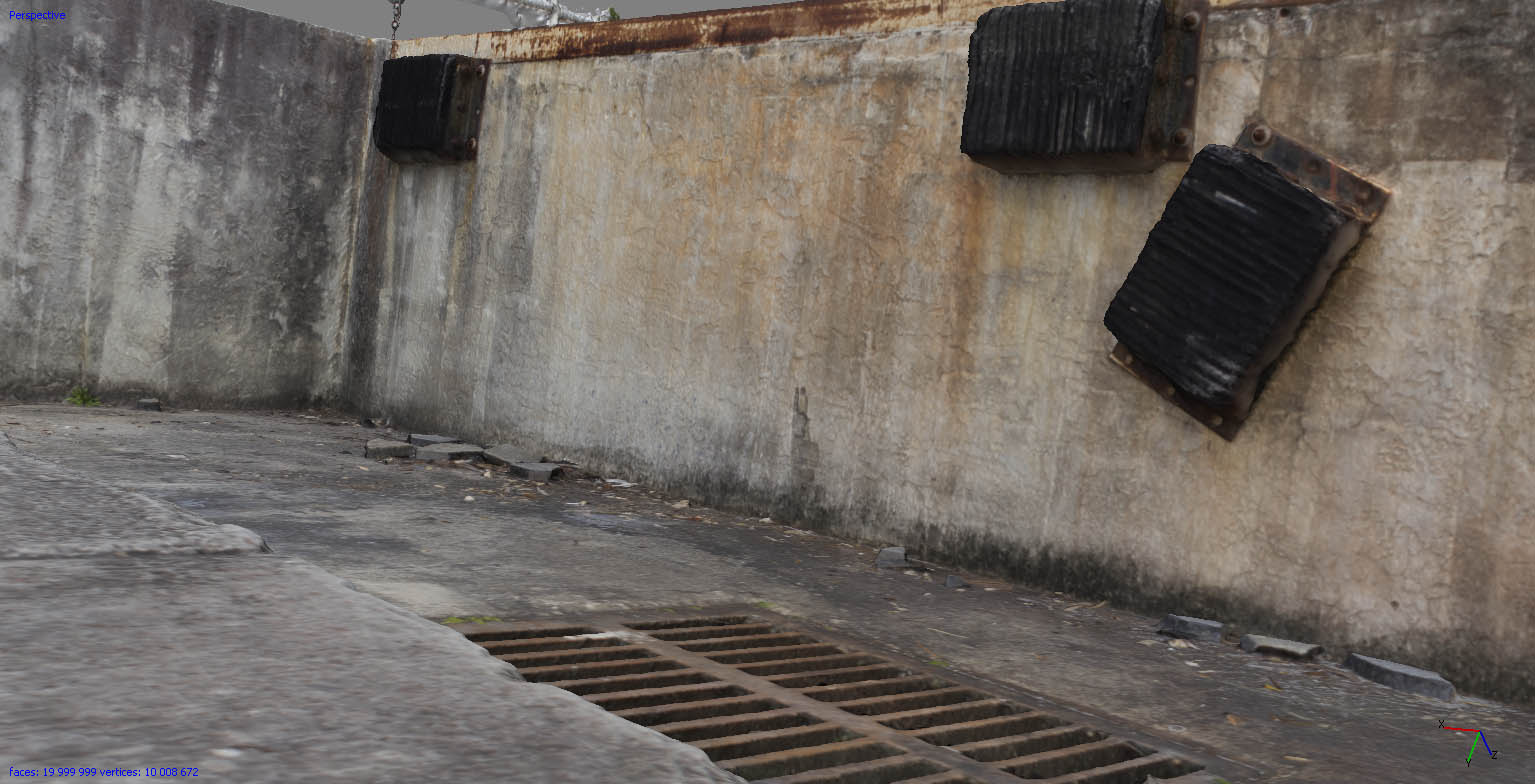
There is actually no texture applied yet. All the color detail is coming from vertex colors only! I’m very impressed by how much detail PhotoScan has been able to recreate from the photos The fact that the metal grate is correctly recreated astounds me! It is a shame the hatch is going to be placed over top of it.
The mesh is so large, in fact, that I’m going to have to either bring it into Blender in multiple pieces, or have someone help me with importing it all in one piece. It took over 20 minutes for me to import the whole scene at medium resolution, and that was only about 4 million faces! This is about 5 times as big.
This really is an interesting project. I’m really impressed with the quality that is coming through. But I’m curious regarding the time and expense to accomplish this.
The process is still a little confusing to me…
- You take all kinds of photos at a real world environment…
- You then bring them into the photoscan program, and it plots a bunch of tracking points, and essentially turns it into a 3d environment.
- Then you have to upload these and they, or you (if you have the appropriate hardware) somehow render the mesh and textures
- I’m assuming you then have to turn this ultra high density mesh into a lower poly and then bake the highquality textures onto it??
- Then I guess from there you have a 3d environment that’s manageable and renderable.
Am I understanding this process correctly or am I way off on this James?
Damn, this is really a class of its own texture quality, James.
I know you said that it is vertex color only at the moment but once you have baked it this will be such an awesome realistic texture. The problem now seems - how to bake this onto a low poly mesh. I guess the mesh from the workstation has no UV map? And I wonder how to UV unwrap this to something useful by hand. Perhaps you can do some highpoly to lowpoly baking after you’ve made a lowpoly and unwrapped the lowpoly version?
@Harleynut, I also understood the process exactly as you described it. But depending on the baking solution it is really worth that extra processing time.
Harley- Thanks for the kind words! To answer your question regarding expense, it’s cost me about $40-50 for the PhotoScan processing, and since I’ll be using some assets from the Blender Cloud to help me, it will be about another $60 for that (and also to support Gooseberry). So around $100 for this video total. The Blender Cloud assets will of course help me on many other projects as well, so I feel that is a good personal investment for Classy Dog, anyway.
About the steps, you’re pretty much exactly right. The only thing I want to clarify is that the processing is normally done on ones own computer; Agisoft doesn’t currently have any services for processing the model for you. However, because my computer would never be able to process a file to this degree, I’ve enlisted the services of someone else with a copy of the program and a very powerful workstation. But yes, normally you would do this all on your own computer.
I can explain the steps a little more in-depth for you: first you load your images, then PhotoScan will analyze your images to identify points within each image. Then it will match points between photos and determine where in space the camera was for each image. Once this process is complete, you will see a point cloud of the scene, and each camera position. The more defined and dense the point cloud is, the better your final mesh will turn out. The next step is mesh generation, which you have several options for computing. If your images were all taken along a single plane (such as aerial photography, or of a wall), then the height-field mode is often a good choice. If your images were taken from many different orientations, such as a person or environment, then arbitrary mode is necessary. Height-field has the benefit of being much faster to compute, but without the ability to recreate objects with multiple axis’ of depth.
Also before mesh generation begins, you specify quality level (ultra high quality uses the full resolution of your images, each level lower uses 1/4 the detail of the previous level). You can also tell PhotoScan to decimate the mesh to a certain number of faces after generating the mesh; setting this number to 0 disables decimation.
You can learn more about the processes of PhotoScan from this page: http://www.agisoft.ru/wiki/PhotoScan/Tips_and_Tricks
minoribus - Thank you, I’m very happy with how good the textures in this textureless model look! You’re right as well, the tricky part will be creating a lower-poly version of this model while still retaining the details. I have no experience with baking high-poly to low-poly, and because I’m trying to limit time spent on this project, I’m hoping I can use the decimate modifier to quickly lower the polycount. But I may have to find a Blender artist to help me with this task, partly because of my aging desktops lack of computer power.
You’re also correct in that the file I received from the workstation has no UV map. PhotoScan does, however, have the ability to generate its own UV atlas before generating texture maps. It does allow for you to setup your own UV’s in another program, though, so that is a handy feature. The texture in the medium quality, full environment mesh (post #47) was generated automatically by PhotoScan.
In any case, once the lower-poly mesh is ready for texture generation, I’m hopefully the textures will look even better in the closeups. I shot the original images with my prime lens at f-8 to obtain the best sharpness I could.
Hi, James, thank you for taking the time to explain all this in such a depth!
Would it be very difficult to post a screenshot of the texture atlas, you’ve mentioned? I really have no idea how this will look like and in which way this could be useful. I would expect something like I know from photo stitching for panorama photos. But I’m sure I’m wrong with this expectation.
Here is the UV layout of the full environment, minoribus. I had not even looked at it until you asked:

As you can see, the biggest chunks of the model typically get unwrapped well, but then many of the smaller areas get divided up. It’s certainly not an ideal unwrapping, but the results seem satisfactory for my uses.
Edit
Although now that I look at it, that is pretty bad! Maybe I will go back and try adjusting it a little.
Thanks for posting that, James. There are big chunks in this texture atlas, which look good, that’s mainly the base of the range. It appears to me that everything that was farther away is blurred in the texture atlas. But if you keep the camera at the base that might work well.
minoribus- It’s possible that some parts of the texture are slightly blurred, but for the most part I think it is fairly sharp. I believe the blurry parts of the texture map are the areas between islands in the UV map. I’ve not noticed any bad blurring in the model when in texture view.
I’ve rendered out a couple tests with the empty shells. The first part shows Liero’s script in action, and the second part shows just a simple RB simulation. I only lined up simple planes to act as passive rigid body surfaces, so you will see shells floating or sinking in some areas. This was just a test.
One thing I’ve noticed is that when using Liero’s script, particles seem to lose their initial velocity. You can see in this video, the shells being ejected are gradually thrown with less and less force, to the point that they begin hitting each other. I don’t know how to solve it, other than avoiding it completely.
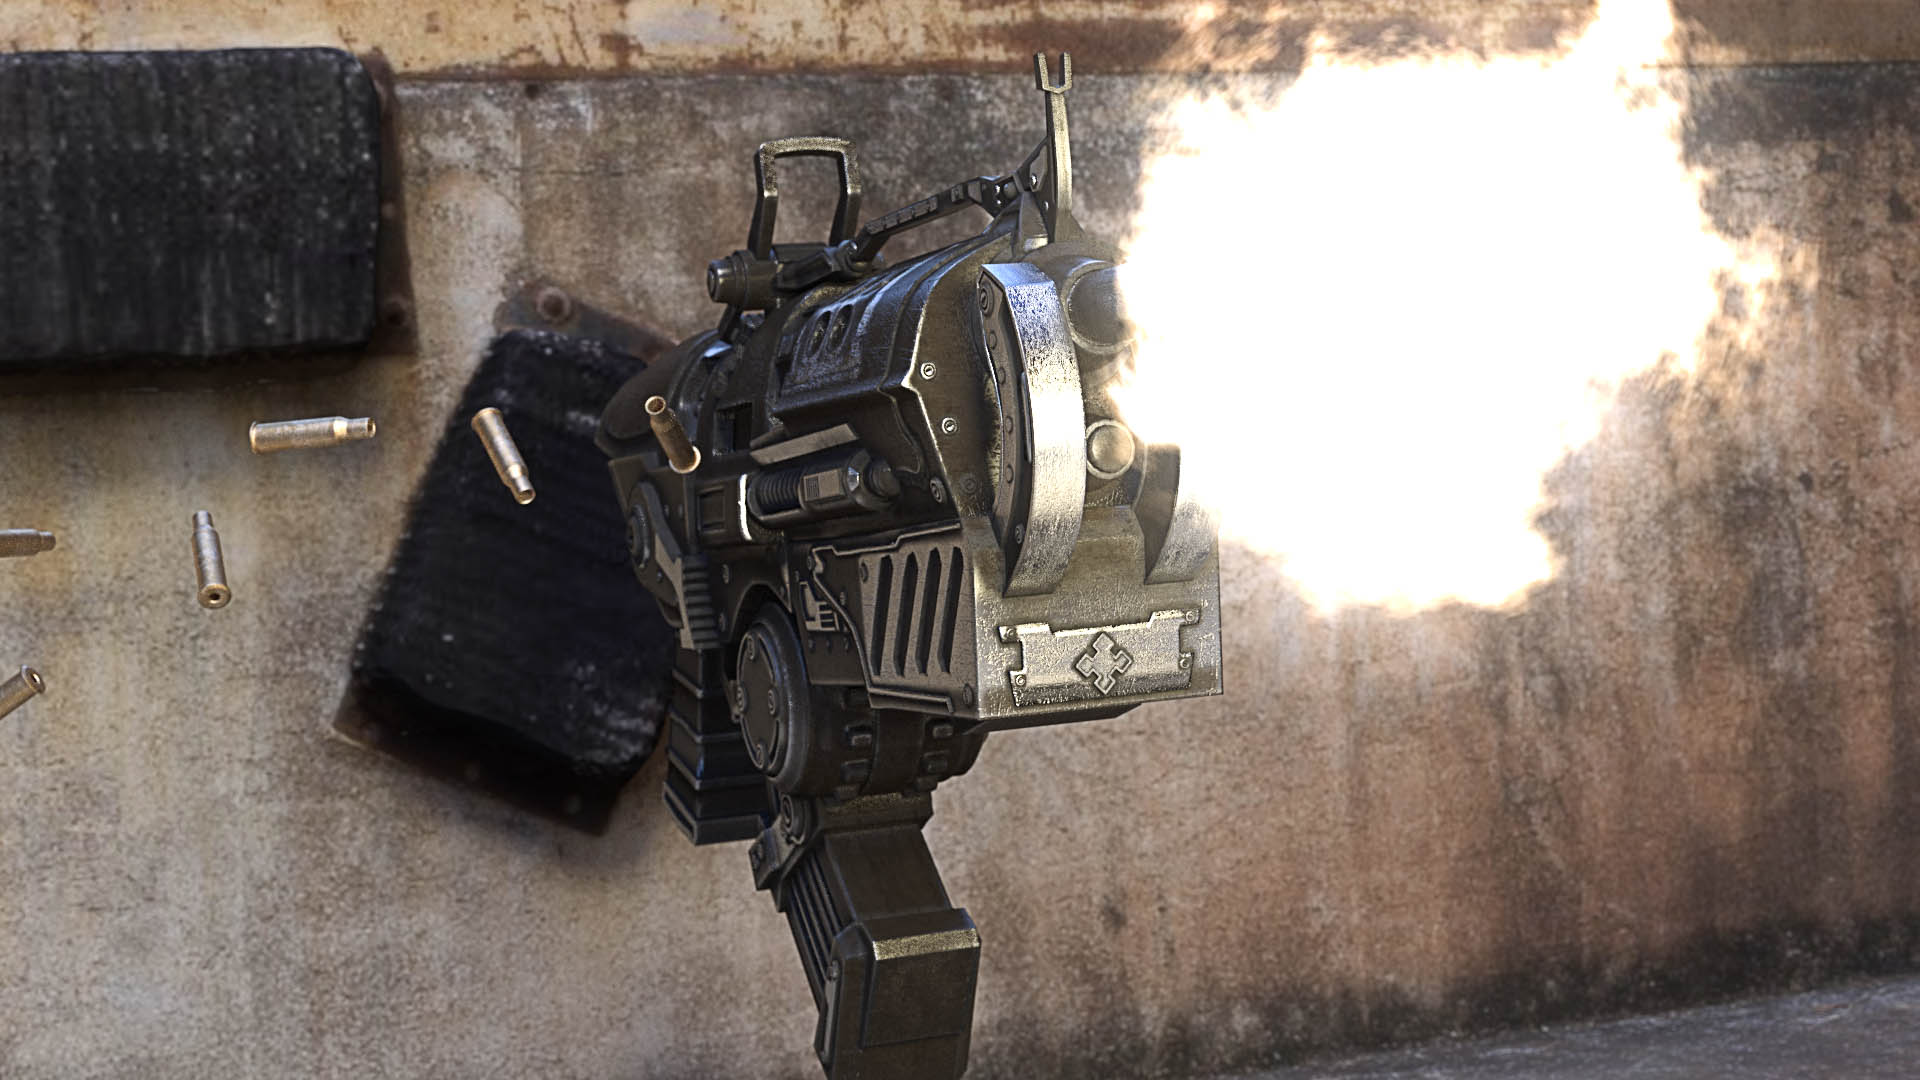
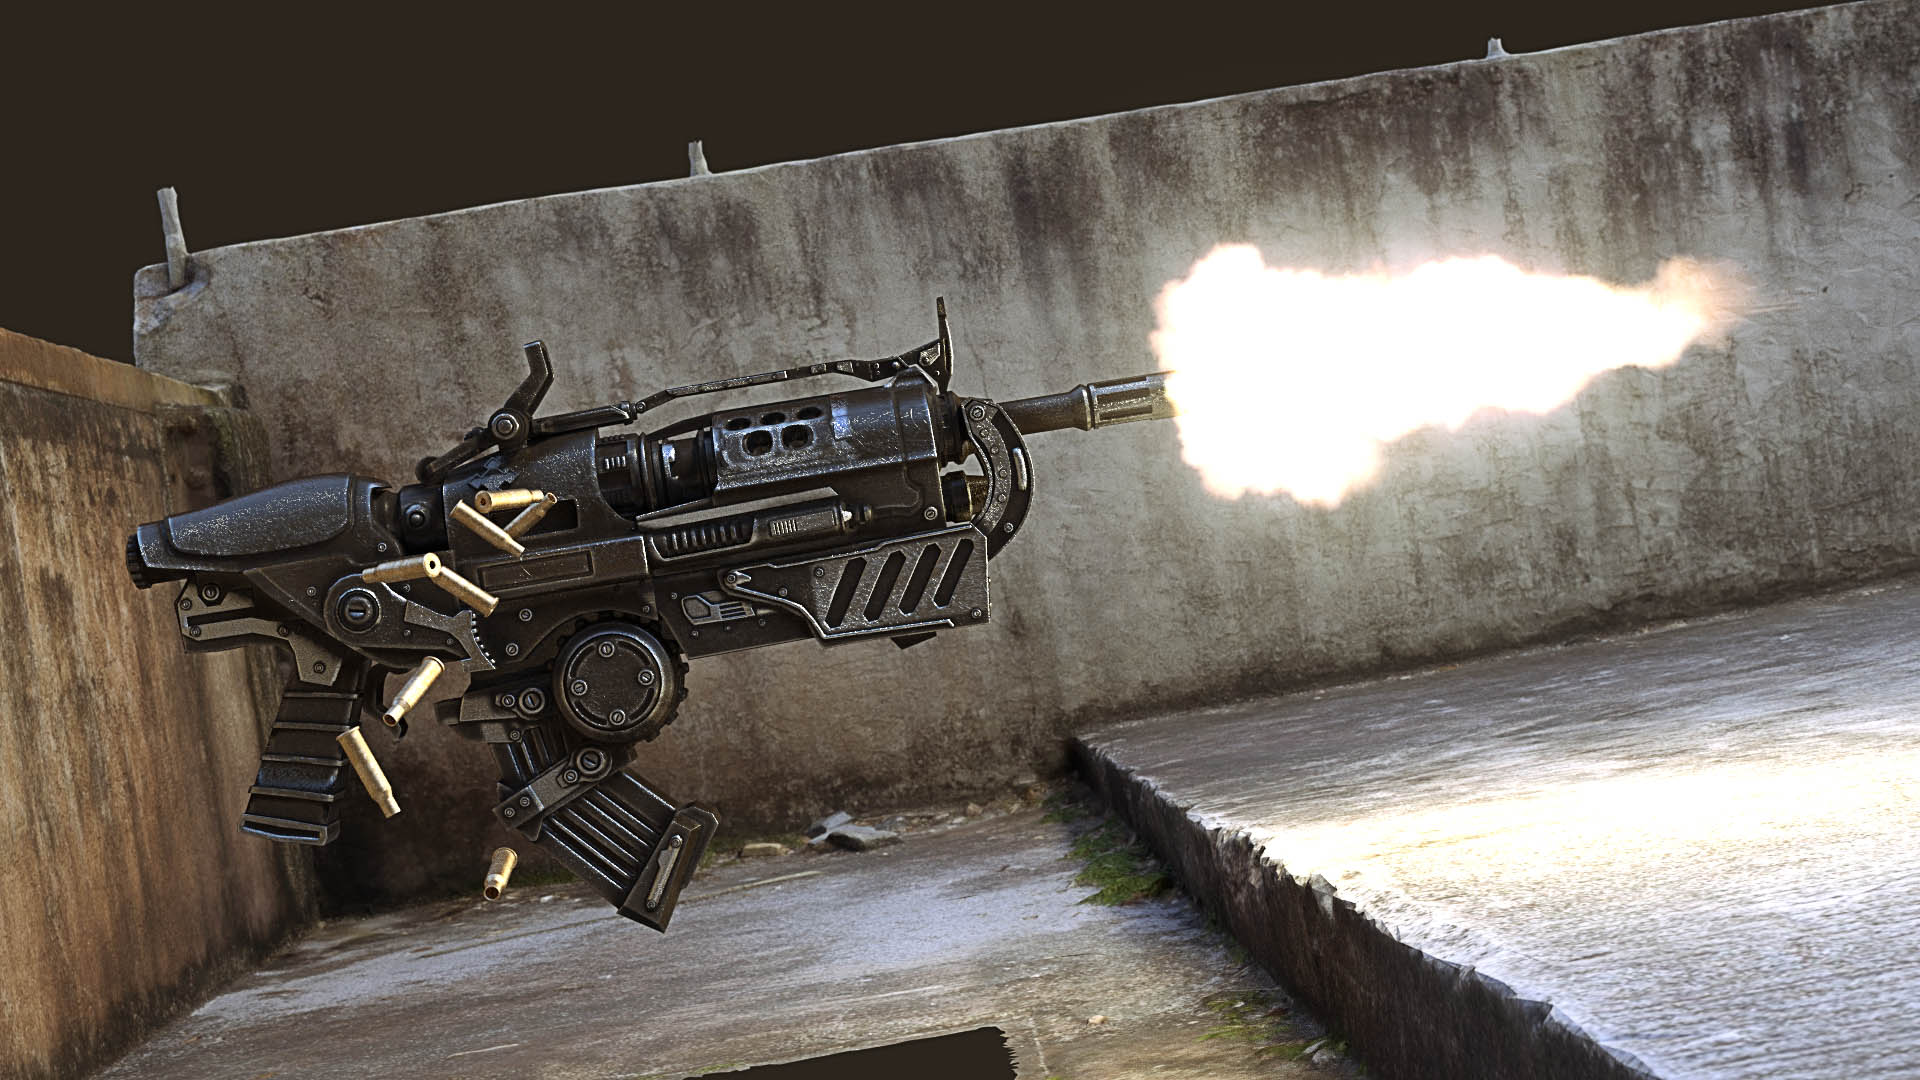
I’ve also been testing muzzle flashes tonight. The first two flashes are made using Fractal Noise for the shape of the flash, whereas the third one is a flash from the Action Essentials kit. I’m satisfied for now, but want to work on refining the shape of the flare for the final video.
I’m also not sure if I want to render the video in 720 or 1080. I am beginning to lean towards full HD 1080, because I think the textures will hold up well. But will enough people care to watch it in full quality to make it worth the rendering time? I’ll continue to think about it.