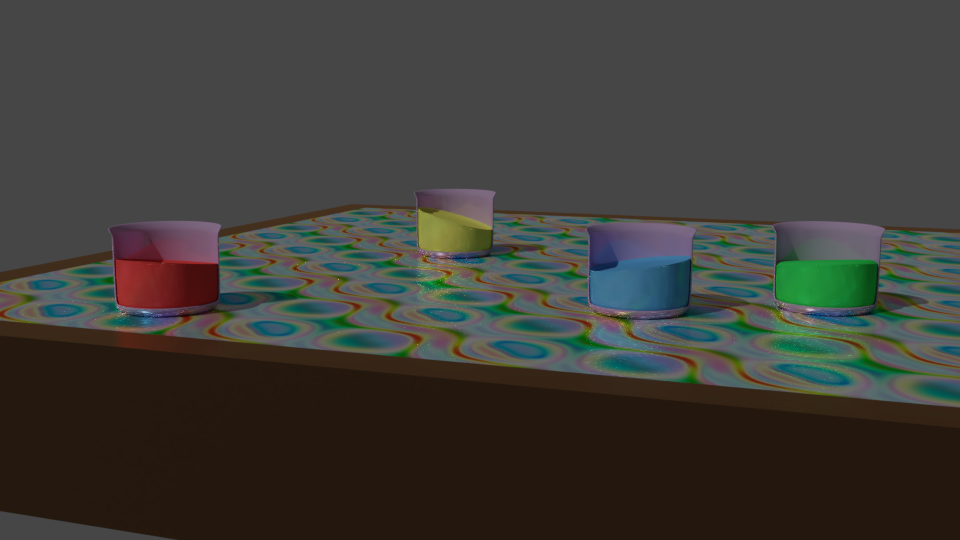
This is a little experiment I have been working on to see if I can simulate fluid moving in a beaker as you accelerate the beaker. This required a new node to measure the acceleration value and direction, so I would know what to do with the fluid. When you accelerate a vessel with liquid in it, the liquid tries to stay still so will move up the side of the vessel away from the acceleration force, the opposite side will move down. When you stop the vessel, the liquid will return to a state of rest (horizontal top surface) over a period of time depending on the final acceleration and the viscosity of the fluid. The hardest part was making a node that did this and that automatically kicked in the “settling stage” when the vessel stopped moving.
Here endeth the physics lesson.
This was the first video:
Here is the second:
I have made changes to the fluids’ viscosity here and gave the green liquid a convex meniscus, rather like mercury. (hmmm, no mercury emoji…)
You can see that I have to use Execution Triggers to get this to work properly, I am finding I am using these more and more these days. All I have had to do is keyframe the position of the beakers and everything else is Clockwork Magic. I am quite happy to explain all this if anyone is interested. What is new for me is to use the three nodes at the left of each set to compute the location of the object on current frame, one frame forward and two frames forward, this is fed into the Expression node, which uses boolean maths to see if they are all the same and if so, this triggers the “settling stage”.
I am not ready to publish the new node on my Old-GitHub site yet as there is still a lot more testing to do.
Cheers, Clock.
EDIT:
The fronts of the beakers are missing on purpose so you can see the liquid, of course it would all spill out if it were not for Clockwork Magic!
That’s looking really cool Clockmender. I think that the initial “fluid up the side” is far too instantaneous. Is there a way that you can blend the stationary state with this “fluid up” state… even just a few frames of accleration?
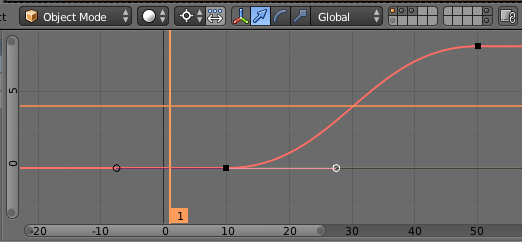
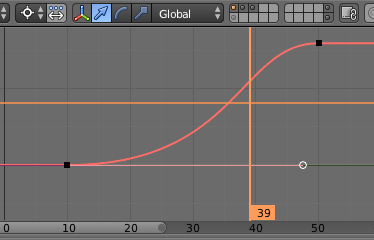
Yes, I have been looking at that - much of my work initially was to sort out the maths, a method that would work with AN and a mesh build that worked. Now I am concentrating on making it more realistic, the true acceleration of the animated object is measured, that needs to be controlled for a realistic animation. The first thing I did was to look at the handles on the F-Curves for the animated object, here are two example:
The first image was the handle setup that Blender gave me when I just keyframe the animation, in the second I moved the right handle over so the acceleration was more gradual - that way the fluid doesn’t jump up the side of the vessel so fast. In reality I think I also made the fluid move too much, but that is just an adjustment of the Scale Factor on the node. With the revised handles, the fluid rose up the side to the maximum height over 25 frames instead of only 5 - that may be too slow, so somewhere in-between would be a better option. It’s a case of getting the acceleration and fluid movement to be more accurate. Here is the new test model:
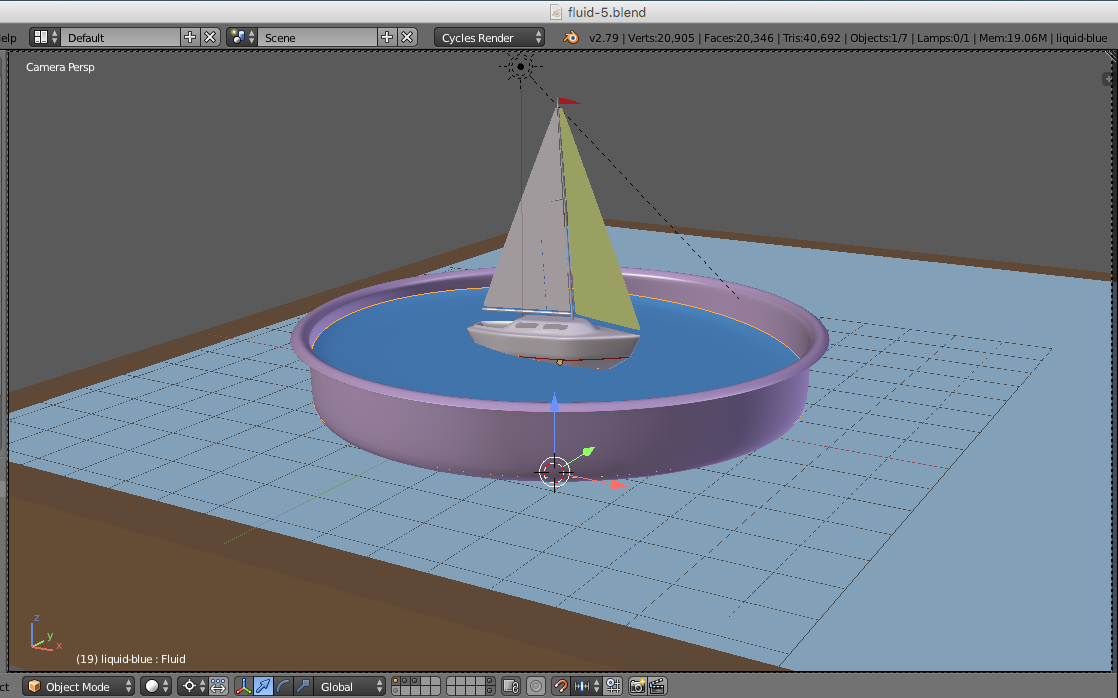
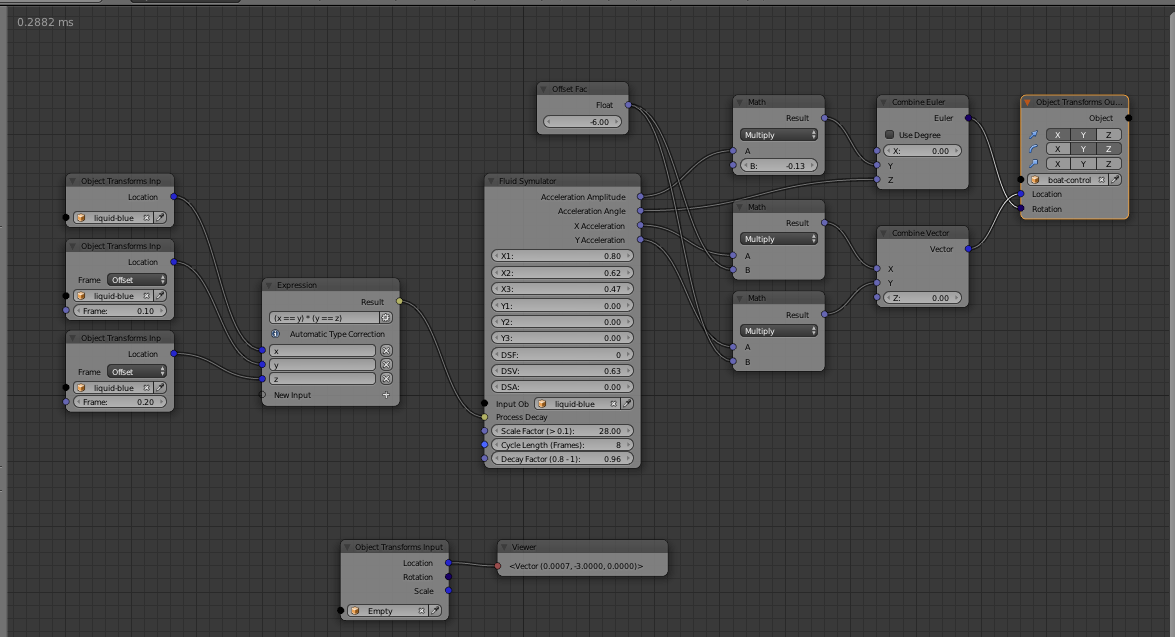
I have taken the new output from the node - I added individual X and Y accelerations to the node - rather than just the resultant value and fed these into the little boat’s X and Y location so it doesn’t move exactly in time with the fluid (video cooking to show this, but no revised F-Curve handles). The boat rocks the opposite way to the fluid in this experiment, which looks right if the boat has inertia against the fluid moving. This is the node tree for this test:
Next video, I have not cleaned up the accelerations in this one so it is still a bit harsh on initial movement, this is not a process change, I just need the settings to be right.
I have added a new feature to the node so you can use a boolean intersect object to get the top surface of the fluid rather than a shapekey - you lose the meniscus, but that doesn’t matter for larger bodies of fluid and it is easier to control, the new node is below in the node tree:
This time I control the movement of the boolean object rather than a shapekey. This also has other advantages, like you can tilt the fluid object and its top stays horizontal, because the boolean object is not moving. I can elaborate if anyone wants to know more.
Latest test video below; I am now on my way to Tresco (you can look up where that is) for two weeks R&R, so no more progress until I get back.
Cheers, Clock
Hope this works as I am posting with my phone.
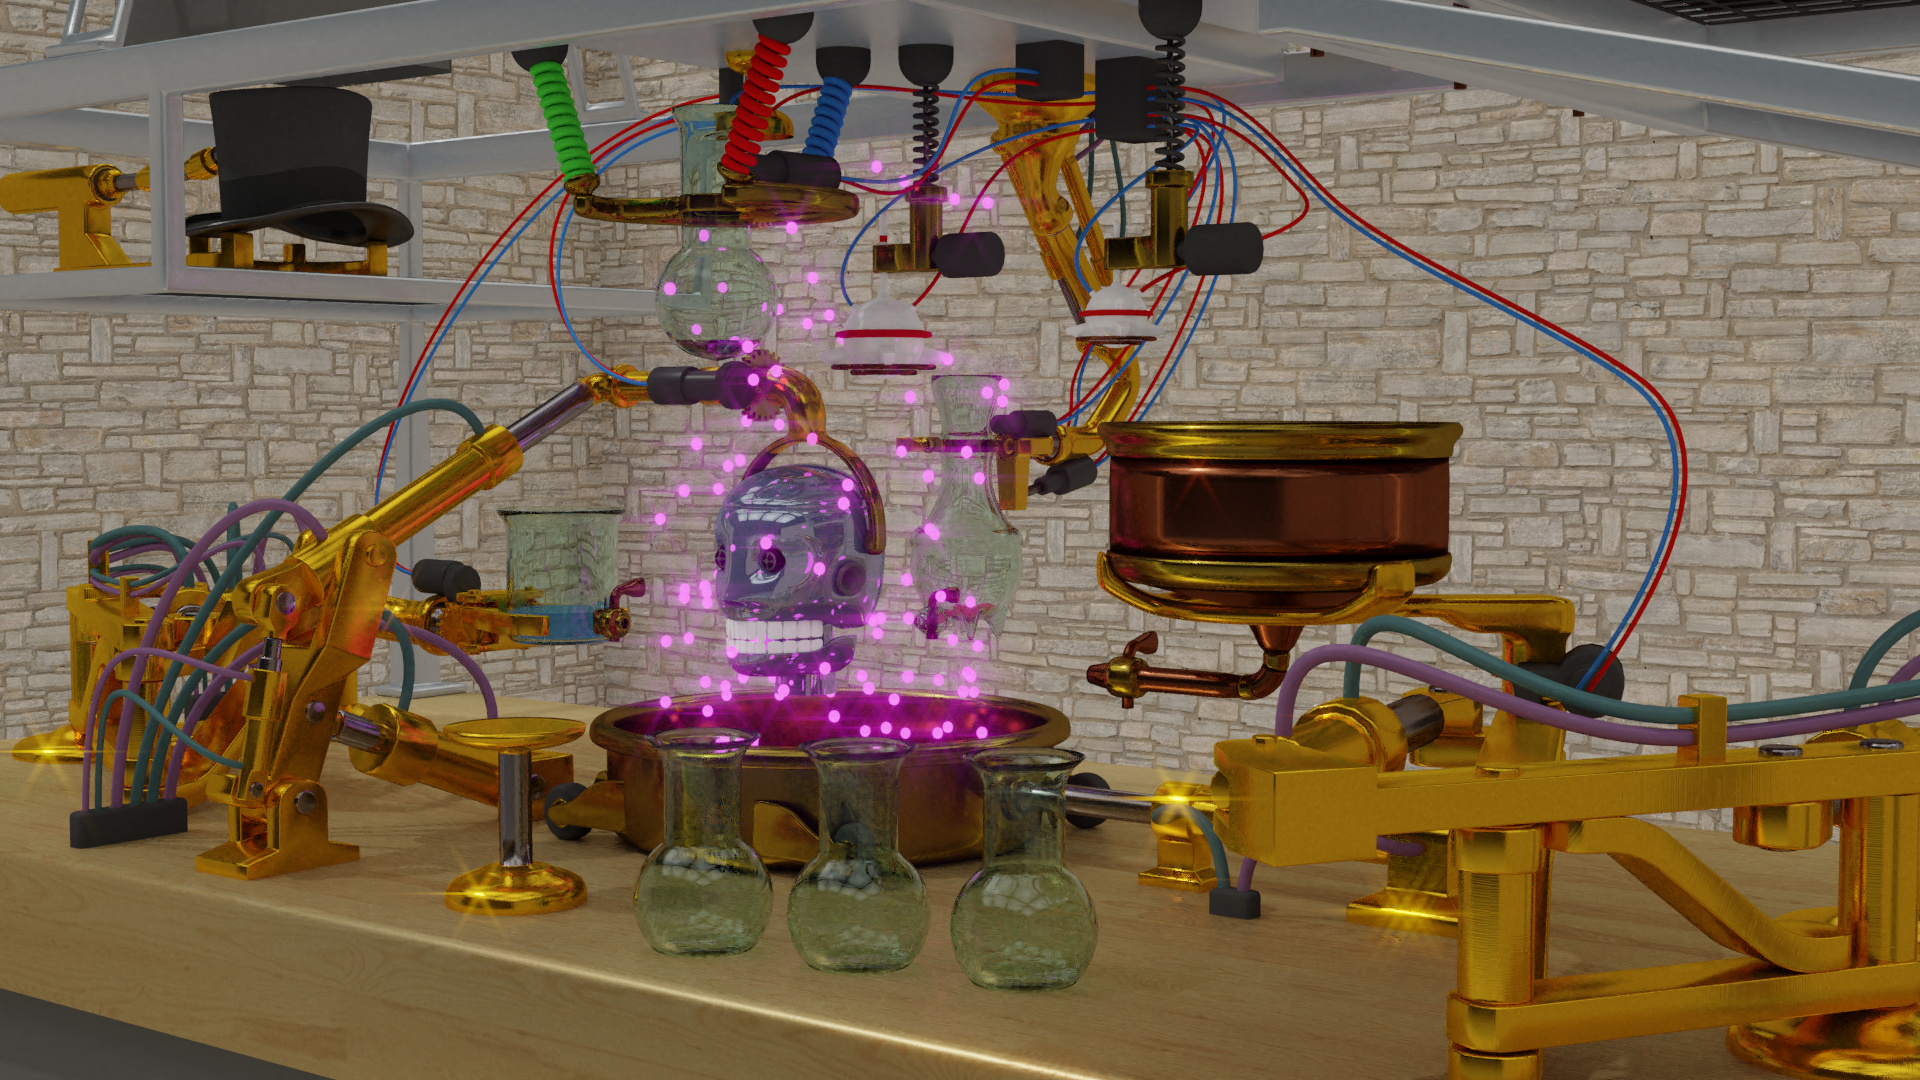
PS I have added all the hydraulic pipes and wires, but not in time to have them on this render so next time you will see animated cables and pipes!! Now there IS a treat.
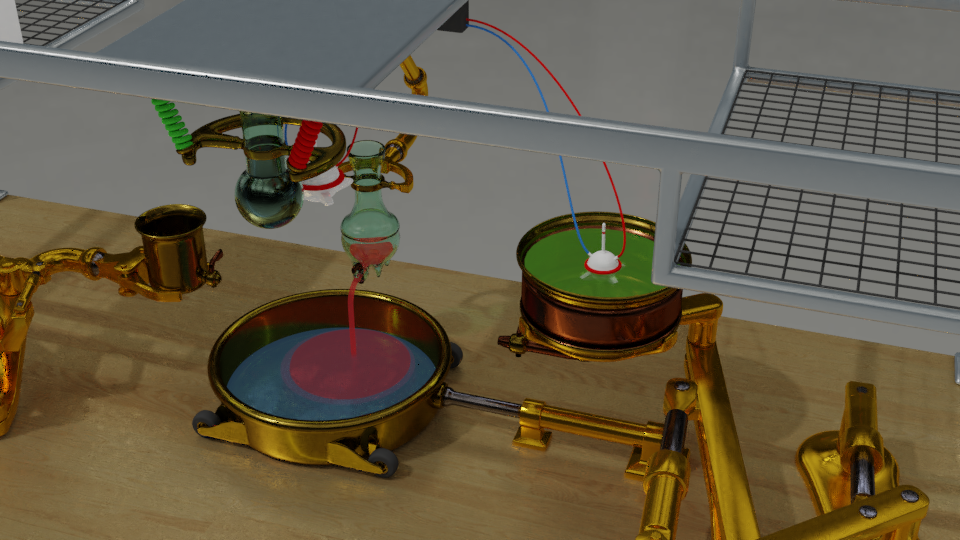
Here we can see all the hydraulic plumbing and the cables - all rigged of course - and the Professor Emeritus of Alchemy, one Septimus Ignatius Ponsonby-Smyth Esq. I believe he works for Cambridge University faculty of New Technologies… He was helped in the building of the machine (hydraulics mainly) by Josiah Pendleton of William Arthur Norris Kinematics Ltd. based in Stourbridge, England.
Hopefully this image will stay at full resolution so you can see the detailed texturing (machine marks) on the brass-work, otherwise it was not worth all the effort of UV mapping everything!
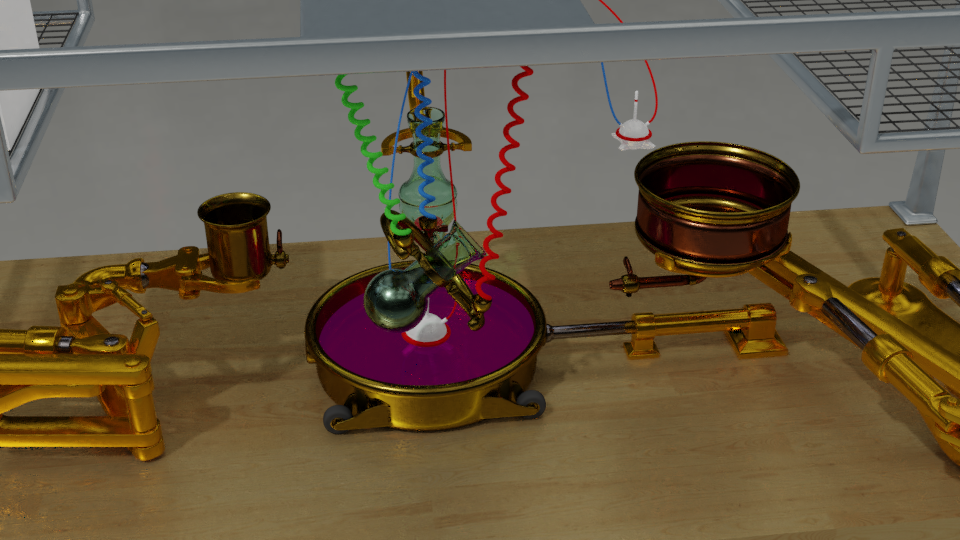
I have also added some rising bubbles using a particle system with a simple sphere object and a coloured “glass” material, with a bit of emission added in. I also added some streaks and fog glow using compositor. I have checked all the rigging and made the animation longer, I felt it was all too fast before, so now it will take ages to render, but hopefully will look better. Before I do that however, I must do something with the camera, I kind of cheated before, so I must do this properly with a point-of-focus object and better pathing of the camera.
Cheers, Clock (descending ever deeper into my own weird little world…)
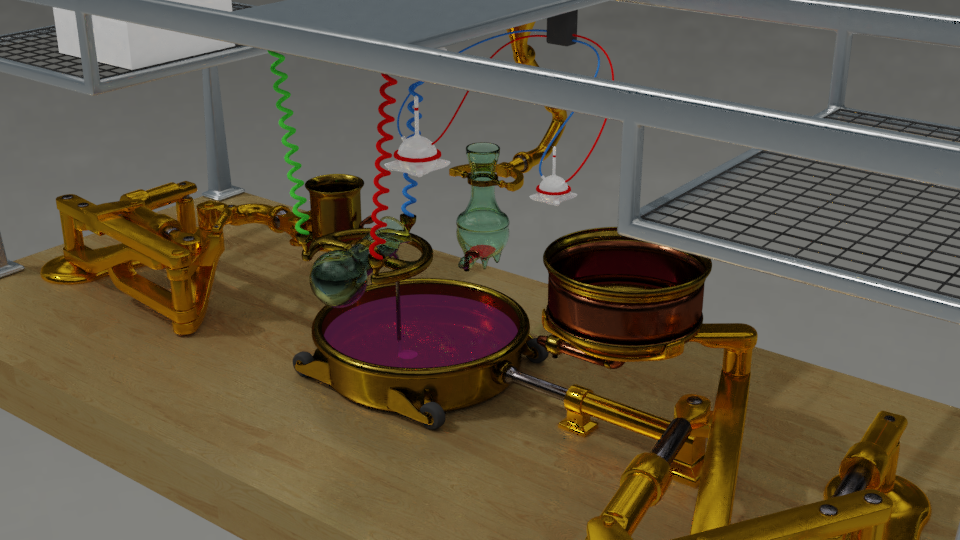
I have totally changed the lighting, rather than light by a sun with a Studio HDR, I am now lighting using 36 square planes, evenly distributed on the solid ceiling with an emission shader:
It seems to work better and be more realistic to a “workshop” type scene. Also the liquids look better to me and the reflections and refractions through the glass objects look better - fell free to disagree with me
I have also added the missing hydraulic pipes and cables.
The animation is now 4800 frames long, so a video render is some time away…
Cheers, Clock.
PS. I have found the bloody pilot emoji at last… Off flying tomorrow.