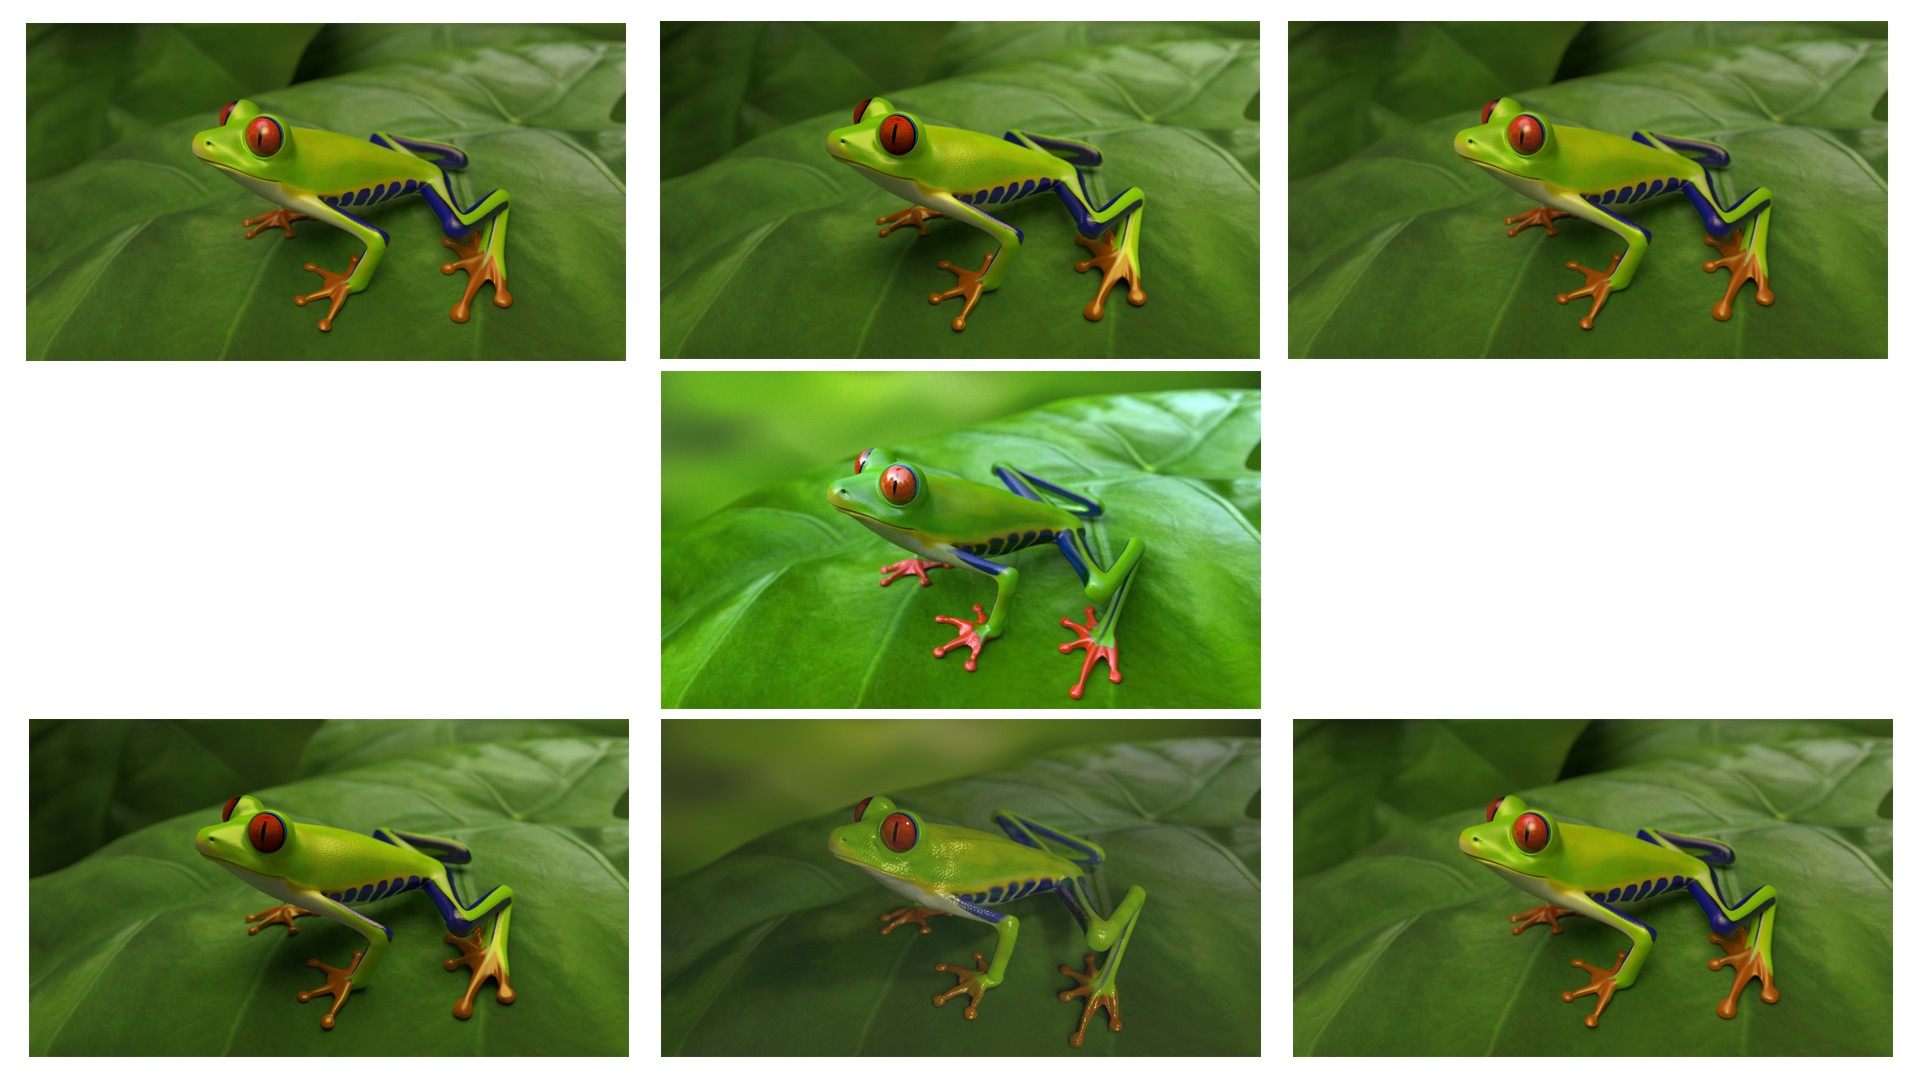
I created a tree frog about 2 years ago and was never able to get the skins “bump” texture to work out. The UV map worked well for applying the skins surface material but not for the small bumps found on the skin so I ended up cheating and used “Camera Texture” coordinates. Using the UV mapping coordinates distorts the texture in some areas and I can’t figure out how to fix it.
Is it possible to have two separate UV maps for the same object?
How do you apply a bump texture on a complex shape like a frog?
I cant tell you what you need but, this pic is really nice. What I can tell you is that the eyes need some gloss to it. With out it being glossy it looks lifeless. The feet need to have a slight touch of a transparent look to them… also lighten the dark line you used for the mouth. But, its a great pic!!!
The bottom middle seems the most natural looking…Only thing the contrast seems a little dull… If you can get it to be similar to the top row that would be great . The eye in the center picture is a little better… to it does capture some detail of the landscape so if you can get the eye a little closer to that…you may have nailed it… So…1st row colors great but skin texture too smooth…center pic little too vivid…but great eye… bottom row …center pic good but a little dull… the ones on the other side are ok colorwise but, theres subtle differences that make the center more natural looking. Im not a good blender person yet but, I used to be a good with drawing and painting
I found out how to use multiple UV maps and have created a second UV map for the skins bump texture, still have some issues with distortion but will figured it out soon.