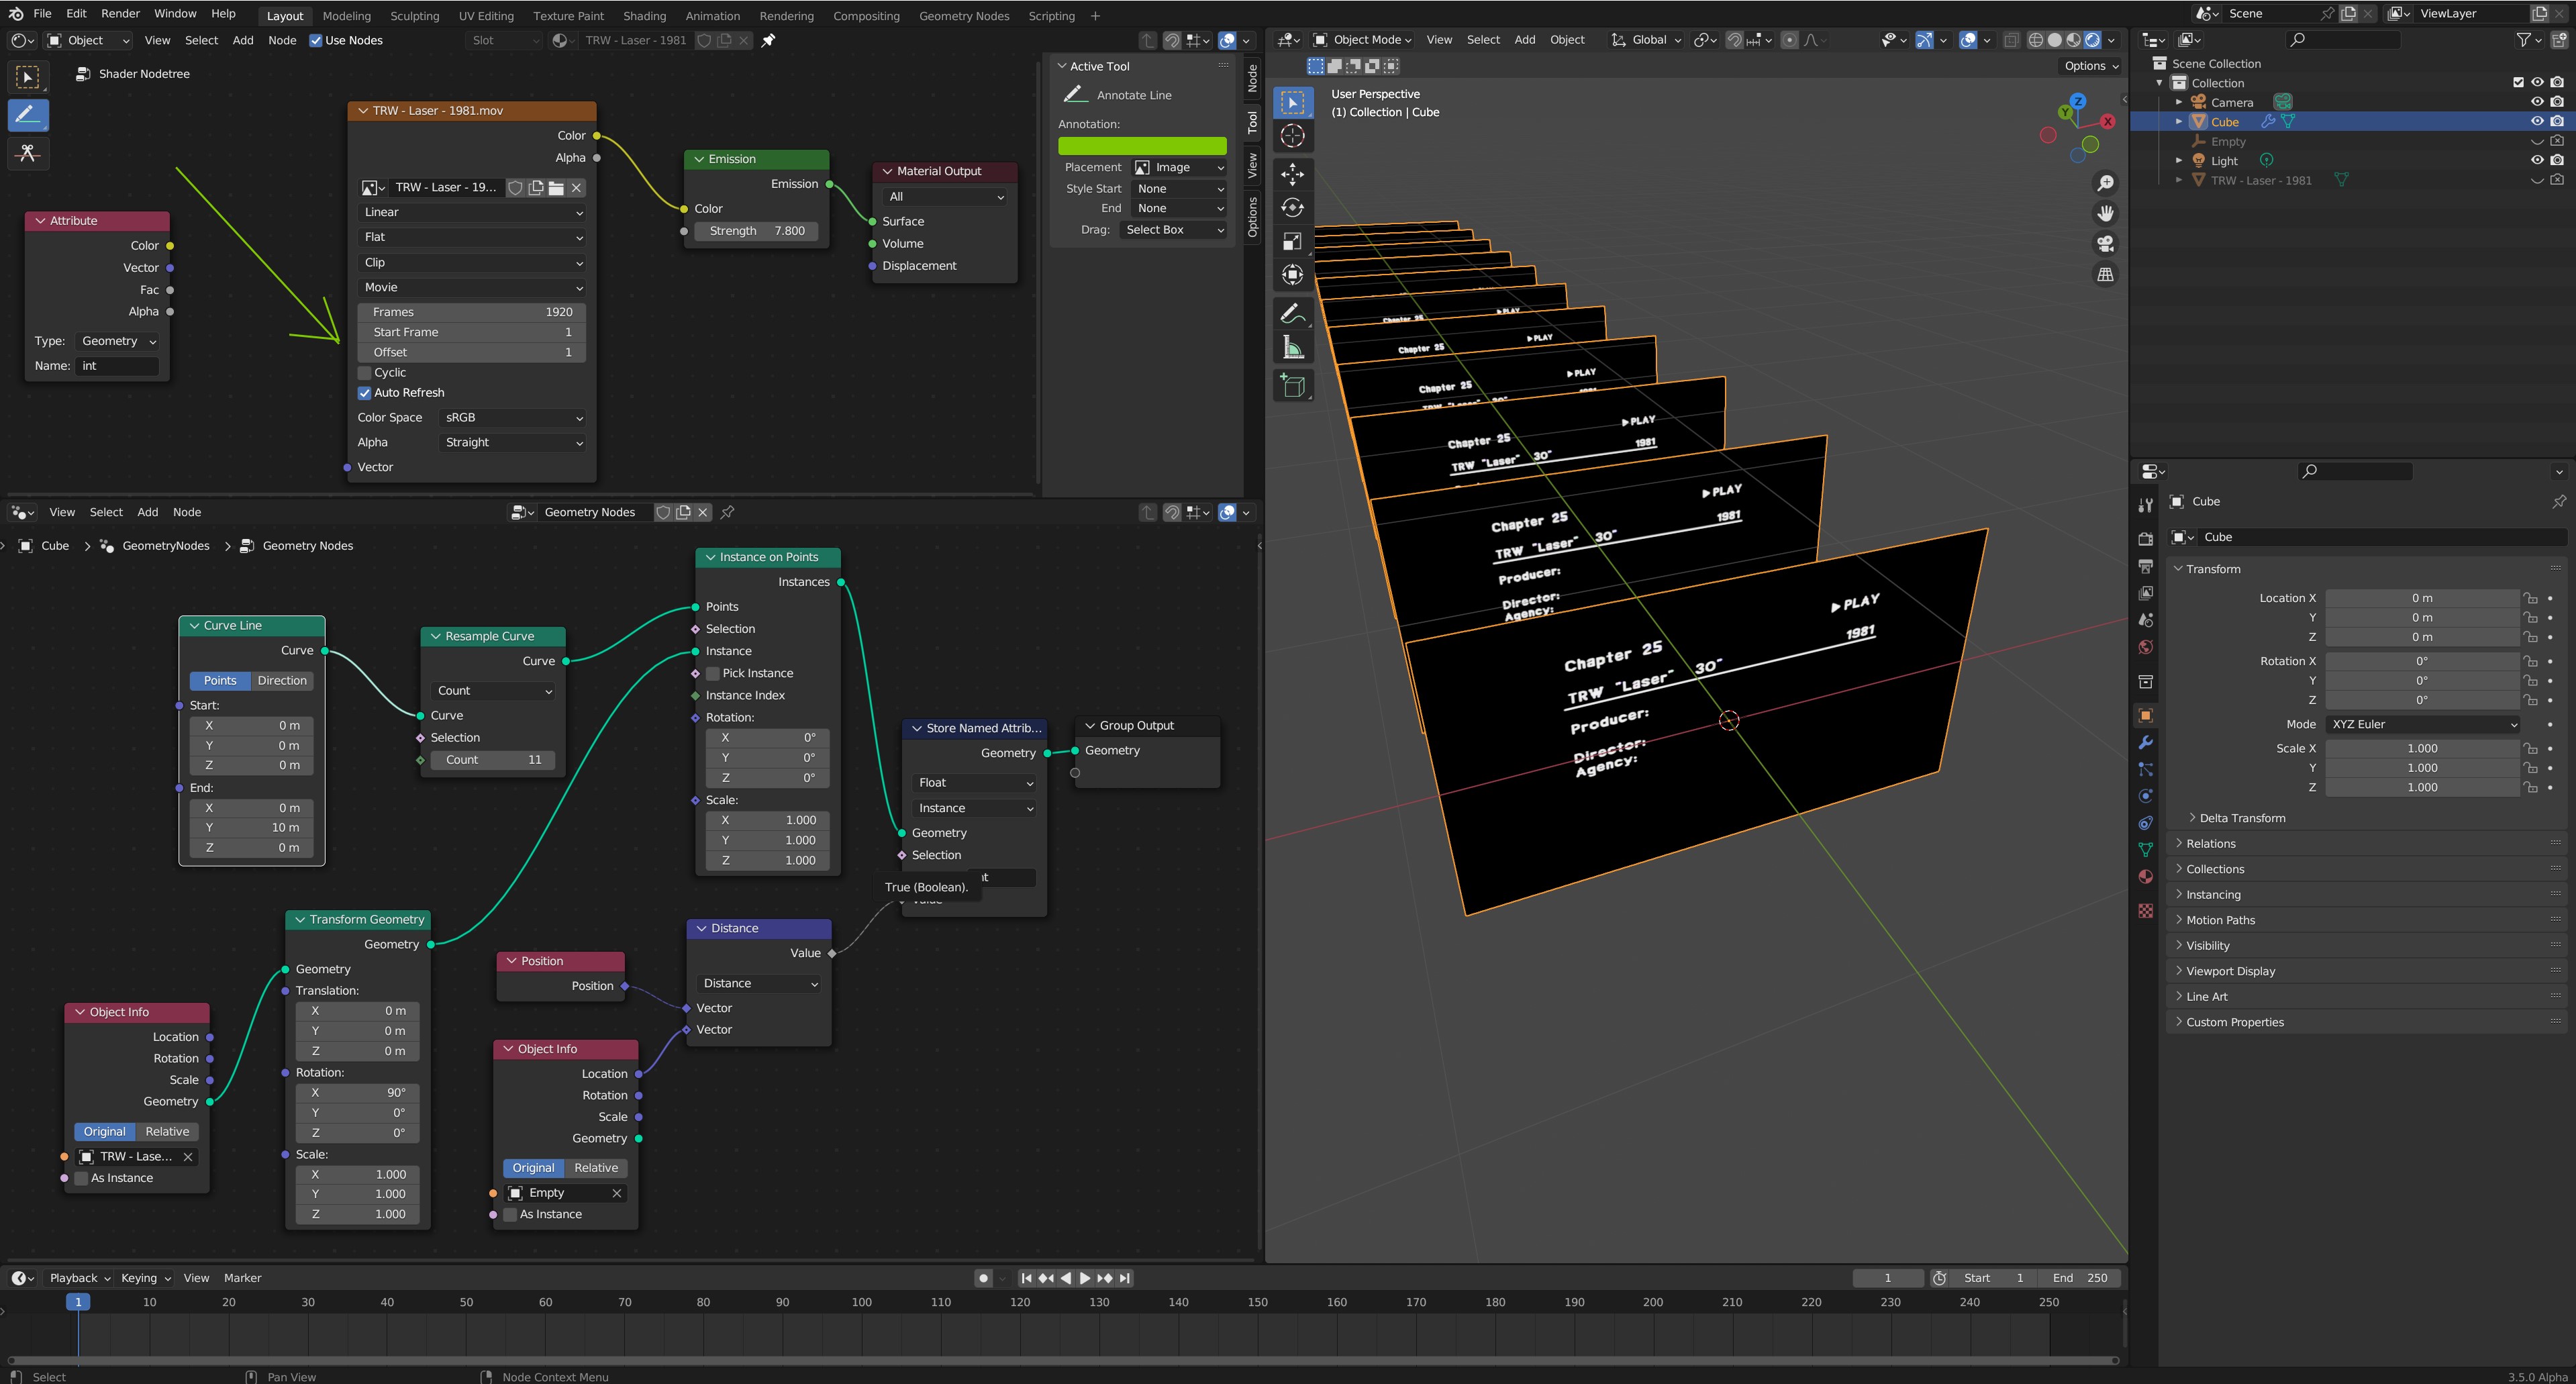
Please take a look at the attached screenshot and the blend file is also attached.
Here’s what i’m trying to achieve:
I want to have an array of images created with geometry nodes.
The source of each image comes from an image sequence.
I want each instance to display a different frame of the video.
important : when i play the timeline, i don’t want the video sequence to play!
I have two problems.
I’m not sure if my geo nodes set-up is correct to achieve this.
A bigger problem: the image texture node in the shader doesn’t have an input for the “offset” value, so i’m not even sure if it’s possible to achieve what i’m trying to do (step the frame forward for each instance).
Actually, i’m sure there’s a lot wrong with my set-up, i’m just a beginner trying to hack something together!
Only way to input stuff into textboxes (without inputs) is to use drivers… No idea how to get at the data-paths of named attributes in GN - But this is something I’ve wanted to find out myself… Any python gurus know how to do that? If you can get at the data-path of the input attribute then this should be doable with some driver math.
The other alternative would be painful - you’d need to make a image which has the sequence stacked so it’s a very long column image , then you index into the image using a squashed UV frame… So, it’s possible, just not something I have enough patience to attempt.
Yet another alternative is to use the Import Image as Plane addon and then just drag the whole sequence and arrange it manually - also painful.
Hum, unfortunately it’s not possible to really control image sequence like you’d want.
Even If I didn’t look into that , I’ll try to use UDIM : having each frame as a UDIM tile, and make a geo node setup that offset the UV depending on a value , to access a particular image.
It should work, but then it’s unclear how blender will handle, is every frame going to be in the memory ? only those which are visible ? ( given you don’t display all the frame at the same time ?)…
Worse case scenario, you import each frame with import image as plane and build something from there !
I’ll give a quick explanation of what / why i’m trying to do it:
Imagine i have a 500 frame long video sequence that is transparent with only small, differently colored disks moving around the image… say, 20 disks.
Now, if i can make an array of 500 instances of that video, stretching from 20 meters on the Y axis up to the world origin, with each instance displaying a different frame, then the result will be sort of light streaks through the air.
And if i animate the array to move along the Y axis (or even better, to follow a curved path), then i’ll get the light streaks to move (or, er, “streak”!)
Clear as mud, i’m sure haha!
I just made a tutorial (mostly just as a reminder for myself for later) which shows a related effect, check it out here to get an idea of what i’m talking about:
Blender isn’t really strong to deal with time offset in a video, for blender one video ( or image sequence) can only be set to one particular frame.
That means, if I have an image sequence , I can load it as an image file, it’s fine. Now if I want to display that image sequence at frame 10, and on another plane the same image sequence but at frame 20 , I need to create a new Image.
So if in geometry nodes you want to have say 10 image from the same sequence ( or movie clip) at the same time, you need to create 10 image texture , or 10 different image datablock.
It’s not possible to have one image datablock, and use a “time offset” node to access different frames.
So you need either to do a hack with UDIM, or load each frame as a separate image, or find another hack that can do the trick…
Or instead of using image you find another way to do the effect you’re looking for…
“Or instead of using image you find another way to do the effect you’re looking for…”
This is actually a really good idea and i hadn’t thought of that: to create the “frame” with moving colored disks in geometry nodes.
But to give each disk a different color, how to do that? And then each frame needs to be driven by the same animation, but offset by one frame for each index, again, probably beyond my present understanding & abilities!
For changing colors, you can have one material and use one color attribute to have different colors but only one material.
And making the animation doesn’t sound super simple either; probably the first step is to make that animation in one frame, and as a second step would be to see how to make an array of several images offseted in time…
It’s hard to tell what is the less complex between that and hacking image sequence …
Looks like you’ve pick the wrong subject to have fun in a simple way with geometry nodes …