Geo nodes pipe and paneling generator

Hello there!
So recently I’ve started a project mainly to get a deeper understanding of the geometry nodes feature in blender.
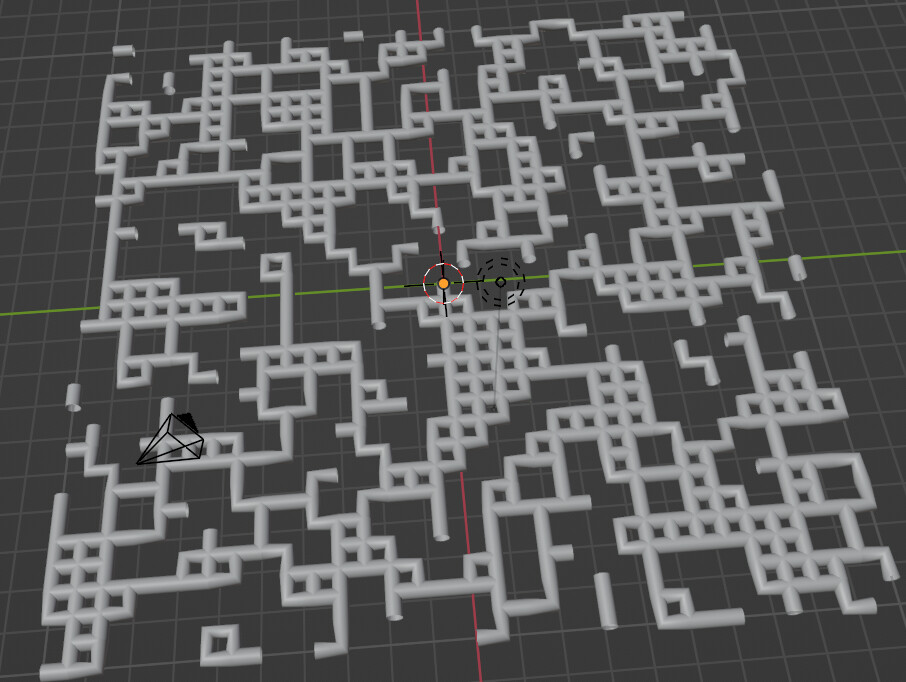
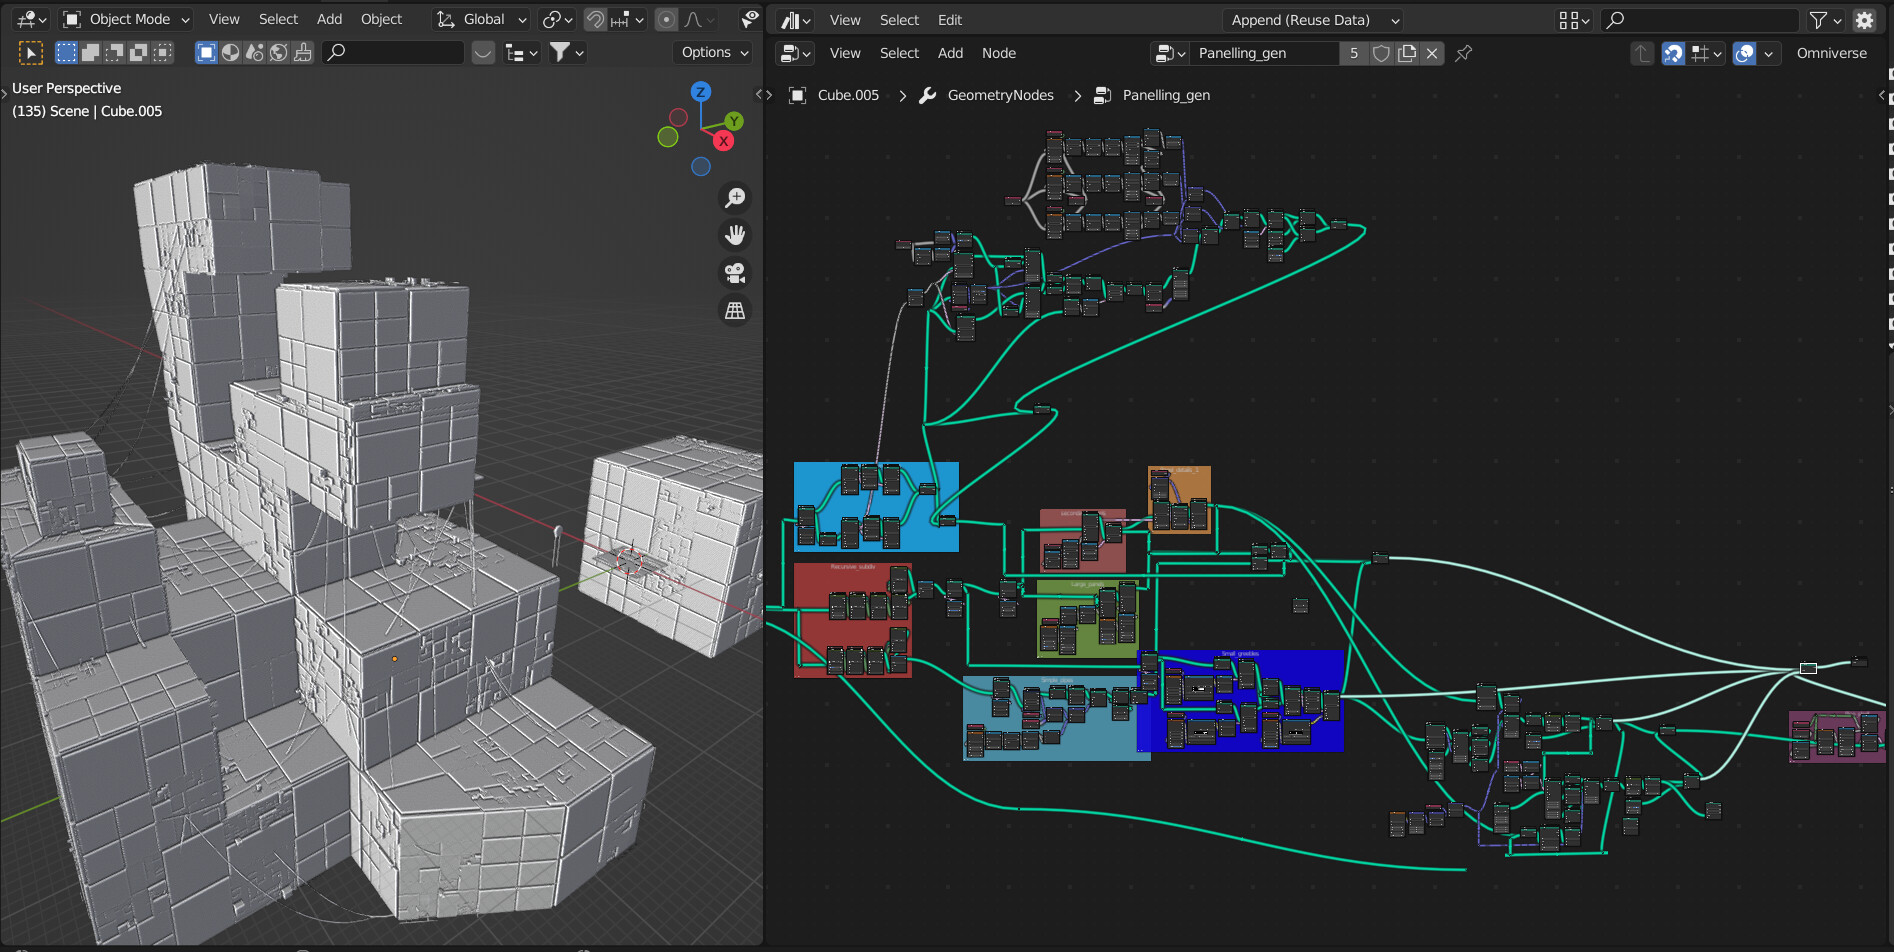
A cool effect that I made was a recursive subdivision system, and I realised that using this I can make a paneling generator.
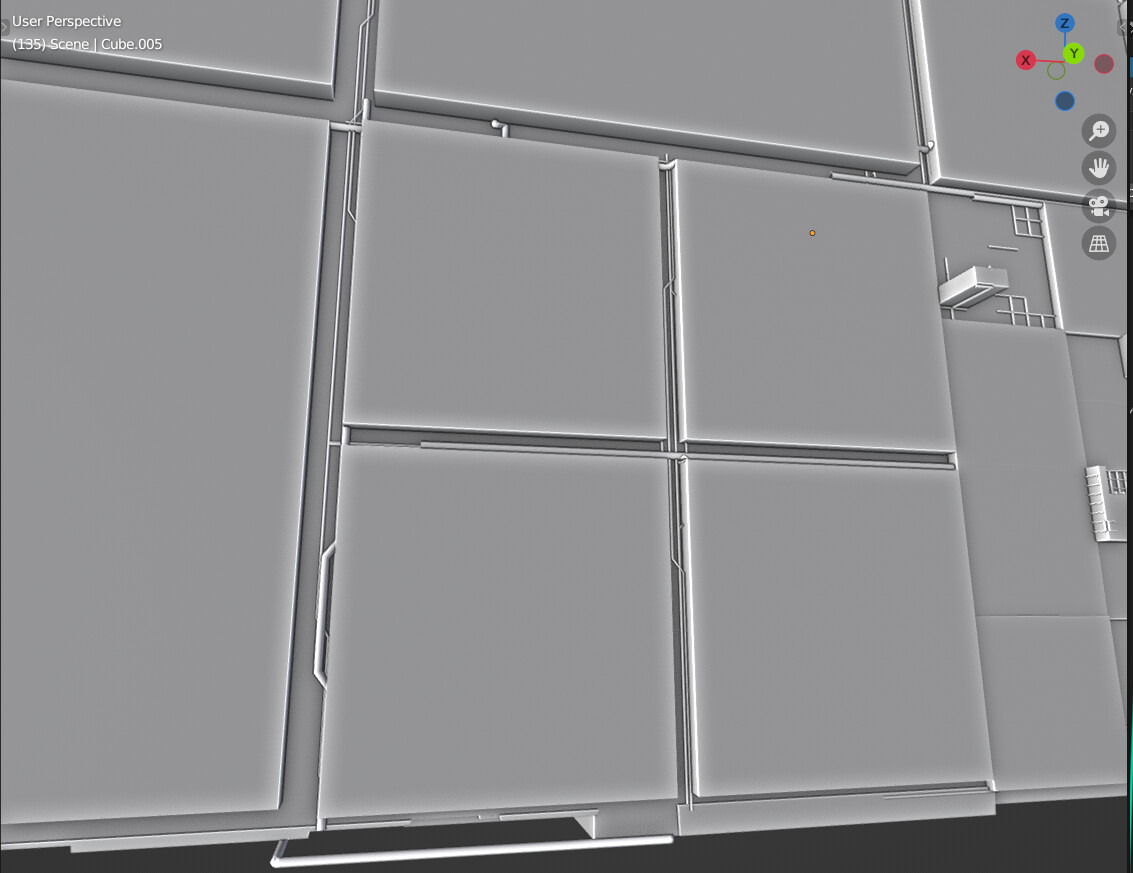
And while having random panels is cool, an even cooler thing is having pipes generated on that surface.
Now this is where I’m stuck at. I’ve made a few experiments but I can’t really seem to get the effect that I’m looking for.
Here is what I tried so far:


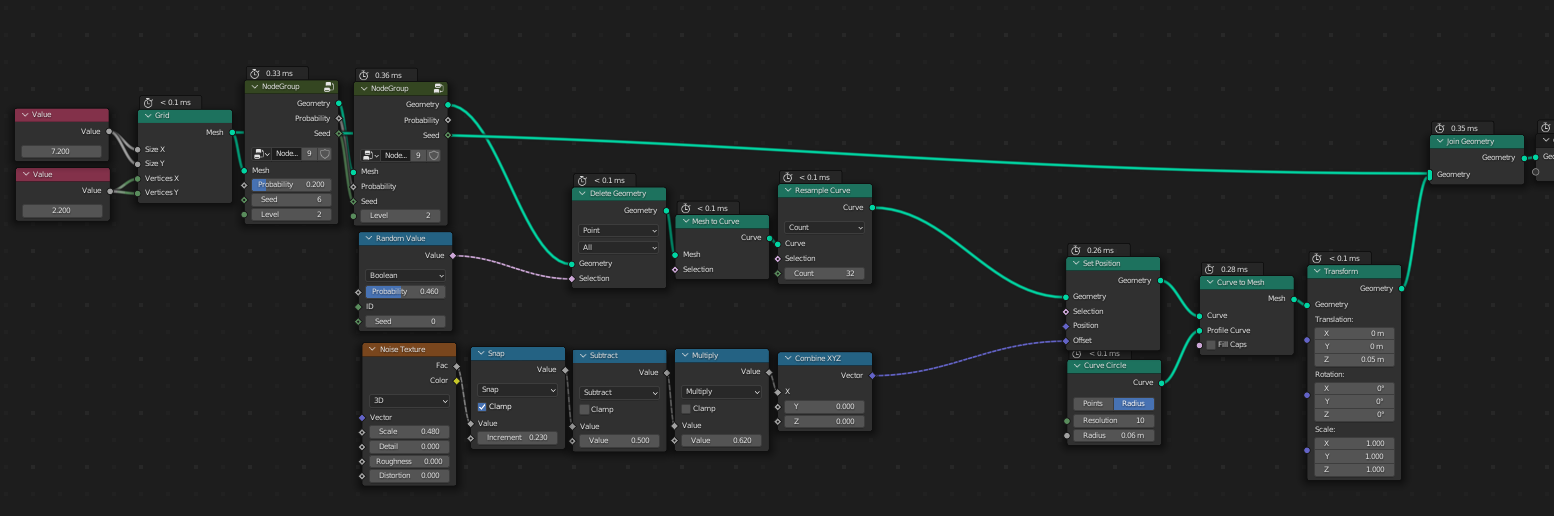
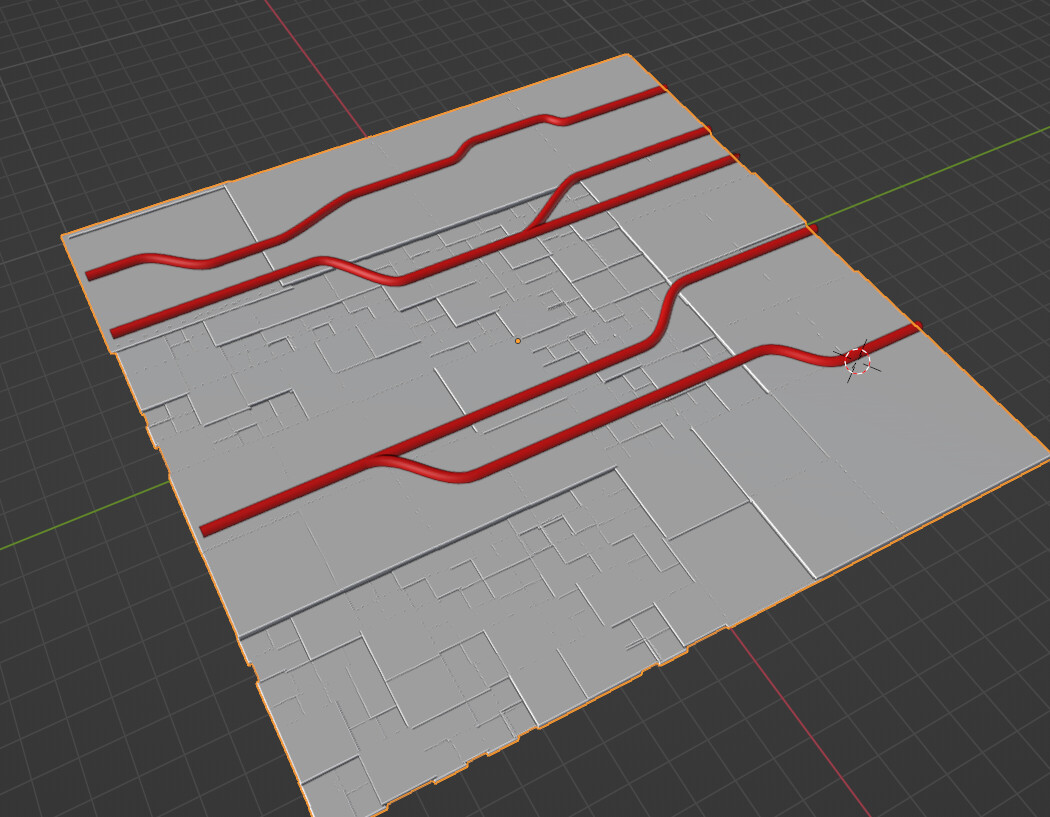
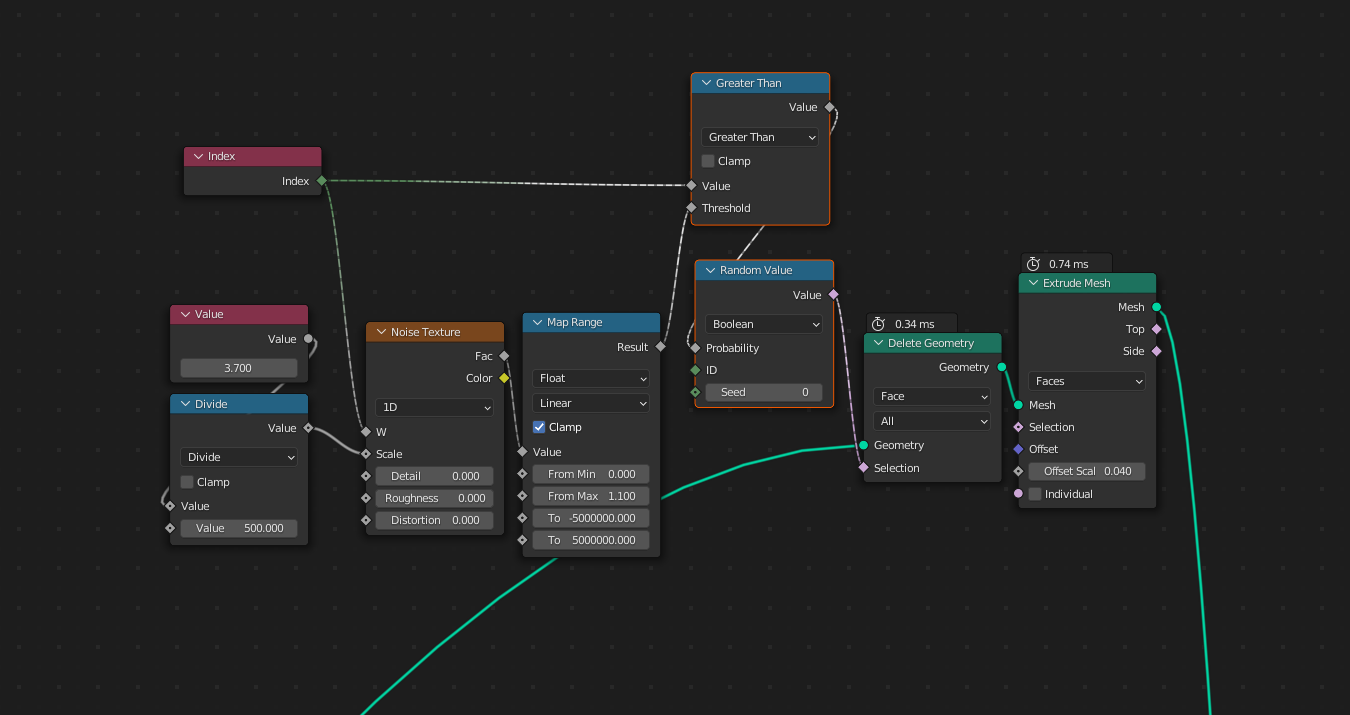
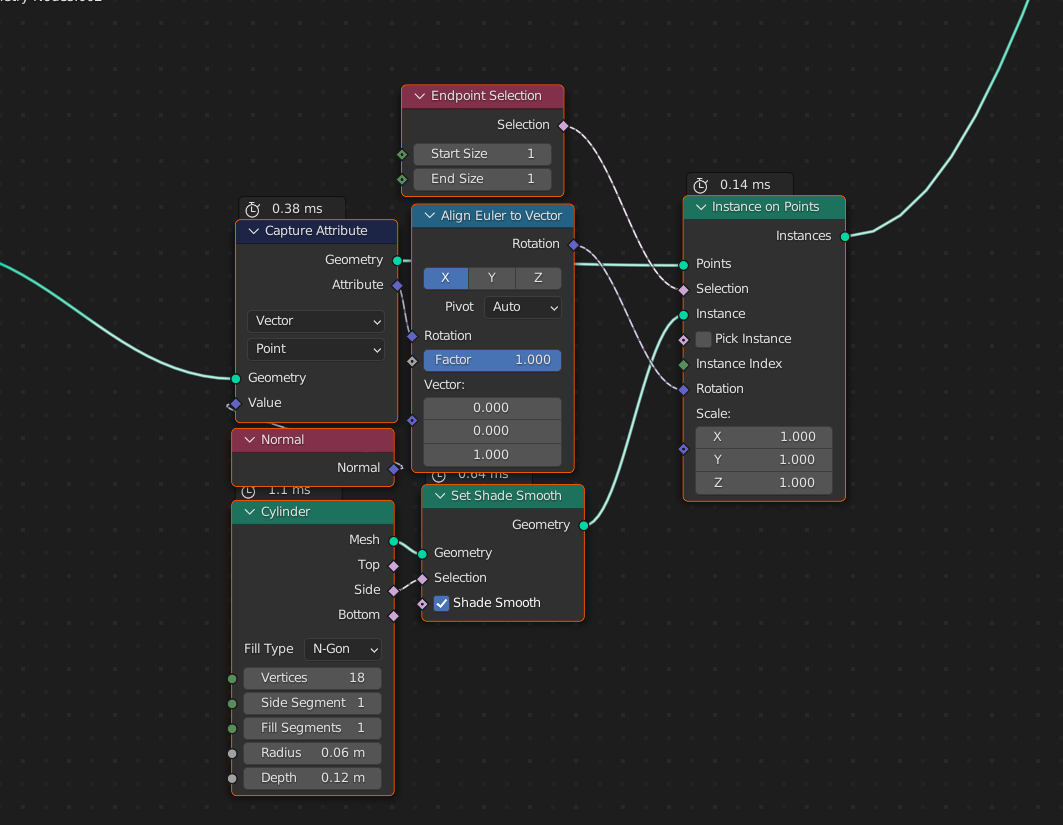
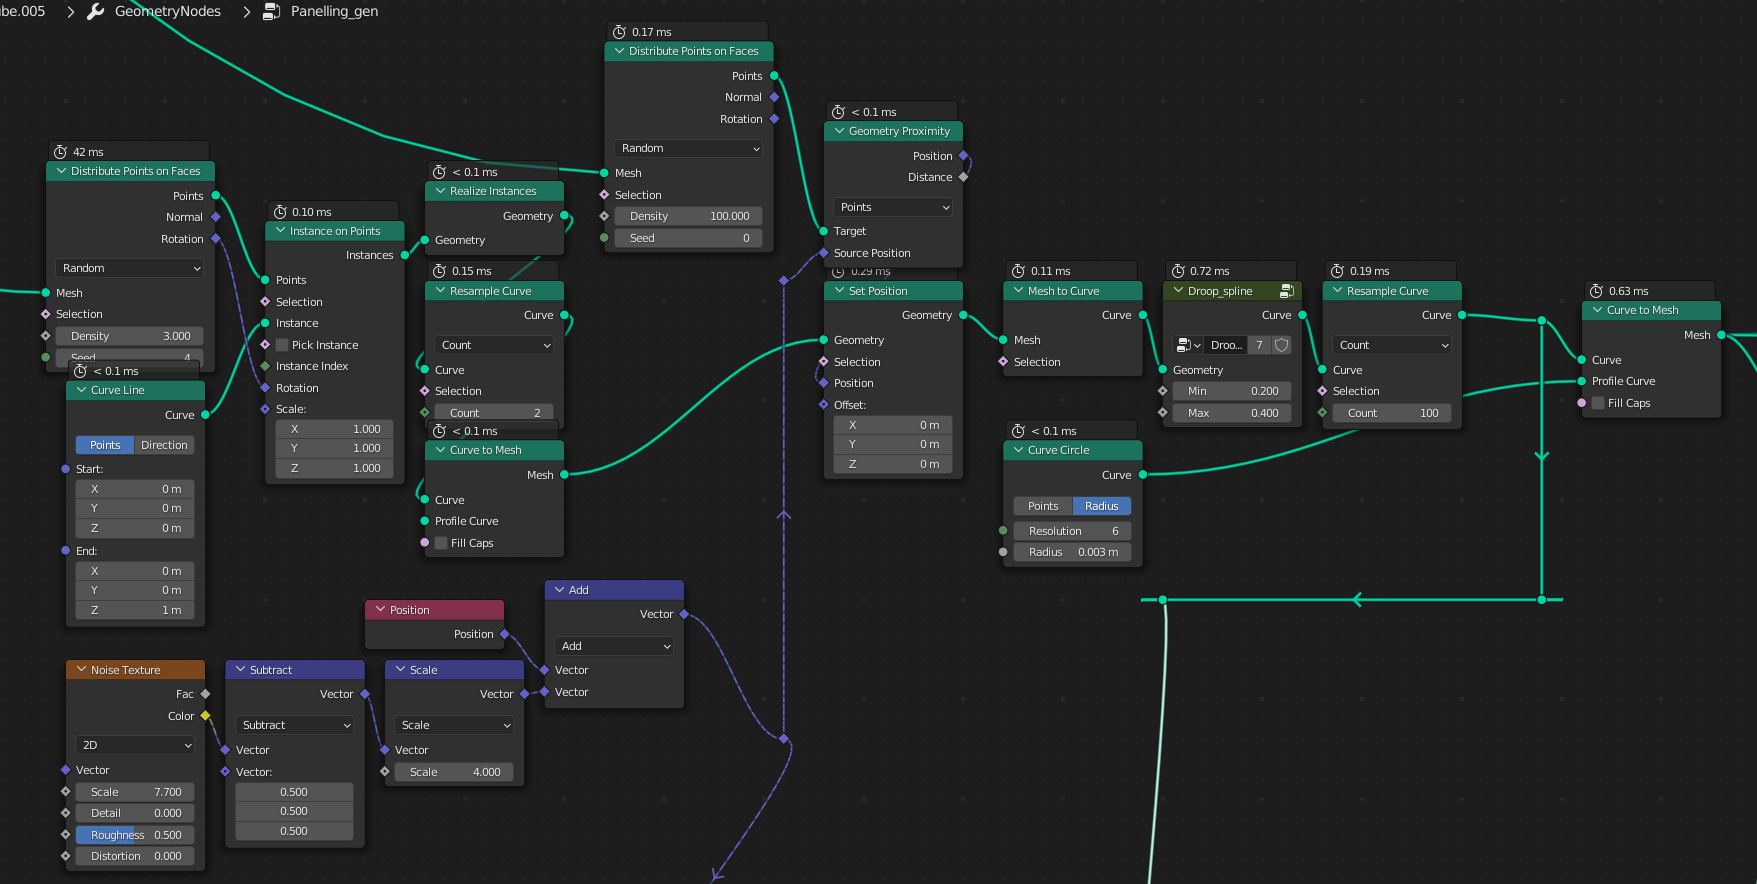
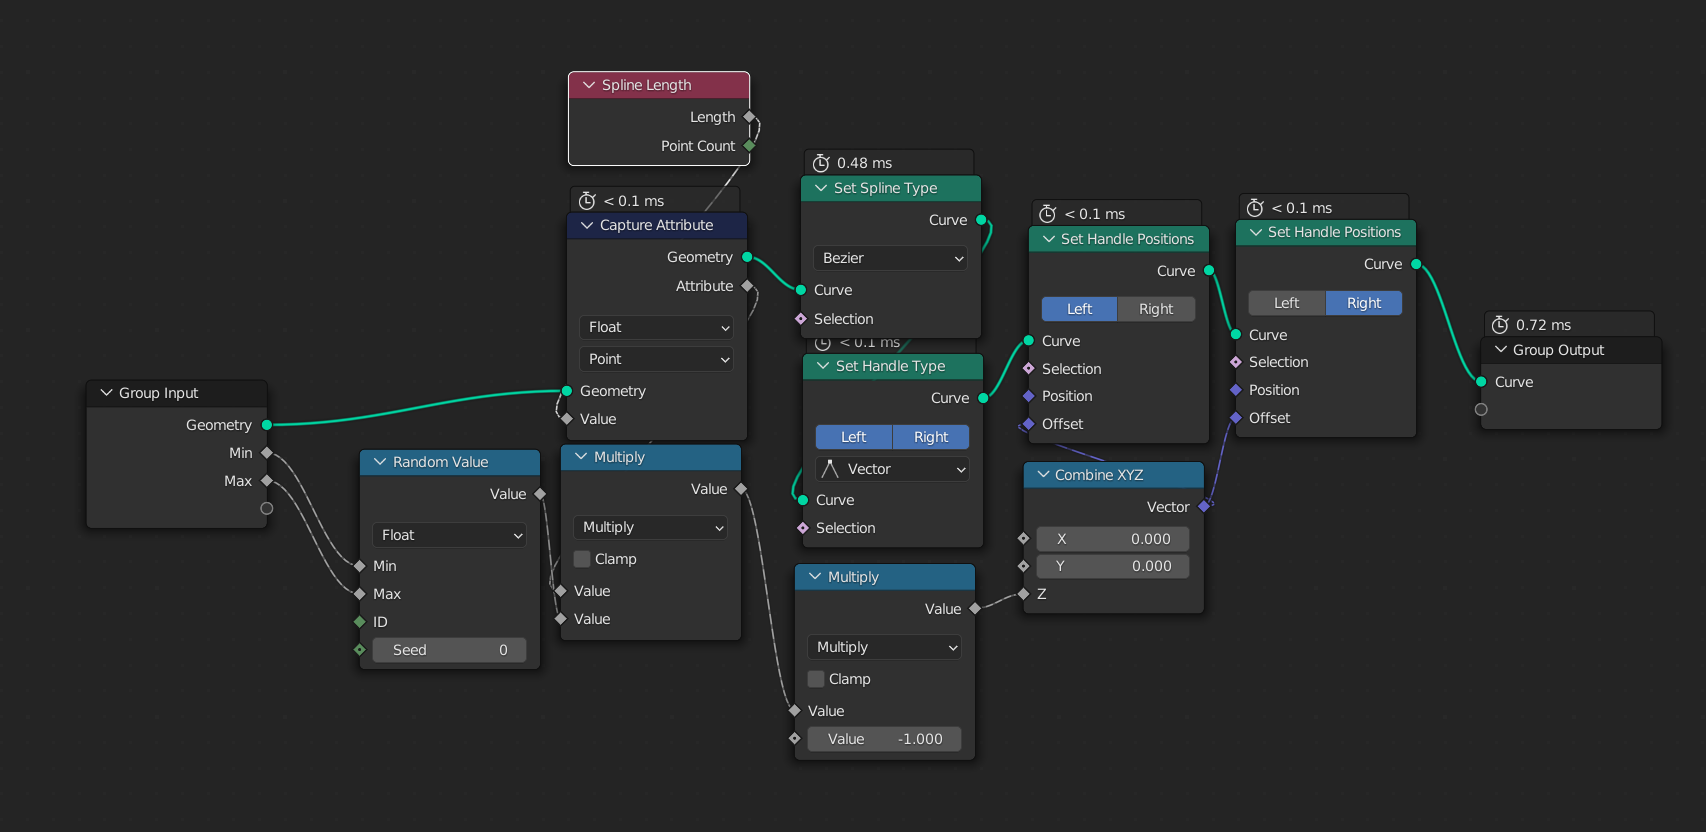
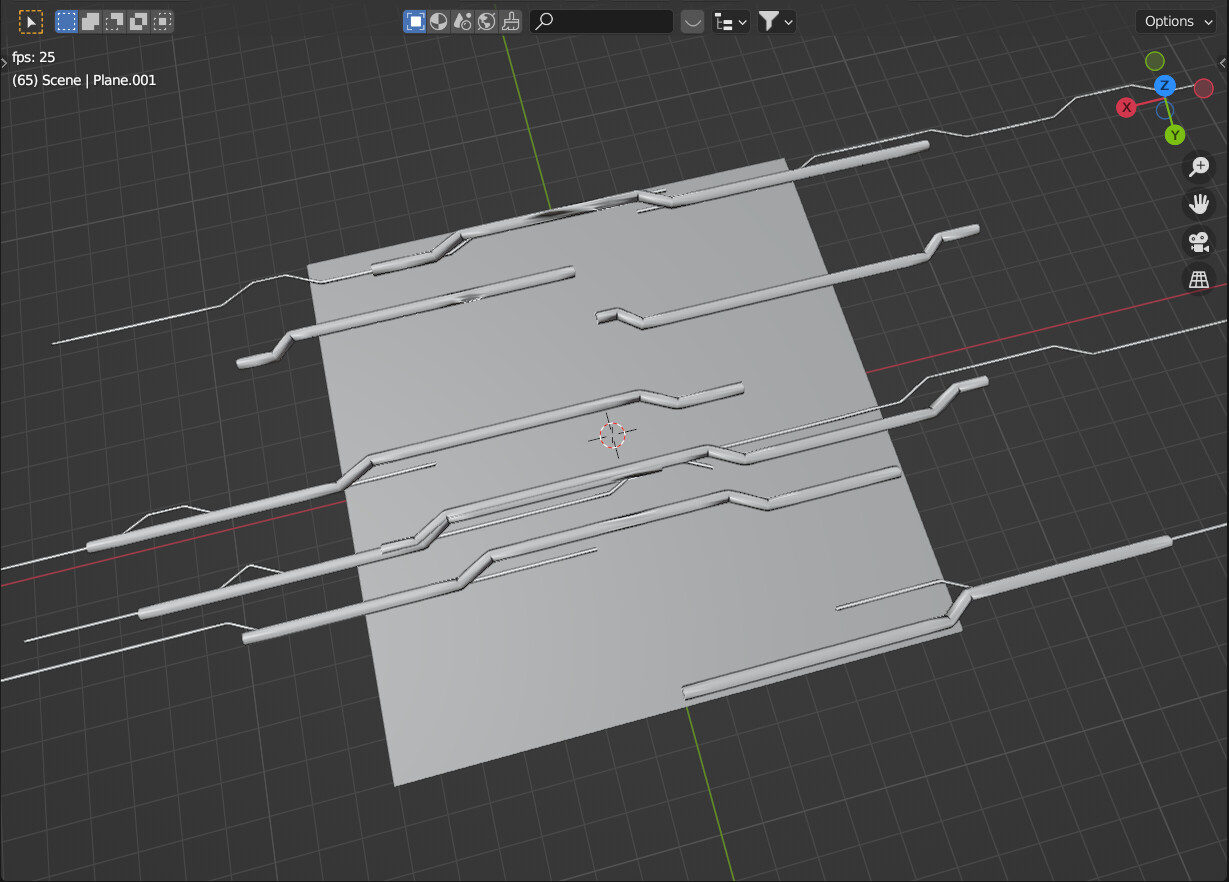
This has been my first thought to randomly subdivide the surface of a plane, and then randomly delete points off of that. Then I’d convert that to a curve and diplace it using a noise texture. The problem with this, is that it doesnt give the result that I wanted.

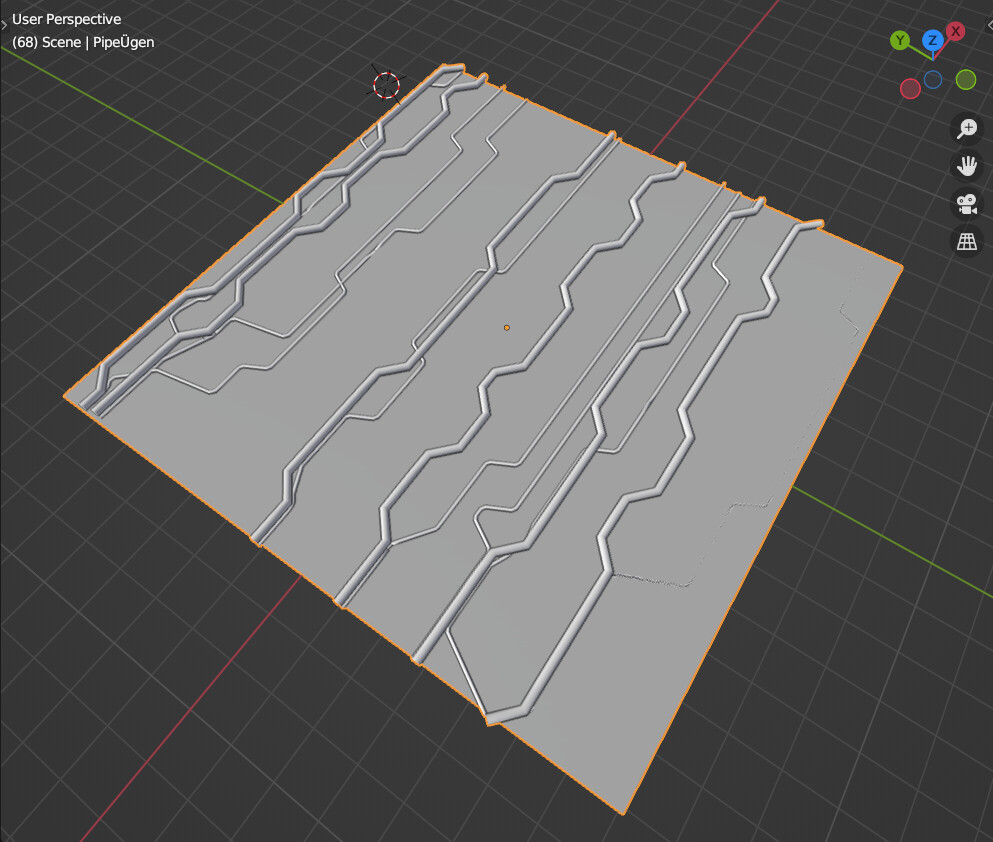
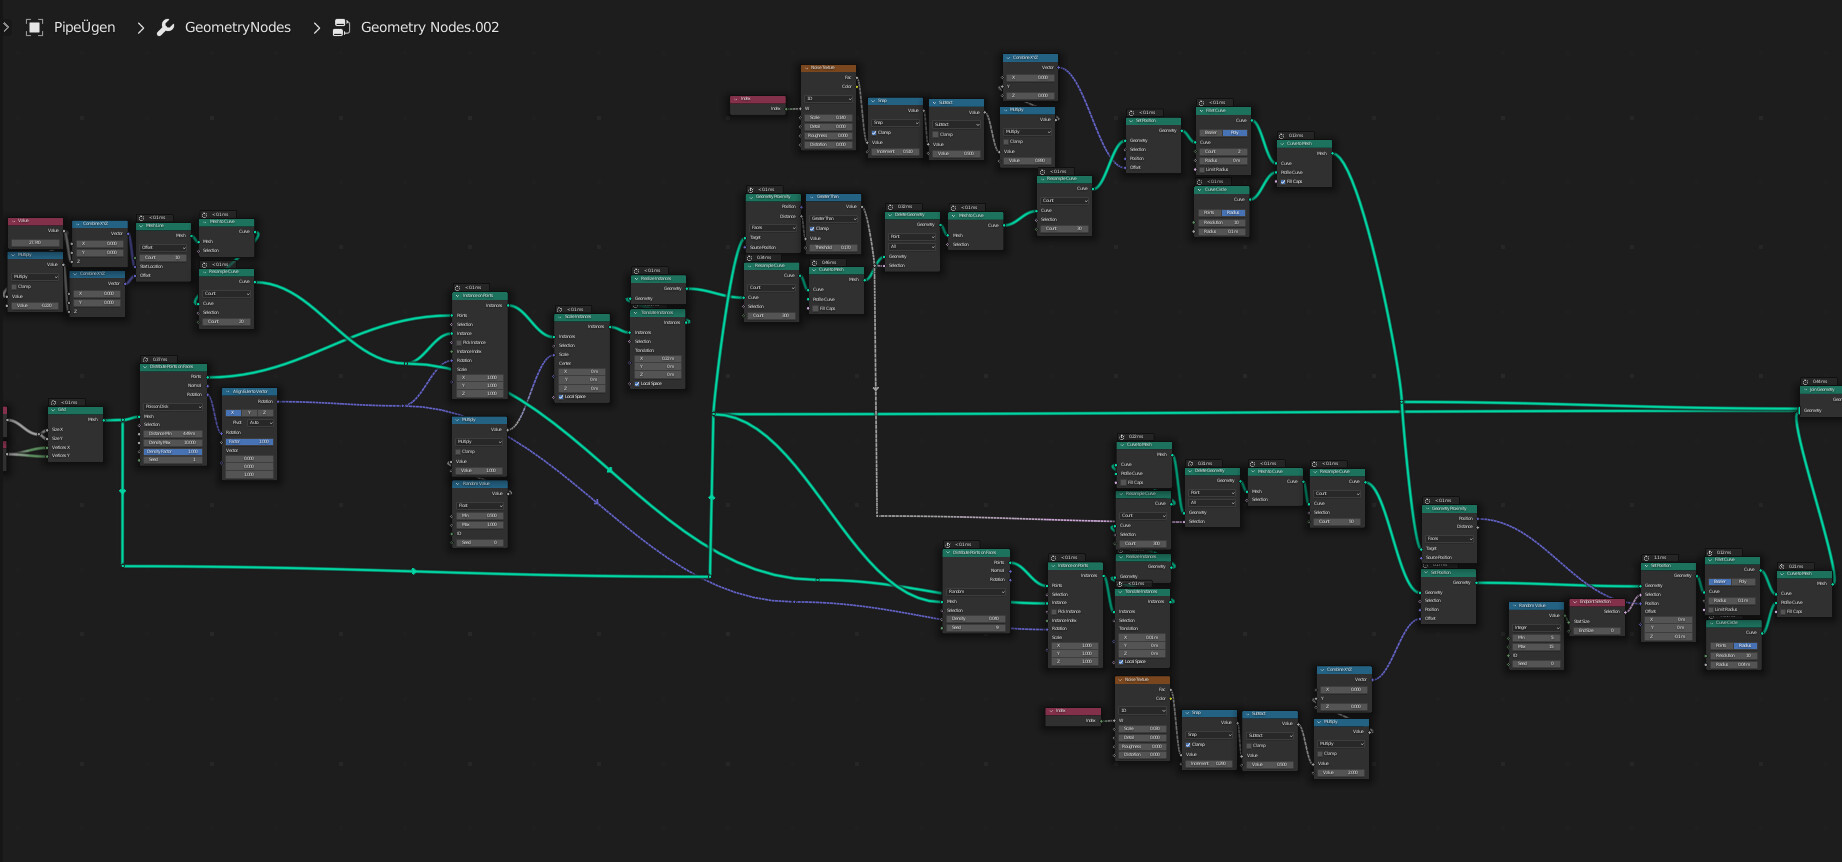
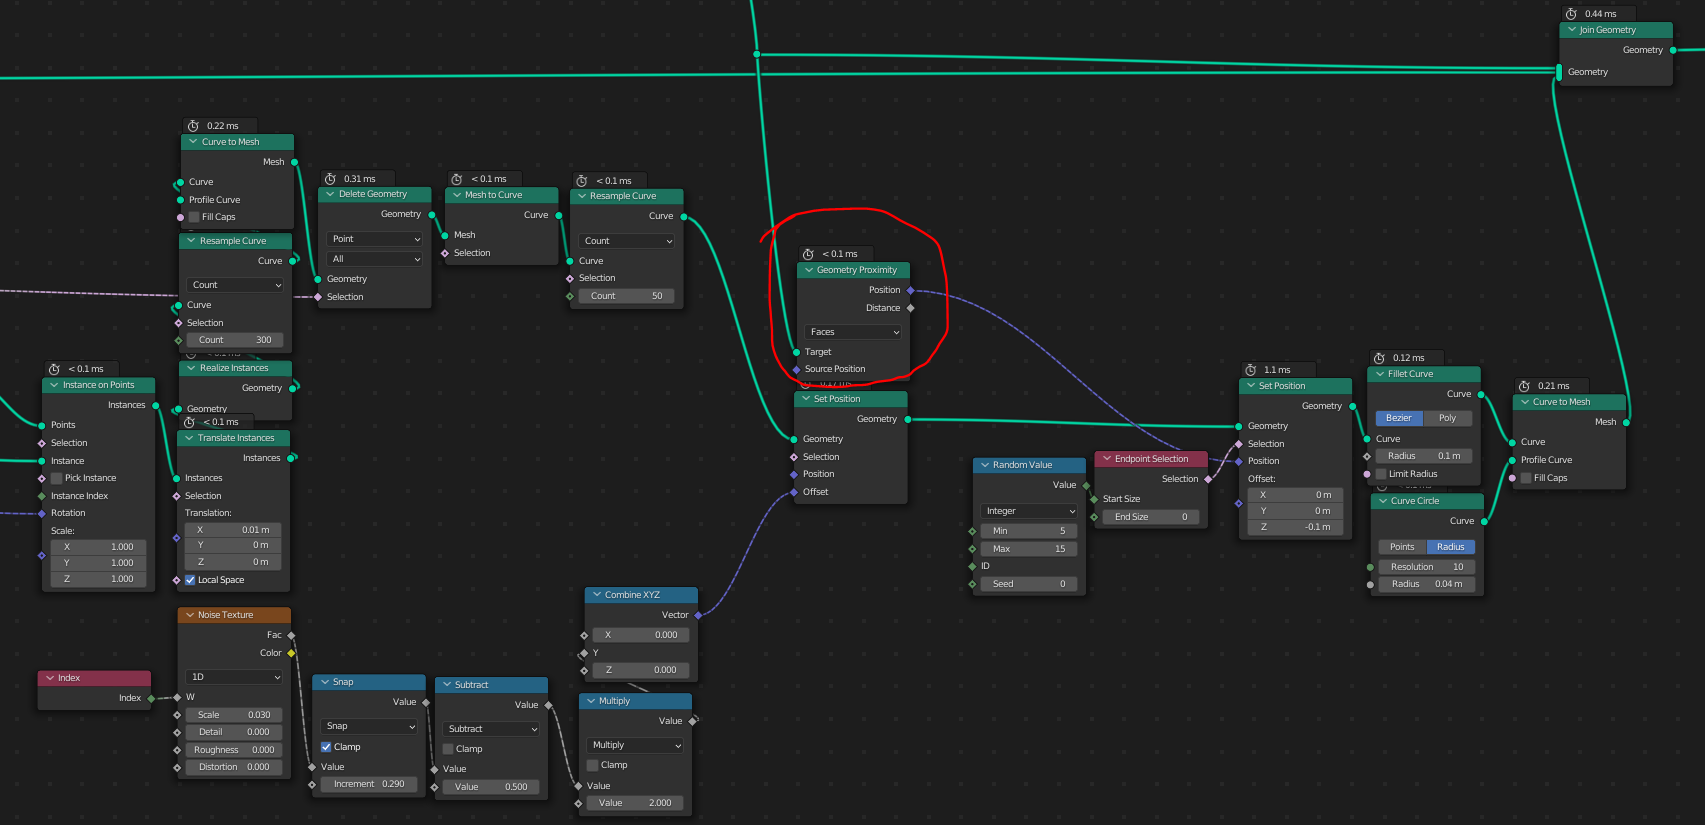
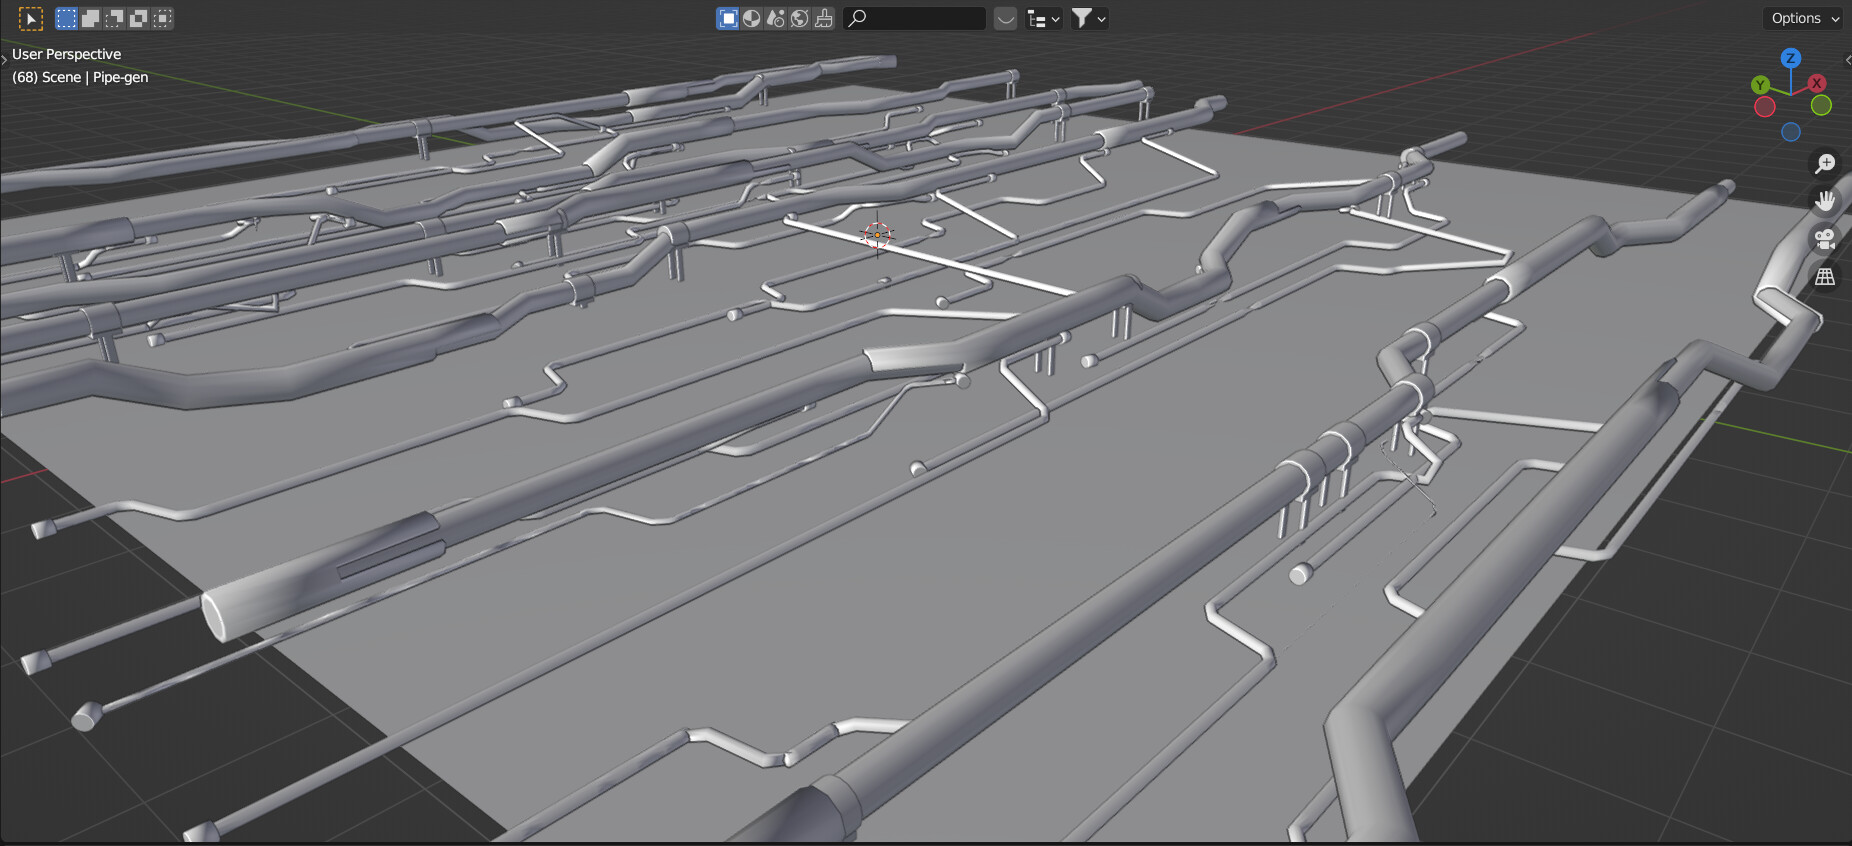
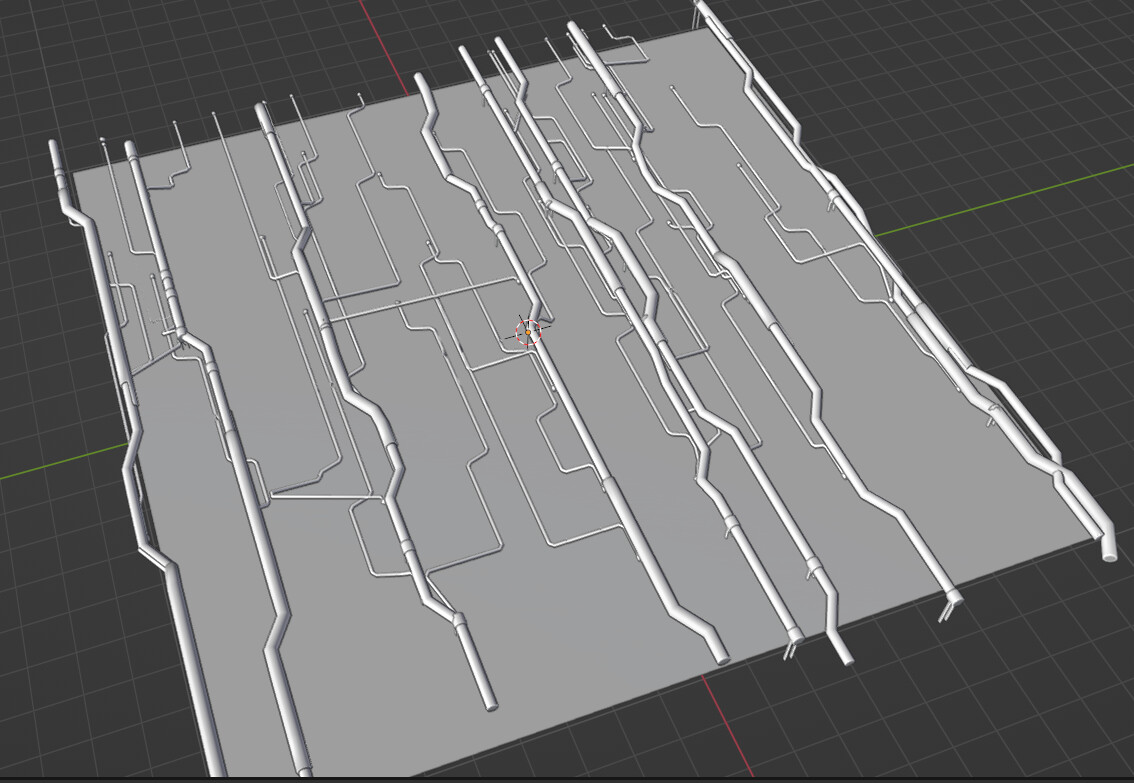
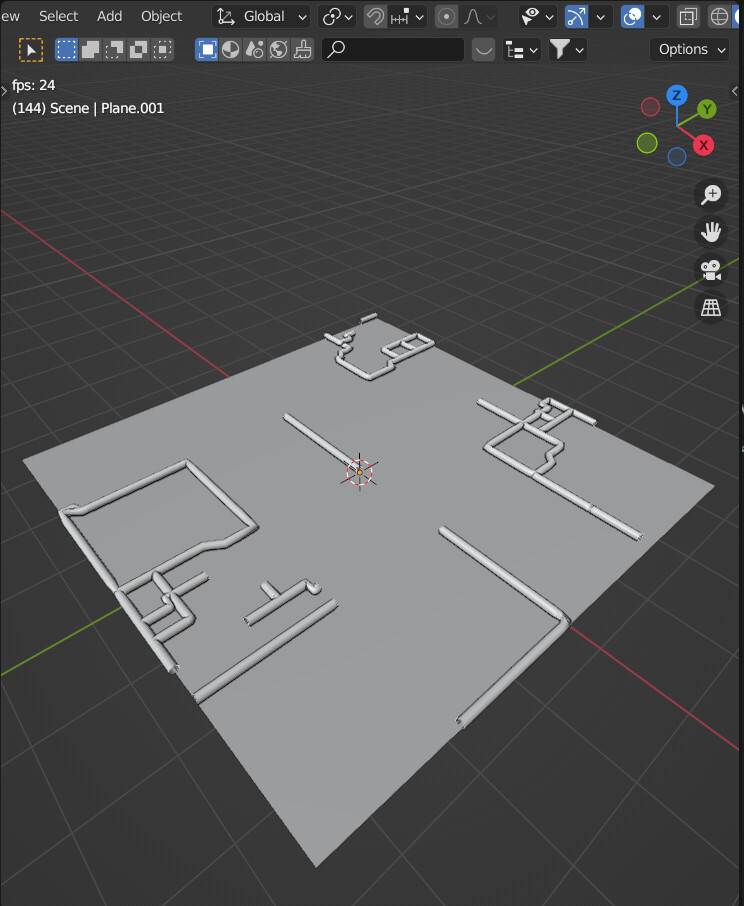
My second idea was to instance curves onto the surface, and here is where I’ve gotten so far…


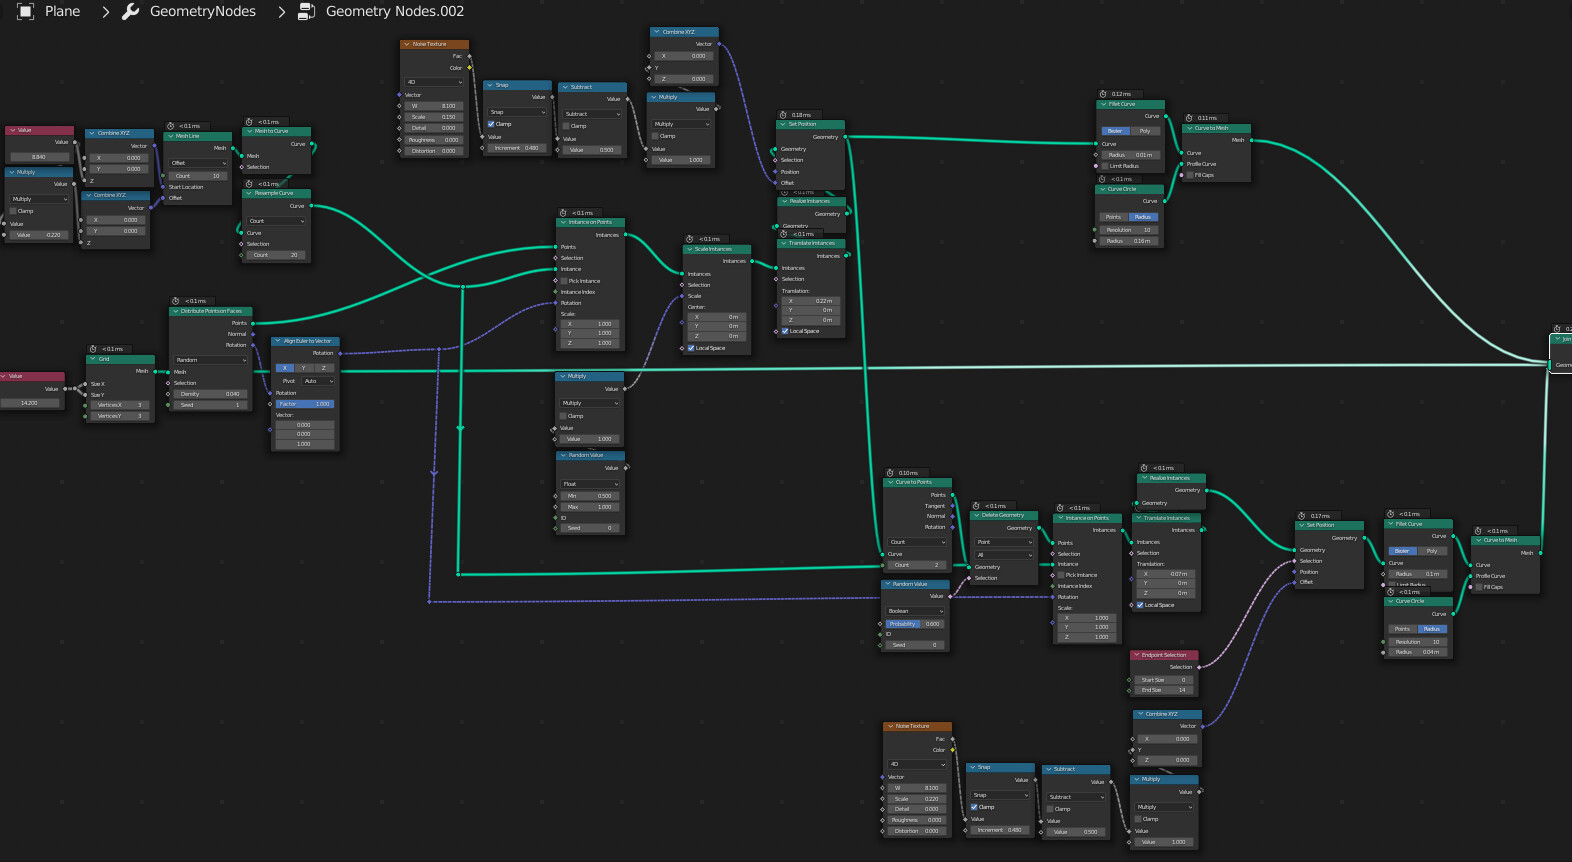
I feel like this on has more potential but I’m kinda out of ideas on how to further develop this. One of the main things that come to mind, is that I’d like to have the pipes interconnected. It would also be good to somehow have the pipes end at the edge of the plane that it is situated on.

If you have any tips that might help and a few extra minutes then leave a comment!
Thanks!

2 Likes

can u show us a picture how your result should look like please?

1 Like

or do you mean something like this?

2 Likes

Cool !
One thing that help me when I’m a bit lost, is to first do a reference by hand modeling what I want to acheive. That can help us too to better see what’s the result you’re looking for, and provide solutions.
Another good thing is , once you got the reference you try to redo-it by hand by mimicking nodes operations, or simplify it to the less amount of step possible to start getting a better idea of the procedure.

I think that’s quite tricky ! you may try to use the merge by distance with the curves converted to mesh. You may “capture attribute” the ends points selection of the curves beforehand to make a selection for the merge by distance node.
But I think the first approach may be better in that case because you already have the connection.
I think a node that do that is planned (connect curves together) . Probably it’s doable with some maths and clever tricks but it’s still hard, quite a challenge on it’s own.

One quick and dirty way of doing it , is to resample curves with a great amount of points. Then convert it to mesh, and use a geometry proximity node to get the distance between the plane and the tubes. If the distance is below 0.001 then you delete the points. Then convert it to curve again and resample it to a lower amount. This should be done at the right stage, probably before using the texture to displace the points.

Hope that helps and feel free to ask me if you want me to elaborate on something.

1 Like

Thanks for the tips, I’ll give your suggestions a try and I’ll post the updates!

1 Like

Hi!
The result I’m trying to get is something like this:

I know that something like this should be possible with geo nodes. I just haven’t dug deep enough.

As for the image that you shared, that was how I initially started this project, but then quickly realized that this method would give the desired results.

1 Like

Here are some updates so far!


this is where i’m currently at!

I realised that i can connect the pipes by using the geometry proximity node and selecting only the start points of the curves. This way the pipes kinda branch out.

My next step will be adding more detailvand variation to the pipes. I’ll also try to add som more displacement so that the pipes lift off in places from the surface.

Overall I’m happy with the progress for one night’s of node sphagettification.

If anyone has any ideas tho, then keep 'em coming!

2 Likes

Cool this is taking good shape indeed !
Well done !

1 Like

right-o, so here is an update on the pipe generator project…


I’ve made some improvements to the geometry of the pipes, as well as the distribution. I also displaced the pipes so that they lift off the surface they are on. Obviously this means I had to distribute some supports along the pipe.
I also randomly selected face islands on the pipes and randomly extruded them giving a kinda more industrial patched-up feel.


(this is how I got the random mesh islands on the pipe mesh)

Also, the distribution of supports is pretty easy, you can specify if you want to only place objects on the end and startpoints of curves:


Just keep in mind that if you are scattering an object on the curve, then applie the scale… (I might have spent 30 minutes figuring that out)

So what next… I want to add more pipes that branch off in weird ways… also I might model different kinds of supports that can be distributed accordingly.
And the most important part… I need to see if this actually works on a cube, or any other 3d shape so I can implement it in my paneling generator.

Here is the most recent file, if anyone wants to take a poke at it:
Panelling_gen_2.blend (1.9 MB)
(yes i misspelled paneling…)

Cheers!

5 Likes

Awesome, it’s starting to look very good !
With the paneling and other little details it will be super cool !

1 Like

So… It’s been a while…
I’ve done a few updates to the paneling generator. (it really seems like I could just add stuff to it forever.)

Here is how the node setup looks right now:

First of all, I added some hanging cables to it. I still gotta figure out how to add collision to them, so that they dont clip through the geometry.

The cables generate on selected parts on the meshes, and then attach to points generated on the other parts of the mesh. this is cool because you can specify what you want the cables to connect to.
I have a base cable that is distributed on the geometry and connects to the geometry of the structure, but I also added a second layer of cables that can connect to the structure, and the other cables themselves.

Also, here is the setup for the base cables:

And you just basically repeat that to make the seconday cables but, add the geometry of the base cables to the geometry that goes to the “geometry position” node.

Here is the setup to make the splines droop:

I need to metion that most of the node-ing that I did concerning the cables was the result of a tutorial on how to make cobwebs in geo nodes by: Joey Carlino

I also added some small greebles that are generated via a voronoi texutre. Currently every geometry is procedurally generated:


but I am thinking about adding some pre-modeled greebles such as antennas and stuctural supports to make it look even cooler.

There are parts of the panels that are big square blobs. I added some pipes that run between these structures. This give it a bit more depth in my opinion…

While this is not yet a finished project, I will leave the blend file here in case anyone wants to noodle around with it.
Panelling_gen_2.blend (3.3 MB)

Overall I haven’t even implemented my pipe generator into the node setup, mainly cause I will probabily need to redo it with my newly gained node knowledge…
(and also I want to check out the shortest distance node since that sounds interesting)

Anyway…
Cheers!

5 Likes