I have an idea in my head, but not even sure how to call it, let alone execute it.
How can you force generated curve line to be only forwarded alongside global Z axis? And then, how you could also generated UVs following the this generation principle?
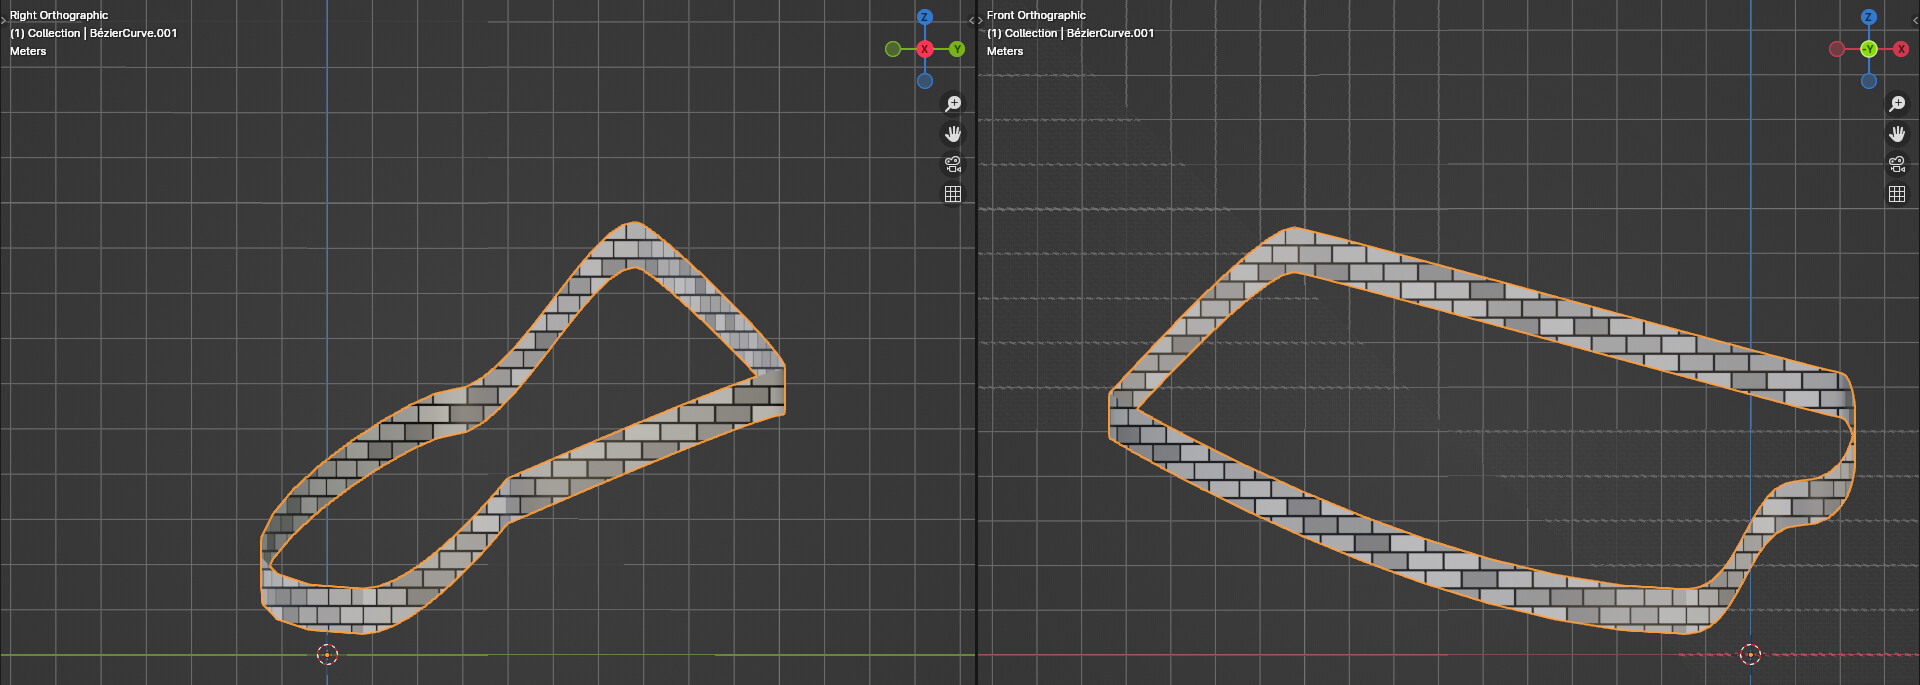
Imagine a wall that is suppose to be composed of bricks or different, layered foundation blocks. They would be horizontally stacked on top of each other no matter the elevation or direction of this wall.
I tried to demonstrated it on the picture below. Left one is to be adjusted, right one is roughly how the result should look like. And this approach should be also transferable to an profile curve, not just a straight line, ideally.
If anyone can show such result with the node set up or at least point me towards relevant source, I’d appreciate it!
At a glance, I think this will require you to make your own custom “Curve-to-Mesh” nodegroup. I’m pretty sure curve normals are ALWAYS perpendicular to curve tangent, and just can’t possibly point this way (correct me if I’m wrong).
What I would have tried is something like (roughly speaking):
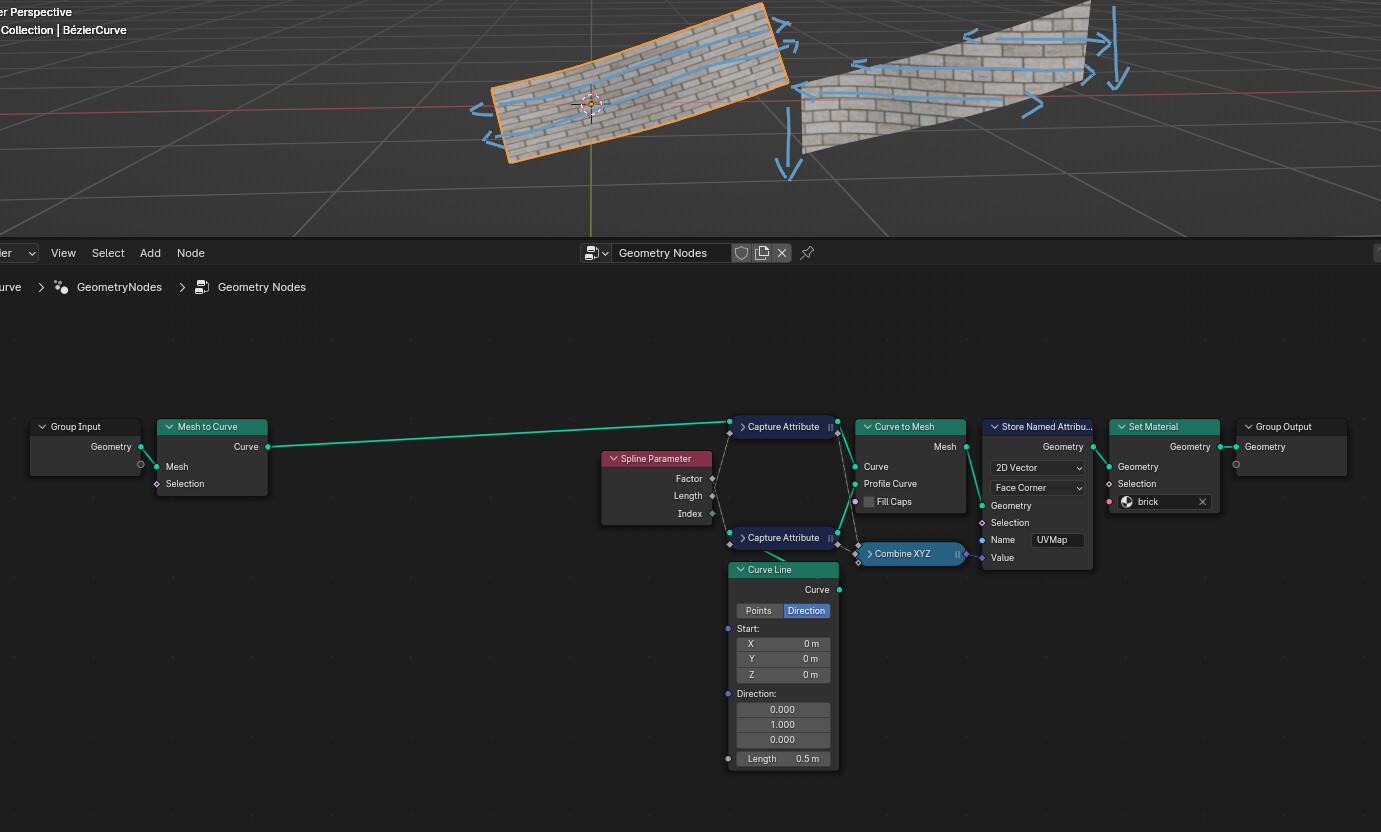
Instance curve Profile all along the input curve, so that all instances point along target axis (Z, in your example);
Make a mesh Grid of correct size (“points of curve” x “points of profile”);
Set Position of grid vertices on those profile-instances (some indexing magic may be required);
Find a way to unwrap and hope for the best
Maybe there’s an obvious simple way, but that’s all part of the fun…
In 4.1 the “Free” mode for the Set Curve Normal was added. You can point the normal in any direction, which makes my old z-up curve-to-mesh only useful for old versions of blender…
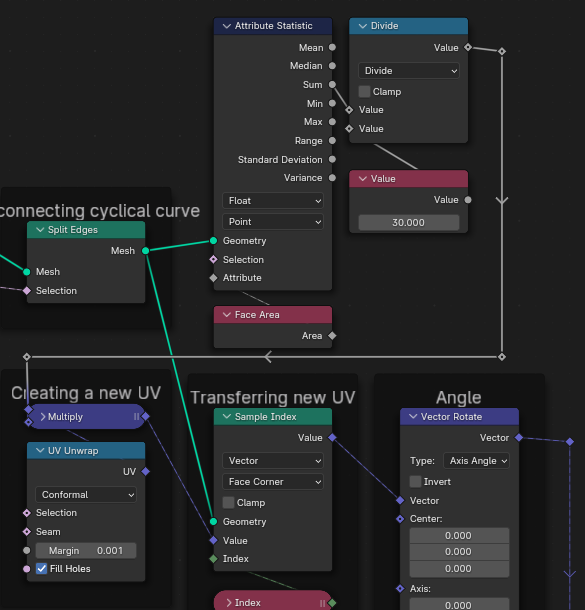
Edit.: If you don’t want to keep rescalling UV everytime you move or expand the curve, this helps. Just divide the float, if you want UV to be larger or smaller in general.