I am using Blender to help me to make 3D designs for an App. And in the App, the plane’s material (an Image texture) will keep on changing. Now, what really makes it look like 3D is the shadows and interaction with light.
Question :
So, for the purpose of the app, is it possible that I could export a “mask” kind of layer/png file, which I will be able to add over the bitmap in the Android app, to produce similar results (as if, I had set the material of this plane to that Image texture) ? This “mask” should not contain the object data, but only data related to its interaction with the light, due to presence of curves, and other objects.
NOTE : Again, for my use case, the background of the plane (or the Image texture) is not static, It will keep on changing.
I have tried using Shadow catcher and it works right if I just wanted to catch the shadow caused by the cube, but I also want followings :
The cube is metallic and will reflect the color/image-texture used by the plane. I want a mapping of the pixels so that I could use them to edit the color of the cube as the image of the plane changes.
The plane has curves, if I use it as an image catcher, I lose those information that makes those curves visible there.
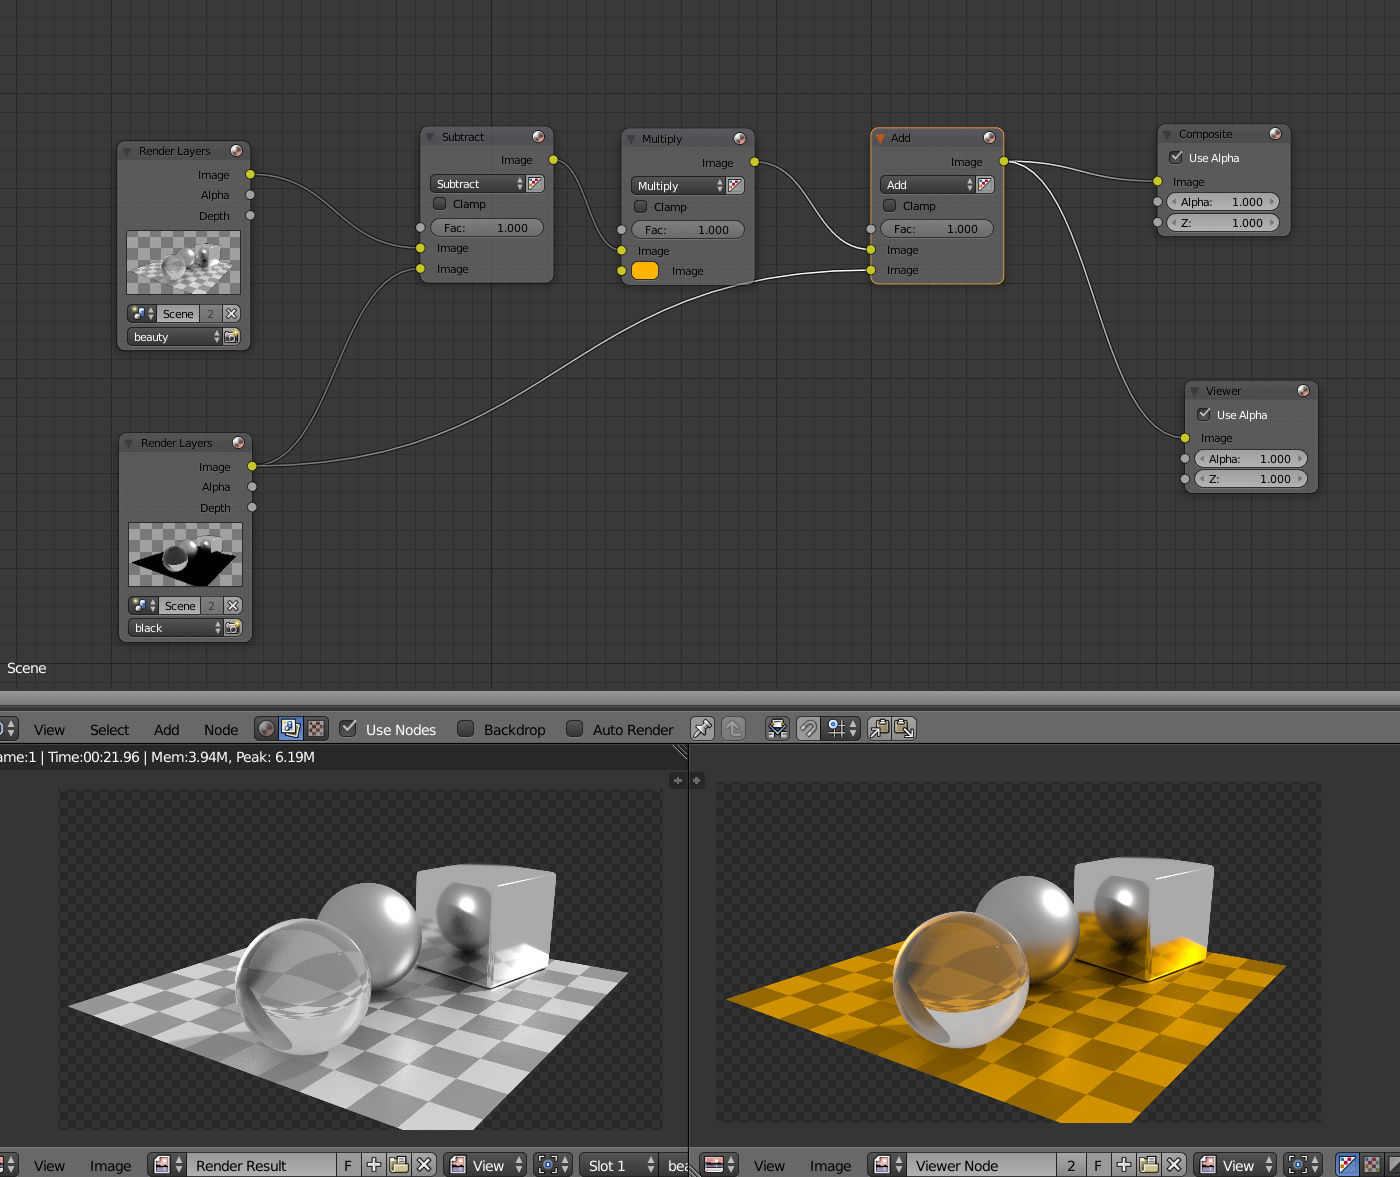
There is one simple way to achieve partly what you want. You must prepare two elements, one is the “beauty” render where your plane object has all the material properties it should have, but is white colored. And in another element, lets call it “black”, render that object as totally black (disconnect the Material Output node). Now if you subtract the black element from beauty, you get only interactions from your plane object. If you add the black element again, you get original beauty image. But if you modify the intermediate image before adding black, you effectively change the properties of your plane object with all the indirect bounces, reflections and so on. Another way would be banging it all into separate render passes and combining but this method is way simpler.
This method won’t work if you want to change the texture of the plane. For that you need to map new texture to UV space of the plane, this is usually achieved with ST maps (just fancy name for screen-space mapping). But you can’t map texture onto your plane with simple merge in your app even with ST map, because it is an effect that needs sampling image texture based on value in ST map. But if you code the app yourself, it is not hard to build it yourself.
Example comp and result from simply grading the intermediate before adding “black” element back:
There is also this thing if the textures cannot be prerendered and have to be changed on the fly in the App. It might not be a very easy thing to implement, but in Blender there is this UV pass and a way to deform textures according to the UV pass. The pass it self is only a gradient representing U and V values. So if you rendered a shadeless texture with that gradient and let it reflect or refract though completely clear or reflective materials it could probably be remapped in reflections or refractions as well with Blender’s compositing. Now the question is how would one go about programing this kind of remapping on an Android app?.. I have no idea.
Its the same thing I wrote about. In app it is rather easy to do: R and G channel values (or whatever two channels express the texture coords) are directly used for sampling a position in texture image and found value is simply assigned to that pixel. Creating a proper texture coordinates image and other elements for composing the final image is probably a bit more fiddling.
I probably managed to view your response while you were editing that in. I wish it was possible to use it in Photoshop. It would make my life easier. Do you maybe happen to know anything about it?
Thanks for such a cool solution !
I tried using exported image from the beauty and black layer and performed the operations similar to nodes, using Gimp layers and I think it works exactly the way I wanted, except the resultant image is a bit darker.
Further (this should actually have been an edit in the question, but I tried and it didn’t save returning error message) the background I want to use with the plane is a simple image and I am not concerned with the UV mapping of the plane on the image. Any position of the plane vs image will work for me.
Also, after trying your solution, I think it works perfect, then why did you say it would only “partially” achieve the required result ? (I suspect it was regarding the UV mapping over the image for texture)
Yes, that was it, I thought you need to map new textures to plane so that they follow the curvature, for this you would need texture coords based mapping.
Regarding getting a bit darker image in GIMP, check that you use 32bit float project. 8- or 16bit integer projects can introduce precision issues and can also clip your data.
MartinZ, in PS you would have to probably build a plugin, I’m not sure there is a tool to achieve it. Might be though, I don’t know all the ins and outs of PS.