Hello everyone, I hope you’re having a good day.

I shall present you my most recent project which I called Ghosts of Streetlight, with inspiration drawn from the park next to where I live. Without knowing exactly the form the ‘ghosts’ (in blue) would have, I checked some references online and came across will o’ the wisps, (famously used in video games with little living flames having eyes), in their real form, where a very rare occurence of combustion of different chemicals in the air result in a phosphorous sparkle, hence emitting light with different colors.
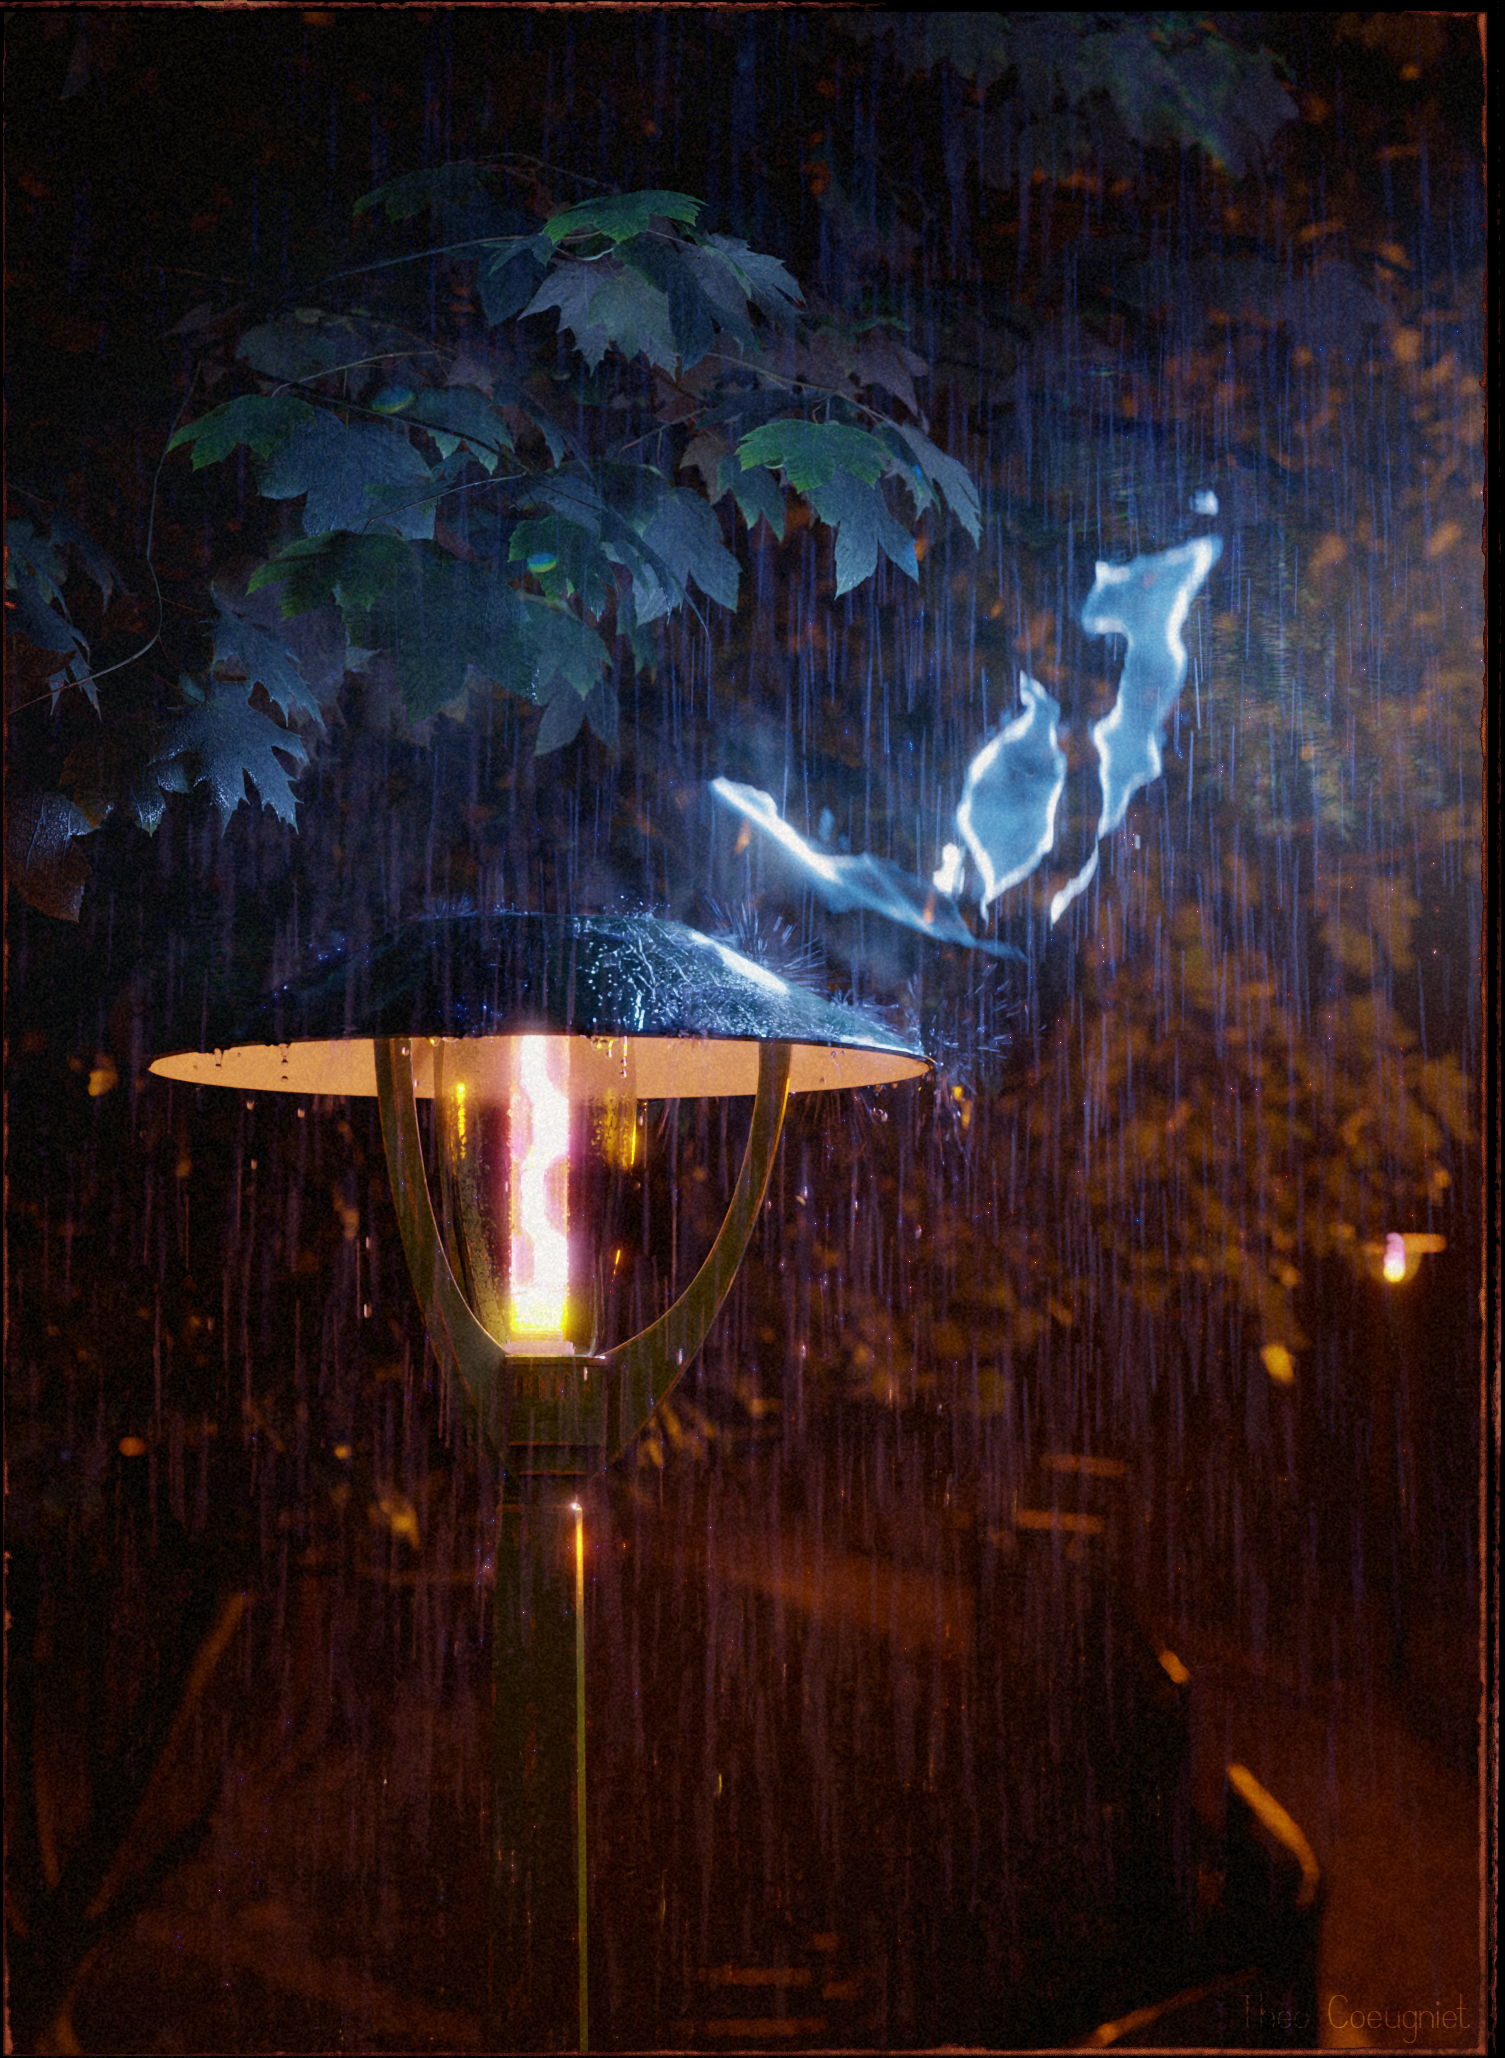
Full 1505x2058 render, 7 hours rendering in Cycles at 4096 samples with denoising, including volume passes
The process of making the will o’ the wisps
To create the different forms in Photoshop, entirely digitally, I feared it would look too controlled and too man-made. I wanted to have random, intense and dimmer parts, leaking shapes that I could fine-tune afterwards on Photoshop. For this reason, I turned towards the process of real light manipulating with photosensitive paper and chemical development.
To put it simply, I used a Durst Enlarger (I don’t recall the exact reference), which emits light like a spot , goes through negative film and hits a table further away, enlarging the initial negative. A photosensitive paper is placed on the table to receive the enlarged image, and is then ready for chemical development in dark rooms.

A Durst Enlarger. The top part emits light downwards and hits the table. Under the accordion pleats, you can put the negative film.
Now imagine that there is damaged Cinefoil (Black, matte paper used on cinema shootings to block light) instead of the negative film. Light goes through the little holes of the used, damaged paper, and gives very interesting and random shapes.
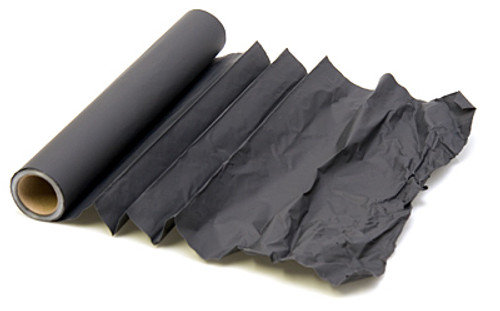
Cinefoil, partially used. The right part has folds and sometimes has holes through degradation.
Here are the results of three different developments after a scan.

Results of the scanning process after development
After some fine-tunning in Photoshop, I cleaned the shapes, added some details and leaking parts, and voilà, it could be used in Blender as planes with transparency and emission.

Texture used as mask for Emission + Transparency in Blender, after fine-tuning in Photoshop
The process of making the rain and splashes
Another challenge of the image was to make good-looking rain and splashes. Using Motion Blur was absolutely necessary to have a convincing rain, and I decided to have motion-blurred splashes also, else it wouldn’t have worked. Problem is, to have small, detailed splashes without them being too ressource-intensive, I couldn’t have just used Blender’s fluid simulation system Mantaflow in the main scene. To have Motion Blur, splashes needed to be animated, I couldn’t just freeze a frame and use the one I liked. On top of that, if any small detailed I wanted to adjust, I would have to redo the whole baking process and it would have taken forever (if it worked).
So, I just created an empty .blend scene with multiple very little splashes, exported each of them splashes in animated Alembic files, that I reimported in the main scene. That way, it was quite light in terms of ressource, and if any modification was to be made, I would just hop on the other splashes.blend file, fine-tune the fluid simulation, and re-export it in Alembic.
This way, I managed to create decent-looking splashes with Motion Blur (even though I spent a lot of time researching and finding the right parameters).
I refer you to this external link which is a GIF sequence of the animated splashes I created, if you like. https://cdna.artstation.com/p/assets/images/images/065/922/030/original/theo-coeugniet-splashes-gifs.gif?1691574453
Overall, the render took approximately 6-7 hours (If I take into account volume passes) at 1505x2058 pixels.
I used Blender for basically everything, Substance Painter for the lamp texturing, The Grove (add-on for Blender) for trees, and Photoshop for compositing and post-processing.
Thank you for reading, and feel free to visit the Artstation project ! https://www.artstation.com/artwork/qebqbn
Have a nice day,
Théo