Hi, I have been following a tutorial to create a glow material.
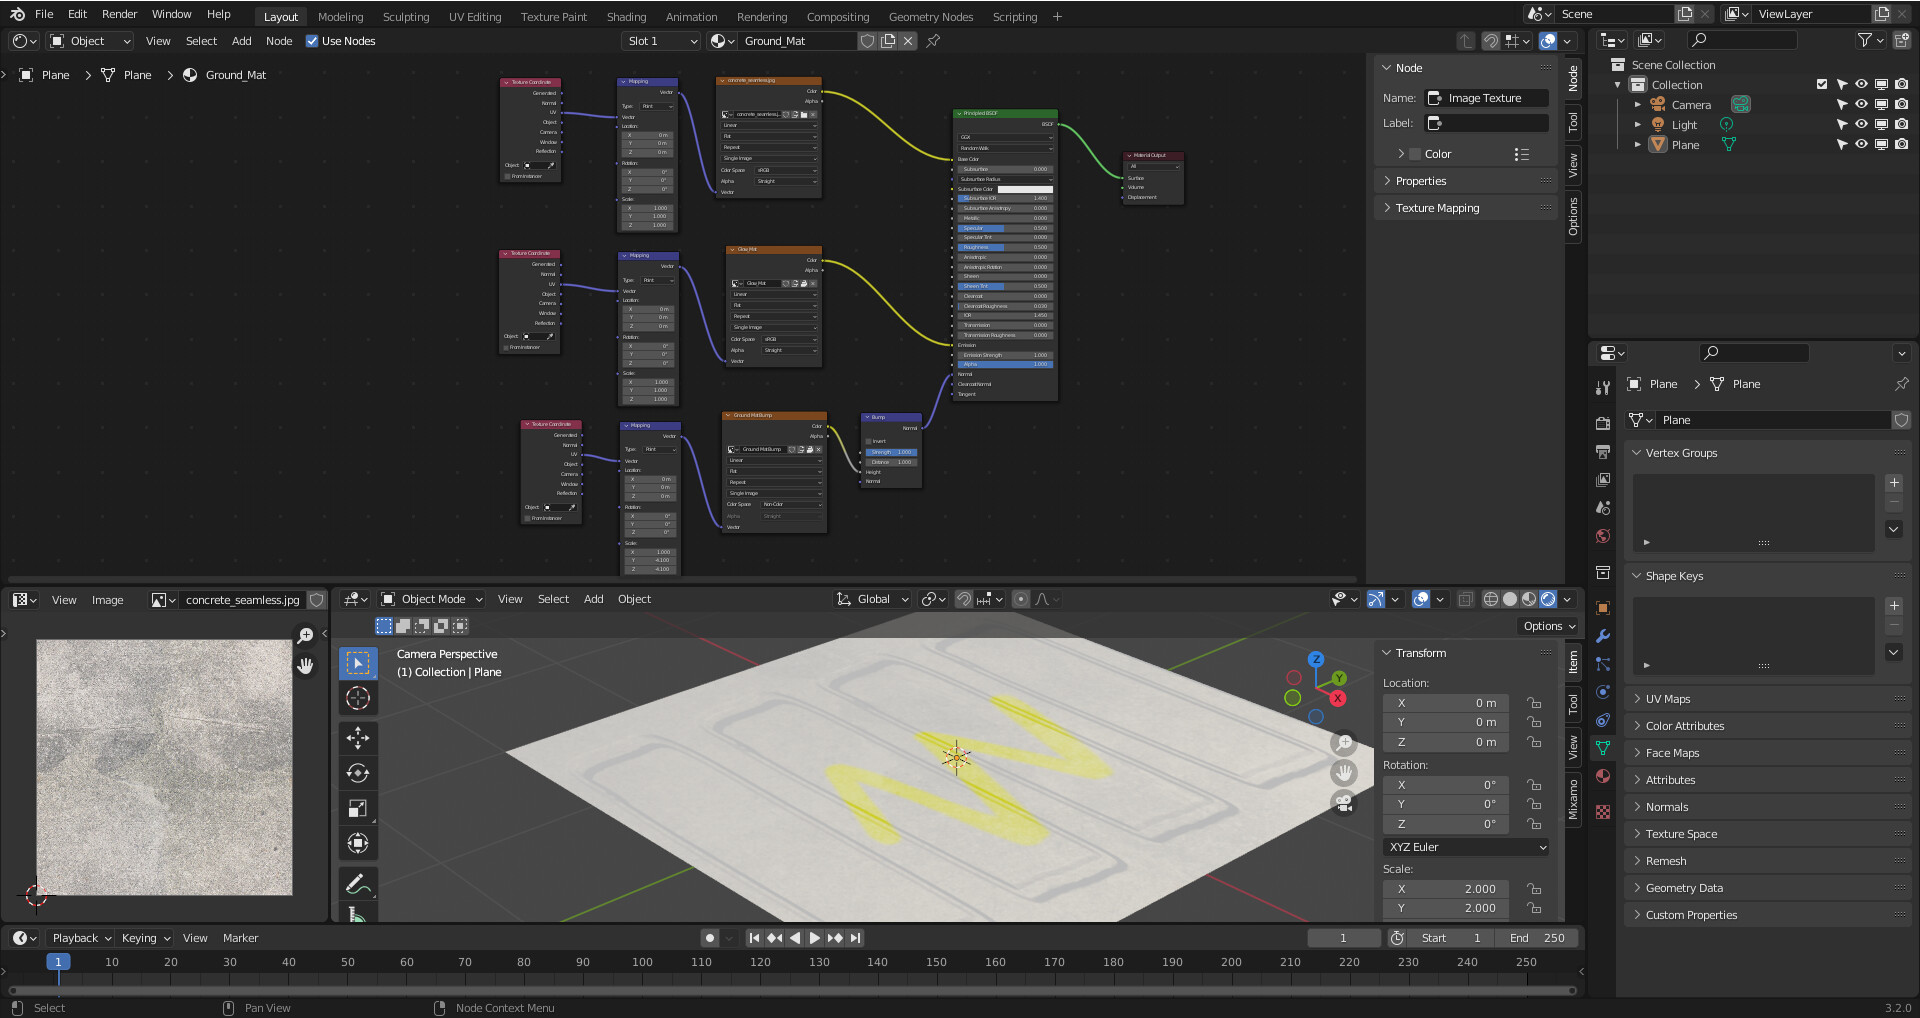
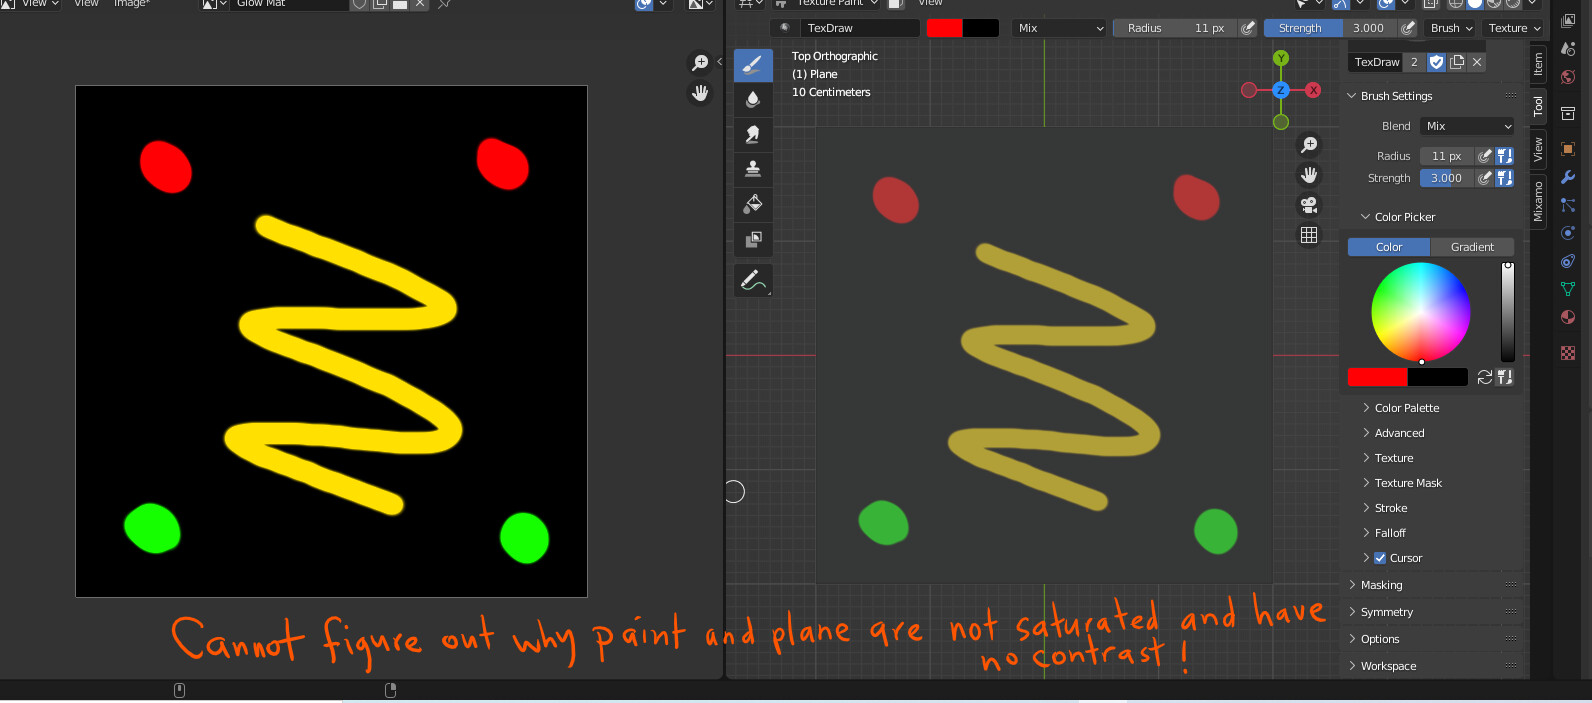
Q1) the glow (yellow) looks so pale and I don’t know why. It is a bright yellow. Is it a problem with my node setup?
Q2) I used Texture paint to create the glow material. I selected (base color) in Texture paint and then just plugged it into the emission slot but when I turn up the emission (see image) emission is affecting the whole layer not just the painted part and the underlying layers are being hidden.
Your emission map should be black where you don’t want emission. you can control the degree by using a brightness contrast node in front of your emit map.
Also If you use the emission input of the principled shader the emission will catch the scene light, and get washed out with light and reflections.
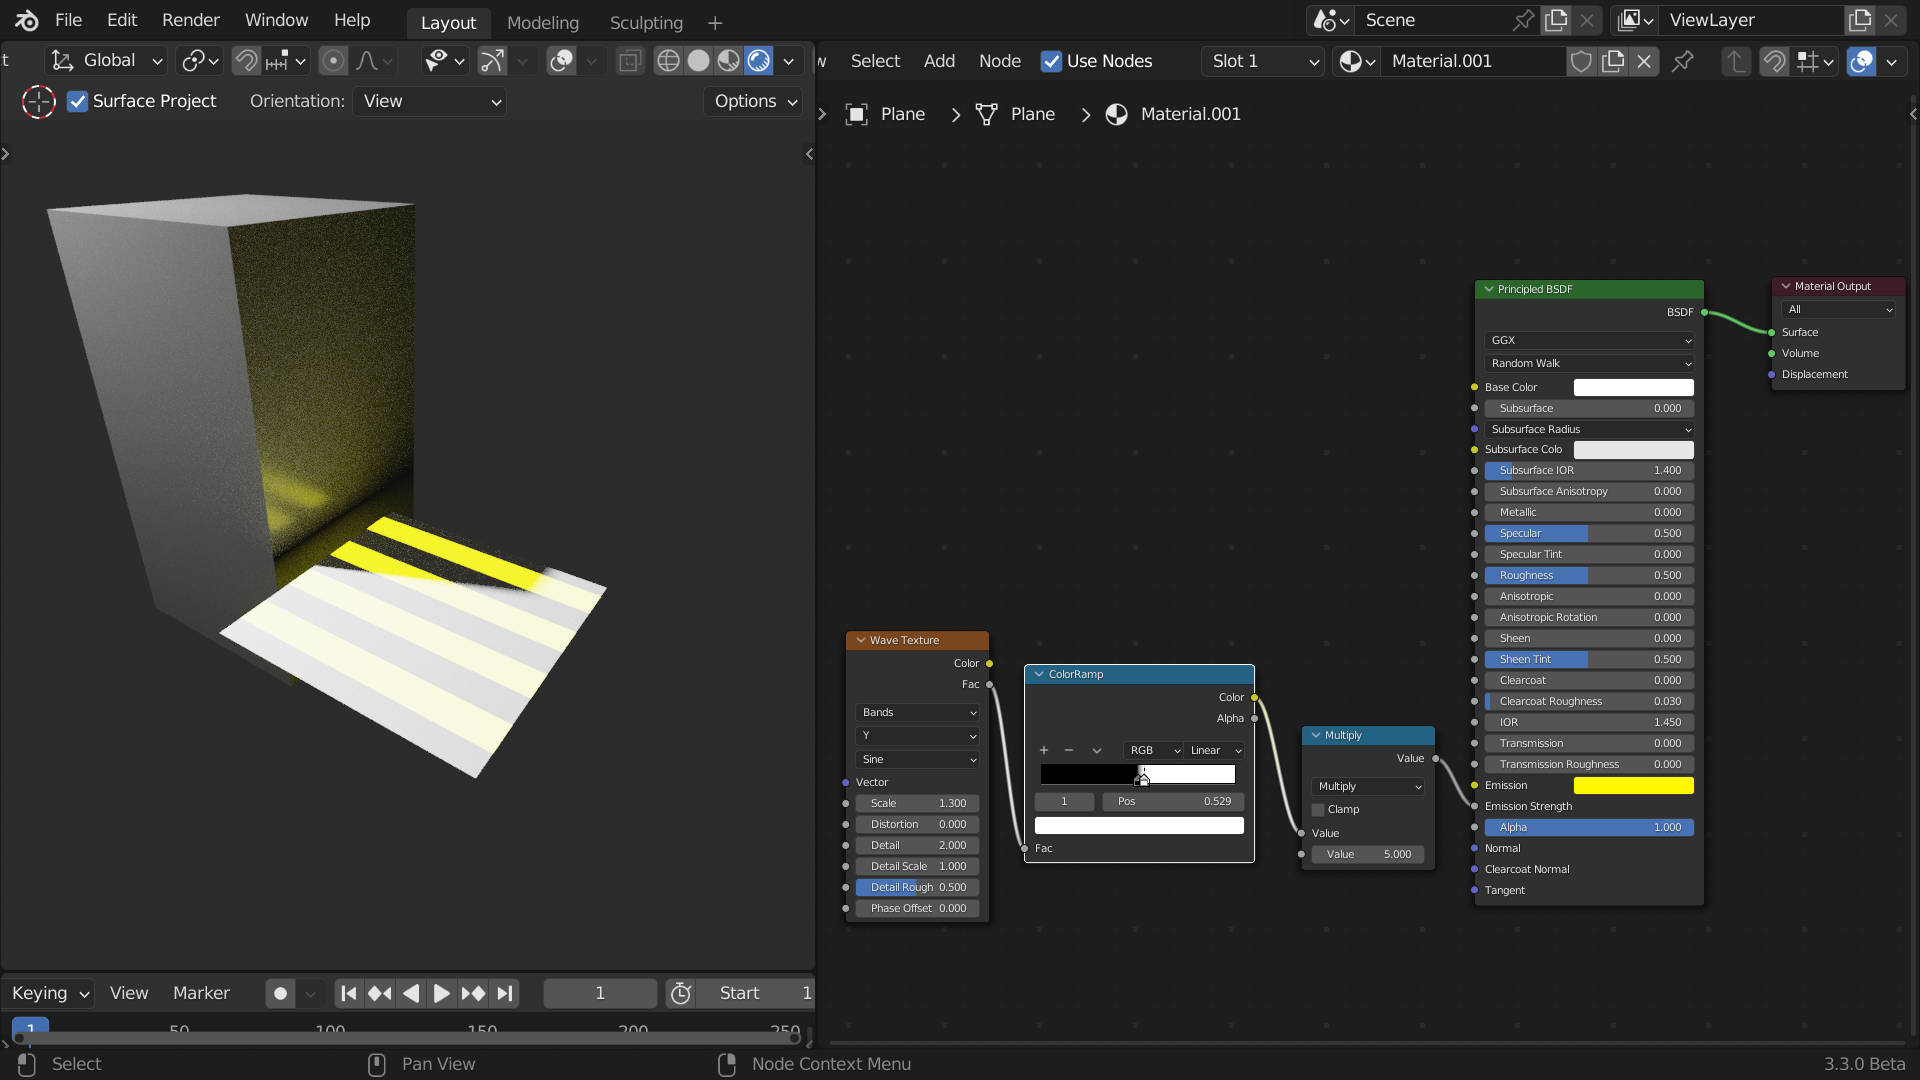
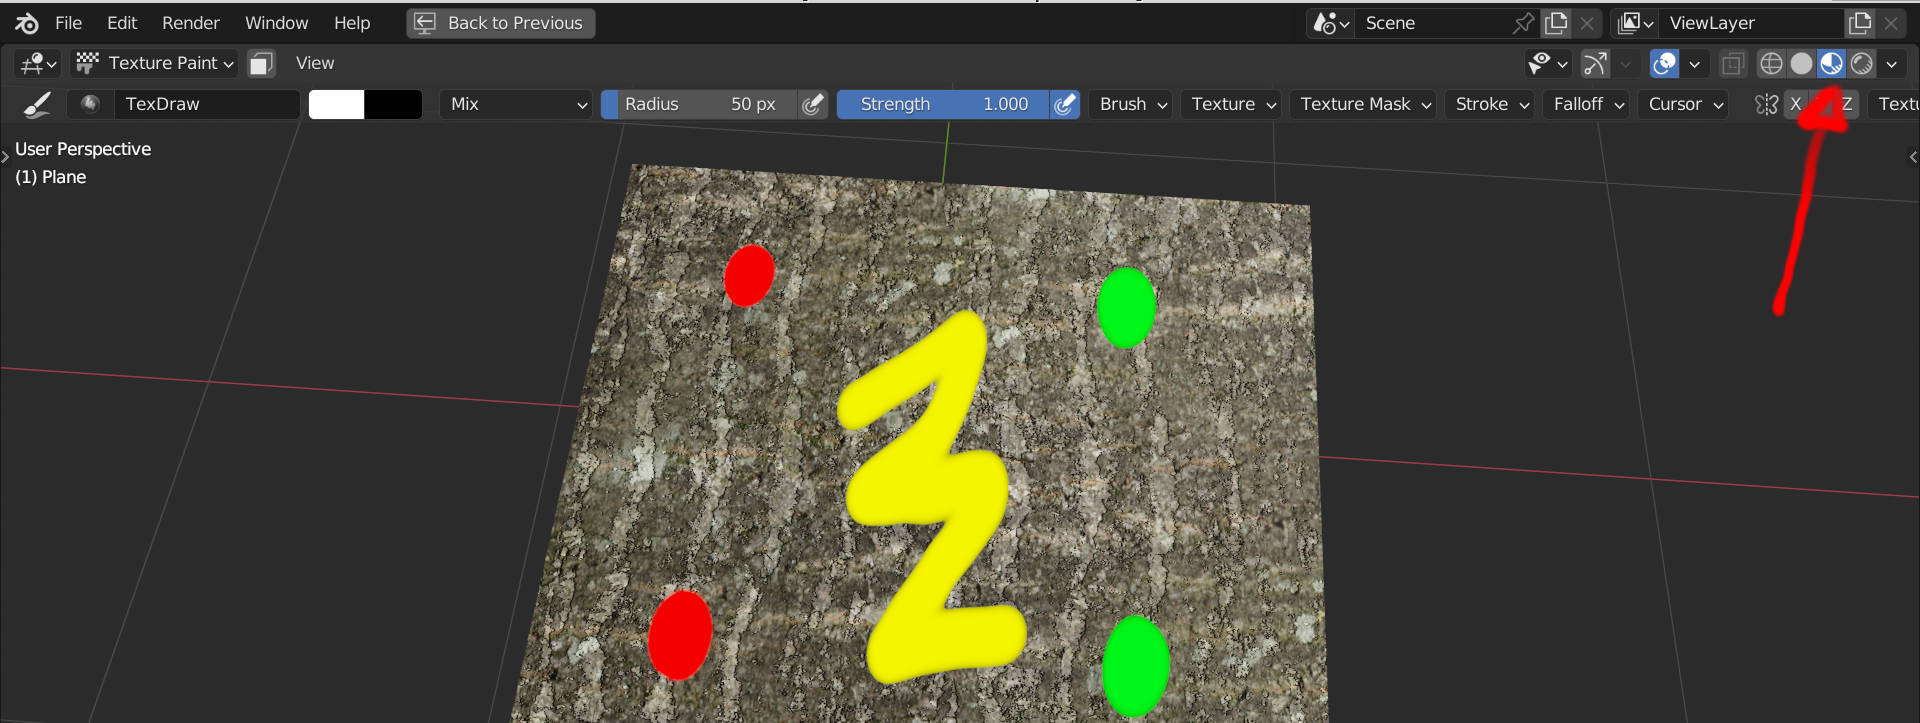
Here I have placed a cube that casts a shadow on the plane. You can see that where there is no shadow the emmision is washed out with the light of the lamp I have in the scene.
It might be better to use a mask to mix the principled shader with an emission shader. The mask should be black and white.
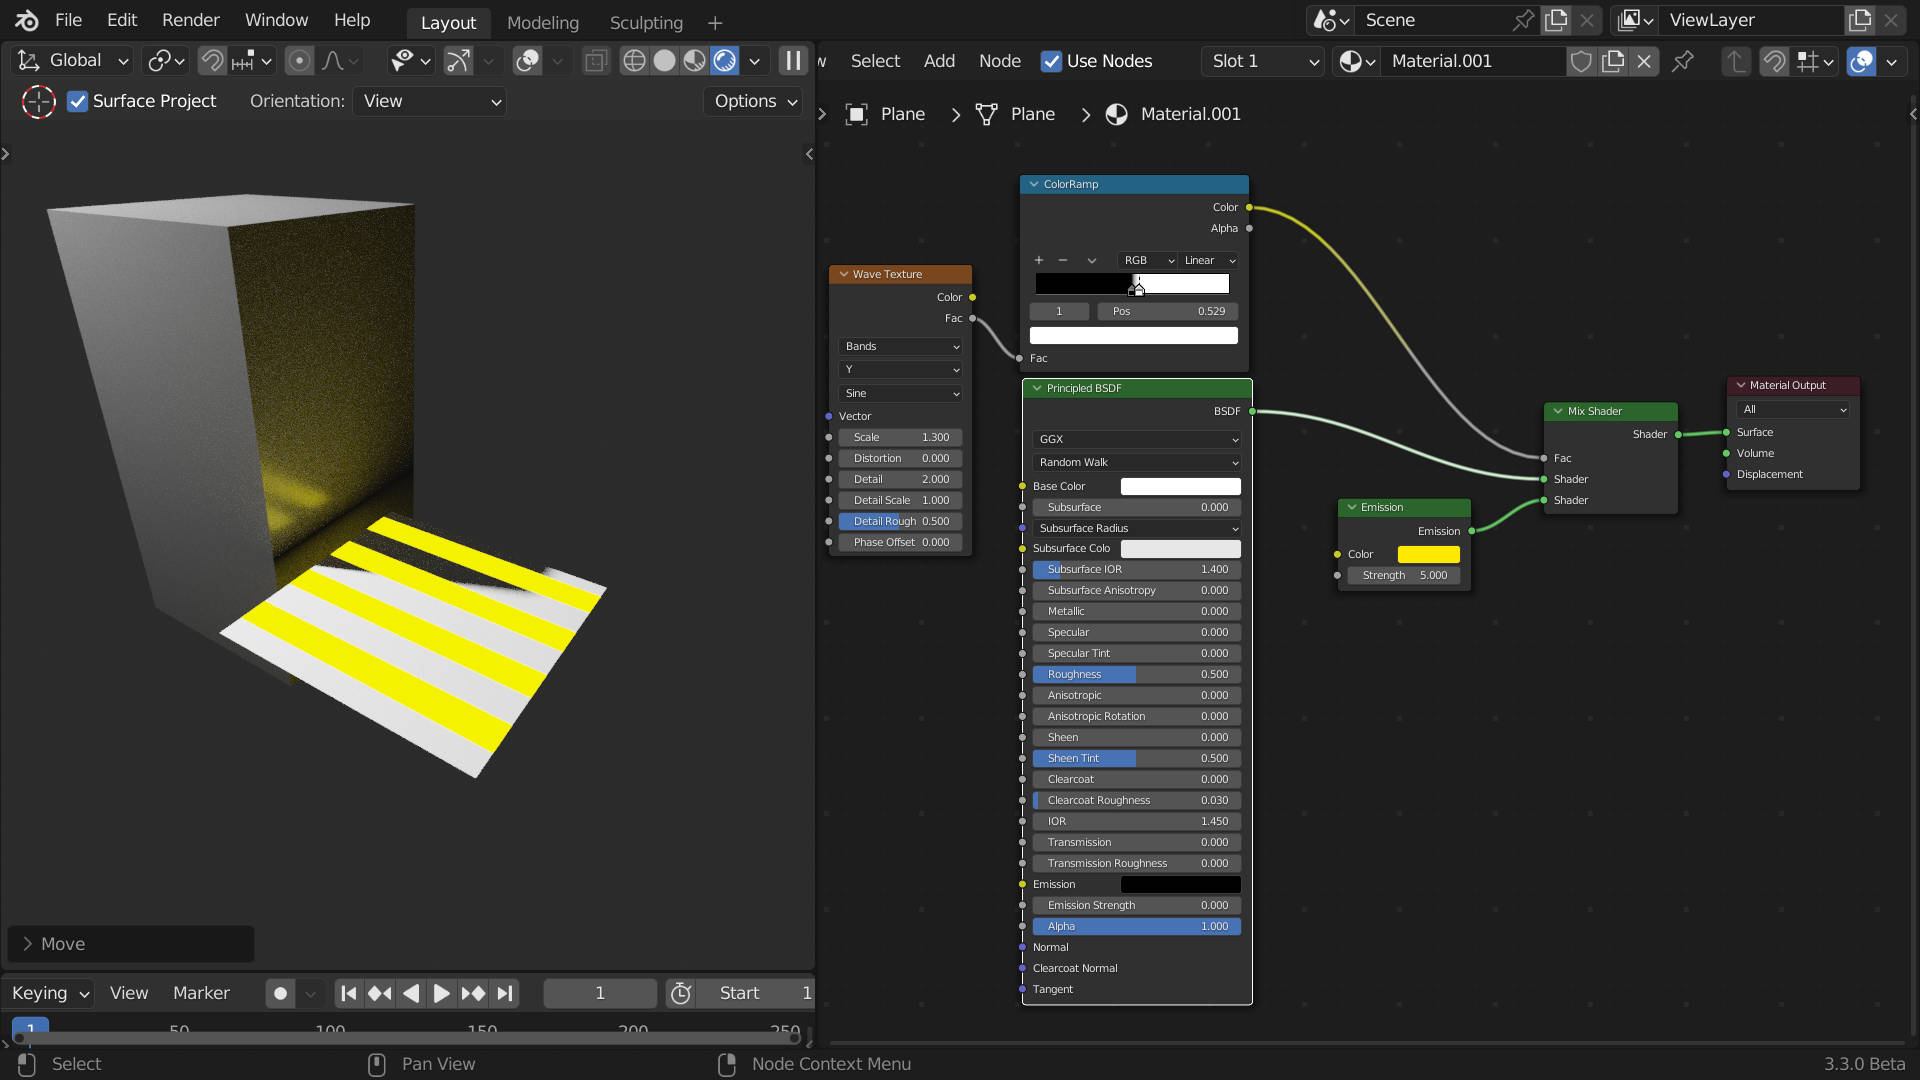
Here is the same scene with this setup.
So I was wanting to paint in Texture Paint (see #1) and see multiple colors in your example you used a yellow in the emission node.
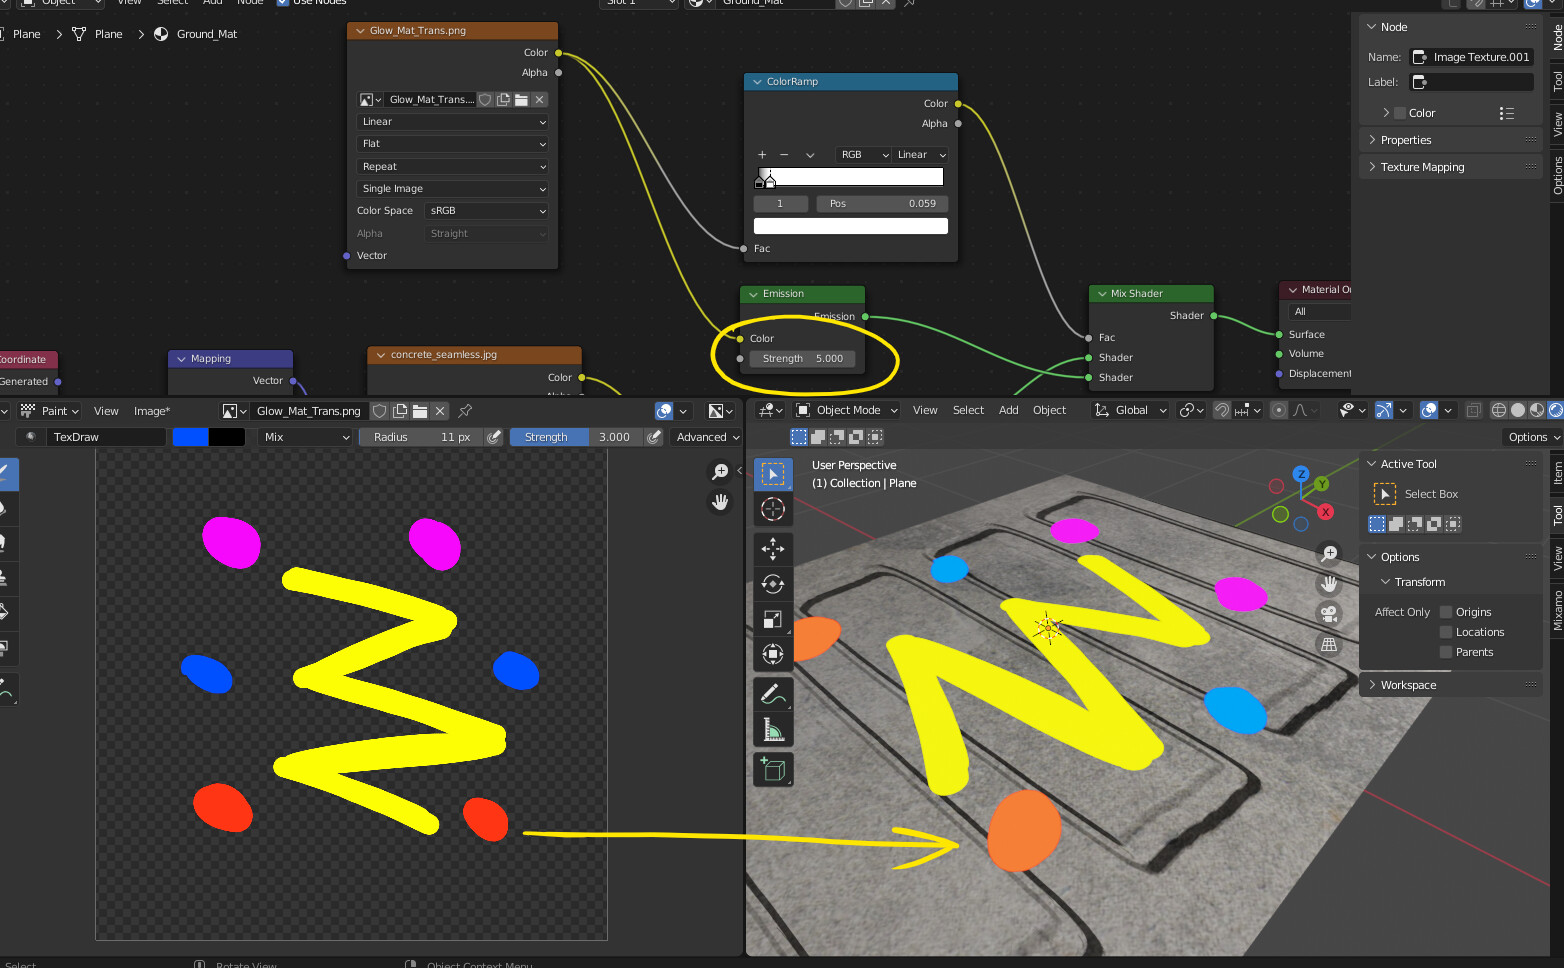
Q1) How do I use my color map (see#1) as the emission map so all my colors (see UV map) are visible on my plane (see #2) because my color map (bottom left) is not appearing on the plane (see #2).
I hope you understand what I am meaning.
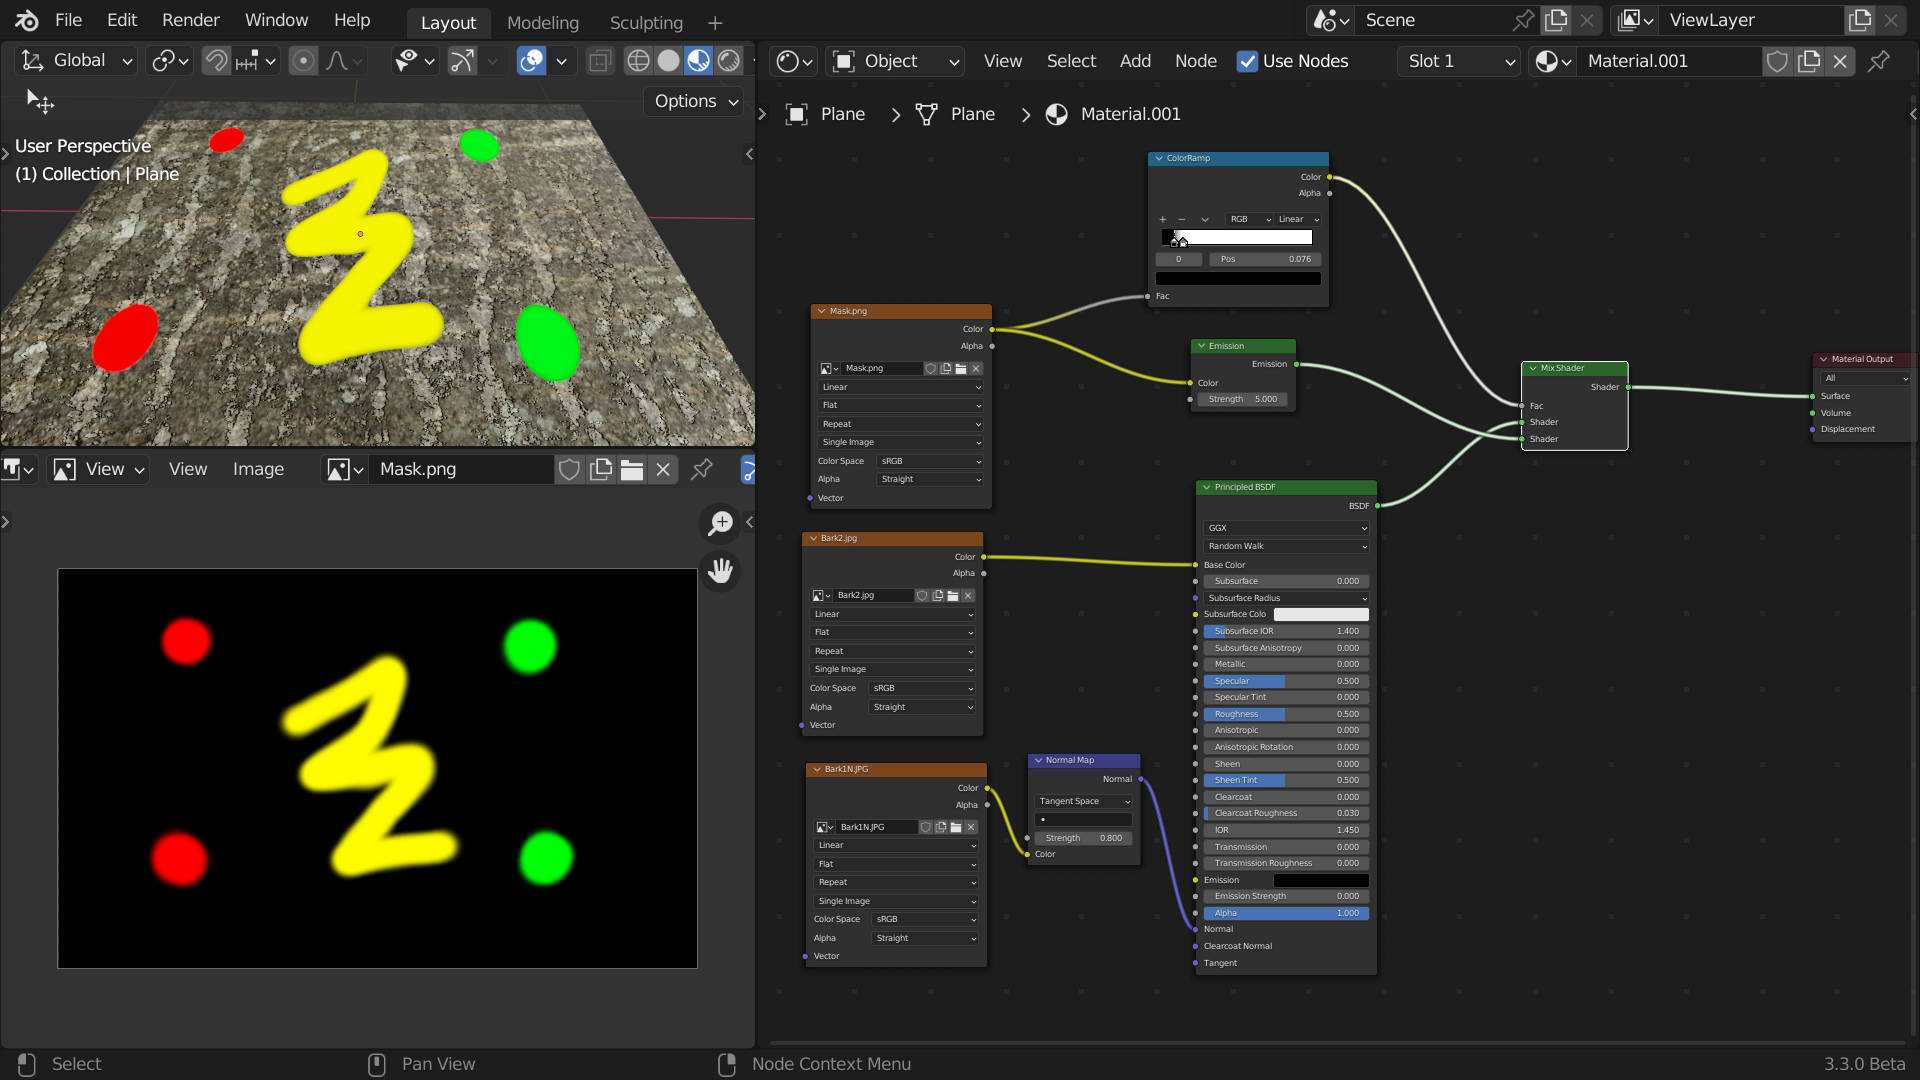
You can plug your emmission map image into the colour input of the emission shader. I would use a black background for the emission map/mask. That way the black part of the map is zero emission.
You will also have to adjust the sliders of the colour ramp to make sure all of the colours get clamped to white for the mask. Note that I had to put the colour ramp stops much closer to zero to get all the coulors to show up.
Ok, I opened PS and made a transparent background, then adjusted the Color Ramp and it works well with a transparent image too. I’m happy now. Your help is very much appreciated DNorman.
If I want to nit pick it would be nice if the reds and blues didn’t get lighter when I increase the emission strength to 5 but maybe there’s no getting around that.
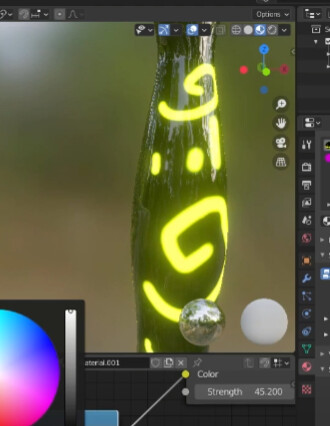
Hey more important than the color change, I just went back to the tutorial and I noticed his emits a nice glow where mine is flat. Any ideas how I can get my colors to glow like the image below?
The stronger the emision strength the whiter the emission objects colour will be.
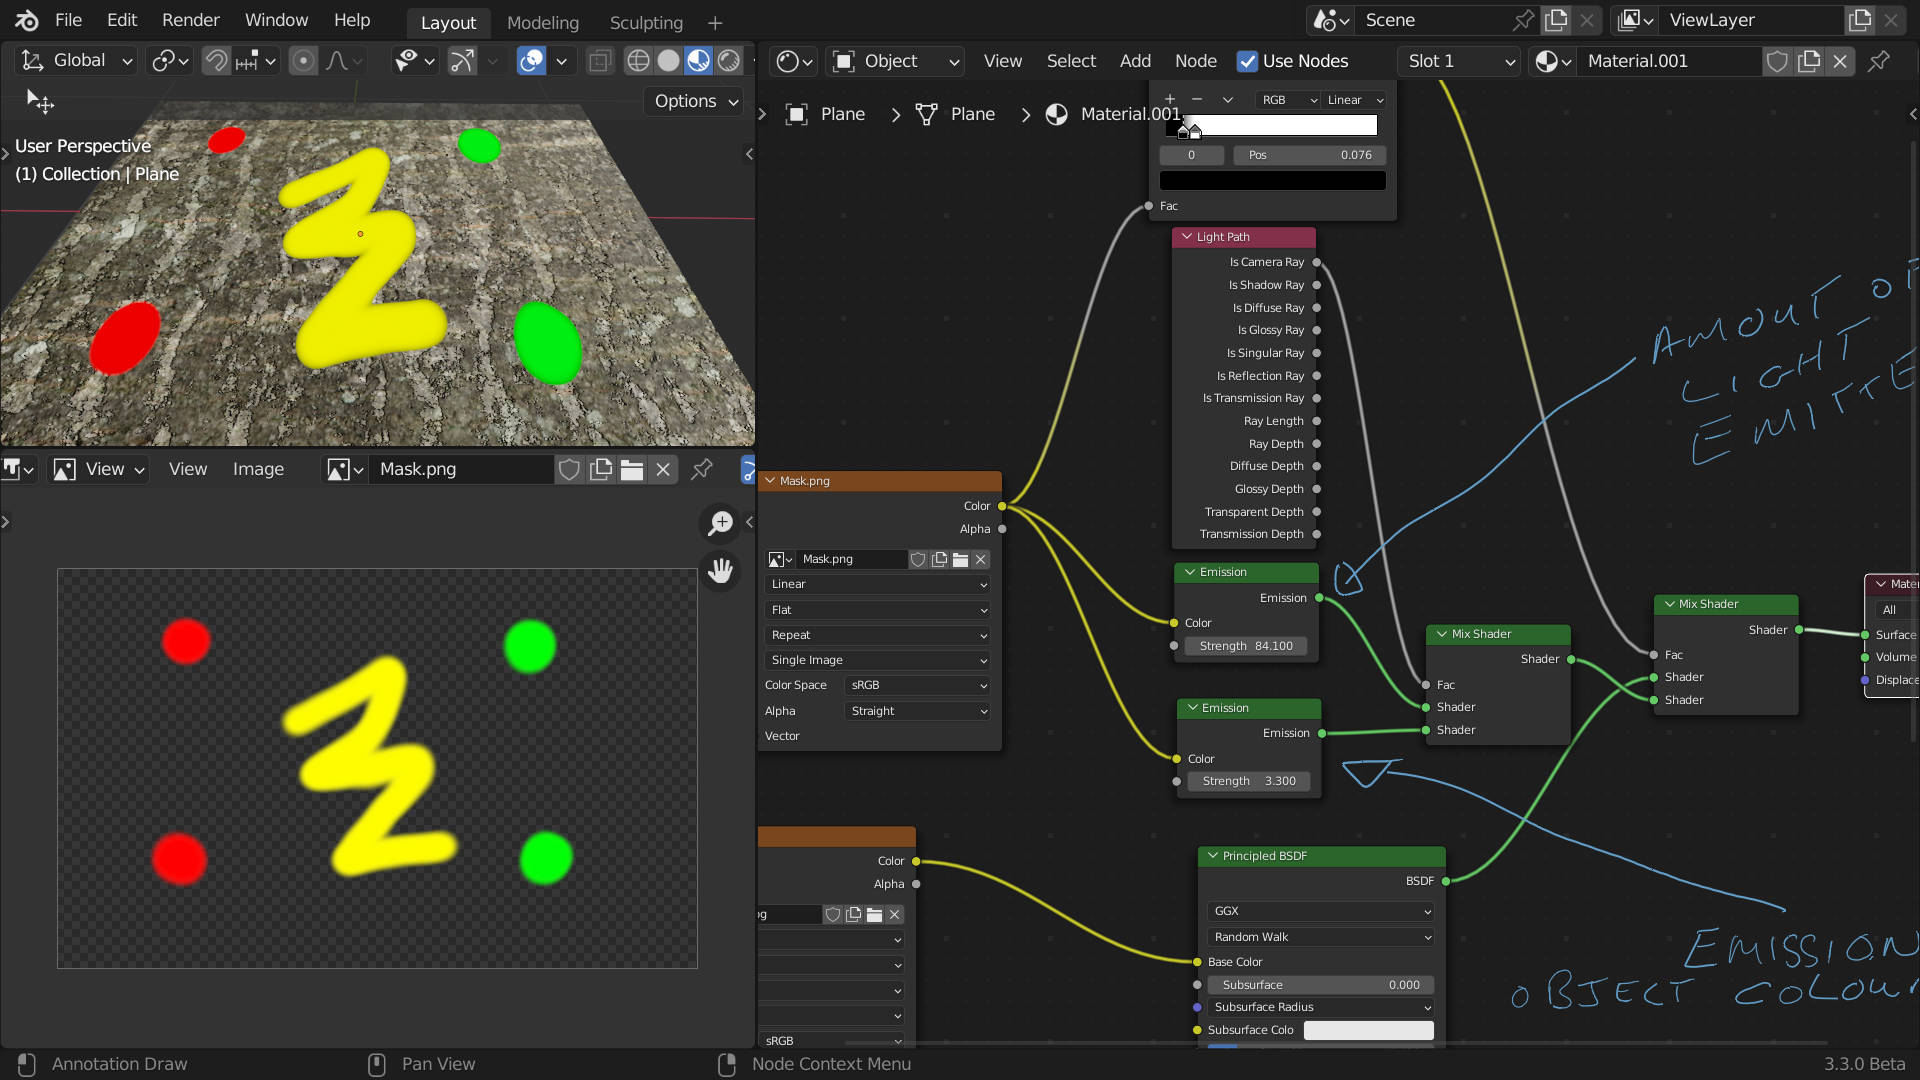
You can fix this by using 2 emission shaders, one that gives the colour for the emission object and the other amount of light emmited. You need to use the light path node’s Is camera ray output to mix the 2.
Note that I set the top emission shader strength to 84 so it will emmit a bright light but the bottom one is at 3.3 and the colours of the emission object stay a nice saturated colour.
Ok sorry, you have to differentiate between emission and bloom. I should have realized you were after bloom from your threads title. I was thinking more in terms of emission.
Emission is the amount of light the object will emit to light other objects. This only works well in cycles. In Eevee the material gets brighter and does not catch shadows but will not actually emit light on other objects.
Bloom/glow is an effect (post pro) that is applied to the final image as a whole.
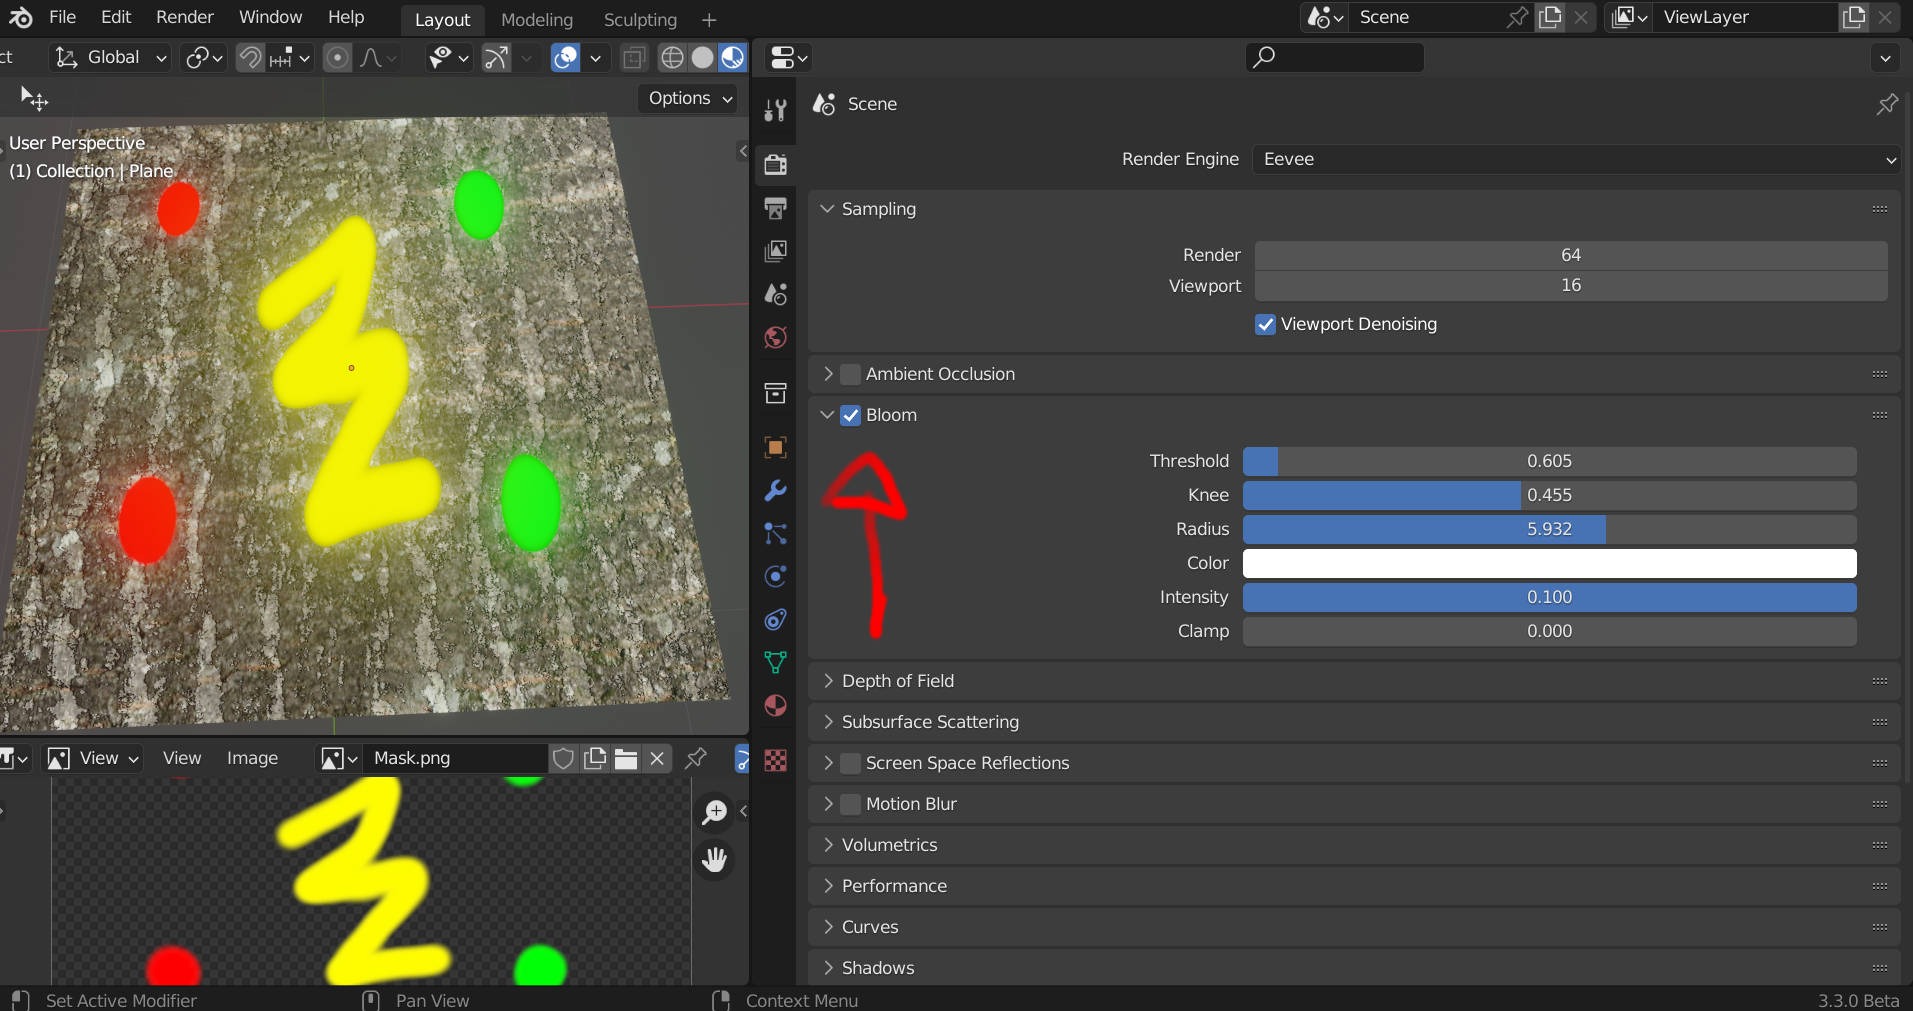
In Eevee there is a bloom option in the render settings.
The bloom option (in Eevee) depends on brightness/strength of the objects material. In Eevee your material will not emit light on other objects anyway.
So to recap for the bloom effect in Eevee there is no point in using the 2 emission shaders and the lightpath node, the bloom effect is controlled by the brightness/strength of the materials surface and has nothing to do with light emitted.
The setup would be like this without the second emission shader (this is similar to the one in the tutorial).
Wow. Thank you so very much. It’s late here so I will have to look this over tomorrow but yes I am sorry, I should have said “bloom” but I thought bloom & emission were the same thing. I will try this tomorrow and post my results or any questions I have. Thanks again.
Worth mentioning, If you’re in Cycles, you can get the same effect by adding a flare node and setting it to fog glow or something like that in the compositor.