Really new at this and I hope that I’m not being too much of a bother. I started learning about 3D after Eevee was introduced in 2.8 beta, so when I first picked up Blender, I saw my very basic first steps render better and much, much faster with Eevee. Since then I never really gave Cycles a second thought.
I hear that some stuff might look better in Cycles because Eevee is based on what video games do and Cycles is something that artists past and present use for their still images or movies or what-not.
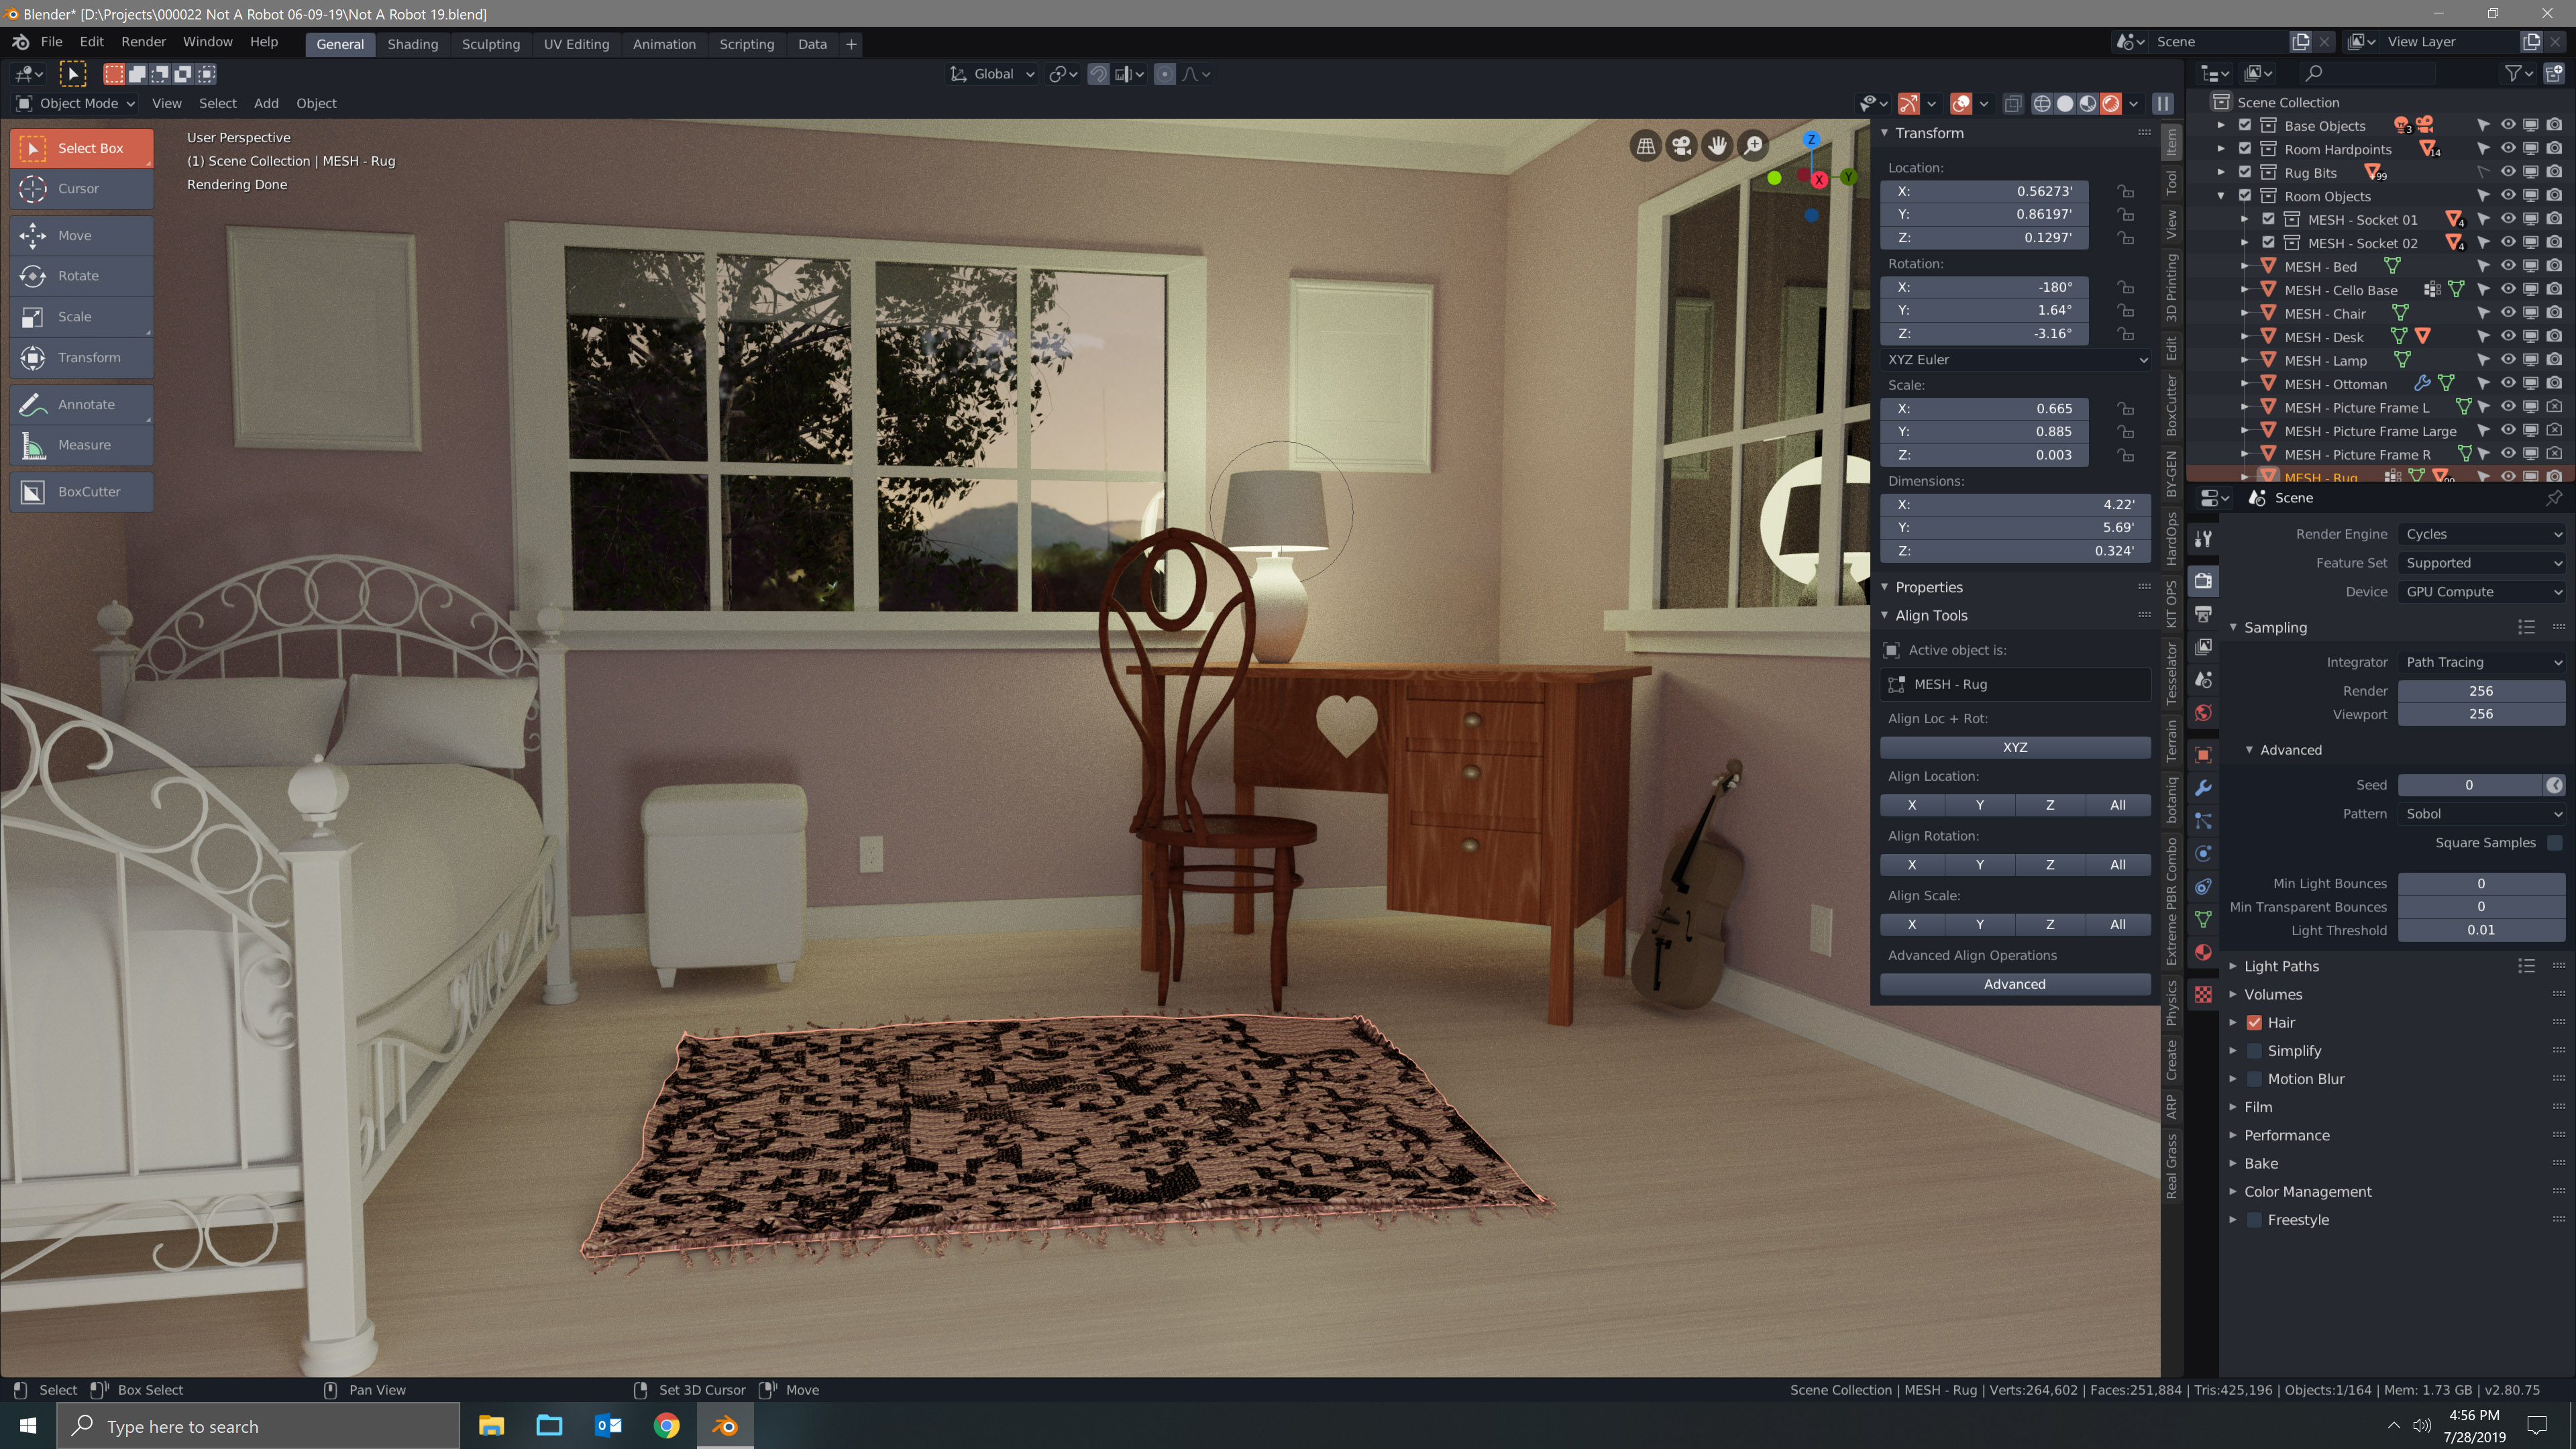
So I have this scene I’m working on, it looks okay in Eevee:
Especially the throw-rug and the fact that it looks like I loaded it up in Photoshop and ran a noise/speckle filter on it.
Is this one of those cases where, to get Cycles anywhere near as good or better than Eevee for this particular scene, I’m going to have to read a book about rendering and I’m going to have to go back, branch off, and design my scene especially for Cycles? If so, does anyone know of any good training courses or books about that, which would also work for Blender 2.8?
Are there any simple option switches I could throw to at least get rid of some of the noise?
Hi.
Sorry, but I don’t agree. Cycles result looks more physically correct. Apparently in Eevee you are not using Contact Shadows, Ambient occlusion or Soft Shadows. Apparently you are not using light probes either.
The transition between Cycles and Eevee (either way) is not immediate. It is possible that for each of them you must individually adjust the lighting (power/strength), materials and settings of each render engine.
Please, if you do not want to share the entire scene, you share the object that you consider does not look properly, with packed textures in a .blend file.
I’m not saying that one or the other is universally better, and I don’t know enough about anything at all to argue about anything. I’m not one of The People.
You’re disagreeing that the second image looks worse, YAFU? It’s cool if you are, but to my newbie eyes something that looks like the snow on a old television stuck between channels isn’t good at all.
You mentioned three things - contact shadows, ambient occlusion, and soft shadows. You are correct in that I’m not using ambient occlusion. Also, I had soft shadows turned off because there was a viewport performance hit with them on.
I turned both ambient occlusion and soft shadows on. I don’t know where contact shadows are. Is that a global thing or an object-level thing?
And if I do these three things and then if I figure out what light probes are and how to use them, there’s a good chance that my Cycles renders will look better?
If you are referring to the noise in the image (grains), Cycles needs very many render samples (Render tab > Sampling) to obtain an image without noise, even more for interior scenes like these. You can search on Google about Cycles good practices to minimize the noise in resulting image.
It is a setting for each of the Lamps/lights (Lamp tab/settings > Shadows) .
Although Cycles does have it’s gotcha’s, I think Eevee is far worse wrt the amount of tweaks you need to do in the settings to get a good result. Making it harder to learn. But that’s just my view, since I’m constantly failing with Eevee myself. I would advice to learn Cycles first, things are based on physics and may take you closer to ground truth even if it’s going to get noisy and time consuming per render. Tests can be done at 25-50% resolution with denoised fewer samples, and you can still see what’s going on and make tweak decisions on.
Sharing the project with textures packed makes it easier for us to pinpoint problems. And I suspect there are a few, like, what is causing those shadows and what is lighting the room? I won’t be doing any Eevee stuff though That Eevee render looks plain flat, I don’t really care much for it. Cycles one have noise issues for sure (expected), but may also have other issues.
One of the major things to consider when converting your scene to Cycles is to make sure the lights are of a realistic size, because shadows in Cycles are soft by nature and how soft depends on the size.
Keep in mind that Eevee could perhaps be seen as more of an engine to allow the fast rendering of high quality animation than something for realistic stills (as it produces noise-free results). The other thing to note is that 2.8 sees Eevee in its first iteration, it took Cycles many years to get to where it is today so I’m certain Eevee will improve too. The features you see in software like Unreal, Unity, and Marmoset show that Eevee is not yet at the limits in terms of fast scanline tech, and RTX could bring better reflections and refractions in the future.
The thing is that blender/3D learners run blender and start from the hyped wondrous super duper mega galactic everyoneistalkingabout EEVEE (which is default).
They will set their quality litmus paper over EEVEE result, they will think that EEVEE with its fancy post production and workflow stuff is correct, then when they switch to cycles they will not be able to spot what’s wrong.
If you don’t learn the basics of lighting, you’ll think that switching from EEVEE to Cycles is a one step operation.
So I agree with @CarlG, newbies who are interested in physical realism should start from cycles, then try to replicate it in EEVEE as much as they find the result and the limitations acceptable for their needs.
You don’t forget that originally Eevee was going to be just a better Cycles preview mode, much better than Cycles material preview in previous versions of Blender.
I don’t see big problem in Eevee being the default engine. New users will then become aware of Eevee’s limitations while they learn, and they themselves will start looking for solutions into Cycles. In the same way in which many of us have started learning Blender with internal engine (even when Cycles already existed, as in my case).
Not so much talking about missing tech (aniso? hint hint :D), but the amount of deliberate tweaking and adjustments you need to do for a good result (interiors). I’ve seen plenty of awesome interior stuff from Eevee, but I haven’t managed to get to those results yet. In order to get good results, you need to have good technical and artistry skills, moreso with Eevee than with Cycles because of the tweaks. In Cycles, you’re fighting noise/time instead for the most part. People see amazing stuff done with Eevee, Cycles, or other engines, and forget there are some very high skillsets involved in creating those.
I’m sad that we didn’t get any call for content wrt humanoid figures or simple interiors to scale added to the add mesh/add example (?) menu, as scale is a typical problem I see again and again.
I don’t have problem with Eevee being default either. People should learn the basics before going deeper into the material possibilities and lighting for interiors.
I don’t truly know either Eevee or Cycles. And I didn’t mean to start a thread about which is better overall, or which is better at such and such a thing, or which I should come to know first. I’ll let the Blender veterans go on about that. It’s not my fight.
I just saw that there are two renderers - one that I’m lightly familiar with and one that I’m not. I thought that my Cycles render was absolutely horrible compared to my Eevee render and wondered why.
So, my answers include:
Ambient occlusion
Contact shadows
Soft shadows
Light probes (for Eevee only)
Increase the samples
Use realistically-sized lights
These are good things to know, and I appreciate the advice, and I will continue to explore proper lighting as well as proper rendering settings.
i pretty much agree with all that was said.
personally i don’t use evee much.only for rough approximations of how material looks in differing lighting.
i would recommend learning cycles.i think most new learners aren’t really learning what matters most.
you can model the coolest stuff but have it look terrible,using bad lighting textures etc.
for instance the shadows by the bed indicate a light source coming from near the camera.not the lamp,or the windows.important but oft overlooked details.textures that look good in hdri lighting,might not look so good with a hemi light or mesh light.there is also the normals to consider.on the carpet did you by any chance recalculate normals ?so yeah there is a lot for you to learn.i say your doing well so far.
you have already mastered the first stumbling block,asking for help.
One of the first things that I learned about was to lay things out at an appropriate real-world size, if one is known. Ever since, I’ve been using real-world scale. This particular room is a little larger than average but still a believable 12 feet by 15 feet.
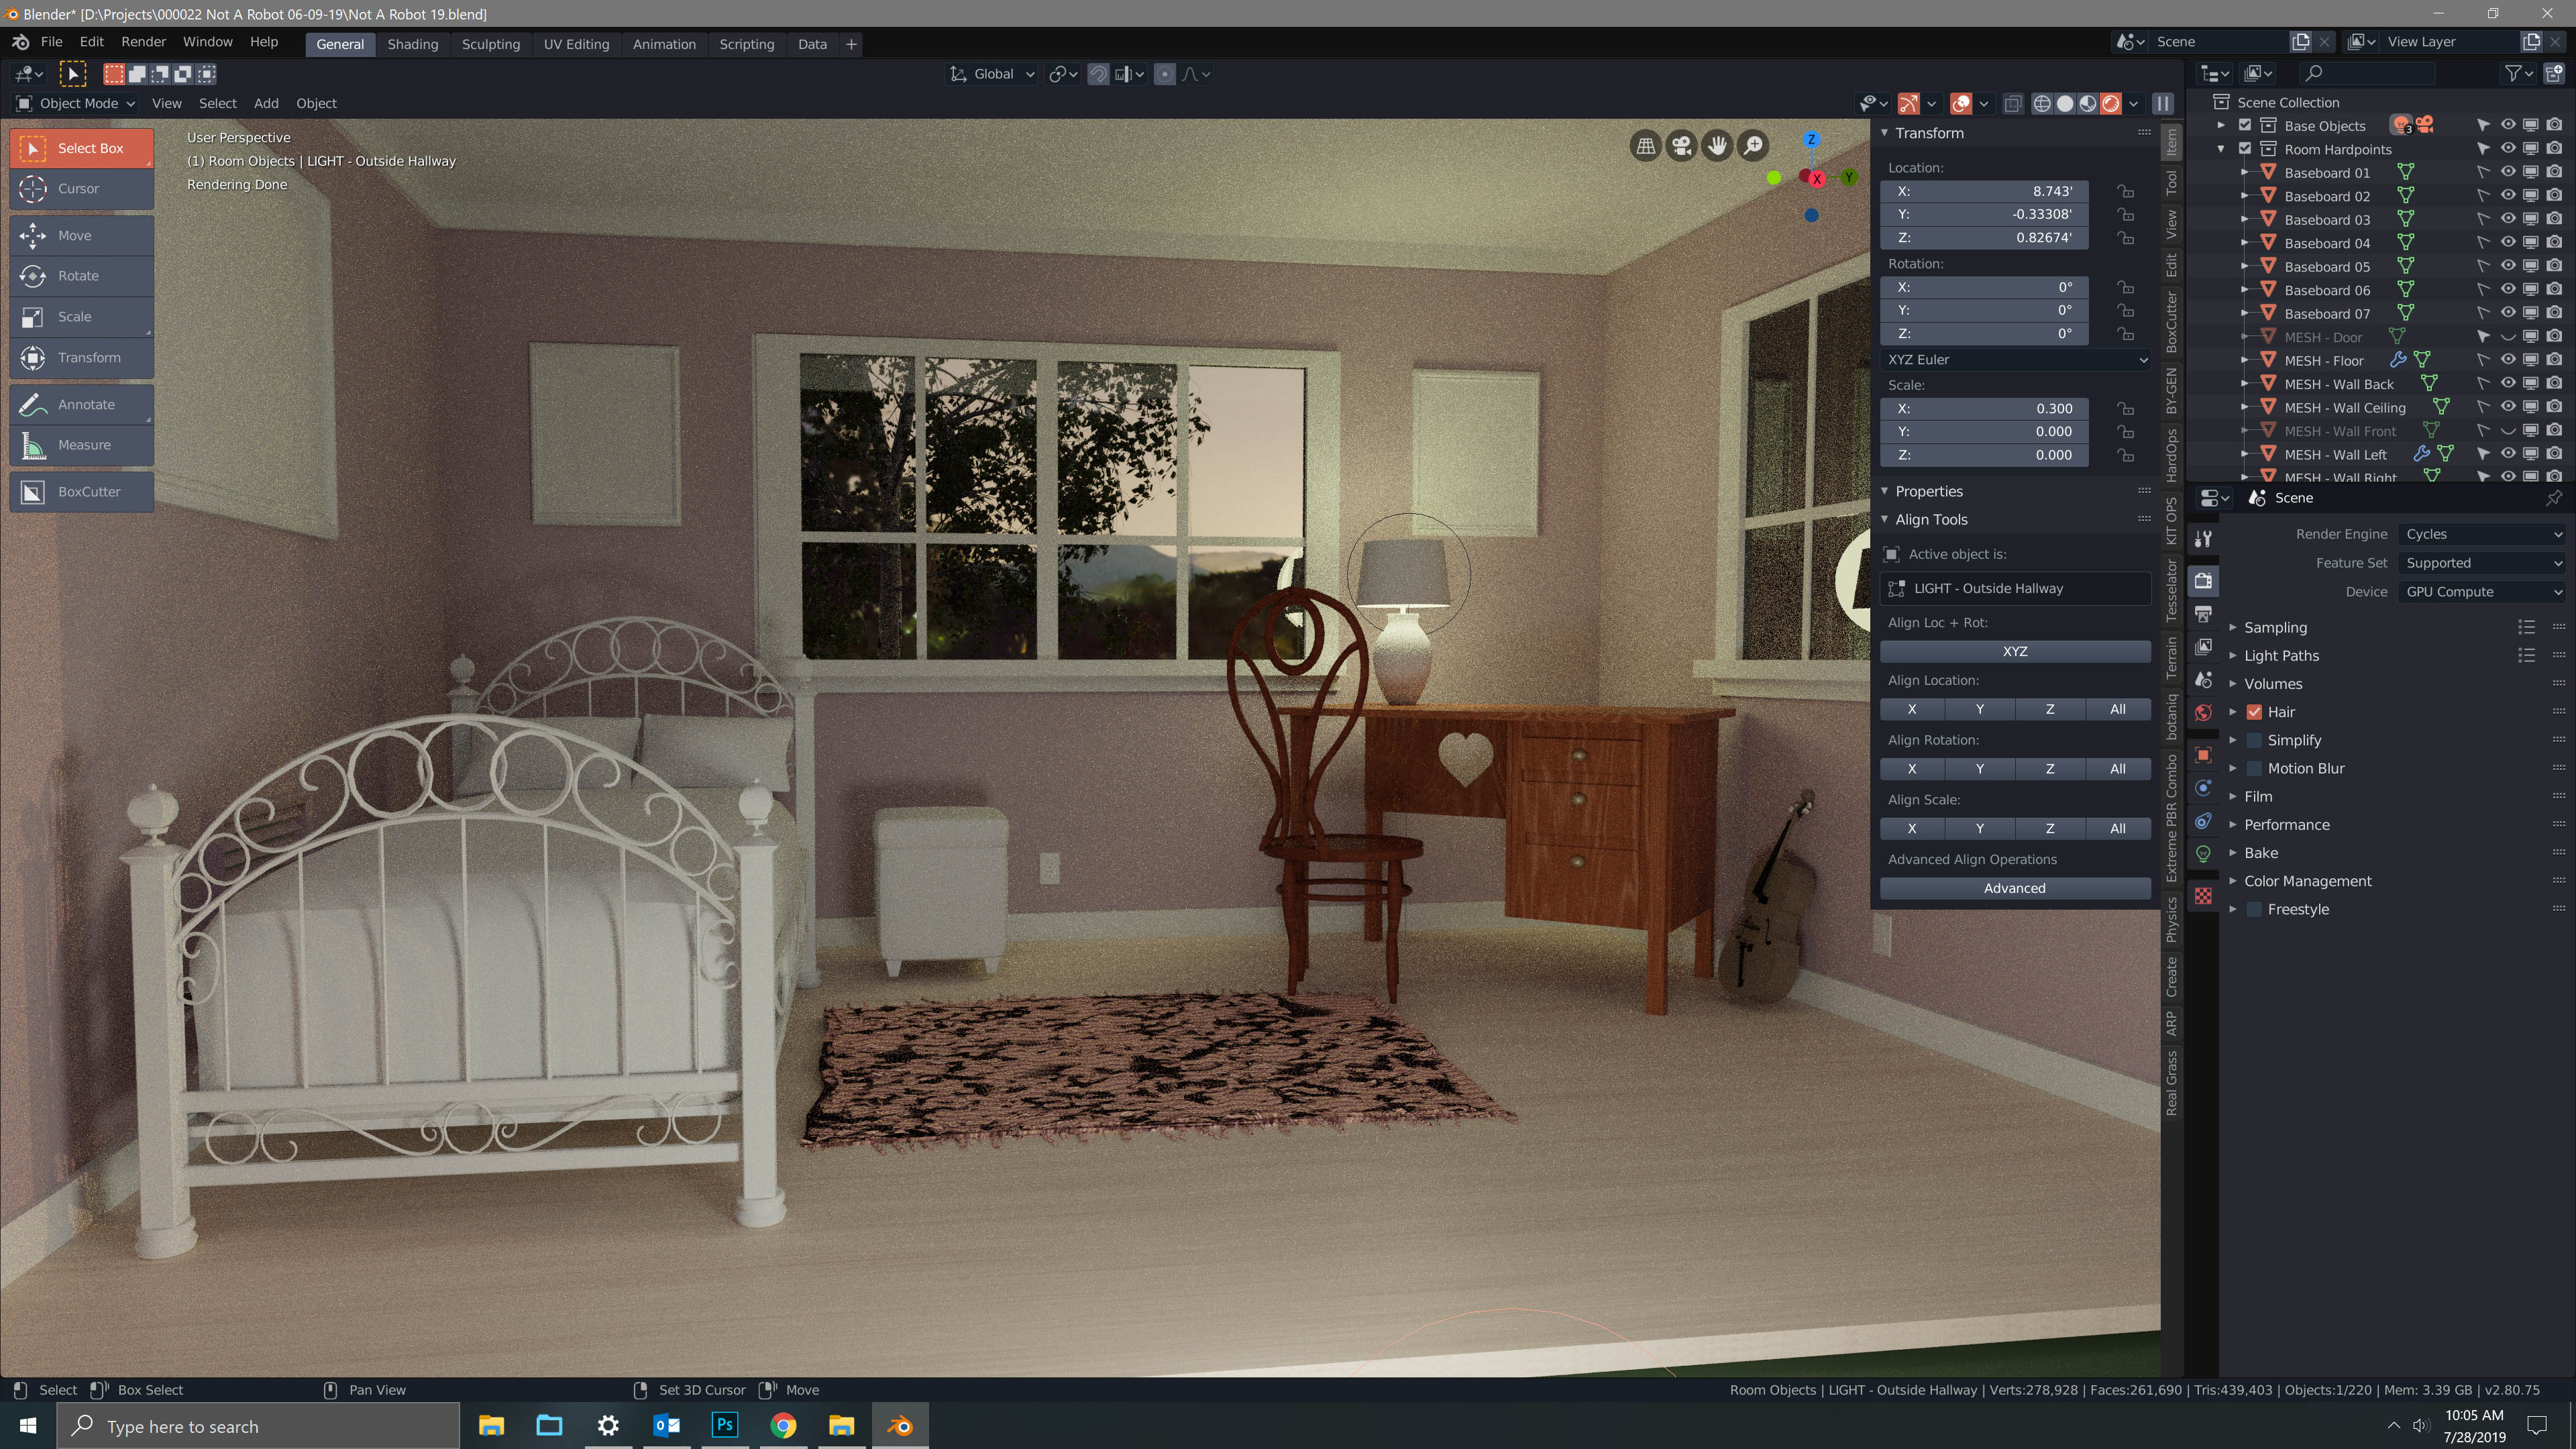
And there we are. Coming along nicely when I doubled the samples and did that thing with AO and Soft Shadows. The rug is still jacked up even though I tried a couple of different ways of Recalculating Normals. I think that probably the mesh is intersecting where it shouldn’t be, but I’ll have to check to be sure. I’m not sure if I can fix that or if it would be better just to start over and make a new rug.
Night table and “mini-cello?” appears to be floating.
Appears to be open towards the environment in the camera end. I can’t really explain the shadow from the bed. You could add a wall here and make it camera invisible instead.
Your light bulb is huge, bigger than the lamp shade, and visible in the window. You have a couple of options: a) Reduce the size of the bulb to natural size and make the shade translucent+diffuse - since I don’t know how it is setup, don’t worry about fresnel and glossy. That will cause the backfaces to receive diffuse light from inside, but the lighting it produces will be strictly indirect (and noisy). b) possibly aided with spotlights or IES pointlights, make the shade emit direct light by faking what the translucency setup would do. Hard to explain, but here is how I might do it for the shade.
Your carpet look really weird. How is it made? Use viewport overlays/face orientation to quickly check normals. Anything in red is facing the “wrong way” - depending on your setup, modifiers and certain material effects are dependent on correct (or at least handled) normals.
All corrected, except for the lamp shade and bulb. I’ll get to materialing those next when I get the wall hangings and the bed and the cello.
I made it by using a cloth simulation, running playback, then taking the frame I liked and going with that. You’re right - the normals are all screwed up. I think I might start over with this… it might be less work than trying to mess with the normals because the mesh is dense enough and the polys intersect enough to make flipping all of the individual normals that need to be flipped a pain-in-the-rear. It’s cool, I’ll figure it out.


 That Eevee render looks plain flat, I don’t really care much for it. Cycles one have noise issues for sure (expected), but may also have other issues.