Gorgious' photogrammetry shenanigans

Thumbnail


I actually just discovered this area of the website, and it looks like it’l help quench my thirst for documenting my recent endeavours ! I’ve recently been dabbing in photogrammetry and NERFs and I find the topic fascinating.

Since I started learning Blender I’ve always loved pushing the limits of procedural workflows, using shader nodes, animation nodes, geometry nodes, code-generated art, etc. Nowadays I’m leaning towards what seems like the opposite workflow : capturing reality to produce CG art, instead of trying to imitate reality with CG tools.

It also aligns quite well with what I’m doing in my job, where I (among other things) reconstruct buildings using laser scanner data.

So my goal right now is to build an expansive library of things I stumble upon in my random whereabouts, and of course share what I can with the world wide web.

Enough talk, let’s see what we can get out of a regular android camera and a bit of processing power.

I’ve tried using a few different apps and the one that really stick to me is poly.cam. I’m still getting the hang of it but it already threw quite satisfying results !

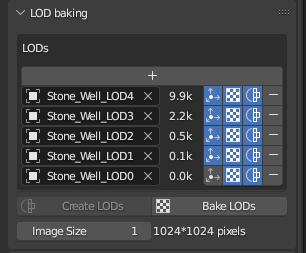
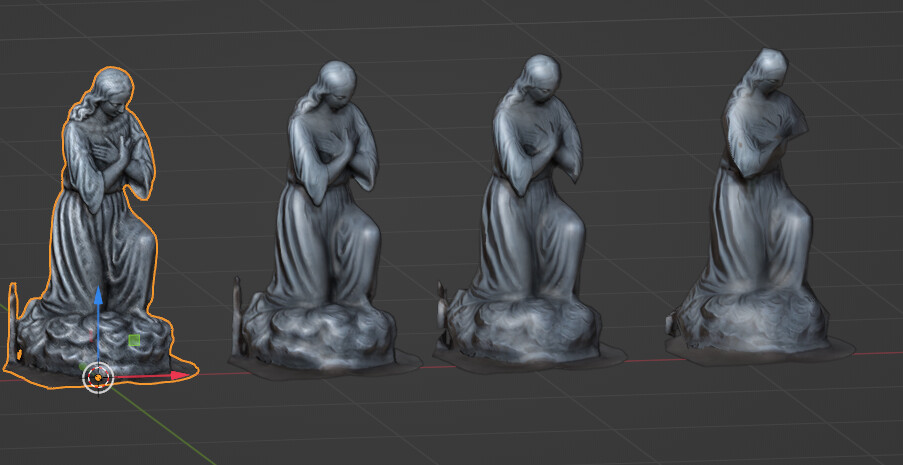
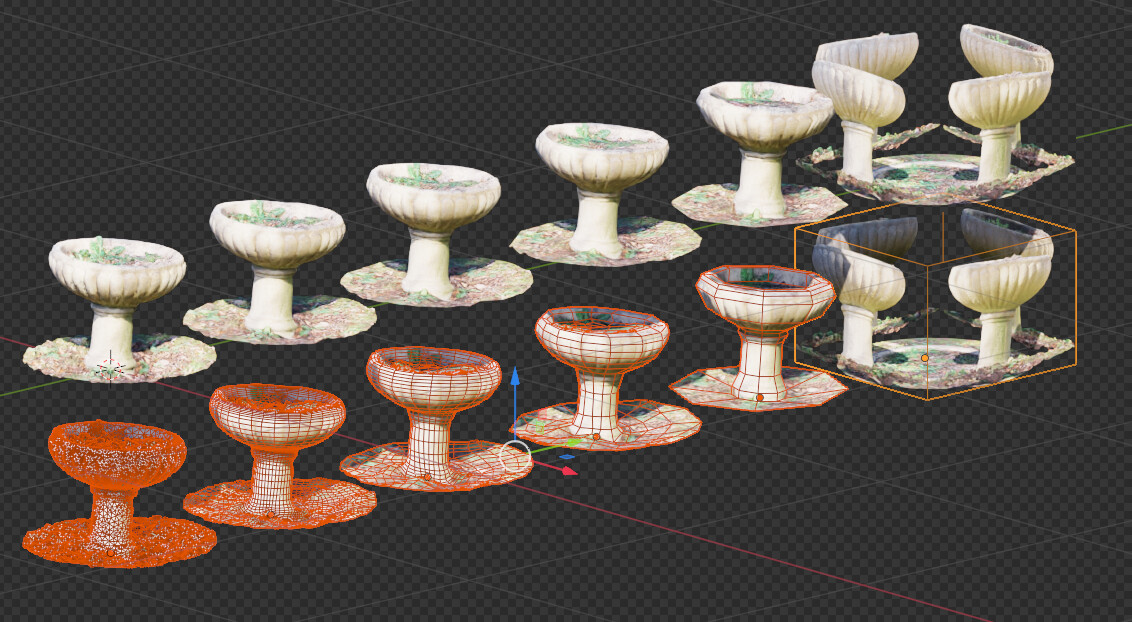
Then I’ve set out to build a little script to remesh & bake my models to create different LODs, to see how far we can push this thing. The idea is to be able to beat doing it by hand or even procedurally time-wise and quality-wise, granted the thing I want to model exists in real life.

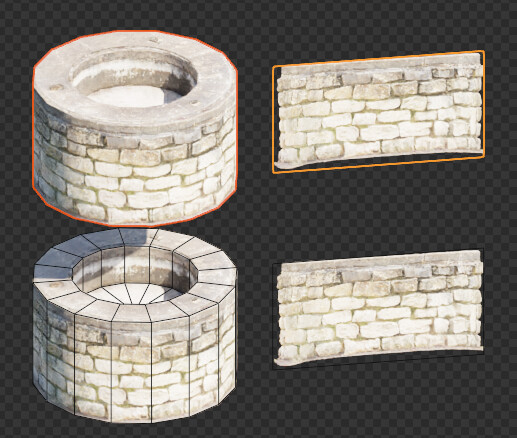
Here’s my first crash test. It’s a somewhat old stone well that laid casually in the middle of a street I walked on in one of my recent holidays. (32 Rue du Peulx - Google Maps) Oh and by the way I’m using the trial version of quad remesher to remesh the base object to make it more quad-y and less triangle-y and it works quite well, I’ll surely invest in it when the trial ends.

The textures in the back are a bit stretched because of the wall behind it which didn’t let me take good front facing photos.

capture2

Here’s the models over on sketchfab for the grabs

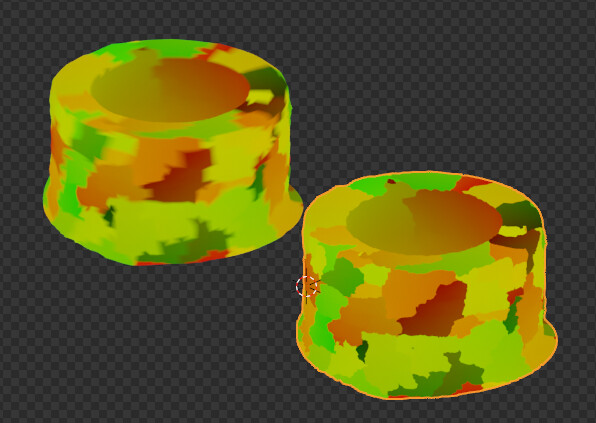
Note that at first instead of baking the data I tried to project the UV map onto the low poly models using a GN node tree

It does work, up to a point

UVs on photogrammetrised objects are notoriously bad, and it generated a lot of seams that make the texture data jump from one point of the texture to another along a quad, hence the ugly seams where the UVs are interpolated.

image

I’m sure there is a way to circumvent it, I’m working on it. It would let met use a single material and I wouldn’t need to bake new maps for the objects, which would be a huge time saver.

To be continued

11 Likes

Alright so here are two new entries to the fountains LODS. Here I didn’t use an auto remesher but just went with plain old polygonal modelling. Hopefully it isn’s too much effort, after all we’re trying to reduce the sweat and tears we put into our work :slight_smile: Right ?


image

So these I can see being used in a game or a mobile interactive app :slight_smile:

I’m also trying out creating a lod utility addon to help in my creation process, there are still a lot of parts to iron out but it does help a lot. I haven’t really delved that much into texture baking ever, and the whole (vanilla Blender) experience is a bit lacking to say the least, especially when trying to bake multiple maps…

image

Yup, I know I should be using a UIList to display the data, but the documentation is also daunting, so I’ll keep using my bits and bobs method for now !

I’ve updated the sketchfab model as well to add the two new LODs.

Next up, this beauty that lied not one hundred meters away from the well !

image

https://www.google.com/maps/@46.2252801,-1.4343706,3a,75y,2.1h,66.99t/data=!3m6!1e1!3m4!1sYf9QFMcovKo7JOFOMzpspg!2e0!7i16384!8i8192

5 Likes

Alright, here goes

The quad remesher automatic remeshing doesn’t seem to really like hard edges like that so I had to get my hand a bit dirty to get a somewhat nice result. I use the vertex painting feature to get more geometry around the sculpted faces which was kind of nice to not get unformed blobs as an output.

Red means higher density, cyan means lower density. After a bit of trial and error I remove the cyan vertex colors because they cause unsightly spikes in the remesh.

I also wrote a simple macro to join vertices and mark sharp to help the remesher know where to force an edge flow.

capture4

Here’s a crappy timelapse of me painstainkingly manually remeshing the fountain

capture3

Also, the quad version has an alpha channel now :slight_smile:

Next up, I was thinking this one

7 Likes

Here’s the latest one then

I again had to add areas with denser geometry for the automatic remesher, and marked a few edges sharp so it didn’t end up as a blob. Redder means higher density in the remesh.

I also wrote a small operator utility to rename the LODs image maps and materials so it doesn’t come out completely mangled in the output .glb file

https://github.com/Gorgious56/gorgious_utilities/blob/master/bake/operator/sanitize_image_names.py

I won’t bother getting into too much detail about how this whole process works in my addon, I’m sure if I leave like that and come back in 2 weeks I won’t be able to use it properly >< But for now it helps me achieve my current goal.

And the model over on sketchfab

Next up this child playground thingie

5 Likes

Here a new one. Not particularly proud of the result, it was interesting playing with a shape with holes and vivid colors.

In retrospect I would have taken more time to capture the top of the thingie, it does miss a few texture detail and polygons. I should also have taken a bit more time around the round parts, the photogrammetry came a bit short on that end too.

The next to last LOD looks IMO the best because I manually modelled it, the overall shapes made it pretyy straightforward I think. However I messed up the roof texture bake. Well, here goes.

Next up, this gorgeous virgin mary statue I captured in a church. A bit of touching up on the remesh side.

8 Likes

You’re building Gorgious Megascan, one asset at a time !
Super cool and interesting to see your detailed progress ! Keep them coming !

3 Likes

The node tree here (the one for UV transfer) might be way too simple for the task you are doing and might require some complex math with a lot more nodes, but I unfortunately can’t tell you how to pull it off. Geometry nodes is advancing a lot faster than my ability to figure out the tricks.

Now in theory, you can also use nodes to turn a scanned triangle soup into something that is passible for rendering (since these are static objects), but that is outside of my workflow so I can’t say how it would be done either.

1 Like

@sozap Thanks ! Hehe happy to share :slight_smile:

@Ace_Dragon thanks for the feedback. I’ve abandoned the node based solution for now, but I would like to find a way to force my UVs to match. Right now every model has its own set of UVs and its own set of textures which is overkill since they should all reference the same data. Food for thought !

Regarding the retopology part, one of the ideas was to get a model that would be “easier” to animate, with correct edge flow and quad topology. It would be awesome if there was a “retopology” node available natively in Geometry Nodes.

capture2

Here’s the newborn

5 Likes

Another one, an ornemental basin this time.

Things to look for :

  • Overcast weather is better, having harsh lighting from the sun will irredmediably bake shadows and lighter areas into the texture
  • Vegetation is nicely rendered from a distance but creates spiky meshes from close
  • it’s important to take photos of the downward facing parts of the objects
  • Cement / cut rock gives a nice textured detail
  • It’s hard to separate the mesh from its surrounding

5 Likes

A tree stump this time. I was pleasantly surprised by how it came out. The details on it are quite nice, even from pretty close.

Anyways, nothing much to say apart from don’t do photogrammetry when it’s sunny !! It’s a bit counterintuitive TBH because that’s when you want to go outside. Forunately around where I live in North West of France we quite often have overcast weather :slight_smile:

Here’s the model over on Sketchfab

6 Likes

Now an ancient arch door taken at Abbaye des Chateliers, île de Ré, France

https://www.google.com/maps/@46.1856768,-1.2977036,3a,75y,78.02h,96.61t/data=!3m7!1e1!3m5!1sAF1QipPA_lBSDBH_kb0Sf_Y0FCRVwutLSHjxnVM0Rvv5!2e10!3e11!7i7680!8i3840

I’ve spent quite some time refactoring the utility addon I use to streamline the lodification process, only to realize it was a huge mistake and scraping everything. I also inadvertently permanently erased some code I wrote from something unrelated, so that was a fun time :slight_smile:

All good, now.

Once again, sunny weather is kinda bad for photogrammetry, avoid it !

The other, shadowy side

It was interesting to capture, I’ve recently acquired a selfie stick which I tend to utilize to capture heights that are unreachables from a regularly-sized human so the scans don’t end so abruptly. I wish I had more salvageable results from the parts around the door but alas it was quite bad.

I also am not a huge fan of the close up textures. If I had to redo this scan, I would do it in two times, one for the inside and one for the outside.

And the sketchfab model

4 Likes

Another day, another lodification

A beautiful column on a wall corner, that the photogrammetry unfortunately didn’t really capture in all its beauty. Fortunately it was in the shadows so, no lighting artifact this time. The upper part leaves a lot to be desired. I’m not tall enough !

7 Likes