that’s such a great addon, well thought out and furthermore a real time saver.
it really is as good as other people say it is.
i’d like to make a few proposals though, if that’s alright.
presets would be neat to have.
and maybe the ability to put your own custom texture masks in, without digging through node groups.
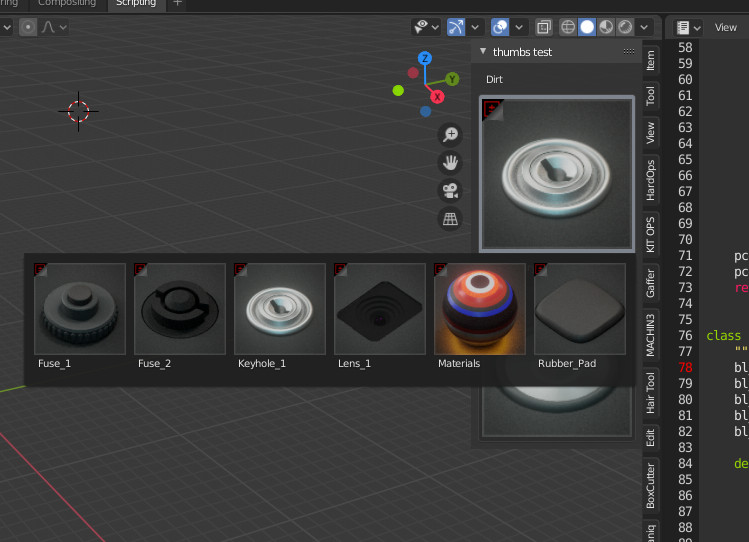
either with exposed parameters or even preview thumbnails. don’t know how hard that be to implement though.
anyways, once again, i really dig that addon! please keep up the great work!
btw. could you update the gumroad link aswell? got it from there instead of the Blender Market and am stuck with the v1.4.3 experimantal.
Thank you! I’m really glad to hear you are enjoying it
Actually I was just experimenting with thumbnails and the interface in order to create a preset system! I’m leaving it aside for a while as I need to focus on supporting multiple objects at once, but I’ll get back to it as soon as that is done
Hmmm… That could be a bit tricky (I assume you’re talking about the scratch, grunge, and dirt textures used inside, not the manual masking feature that already exists https://www.youtube.com/watch?v=bIYV3m5dg9s ). I could expose them, but that would make the nodes unnecessarily complicated for many users. Maybe I will have to split the nodes into a “simple” and “advanced” modes if it gets too complex, I will see.
Yeah sorry about that, I forgot to update it there. You can get the latest version now
yes, i’m talking about the grunge, cracks, dirt etc. textures itself.
exposing these parameters may have been the wrong description. more like having a category for picking your own textures in the main grungit window itself, if that makes sense.
for consistency, you could have these as preview thumbnails too and when you click on one of these, it’d execute the “open file” window where you could browse to your own ones.
I think exposing the textures outside the nodes would work better as it can allow me to switch between textures more easily, and it can also let you choose your own textures. However I need to make the preset system robust enough first so you wouldn’t need to open the shader editor at all for the simple settings, it can be intimidating for beginner/intermediate users
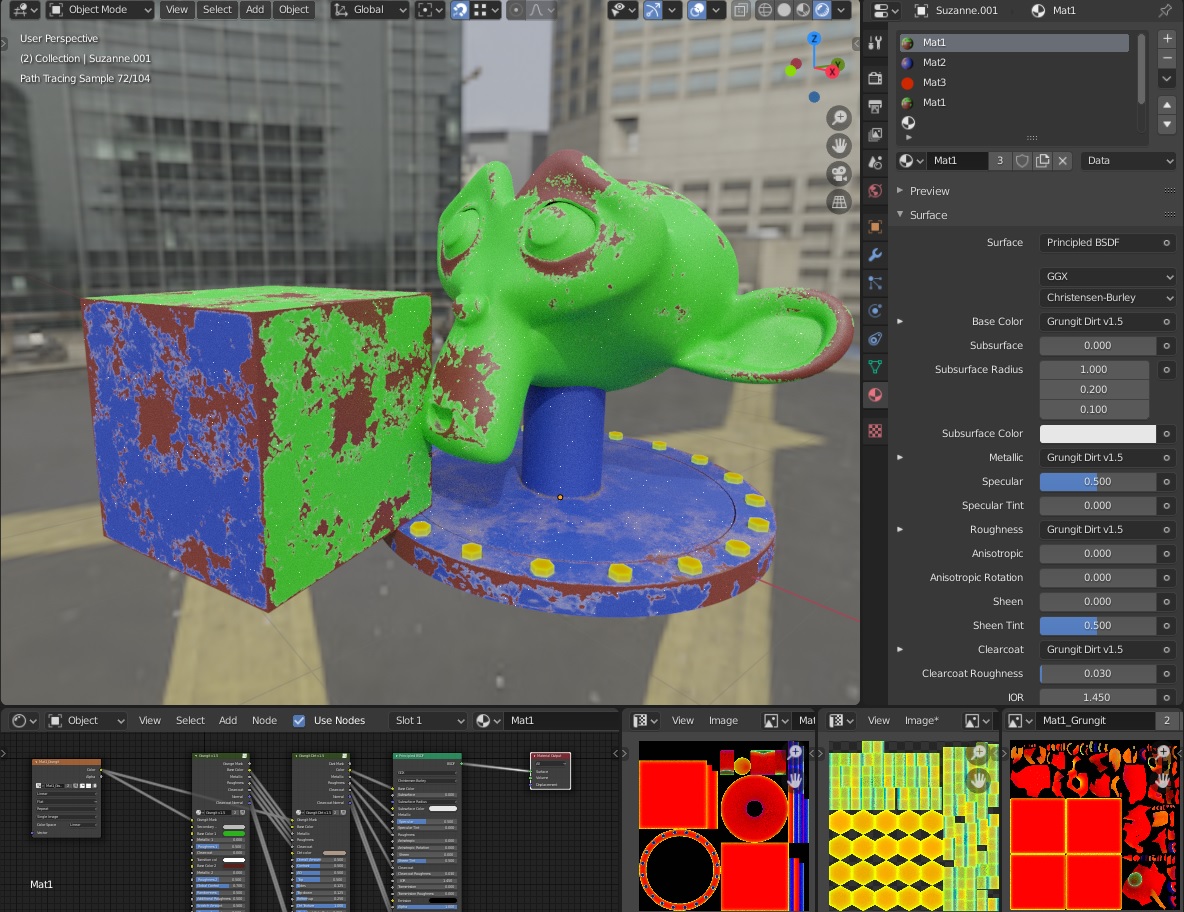
Grungit now supports multiple objects and multiple materials in v1.6Beta1
If multiple objects share the same material, the UV’s of the faces that use the same material are packed together in the same texture space (see in the generated textures in the bottom right)
Also I added the option to set the resolution to 512x512 and 256x256, which can be used if you have a lot of individual objects and materials
A significant amount of code had to be edited/rewritten and there are probably many bugs when used with complex scenes. Make sure to save your file first and if you encounter any issue please don’t hesitate to report it so I can fix it.
Download available on BlenderMarket and Grumroad
I added a “Quick mode” for Grungit, very useful if you don’t need edge wear and cavity/AO dirt.
The effect is applied instantaneously (except if you’re using EEVEE and apply it for the first time, you need to wait for the shaders to be recompiled again)
Feature available in the latest version (1.6 beta 2)
@abdoubouam I finished today my gun design and I used your addon for textures, but I modified a lot in node tree Anyway thanks! It was very helpful especially with my goals to finish everything inside Blender, without using Substance Painter.
Hey there! I too can only recommend you work! Smooth, sleek and great output! What is your favourite comm channel for receiving feedback as I found some cases were the addon struggled that may be totally my fault but may interest you aswell. Again: the addon i was waiting for!
+1 for Custom Textures (thinking direction Surface Imperfections/ Fingerprints)
You can write a public reply here if you can share the images of your scene, that way people who had the same problems can find it.
If it’s not an option, you can send me a DM here, on ArtStation or on Twitter
1- can I have custom textures? For instance, I want to change some of the fine details created by some grunge/noise of Grungit using my own texture. Is it possible?
Yes. There is no interface for that yet, but you can replace images https://youtu.be/M1MbfGK8tzk , and if you want more control you can edit the nodes inside.
Yes, it works even better and faster if it already has UV’s. Just make sure to uncheck “(Re)create UV maps” first
Failing Grunge-Map Bake without Error:
Sometimes I can’t get it to bake the Grunge-Map. The mesh is not too complex and the UV-Map is good. Still - the Grunge-Map turns out black everytime. Also did make sure the mesh is manifold. On other meshes in the same project it works flawless, and i have no clue what the failure-condition might be. What makes the bake fail without an error message? What to look out for? Also: Am using the 1.6b (newest beta) version and CUDA.
Multiple Objects
I get good results joining Objects and do the Map-Baking treating them as one mesh - so the occlusion parameter works perfectly. Is it possible to get the same outcome without joining the objects? I was hoping multiple object support might do this magic trick. Maybe I am missing something. Often I build stuff from multiple objects just aligned that should occlude each other grunge-wise but I’d love to keep them seperate.
That makes sense, I’m glad you sorted it out. Let me know if you encounter any other issues.
So currently the occlusion only affects each object individually, and you want it to be affected by everything, otherwise you are not having any “errors” when using it on multiple objects, is that correct?
The “combined AO” is more intuitive and useful, I will include that in the next update. Thanks a lot for the suggestion!
I’m sad to hear that, do you know if it’s just temporary and will be fixed in 2.82/2.83, or it’s an Optix limitation and it can’t be used ?
Also does it automatically switch to CUDA/CPU, or it simply doesn’t work? I can add a way to detect if you are using Optix and make it temporarily switch to CUDA until the initial mask bake is done, which is the only time when AO and Bevel is used. After that it switches to the baked image and it doesn’t use these nodes at all and that’s why it works with EEVEE.
You won’t get the speed advantage over CUDA (yet) only when you apply it to a model for the first time, but after that Optix will work fine, if it handles the basic nodes correctly