Hi,
I really can’t find this. How do you increase the number of hair guides? On bigger objects there is too few of them, and you can’t comb hair/fur properly.
I created a big box and added default fur to illustrate this - guides are spawned quite far from each other.
Are you using the New Hair tool and asset library? If so then you can drag and drop the Generate Hair Curves Asset and then the settings are in the Modifier tab for the GN …
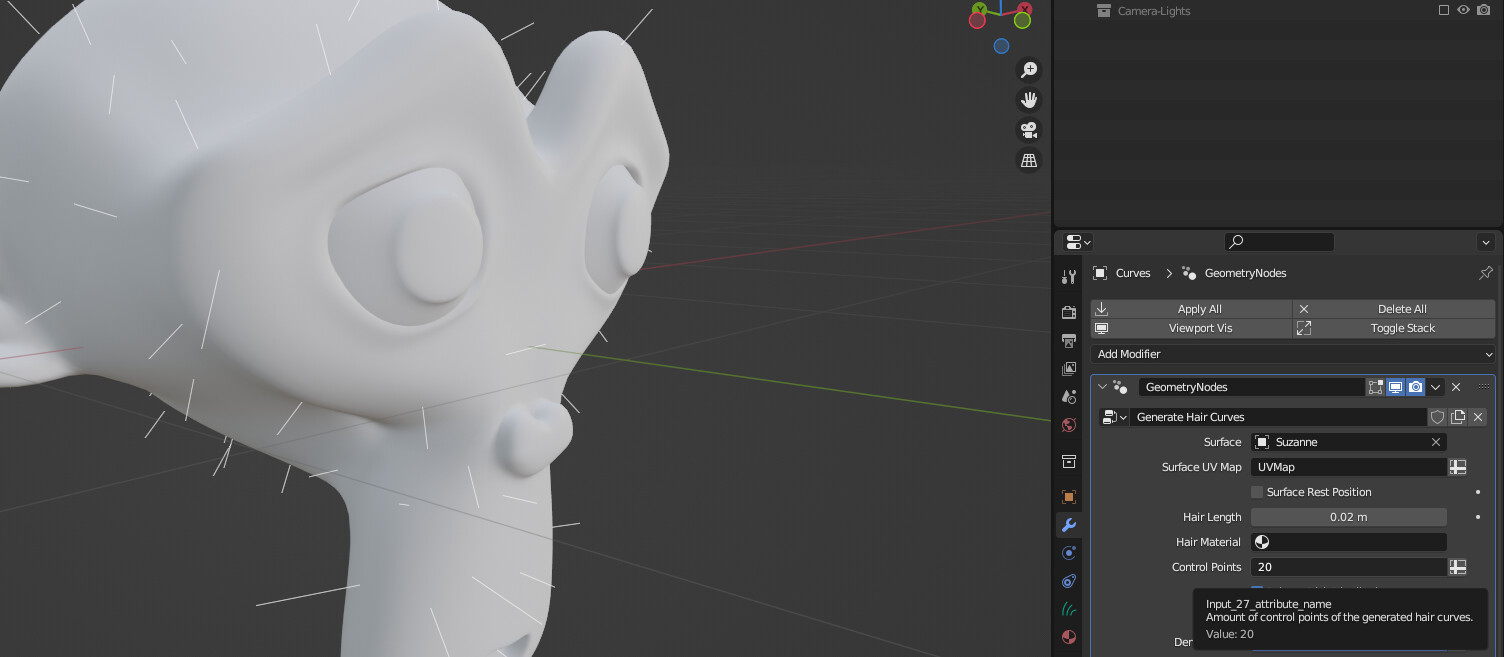
Right - I actually use fur. So it already has a number of modifiers like Set Hair Curve Profile or Interpolate Hair Curves. But there is no setting (or I just can’t find it) that adds/removes the control points.
I can add the Generate Hair Curves manually, and it lets me control the Hair Length, for example. However, I can’t increase the number of the guides (white lines). I don’t see any difference when I change Control Points. On the image below there are 10 guides randomly spawned on a box’s face. I set Density to 0 so that no hair are visible, only guides. How to increase it, for example, to 20?
I’m not that conversant with the update in 3.5, and haven’t really played with it…but to set the amount of Curves to a Quick Fur ( it is really preset). add the Generate Hair Curves…now down where it says Control Points …see the crossed bar icon, click that and you can change it to a single value…( I think that is what it’s for…as well as manually adding curves in Sculpt Mode…)