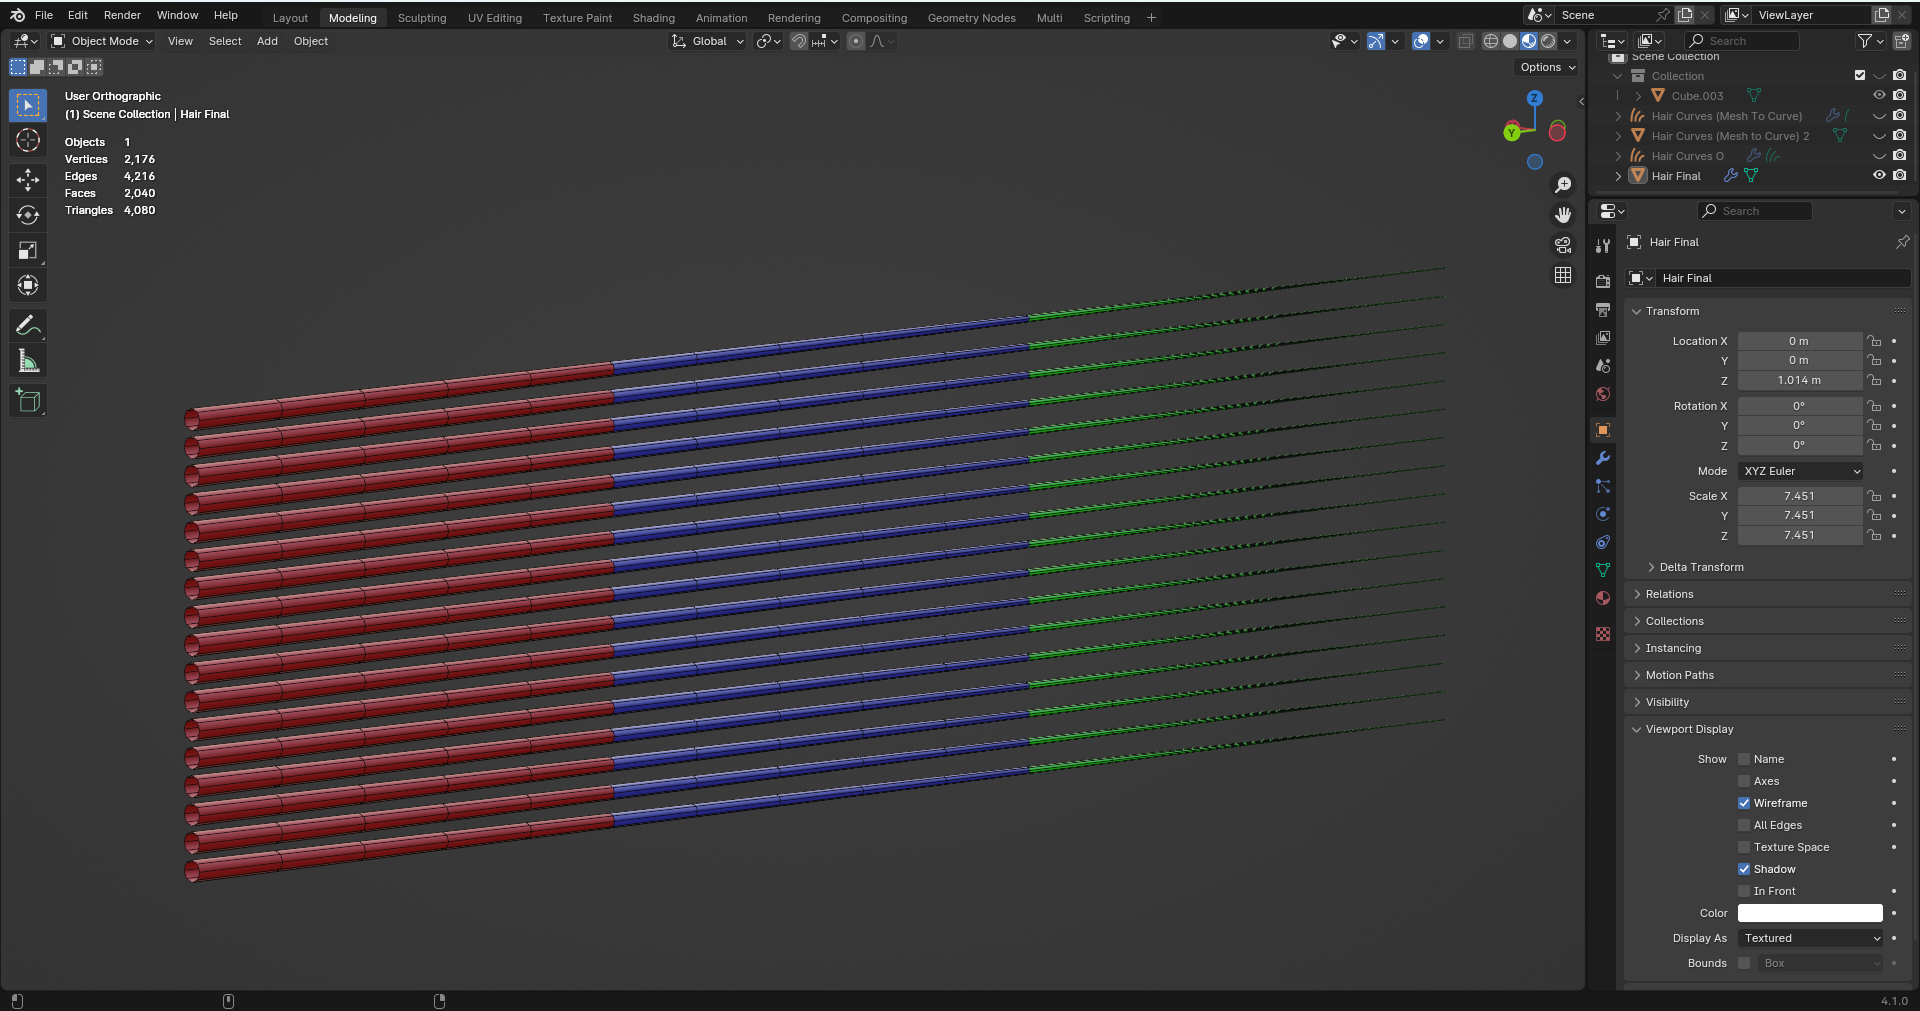
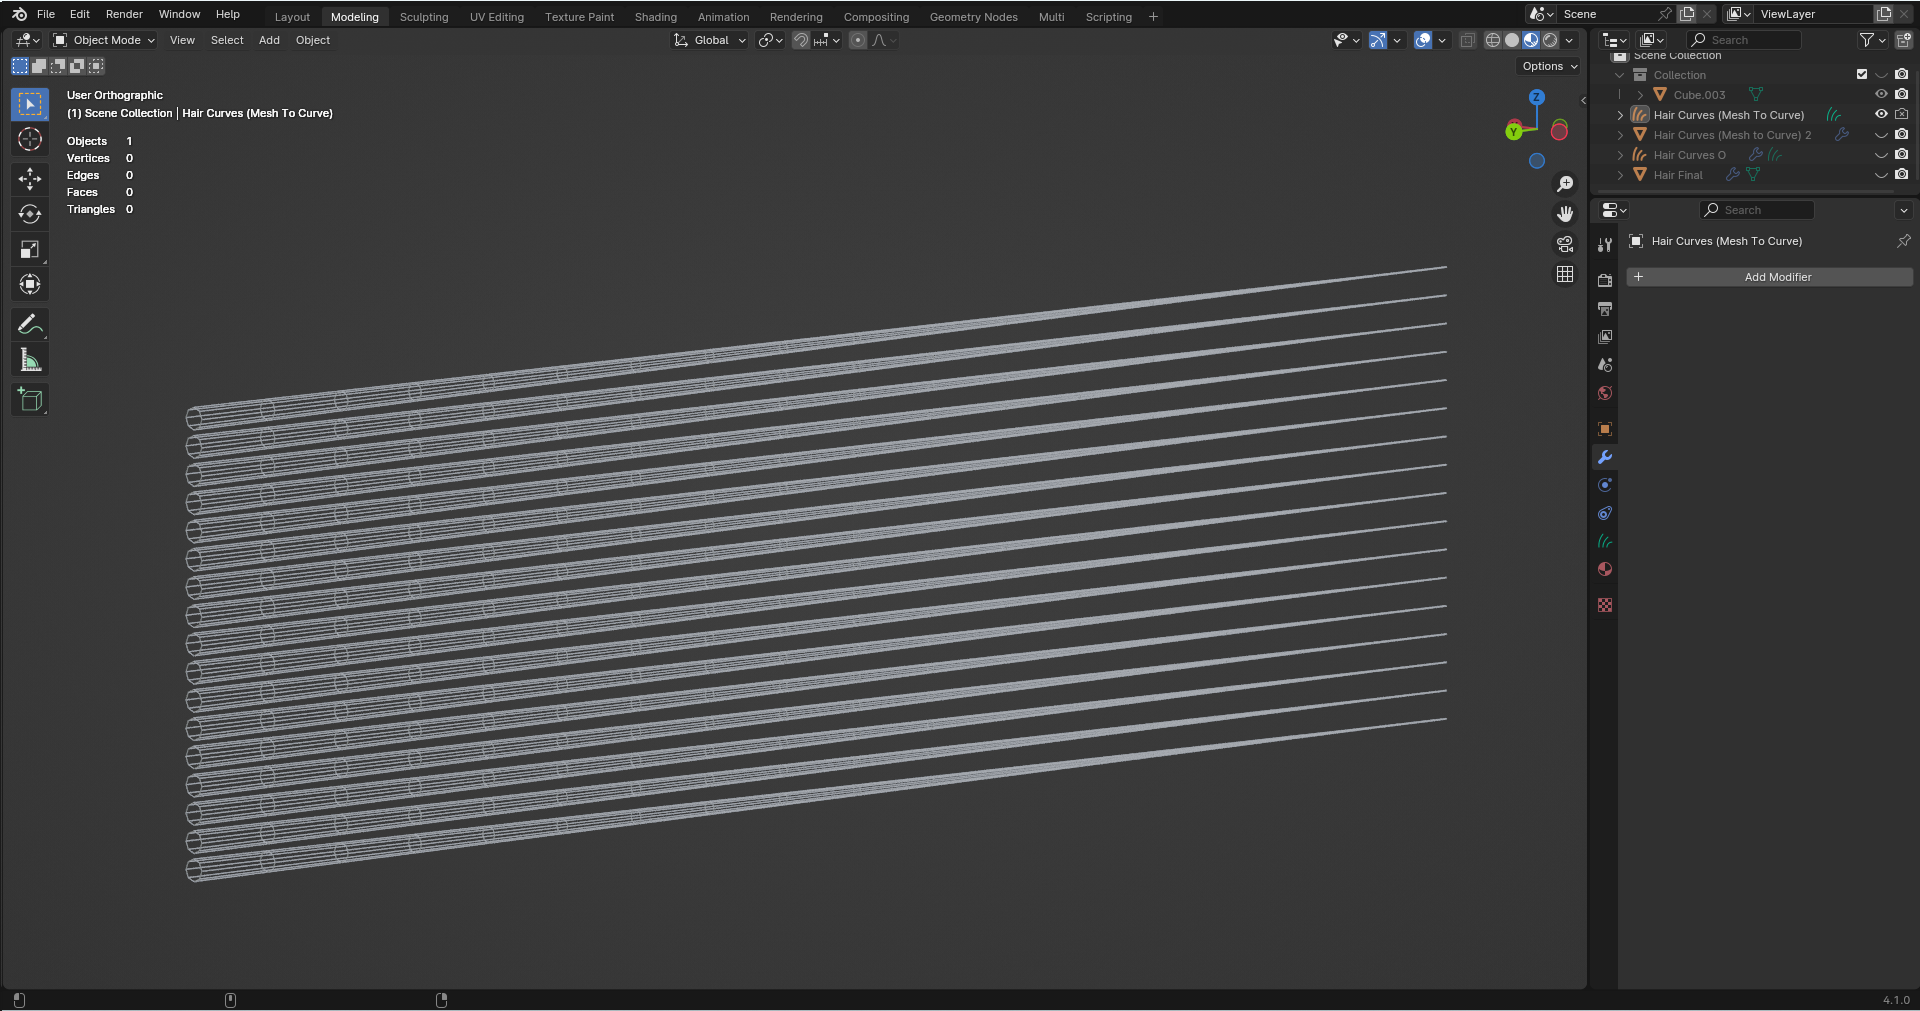
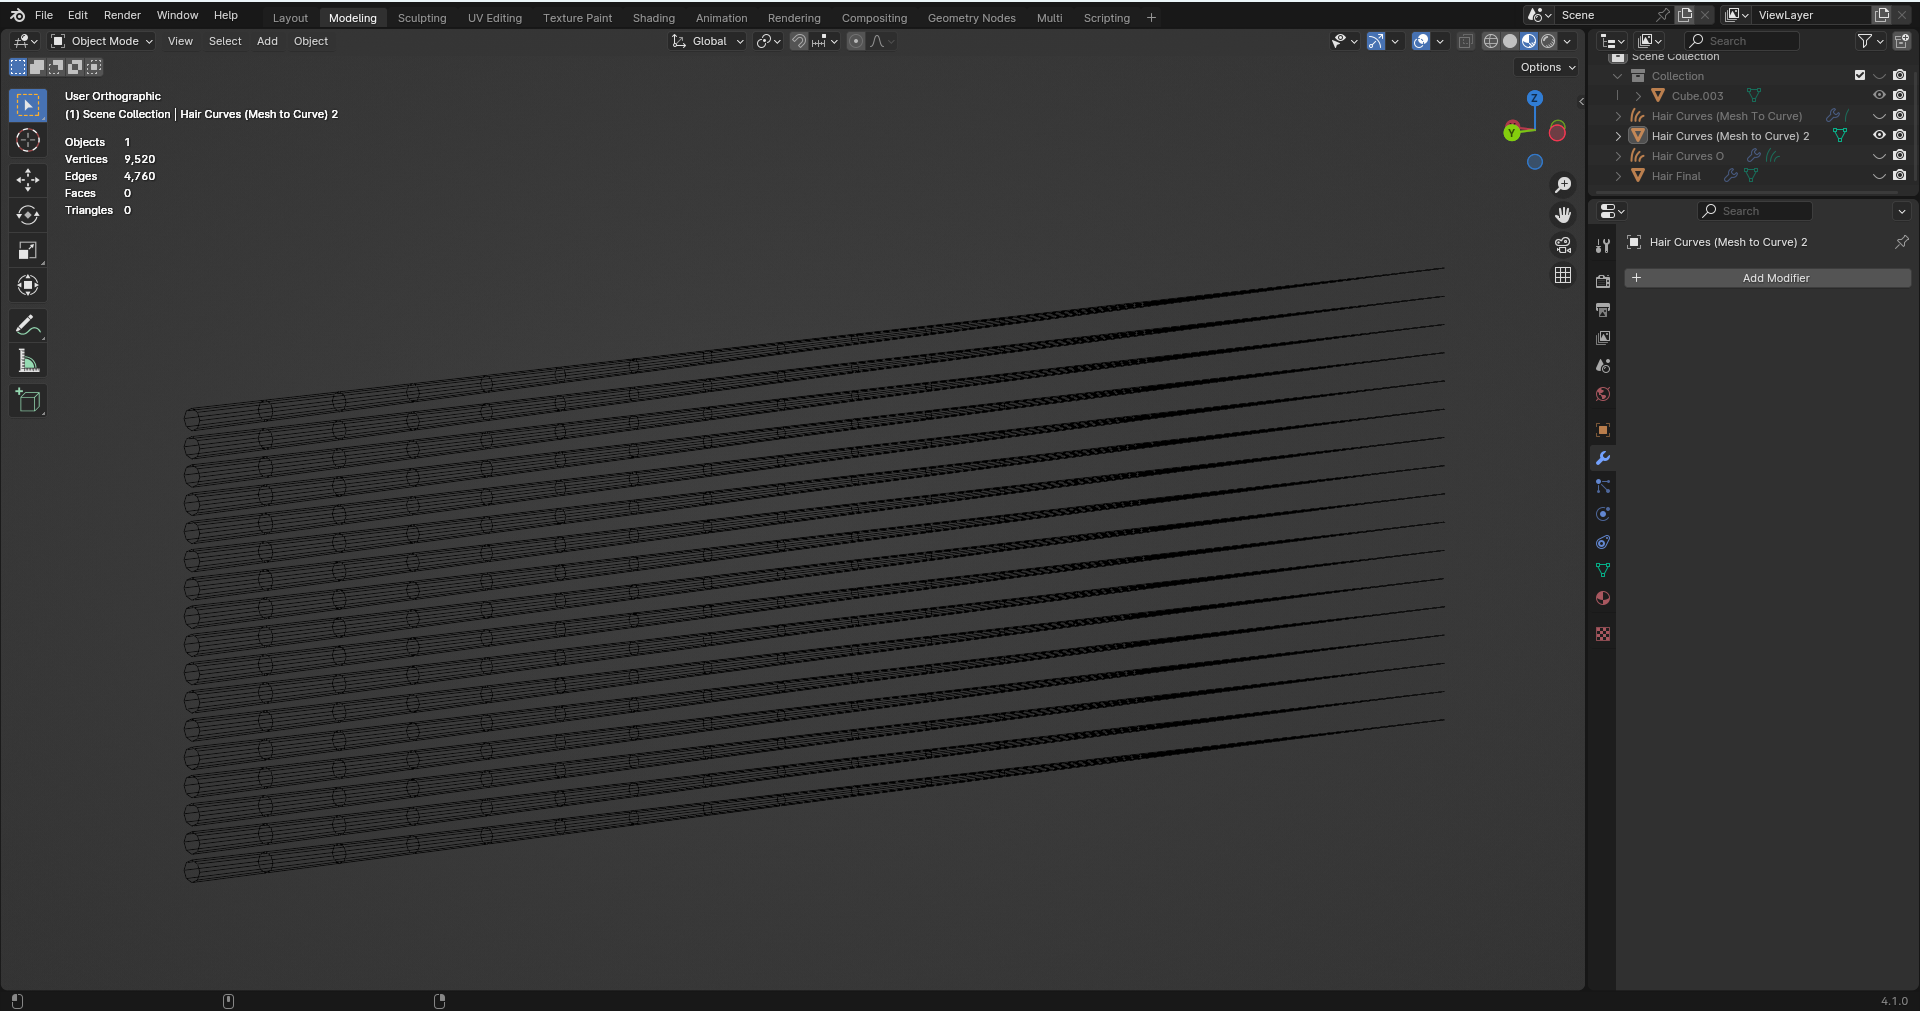
if you think it was already done then no this is just a mesh converted from curves to mesh using Object > Convert > Mesh, when the geo modifier is on realtime and then assigned 3 multiple different materials this is what i need help with
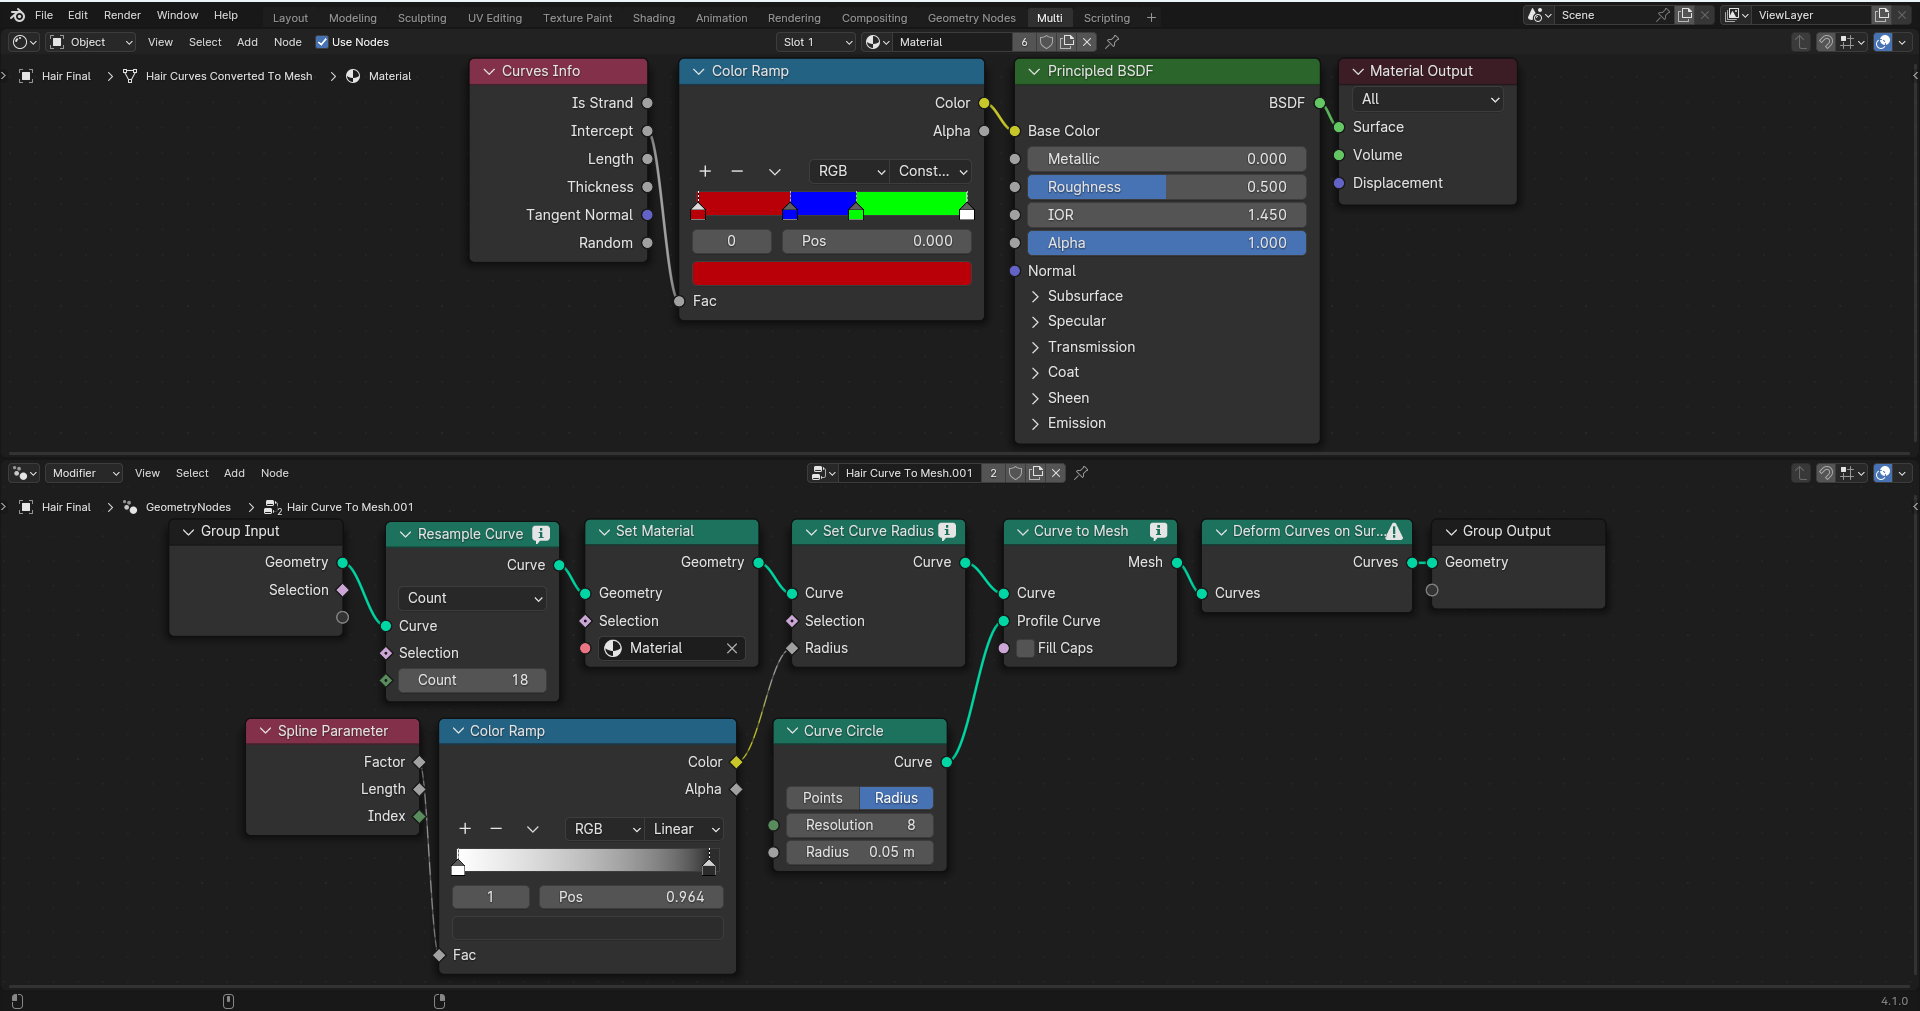
I am needing help to convert the shader to a texture while converting the curves to a mesh and i know what you are going to say “Why not just do what you just did?”. Well i am using the new hair system so i would have to select hundreds upon hundreds of faces to selectively color with 1 or more colors depending on my (at the moment) coloring requirements here is the nodes and shader i use so far
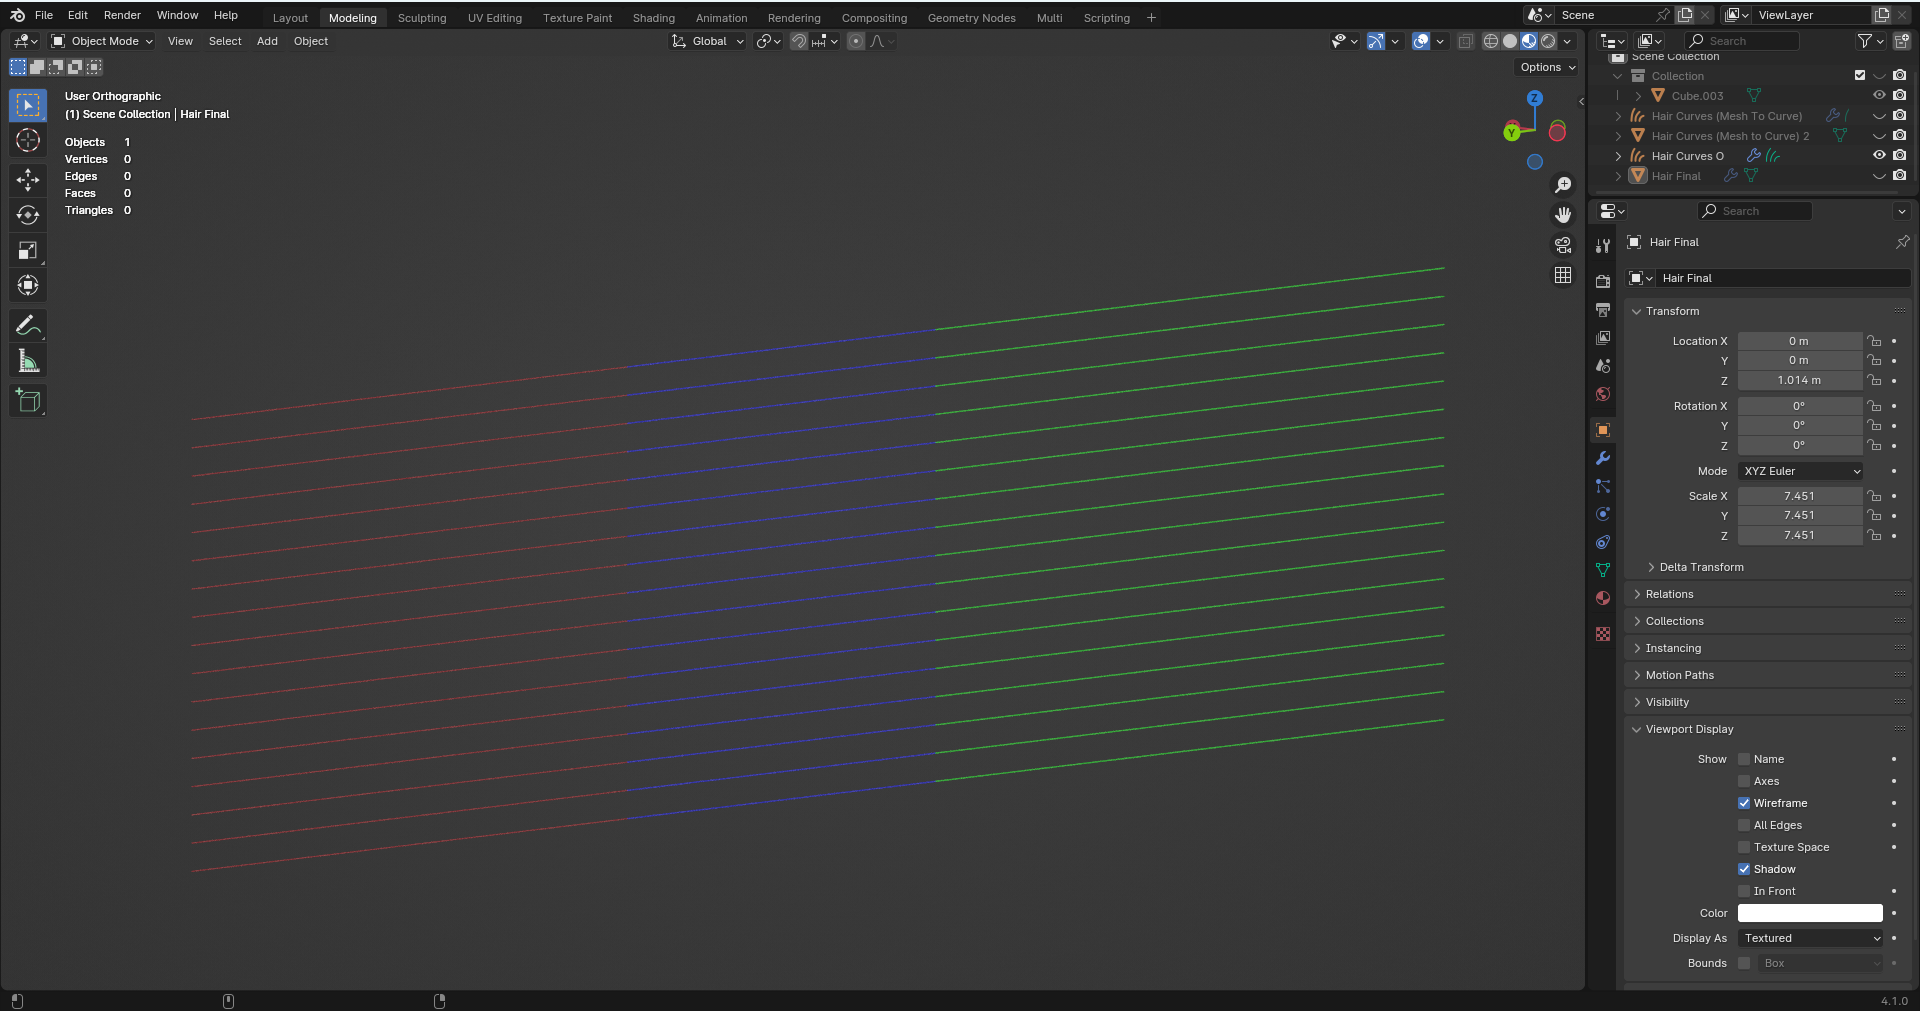
As you can see simple but the geometry node modifier cannot be applied “Evaluated geometry from modifier does not contain curves” and the color material is not applied so you think add a mesh to curves at the end well this is the result
as you can see i am stuck so can any one help me to convert a hair curves to mesh and then baking the shader texture and applying it to the vertices then exporting it to obj and png respectively i do not mind if scripting is needed but if not then just 1. 2. 3. 4. steps or more are needed then okay i am fine with that either way
oh and if you have not seen my other post then no the manual is not a manual it is a dictionary not instructions on how to do this sort of crazy stuff.
i believe its the curve to mesh node which transform the curves to vertexs edges and faces there for giving the impression it is mesh and not curves and secondly blender was designed by the Blender Foundation so pretty much visionary but not implemented well
i know but i have been busy do non blender stuff so when i came back no more replys so i just clicked solution on my own response and well this seems more complicted then simple mesh to curve to hair curve but if blender was designed better for people who do not have the expertise or the intelligence like me to figure out geometry nodes shading or scripting or any problem that comes up then i would not have to be on this forum wasting peoples valuable time
that true but i think makehuman will never add modeling and texturing objects in the same program i think it uses obj and png as a universal type for ease of use for multiple programs like blender, maya and 3ds max
When OBJ was invented as a format, there was no such thing as “export hair curves”.
And from what I can tell from reading the specs, MakeHuman also has specific requirements on what it is intended to import and deal with.
So enough with the “if blender was designed better”. You’re trying to do something that a) uses a format that wasn’t designed to support what you want and b) using software in ways it wasn’t exactly intended to be.
okay in this picture the modifier is on in realtime there for making it from curves to mesh but it does not apply the material to the new faces which consists of red green and blue in the first post i am wanting to take the material of the render and apply it to the mesh using the new faces generated from the modifier which is now temporarily on and then export it as a obj and png texture
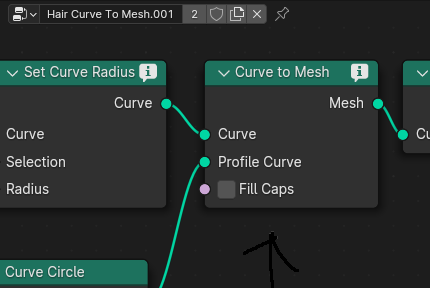
Please hover over the little “i” icon on the Resample Curve, Set Curve Radius and Curve to Mesh nodes and tell us what the tooltip reads for each one.
Clearly there is some issue here, or the icon would not show. This is why Stray queried it. The most obvious reason would be if the input geometry was not a curve, though it does indeed look like the hair curves are what is going in.
By the looks of the screenshot in the other thread, it seems they use good old haircards - like something seen in game models, for example - a lowpoly mesh with a picture of hair on it
I would suggest some research into various ways to make hair, because something tells me you’ve chosen the wrong method here…
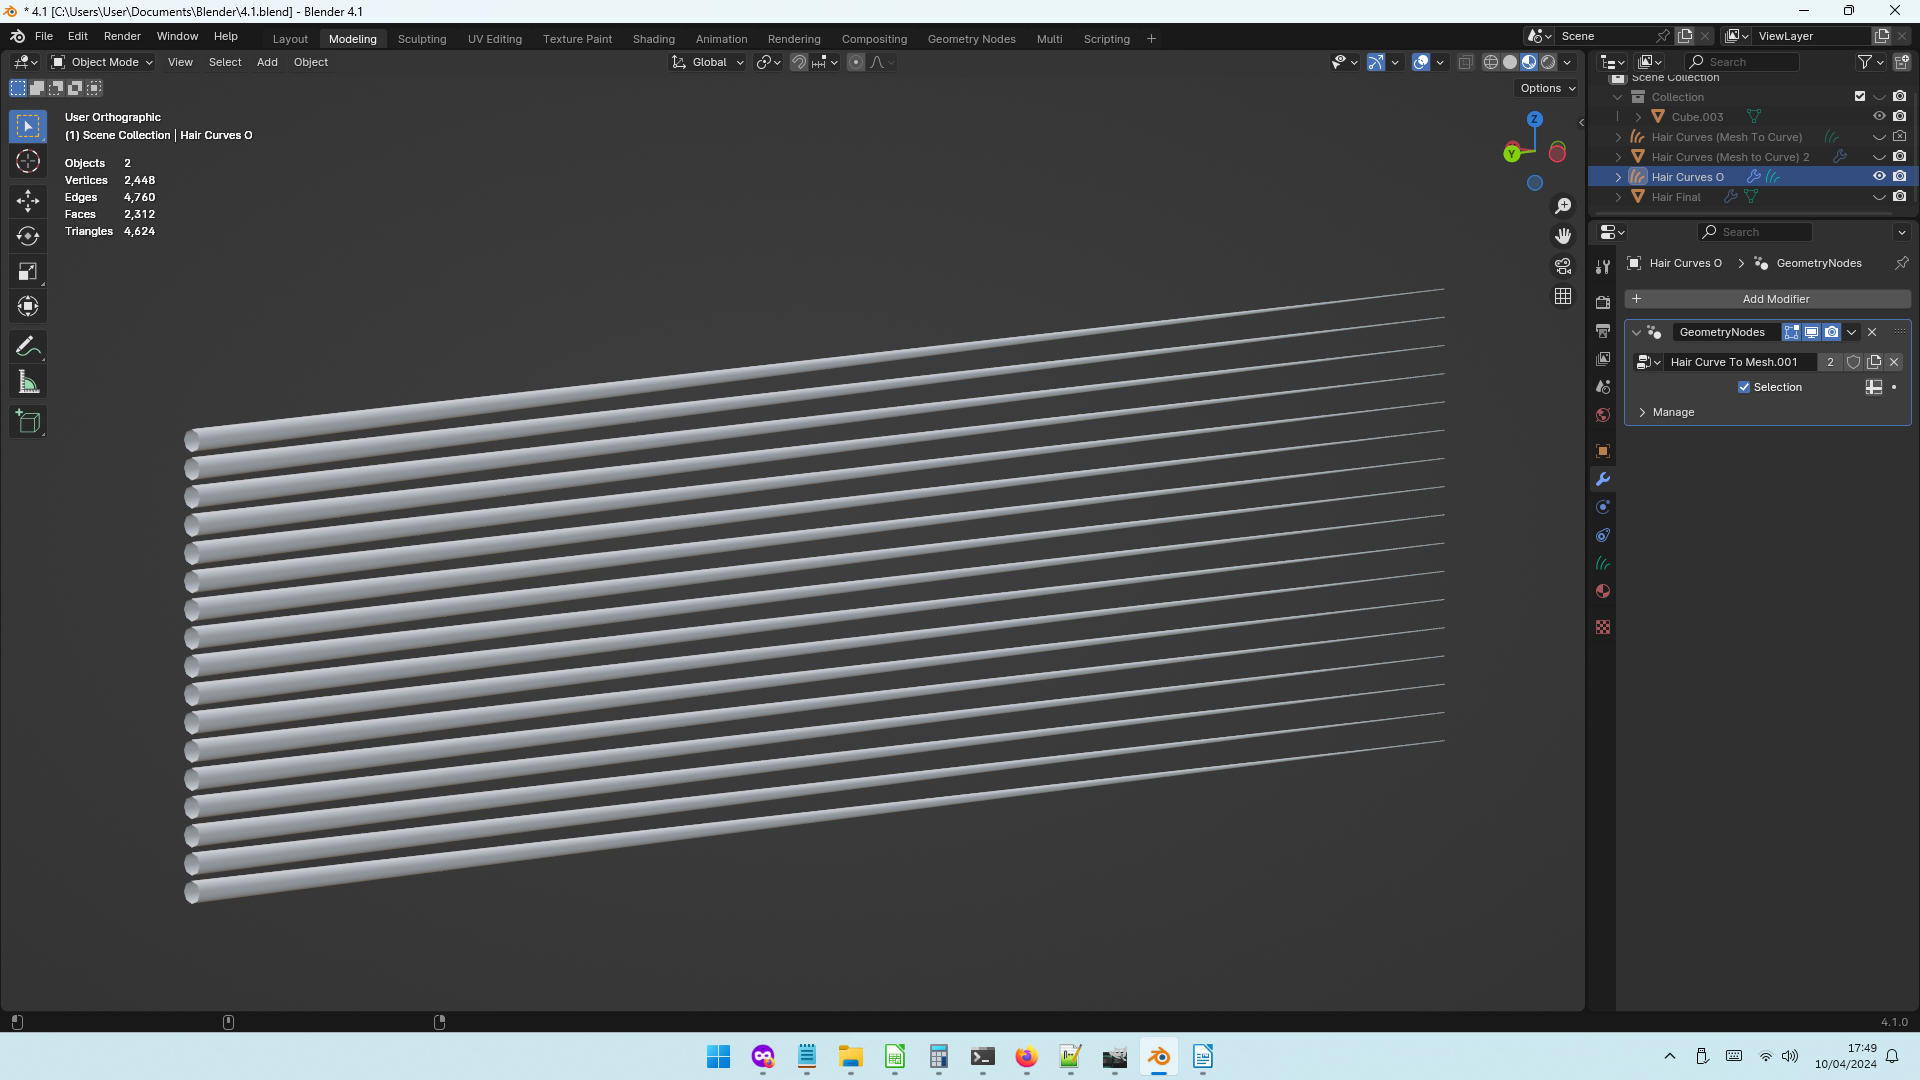
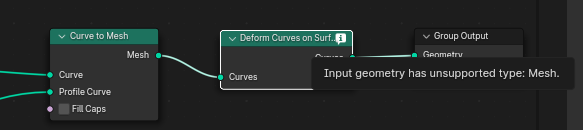
oh no that was because i had left it on accidentaly on a mesh object and forgot to change to curve before opening up a shader and geometry node to take a screen shot and not a curve the only node that shows a problem on the curves
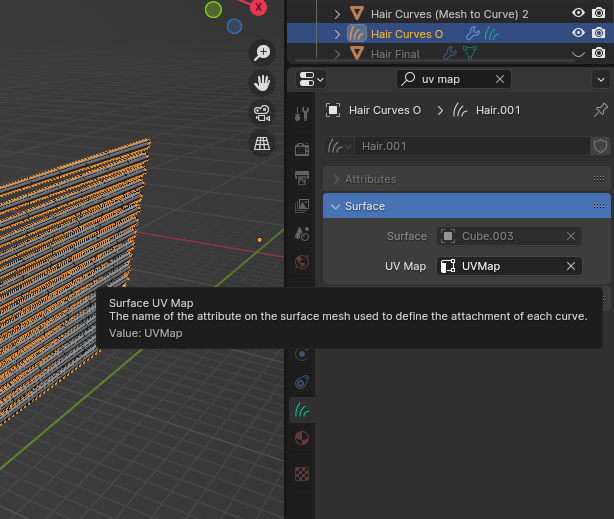
is Deform Curves on Surface because it is detecting that there is no curve after the Node Curve to Mesh but if put before it it says
Yes. Anything that performs curve operations must be done while the geometry is a curve.
As to the problem if it is before the Curve to Mesh, what are your UVs like? Apparently the node has some similar internals to the Sample UV Surface node, which requires there are no overlapping UVs. There might also be problems if the offending curves are too close to a seam. Unfortunately I can’t be of much help on this, as I’m not familiar enough with the node in question.
but the problem is the material will not apply over the mesh in the same way with the shader on the hair curves. For example Control 1 to 2 RED therefore face 1 to 2 should be red but it just turns gray and again i do not want to have to manually set up which faces to be which colors