I cannot work out how to limit where hair appears on an object in Version 2.53. In Version 2.49 I had used weight painting and vertex groups, but I cannot see where/how to name a vertex group or allocate a vertex group to the emitter in the new version. Any help would be appreciated.
In the particles settings there is a panel called Vertexgroups. Add the vertex group name in whatever function you want top control.
You create a vertex group in the object settings under the Vertex Groups panel.
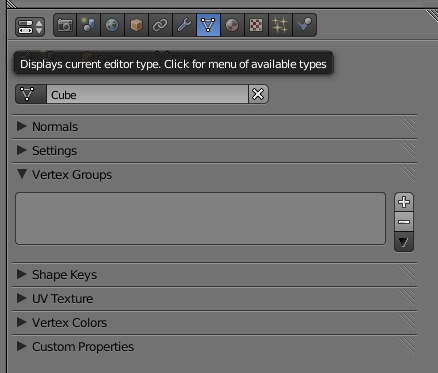

1 - in edit mode select the vertices/faces you want to add hair to, go to the object data tab (looks like a triangle, next to the modifiers tab).
2 - In the vertex groups panel give a name to the vertices/faces selected and click assign.
3 -Go the Particles tab, select hair as type, scroll down to vertexgroups panel, expand if it is collapsed, click in the density area and select the name of the vertices/faces group that you gave in step 2
Hope this helps
Thanks for your reply. From a cube I picked one face and followed the instructions but all sides received hair as soon as I selected the hair type and nothing changes when I selected the vertex group in the density area.
Here’s an example with weight painted cube with hair. The vertex groups is called Cube and one face has a weight of 1 the rest zero
vertexgroup_hair.blend (842 KB)
Many thanks.