I’ve Got something strange going on. I apply hair to my model in the superboy3 fasion and all looks well in realtime, but when I go to render it all that shows up is the hair. Any Ideas?

Never mind, some totally awesome guy already posted an answer to this that I didn’t see.
But on another note, how can I get the hair to take on the surface color of the mesh?
The col button on the same panel and make sure you have the right material index.
If I have a texture uv mapped to the mesh which material index would this be? I tried col and they came out gray. I’m thinking that this is because of the material not carrying the uv data with it. How could I get that to work?
Tried everything I could in regards to the col button and everything in the materials panel and still no success. I’m not sure what I’m doing wrong here.
Did you apply the UV Texture to a material?http://wiki.blender.org/index.php/Manual/Using_UV_Textures
I finally got the color to come through, but only when sss is turned on for the mesh’s material panel and the sss tex slider is turned all the way up. Strange and not render efficient but it works. I am now trying to taper the strands using a gradient and I followed the directions in the blender manual wiki, but when I take the alpha slider on the material panel down to zero the hair only renders in clumps. And on top of this, anything below 1.00 brightens the hair and the mesh becomes really blue and light. It almost seams that the object is clear. I don’t know what to do to get good looking hair that gets its color from a tex. Are there any step by step tuts that show how to do all of this?
I just wrote this post in to keep this thread at the top of the list. Still need help from you guys. Please.
I think make the hair it’s own material, if you want it to have the same as the mesh, duplicate it. Press add new in the links and pipeline tab and have the strand texture there and leave the meshes textures the same. I also wouldn’t have SSS on hair. Remember this material index and turn it to the hair color.
If you need step by step, tell me. I’ll write one out real quick.
If you need step by step, tell me. I’ll write one out real quick.
If you wouldn’t mind it would be a great help. I know how to do all of this in Animation Master. I switched to Blender because it does everything AM: does and more but better and with more stability. But I’m new to the blender lingo, and little of the material jargon and processes make sense to me. Any help you could lend would be much appreciated.
Thanks.
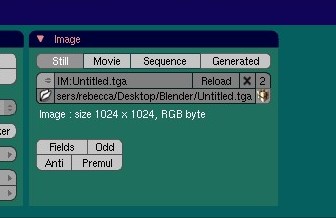
OK, I have a little model in textured draw mode (D). I did a quick unwrap and applied the texture by adding it as an image texture.
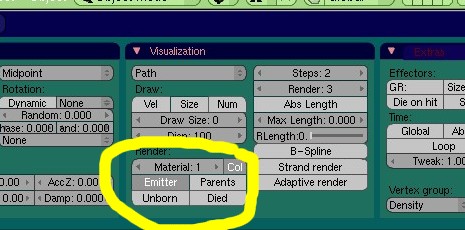
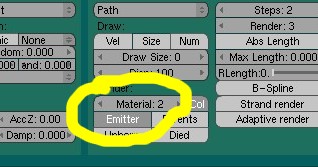
Now I added my particle system. In the visualization tab I select Col and Emitter.
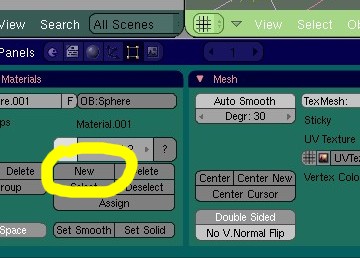
Now in the link and material tab in edit buttons, I press New Under the material selector.
Now back in the visualization tab I change the material spinner to 2.
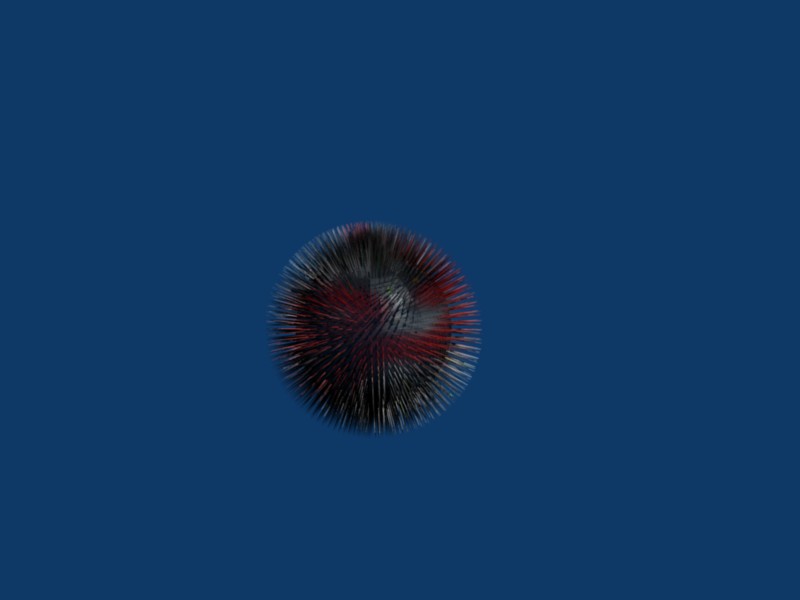
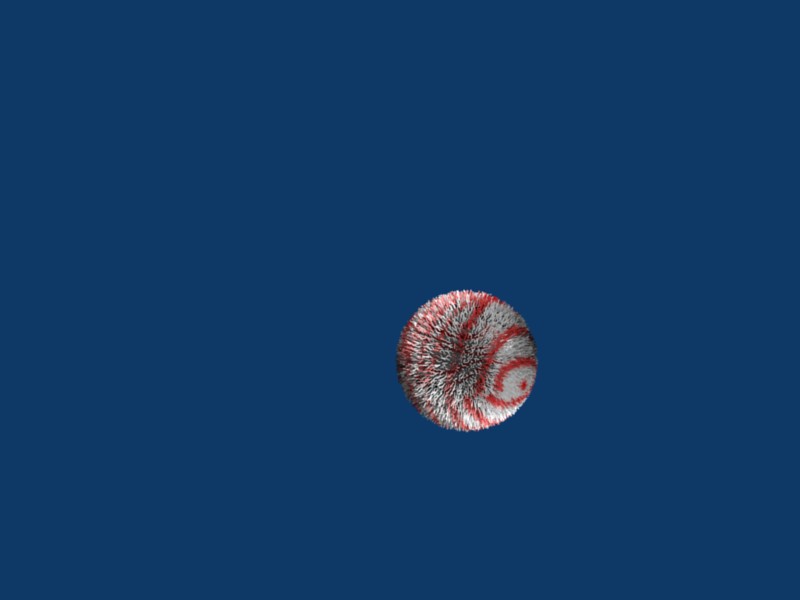
Now I edit material 2 in the shaders buttons to have the strand shader. (like in the wiki)Here is my nice fuzzball.
Happy Blending!
I followed all the steps you’ve given me plus what’s from the wiki, and things have changed a bit but still not to a good result. Instead of the hairs fading they are just the background color now and the model unchanged. I suspected it to be my graphics card so I followed the same steps on my other computer and got the same result. One computer is an inspiron 1525 running ubuntu hardy heron, the other is an e-machine desktop running xp. I don’t know exactly what to do now to conquer this. So the only thing I can think of is to send a project file that can be examined by a wise person so I can be told where I’m going wrong. Would that be okay?
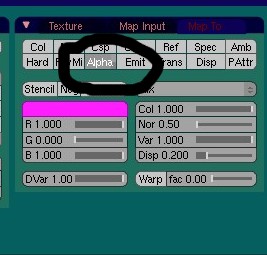
Do you have the texture set to col and not alpha? That would do what you’re explaining. The texture needs to be mapped to alpha.
If you upload the .blend, I’ll take a look to see if you’ve got anything else messed up.
Check out the sample chapter of the book listed in my sig. The sample chapter is all about hair, and it covers all this stuff in detail. You will need to scroll down to the bottom of the Amazon web page, and you’ll find the full chapter in a downloadable pdf.
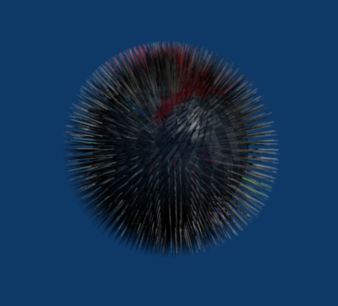
I got the gradient to work but now the surface texture disappeared and the mesh object seems to be partially transparent. A sample of what I have on my end is included. There should be a checkerbourd image on the sphere but there’s not. The forum won’t let me send anything over a meg and won’t send .zip files so I can’t get the .blend file up. Is there an e-mail I could send it to?
Check out the sample chapter of the book listed in my sig. The sample chapter is all about hair, and it covers all this stuff in detail. You will need to scroll down to the bottom of the Amazon web page, and you’ll find the full chapter in a downloadable pdf.
Which book out of the two? I couldn’t find a link on amazon for a free chapter from either of these books. Do I have to be an amazon member, maybe?
Attachments

Ok I got it. The material with for the strands didn’t have the UV texture, that’s why the strand’s didn’t, so go and add the UV Texture to that too; and the ball is clear because it doesn’t have the 2nd material applied to all of its faces. To fix this, go into edit mode and select all the faces then assign the 2nd material to all of them. Also, you forgot to select ZTransparency. 
BoooooYaaaaahhh!
Is this what you got on your end? Because I think that’s the result I should get.
Attachments