Blender is frustrating the hell out me. Weird things keep happening that I cannot explain. I’m new to Blender, but not to 3D in general.
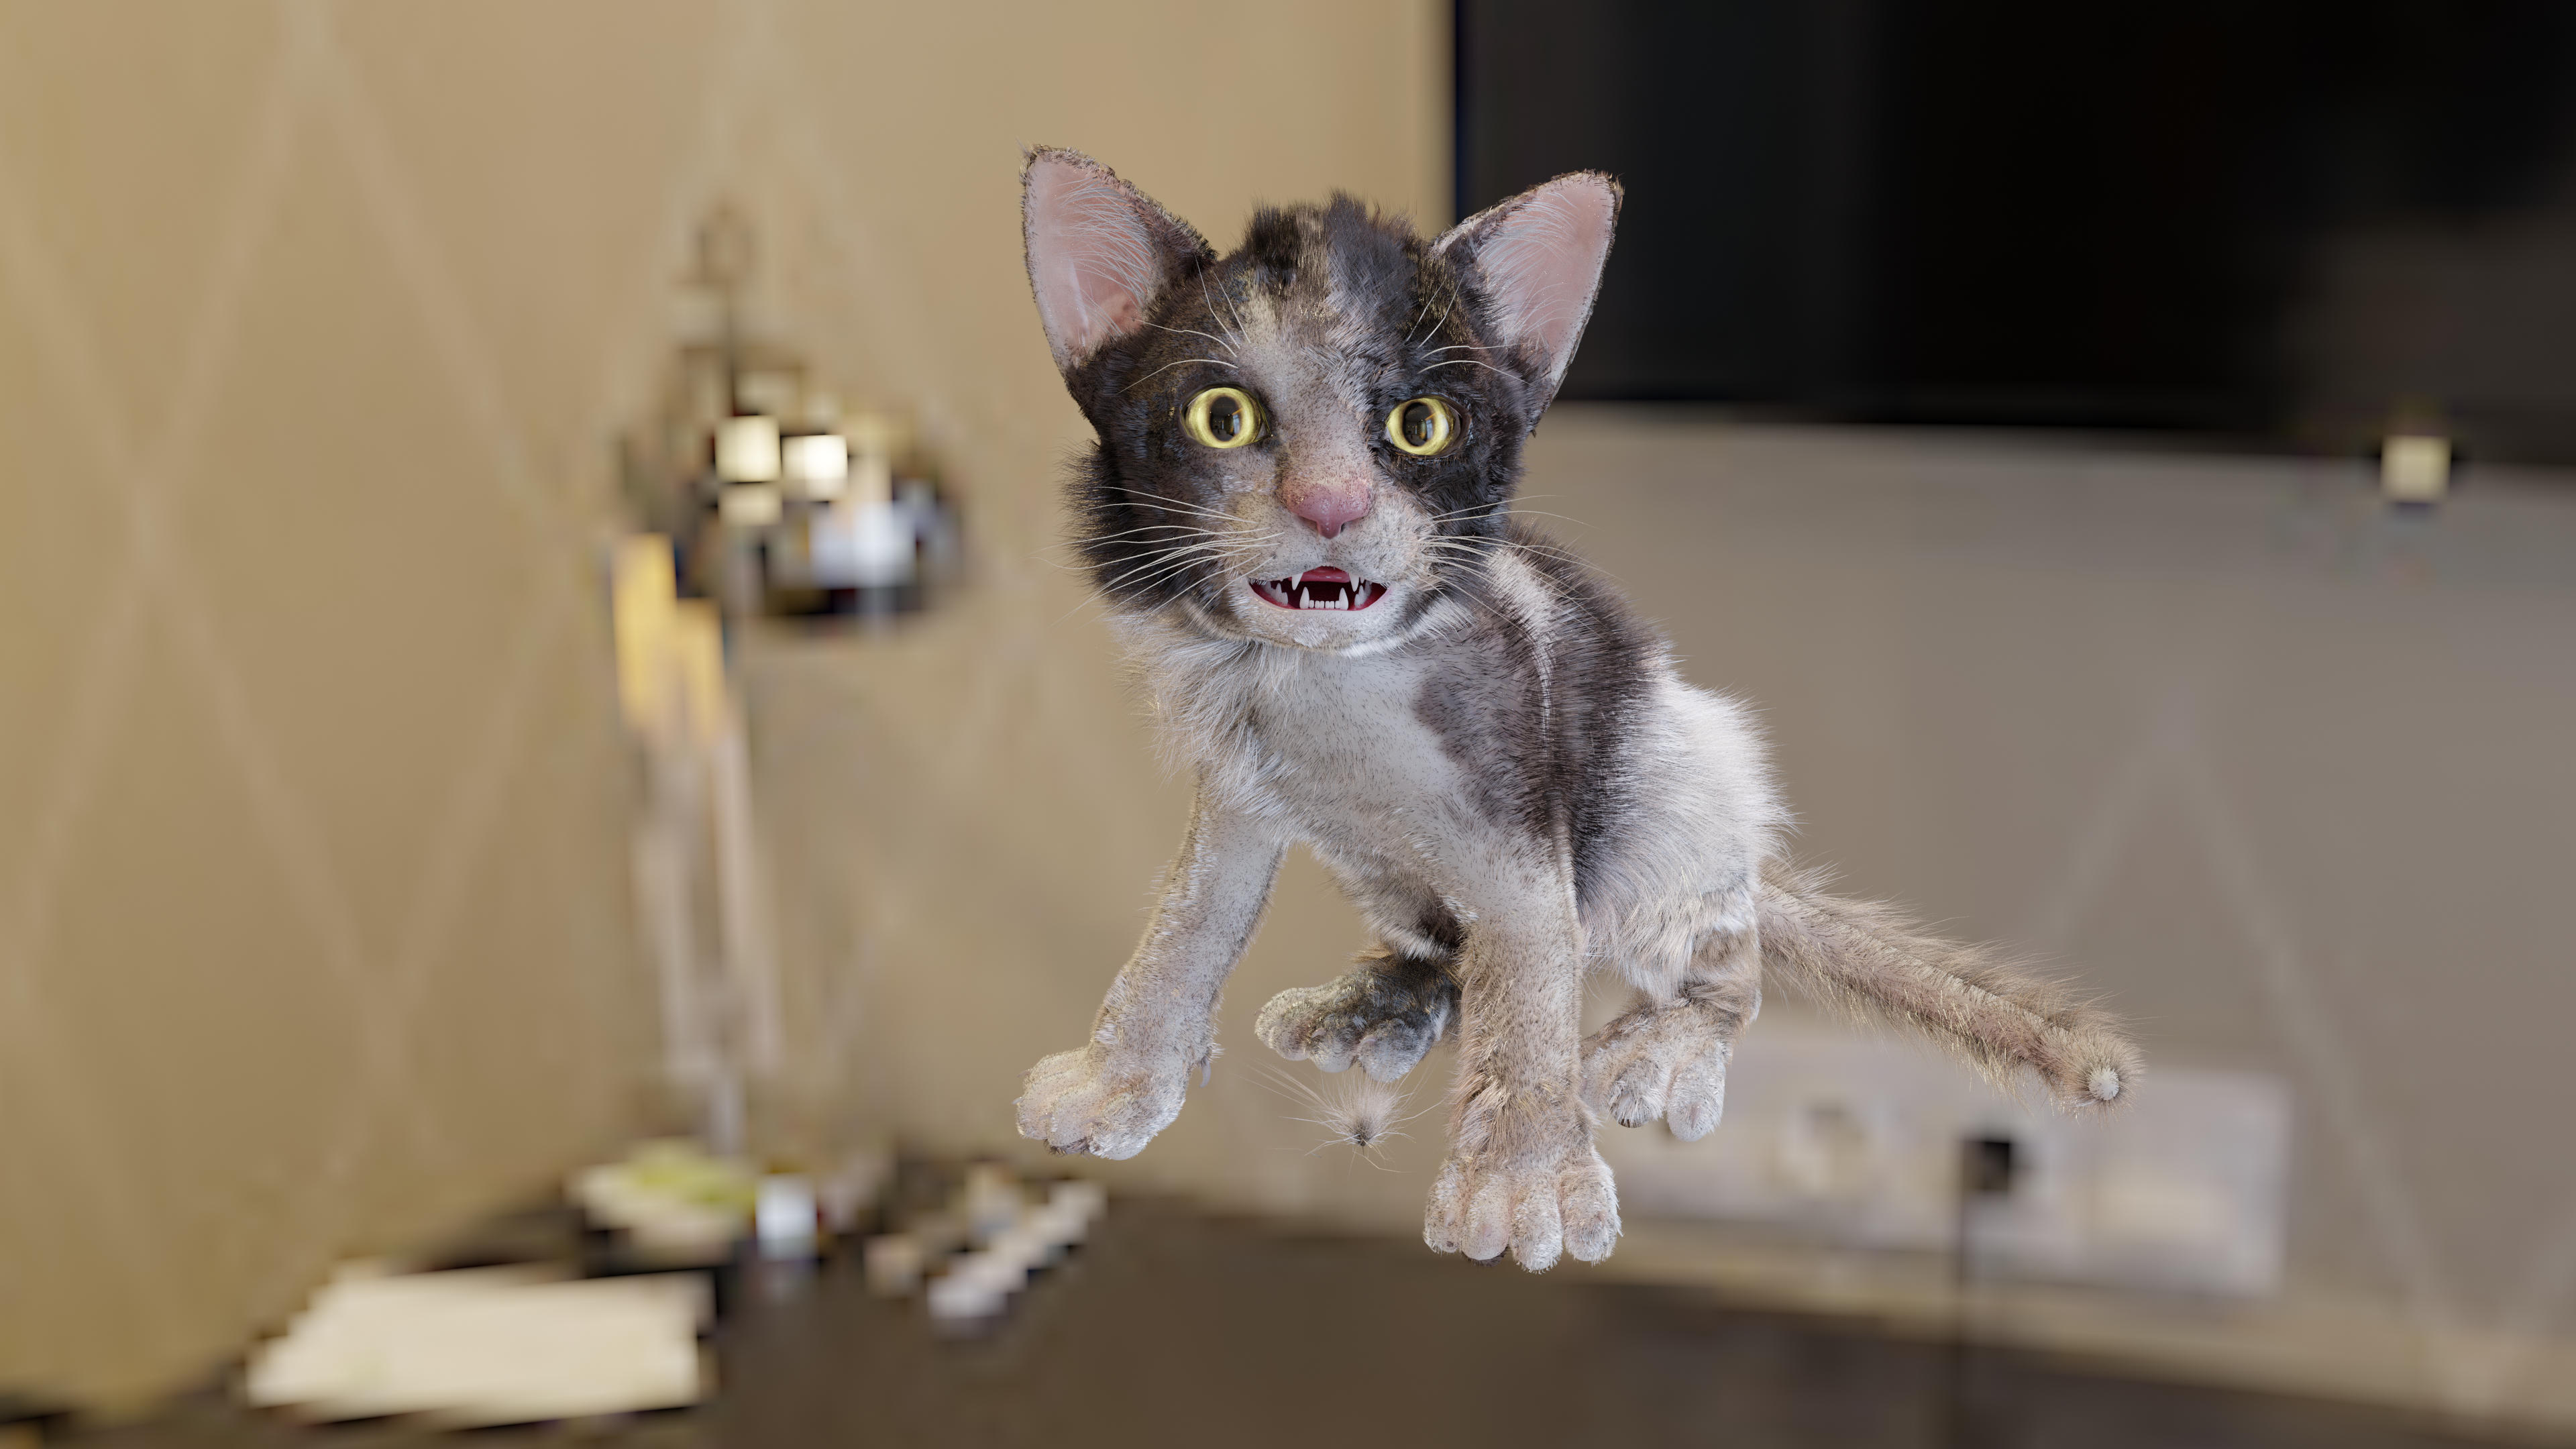
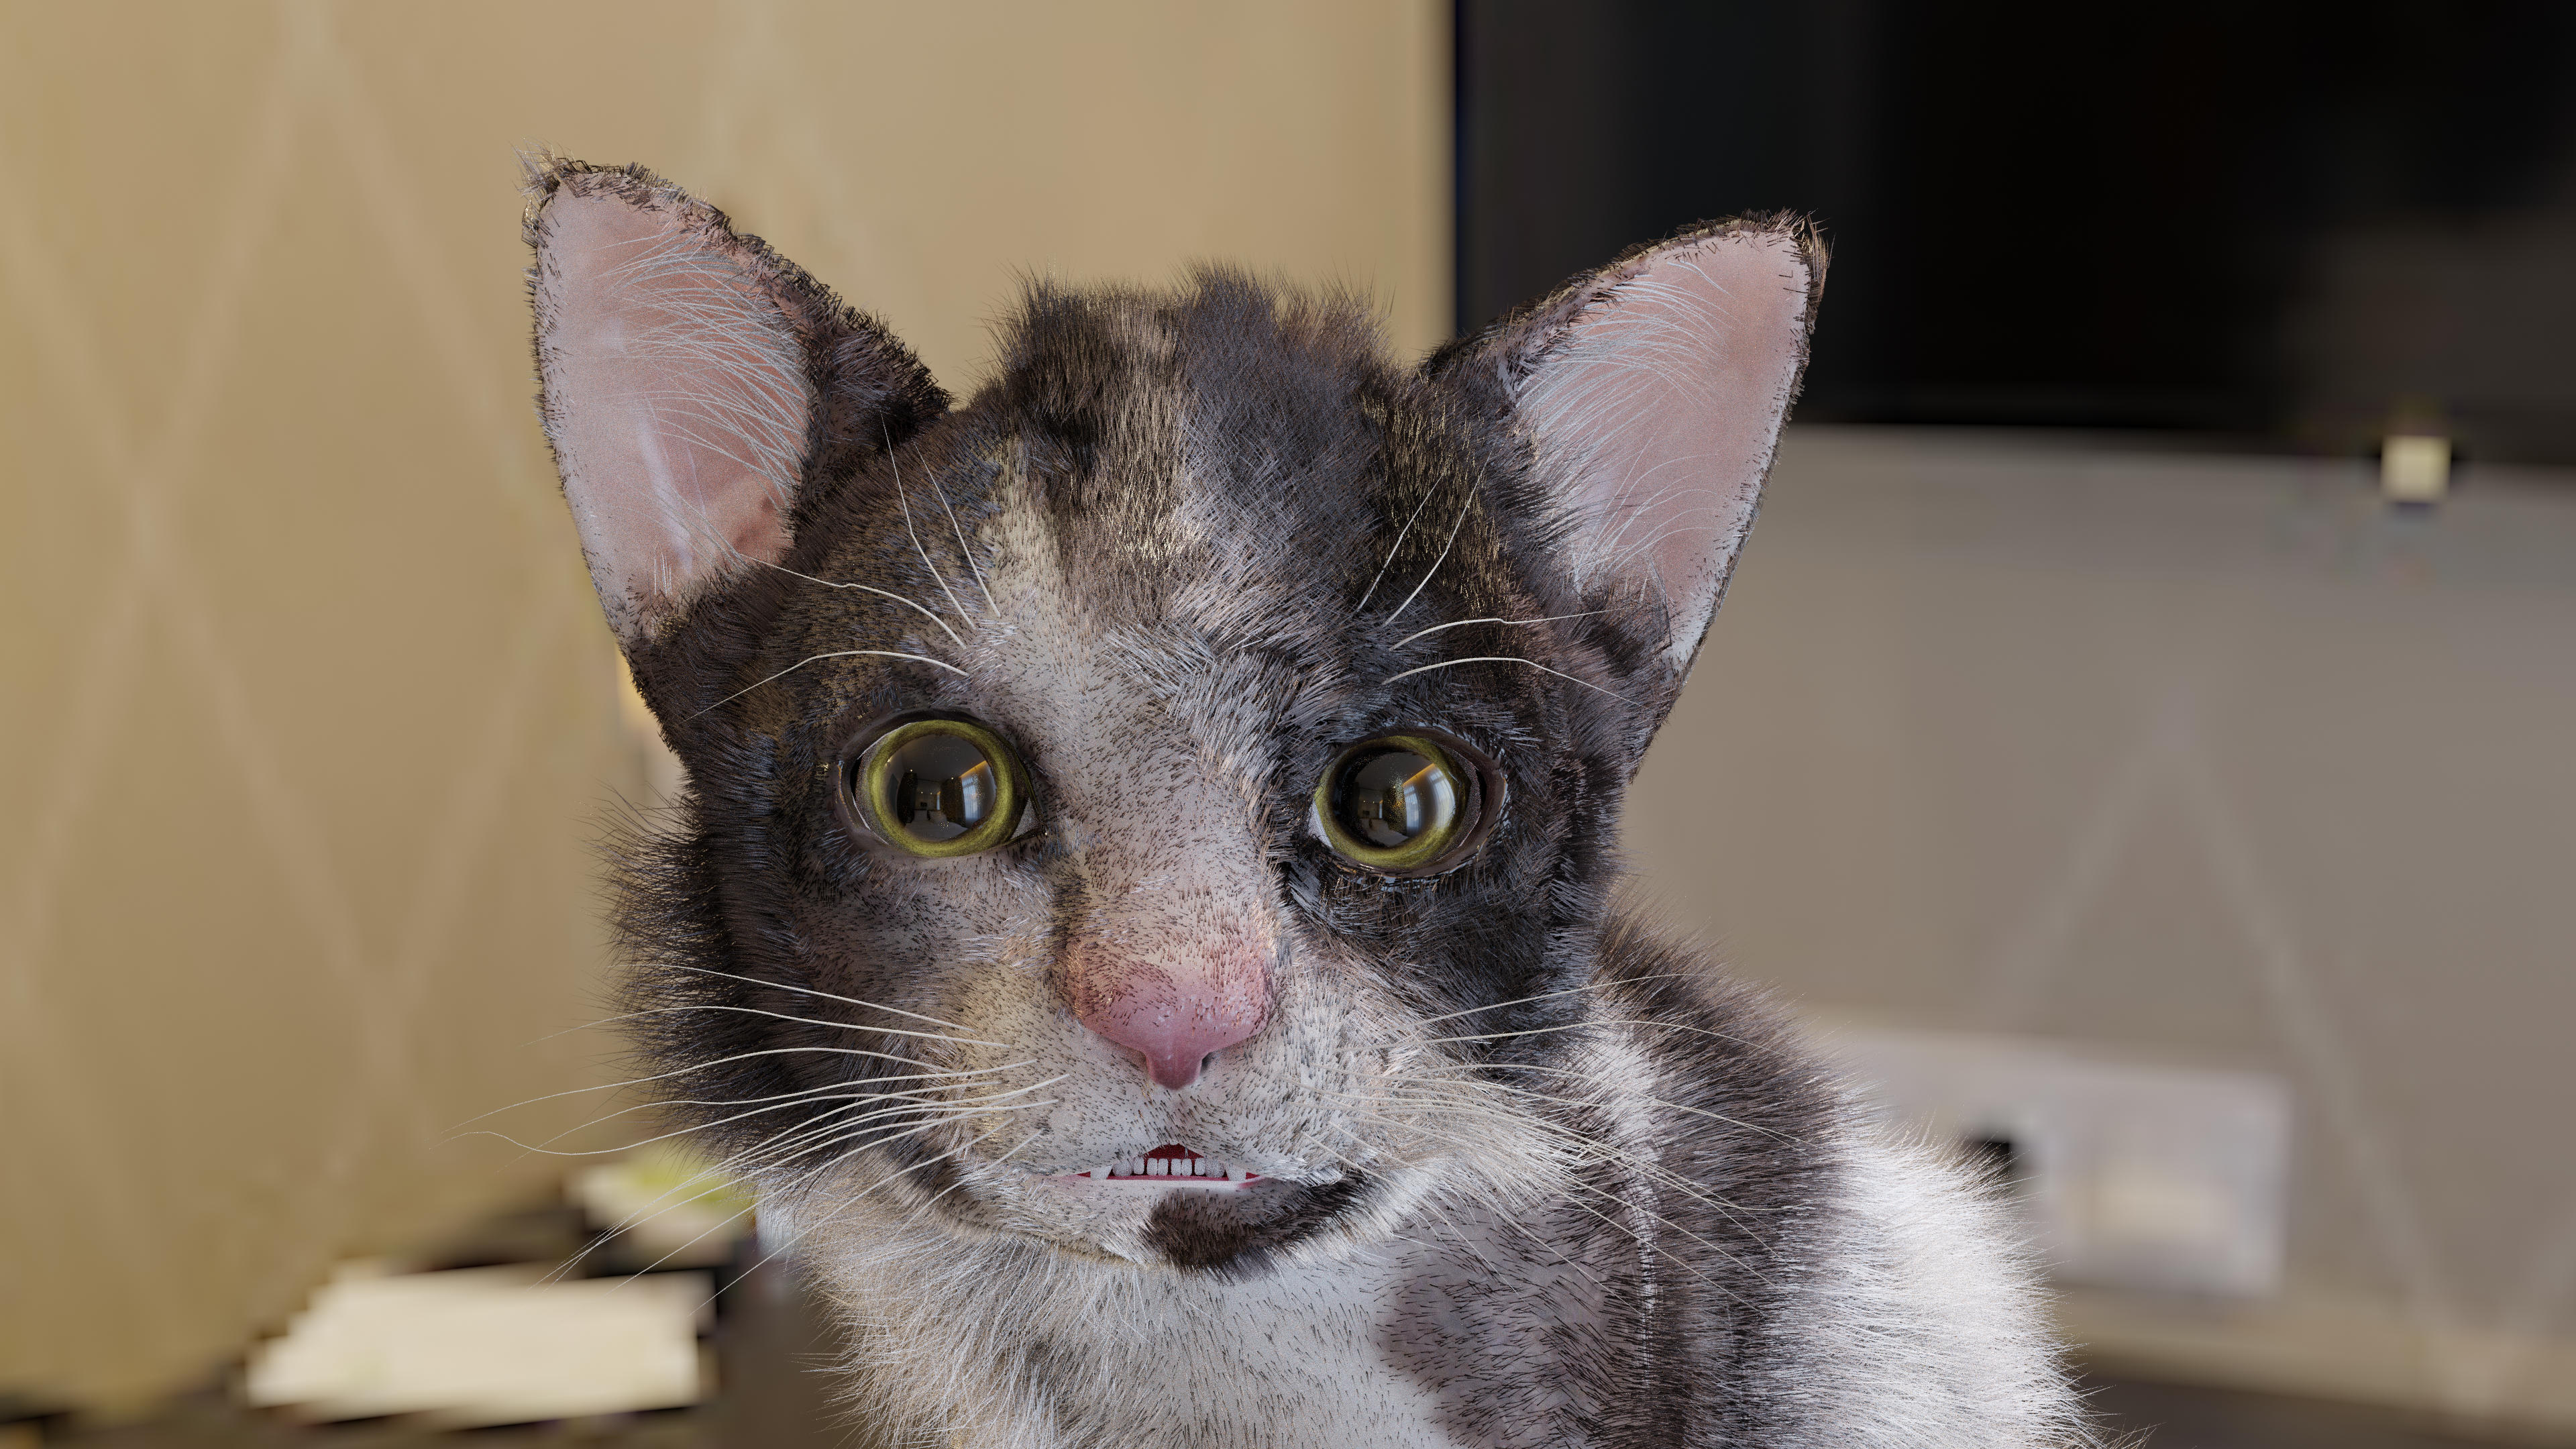
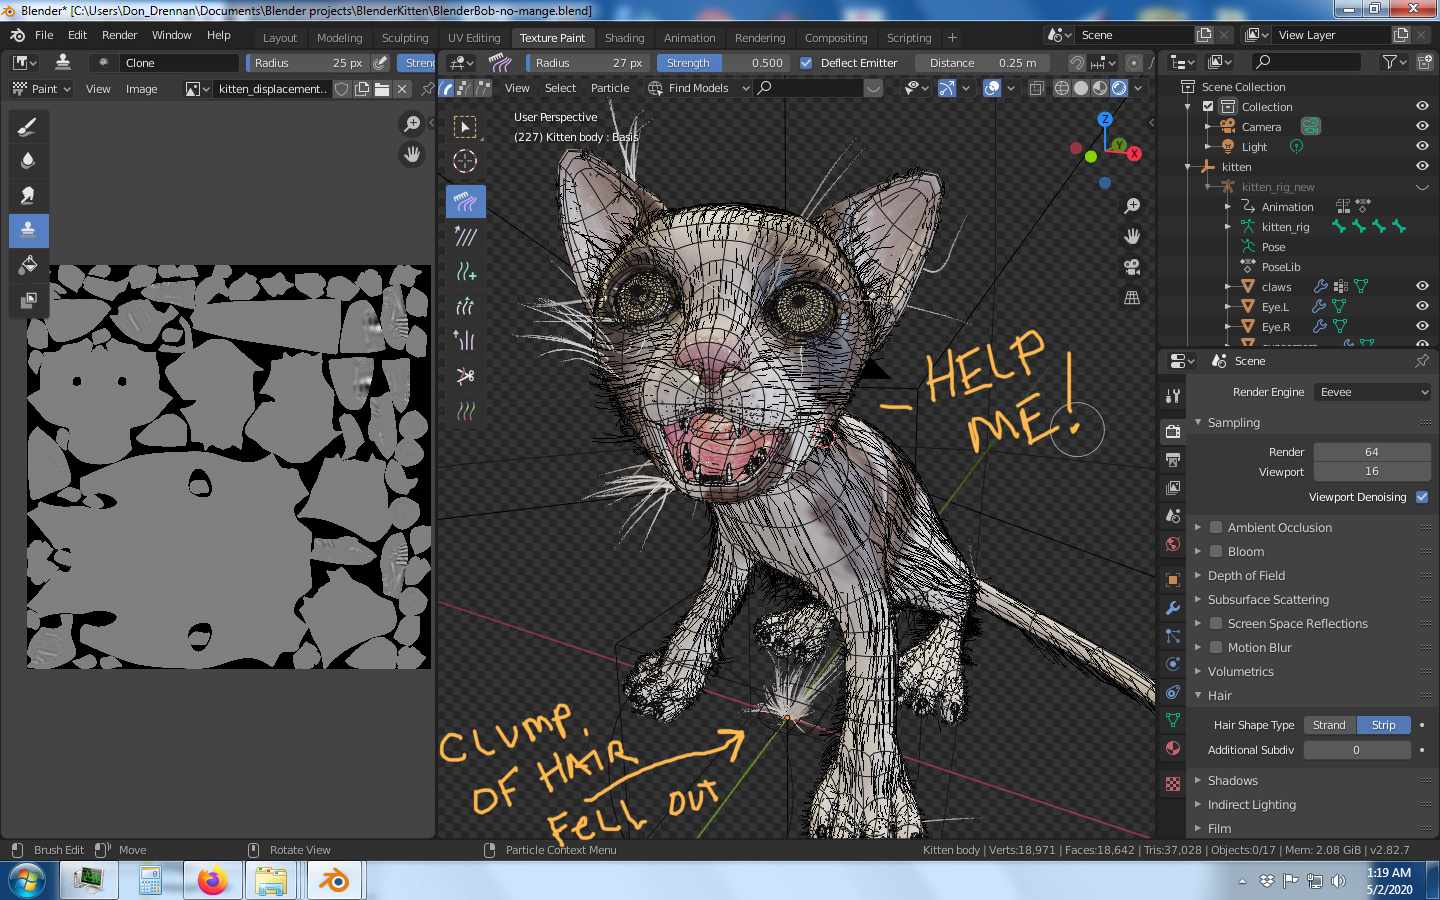
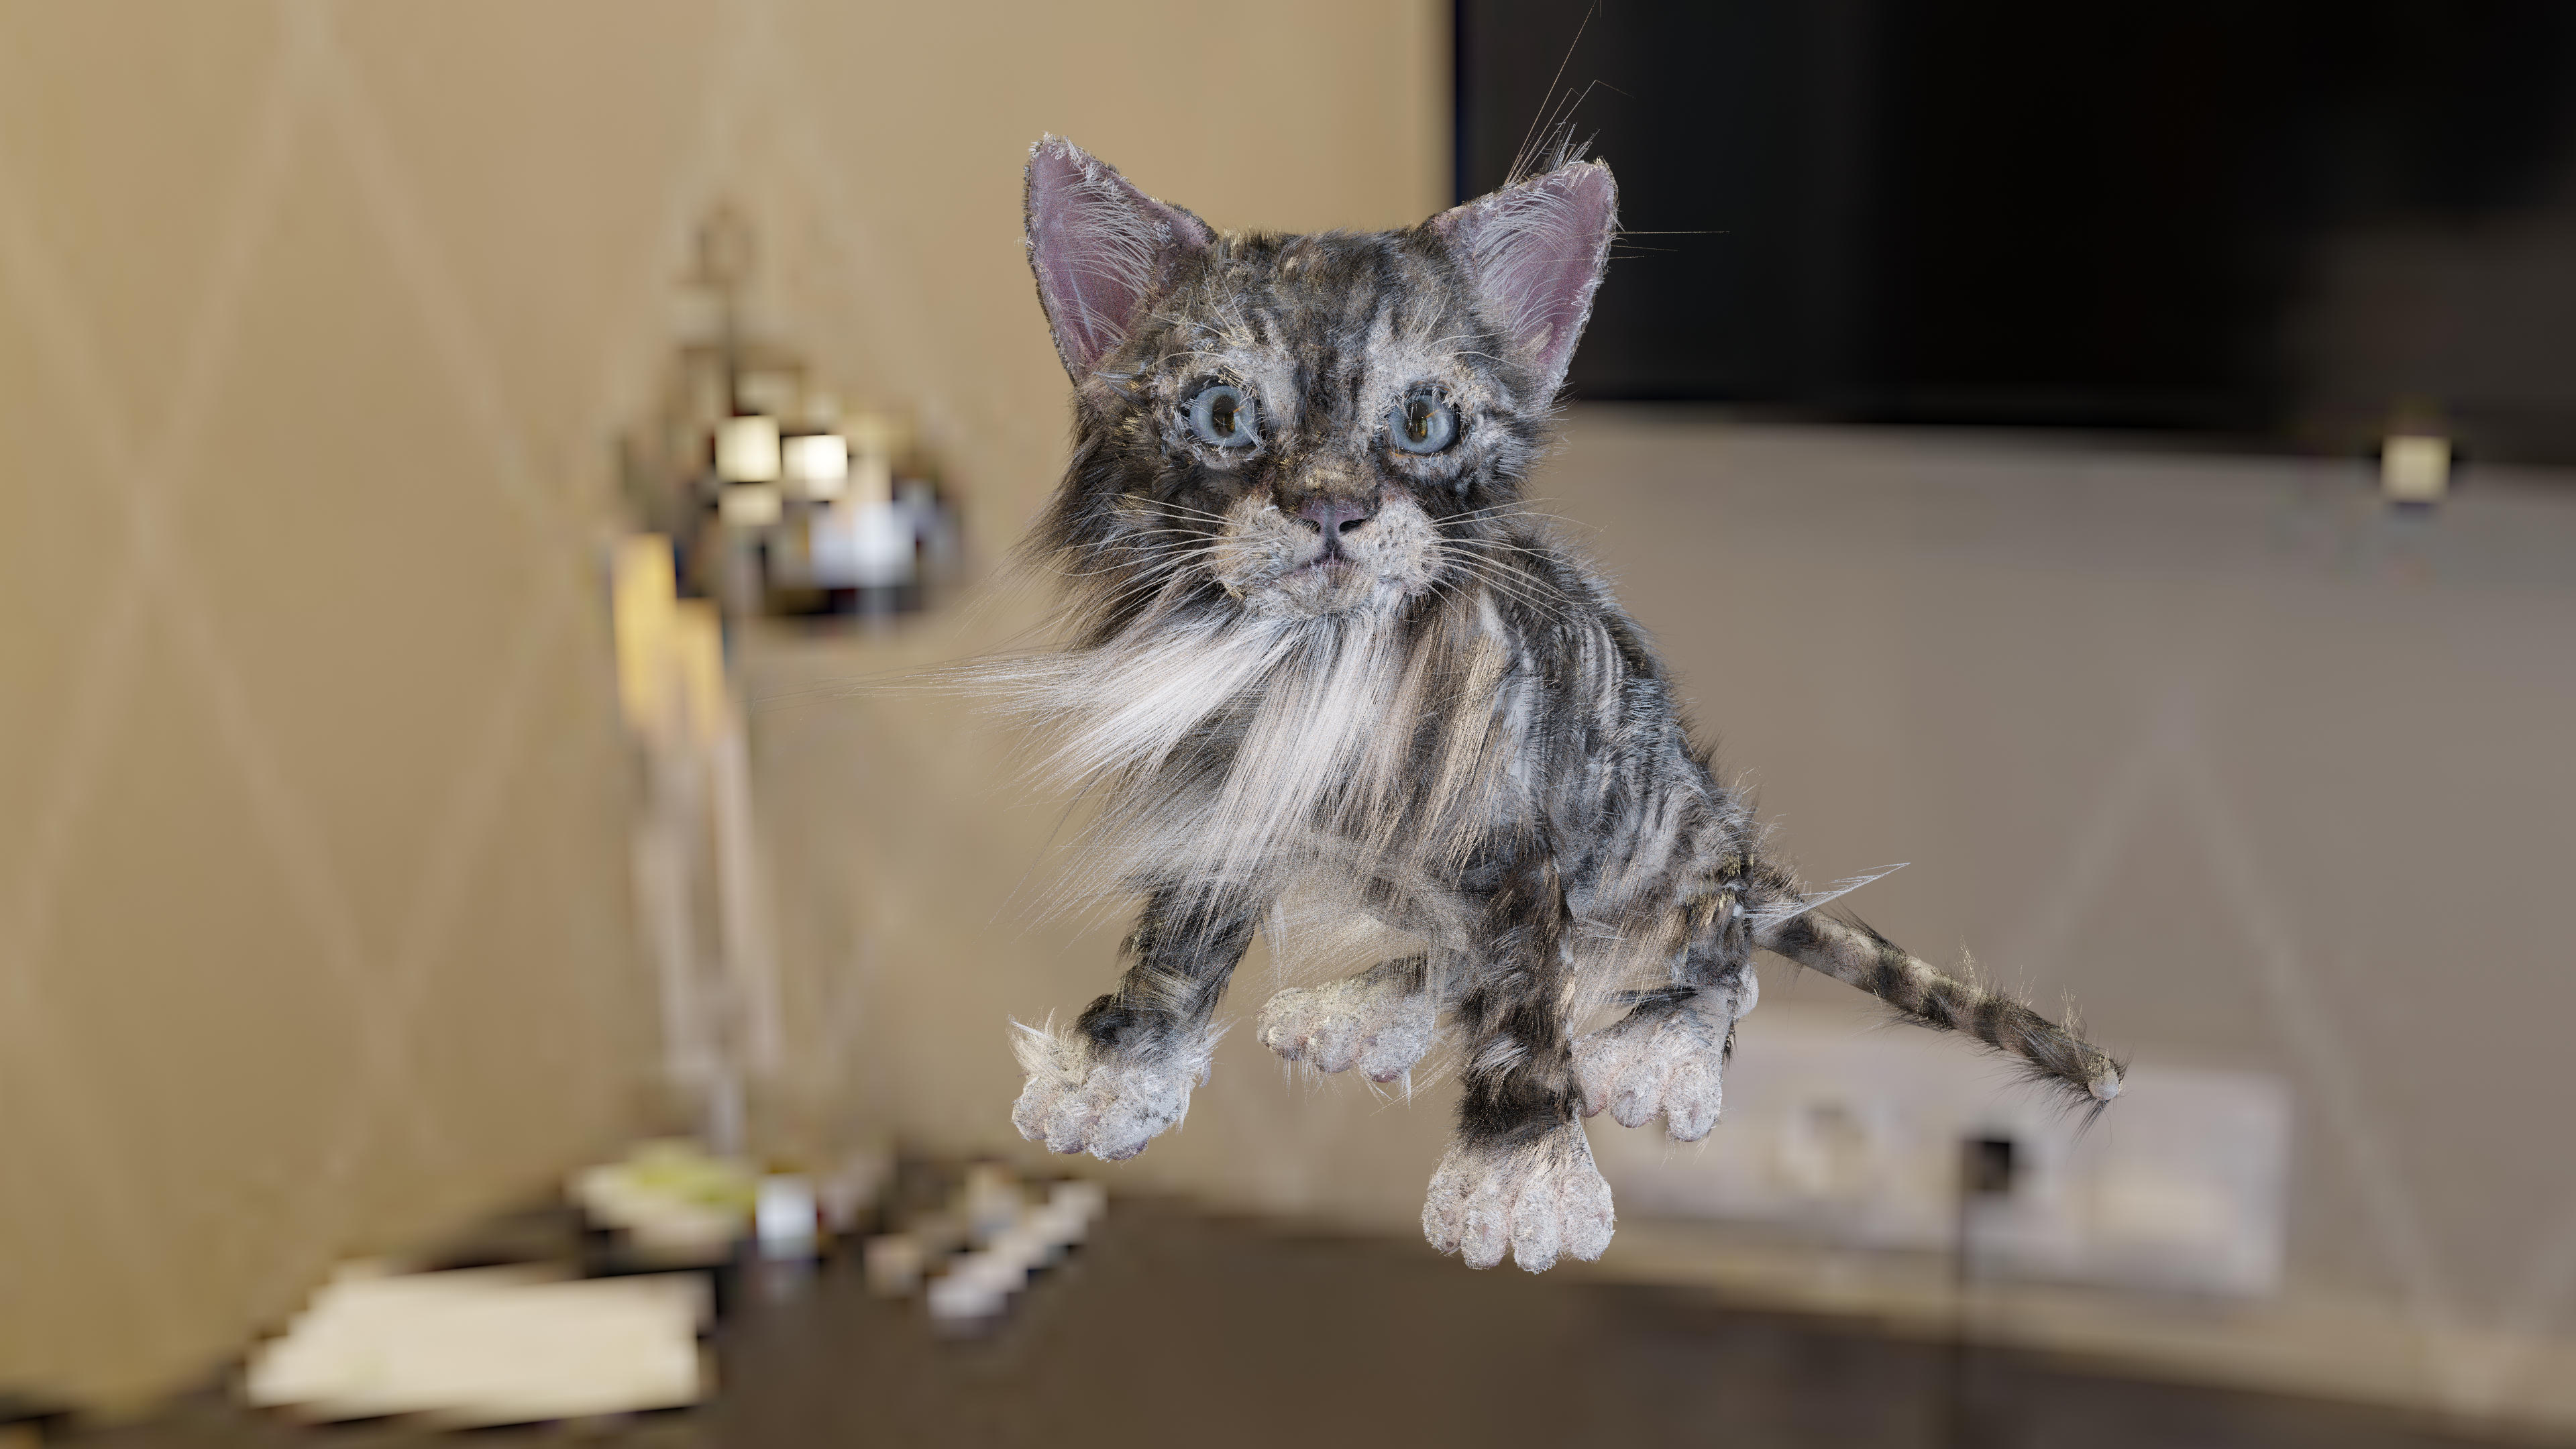
I started out with the BlenderKitten from Blenderkit. I thought I could make some alterations to make it look like my cat Bob. It has not been so easy. I started changing the textures to Bob’s coloration yesterday. Then at some point, the fur became messed up. The cat looked like it had a case of mange.
Then, I started editing and things went haywire again. I started combing the fur, and suddenly all the hair fell out and went to a pile on the floor! Then, I did something, and the hair appeared to be back, but not in the render, and the whiskers, which I did not edit, moved to random places around the face for no apparent reason.
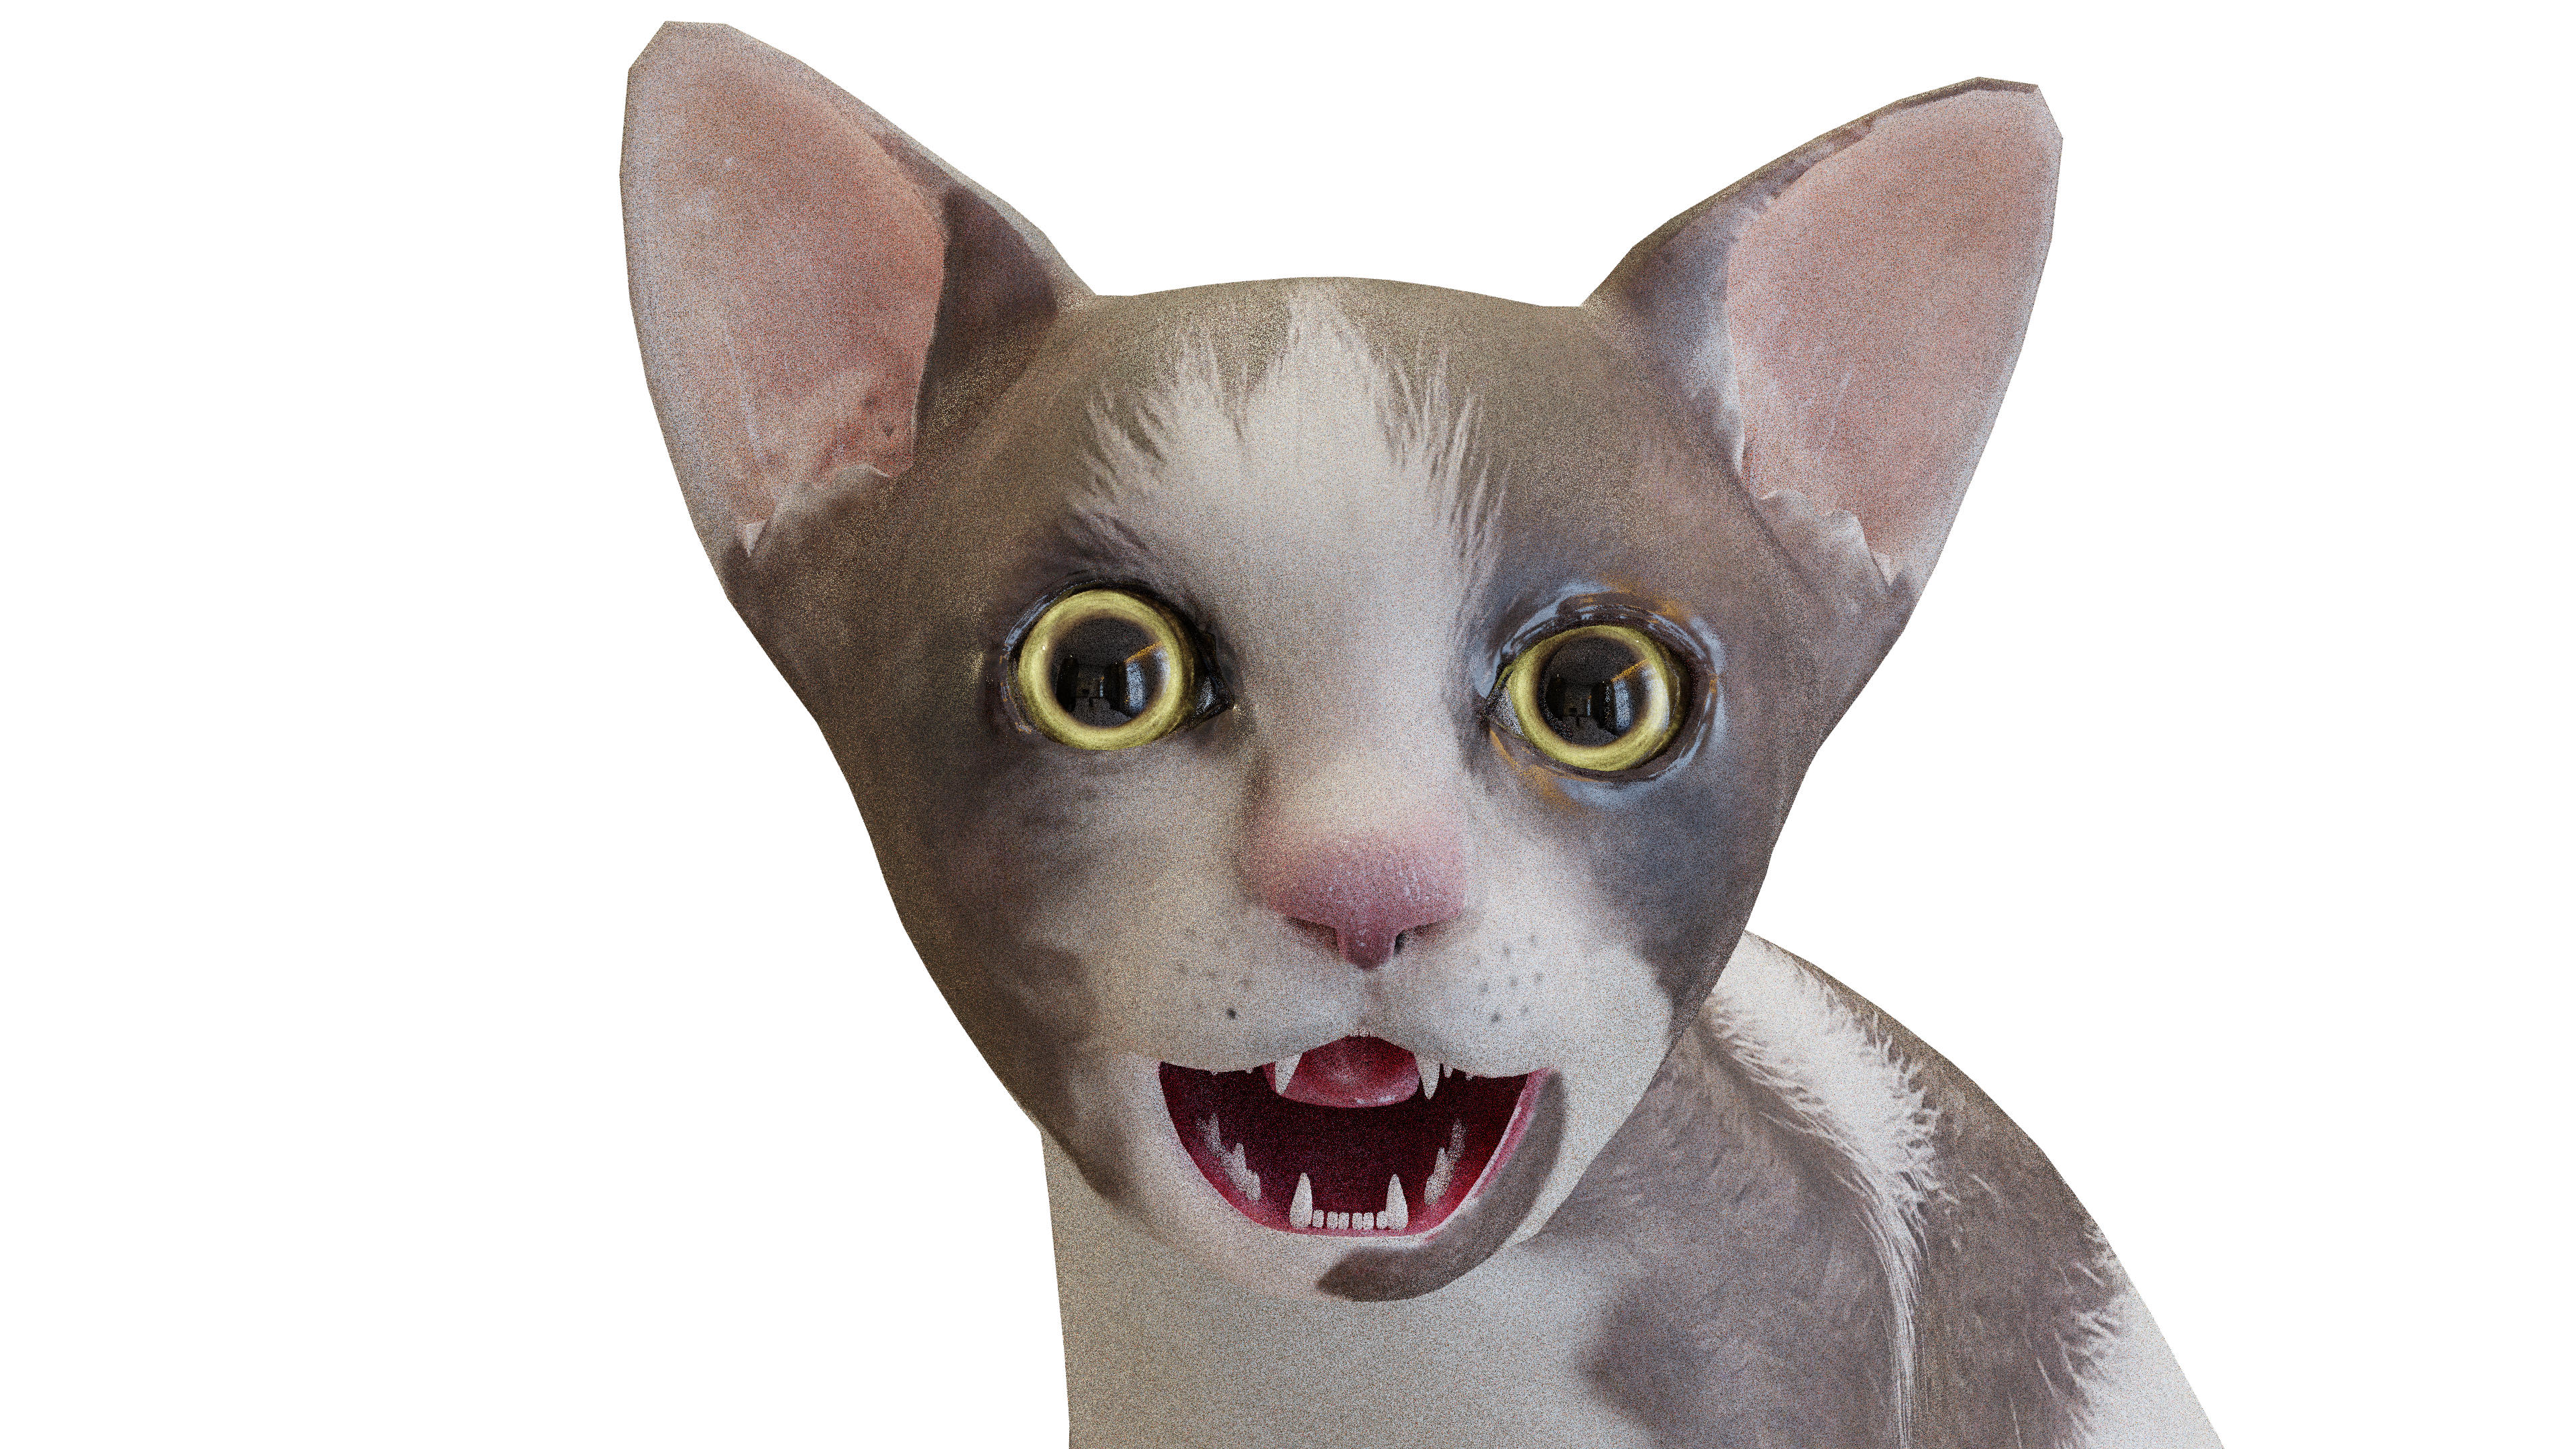
Here, you can see in this Eevee render that the hair is still there.
I tried to do some texture painting, which I had done before on another model, but this time, nothing worked, and eventually Blender crashed. Hopefully someone can give me some tips on what’s going on here. Right now, I feel like the software is gaslighting me. Makes me want to give up.
BTW, I’m using 2.82a.
Poor little kitty! is the model currently static, or is it animated, or have you been adjusting the pose whilst you work? The hair falling out into a clump on the floor sounds like you have hair physics turned on. Have you tried turning that off?
Hair system is full of variables.
There are the ones you set in in the dozen of panels of Particles tab ; the ones you set in particle edit mode ; the ones relative to particle textures ; potential influence of force fields, vertex groups and modifiers.
So, although you are not new to 3D : You are new to Blender.
You will need to be super confident with all those areas of Blender to debug your file.
You probably should explore particles without any goal in mind before starting a project for the moment.
Try to make simple hair style on a plane, a cube, a sphere. Test every single option in particle edit mode.
Take a look at how modifier can affect your hair system. Play with Connect/ Disconnect buttons in Particle Tab.
Test vertex groups fields one by one. Test texture influence, one by one.
And logically, when you would have become more familiar with Blender particles ; you should understand what you did wrong.
But from what you said, I have no clue if you are really encountering a bug or if you just clicked randomly on things in hope to see your problem solved.
There are bugs with particle system. That is one of reason to modify its code and switching to creation of an Hair object in future release.
But if you are not able to specifically name what is not working as expected, we are not able to confirm that is a bug and what may be a workaround.
Thanks for your response. Yes, I know there are many, many variables. But, if I’m not editing those variables, I don’t expect them to change.
This is a model I got from Blenderkit. It’s their sort of mascot. Basically, I just wanted to change the coloring of the fur, nothing that should have altered the particles, or the shape of the hair. Then, suddenly, the cat looks like it has mange, and I can see no reason for it. I did not alter any of the weight maps, I didn’t change the combing. The hair shape should have remained the same.
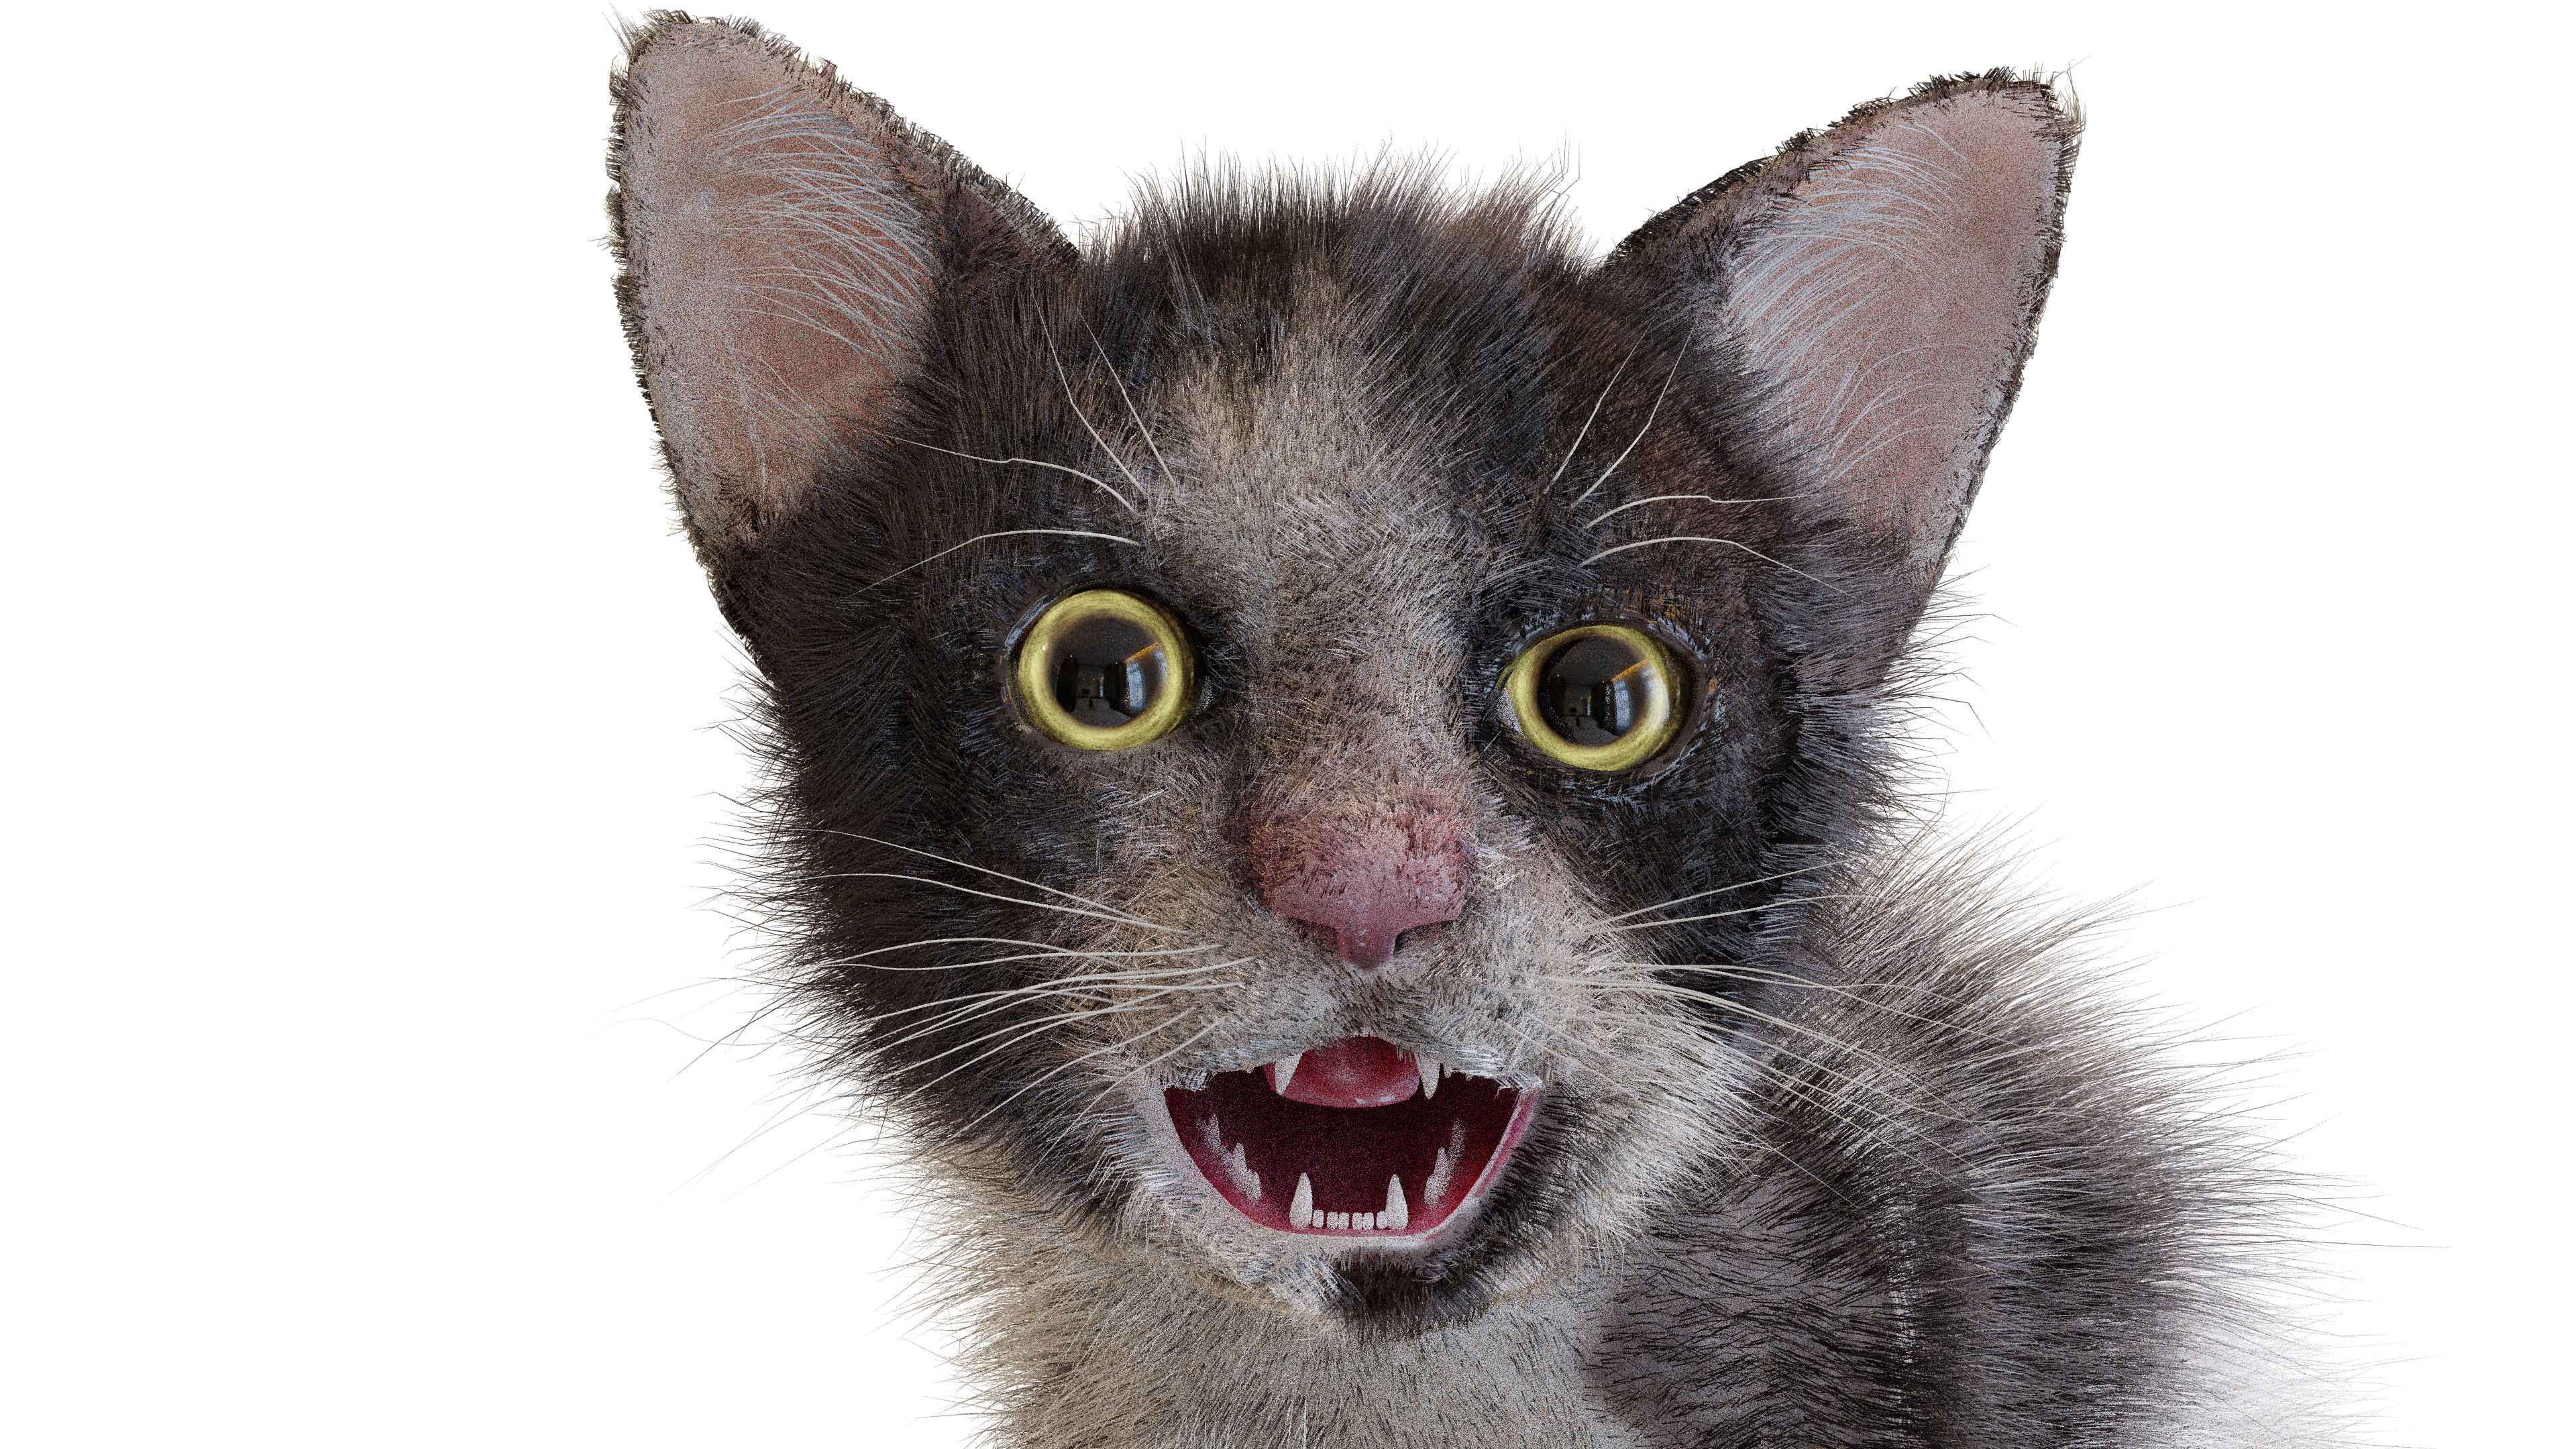
Then, when I went back to a previous version, I tried to comb the hair, just the body hair, not the whiskers or ear hair. But suddenly, the whiskers and ear hair was growing from random places. I wasn’t editing that at all. Then, the hair behaves differently depending on the render engine, as in, it’s there in Eevee, but not in Cycles. I have no idea why there’s a clump of hair at the origin point.
This really seems like a bug to me. It’s just odd behavior that doesn’t seem related to anything I did. Why should texture painting change the length of hair in random places? Why does combing one particle group make another particle group go haywire? Why can I see the hair in the viewport, and in Eevee, but not in Cycles? Why can’t I texture paint on this model, and why did Blender crash when I tried?
I would be happy to share this file if anyone would be willing to take a look at it.
It’s my theory that the combing data is getting corrupted. I’m not sure how that data is stored or how to look at it. I looked at all the vertex maps involved in the particle process, and none of them were altered. I could find nothing that would have shaved half the cat’s head and made the hair on his cheek grow out longer. Since those are both things that can be edited in Particle Edit mode, it stands to reason, in my mind, that something’s wrong there.
It looks like you are confusing Particle Textures (their goal is to control density, length, clumping, twisting… to sum up geometry of hair children) with Textures of Material applied to Hair System.
So, if you just want to paint textures to color hair, Textures panel in Particles Tab should be empty with no texture in it. Unless artist, creating the file, created particle textures also used as material texture.
In that case, you should create a new texture that should be mixed with present ones inside material of hair.
Your texture should only be added as a texture node in material precised under Render panel of Particles Tab.
Hair geometry is different from one render engine to another. Both engines don’t have same abilities.
EEVEE is new stuff and supposed to be fast. It does not handle all abilities supported by Cycles.
And if you added particles textures, EEVEE probably did not handle them as it should.
I wasn’t editing particle textures, that I know of. I was editing the material color texture, in Texture Paint mode. Are you saying this could be linked to Particles? The coloration that I painted doesn’t bear any resemblance to the hair abnormality. From what I can see, the density, length, clumping, etc. is controlled by weight maps. There are different weight maps for all of those things. Would this be used in combination with images (bitmaps, jpg, png)? I don’t see any images designed to control hair. There’s one for color, roughness, displacement, but not hair density.
Also, how is the combing data stored when I use Particle Edit to comb and style the hair? Could this be getting corrupted, or un-linked? Shouldn’t combing for one particle group be separate from others? The body fur is a separate particle group from the whisker group, yet my combing of the fur seemed to corrupt the the whiskers. It didn’t comb them the same as the fur mind you, it randomized the placement of the whiskers.
Here’s a version of the file with mange if want to look at it:
A bit of a late reply, I know, but I hope this helps.
The thing about hair particles is that they’re highly sensible to modifiers stack order and geometry modifications.
Your screenshot has one of the classic hallmarks of a malfunction caused by one of these two: Hair stretched and coming out of the wrong places, tufts floating around or stacked at the origin. The cause could be a shapekey, a subsurf in a different level, a corrective modifier, or maybe separating and joining meshes at some point.
Usually when something like this happens I re-transfer the particles from a working model.
Sometimes systems created with “Use Modifier Stack” will misbehave when in not the exact conditions they were created—in the same modifier order and subsurf levels—so you need to sort these out first to get the hair looking right in the source model.
Recreate the same conditions in the target model now, same subsurf level, etc.
Select the target object then the source one. In Object Mode go through the particle systems you’ll transfer and click on “Disconnect Hair”.
Copy them to the selected objects and reconnect the hair. It’s not 100% guaranteed it’ll work, and the hair may slide a bit out of place, but this tends works fairly well. Just make sure to reorder the modifiers stack to match the source’s order.
Alternatively, if you don’t need to keep the modifiers of the target object, you can skip the the step 2 and replace 4 with a linking modifiers operation.
As a general tip for future hair particles that may see manual edition and combing I recommend to avoid “Use Modifier Stack” like plague and use an Emission Number of 0, manually placing all the hairs.
Thanks for the help. I shelved that project for awhile to concentrate on learning modeling in Blender, and getting to know Blender better.
Since I didn’t build that kitten myself, there were things going on in the file I didn’t completely understand, still don’t, but I’m getting there. Yes, I had adjusted some of the modifiers trying to get this to render faster, so I may have messed it up that way. It was just really taxing my computer and taking hours to render. I don’t remember if “Use Modifier Stack” was on or not, and yes, it does have shape keys.
I’ll take a look at all those things you mentioned.
Thanks again!