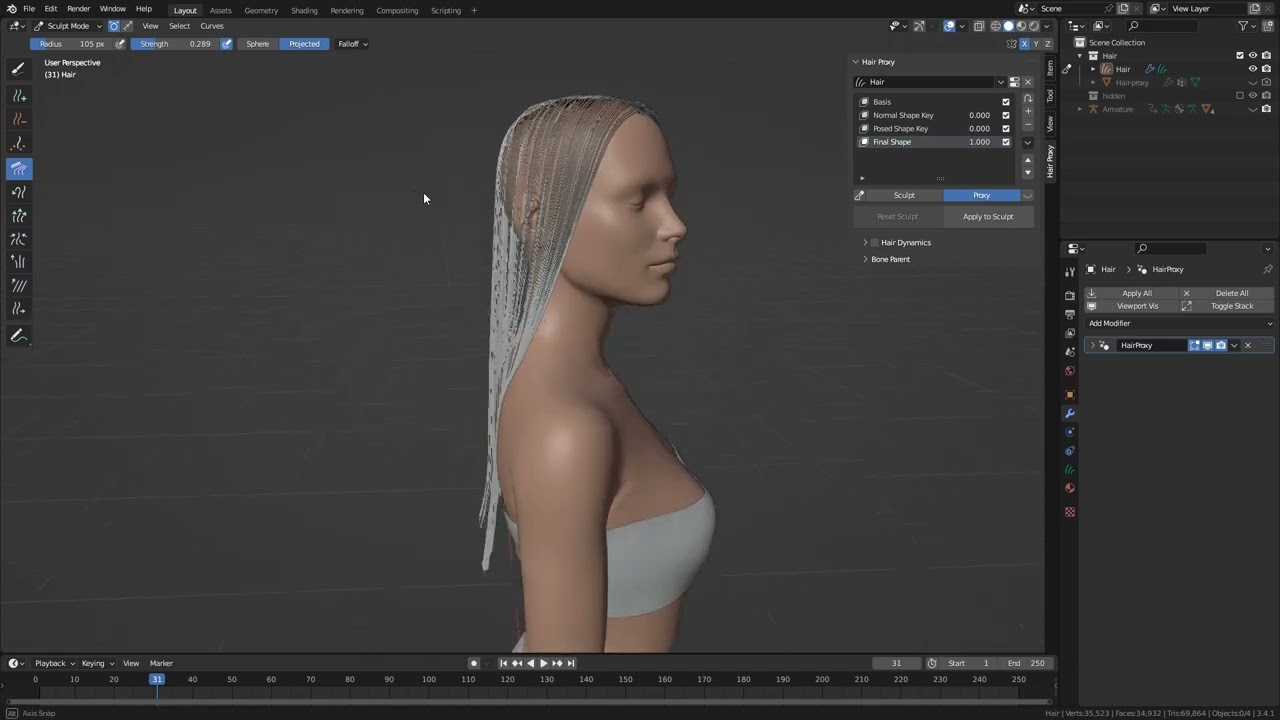
Hair Proxy version 1.2 is now available.
Changelog:
- The proxy can now be updated after adding/removing hair in sculpt mode
- Several warning states have been added to the panel
- The frame number is now included in the name when adding a hair dynamics shape key
- Bone parent UI now displays the current parent
- Bone parent UI has a new button to clear the current parent
- Hair dynamics “Weight” slider renamed to “Mass”
- Changed the panel icon for the proxy object
- ‘Overwrite Shape Key’ button is now enabled on Basis
- ‘Reset Sculpt’ operator will now reset to Basis if it exists
- Bug fix: Generated “roots” vertex group is now correct on hair with inconsistent curve resolution
- Bug fix: ‘Restore Proxy Modifiers’ operator will no longer duplicate “roots” and “pin” vertex groups
So that was an interesting video to watch. It seems like you have made an addon to automate and add extra features and options to something I was playing around with a while ago.
In my little test video (https://www.youtube.com/watch?v=Fu8kp4_3lgU) it’s using Geometry Nodes to ‘apply’ a mass of curves to mesh planes and then Cloth Sim to animate it. This was before the new hair curves, all created manually (a big pain) and none of the shape keys, etc which I guess you can use to make manual corrections once its all baked, since lets face it, the cloth sim system is far from perfect.
Ideally all this would work in default Blender and in theory over time it will, as they replace simulation system with nodes. But that could still be a good 1-2 years away and I’m getting close again to having to re-visit the whole hair setup on my current character.
Going to have to give this some thought.
Hair Proxy 1.3 is now available.
Changelog:
- Implemented Posed Shape Key operator
- Bug Fix: Fixed some issues with multi-user curves
Hey, your addon looks great, i just bought it, but i have a problem setting up the human hair case, it’s not in the blend file example from gumroad and tried with a different setup from Xeoforios: https://www.youtube.com/watch?v=XY5j4_BHU2A&t=159s
the issue is the addon doesnt recognize that setup as a valid object to generate the proxy, the button remains greyed out, can you help me out figure out whats needed to setup your example in the video?
Edit: i found out that i can “apply” the Xeofrios’ Geonode setup and then create the proxy with your addon!
Glad you got it working. And just for clarification for anyone who might see this, the addon will only work for “native” hair curve objects; a mesh object that uses geometry nodes to generate curves will have to have its modifiers applied and the object needs to be fully converted to a hair curves object type before the addon will recognise it.
Thanks for your purchase! Let me know if you have any other questions.
It seems good. generally we make hair with several hair curves. not like one you demonstrate, Does this addon support several curve hair simulation? if possible, how can we use this?
Currently for separate hair curves you would need to set up hair dynamics individually for each piece. You could perhaps duplicate and merge the hair curves into one object before applying hair dynamics, though I could see how that might be awkward if you want to sculpt the individual pieces after simulating.
It may be possible to implement some sort of settings linking between separate hair curves objects. It’s something I can look into. Unless I’m misunderstanding what you’re asking?
This looks great. Do you think there is a way to simulate cutting hair with this node approach? I have managed to use a dynamic brush with the alpha setting to simulate cutting the length of the hair particles, but not tried with hair nodes. Is there a good way to simulate cutting hair that works with this node system please? Thanks
Do you mean cutting the hair while it’s being simulated, so that during the animation some of the hair splits off and separates / falls to the ground? If so, I don’t think it would be possible.

