Need your help! We are a new blender user, and our first project is to create a dome with printed artwork on the inside. Can anyone tell us what we are doing wrong? Here’s the step by step of what we do. We apologize if there’s already a post regarding this, we just don’t understand the blender language yet.
create UV sphere
segments 96 - rings 96 - Radius 2.1m
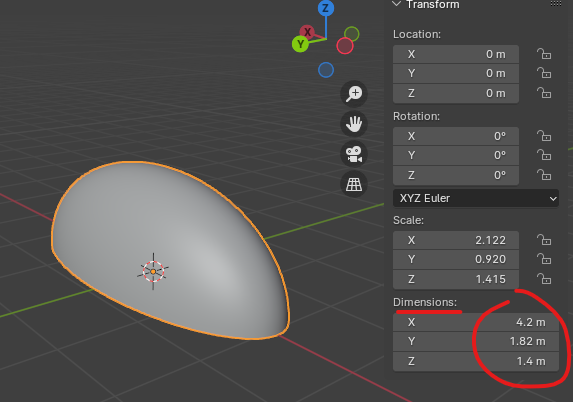
Resize to ellipse ( 4.2mL, 1.82mW, 2.8mH )
Cut in Half (Height becomes 1.4m)
Go to Shading - (below image)
go to UV-Editing ( this is where we start to struggle ) Cant get to fill the image with UV Map even with follow active quad technique.
start baking and unwrap. We need the Unfolded file with the artwork so we can print and start stitching them together. See below image for example.
Hi Zebrahead, thank you very much for the reply. Ill try your method. Now, the issue is how to unwrap the ellipse with the texture included. Looking like the image below.
The idea is to have a print ready file so I can make something like an inflatable sphere. I believe the theory is to bake it first then unwrap it? Is that correct? That whole process is where we get lost.
No, it’s the opposite. You first have to unwrap your target mesh and then bake the texture on it.
Start with the mesh in your original post. Don’t forget to apply scale before the unwrap! Otherwise, everything will be distorted in the end. Add the seams (like you already did) and UV unwrap it (select everything and press U → Unwrap
You can rearrange the islands to your liking but you should not distort them!
My UV map looks like this:
Then create the object from my previous post. This will be the object that we bake the texture from (also, apply the modifiers and scale). After that, it’s just the normal baking process (look up some tutorials on Youtube for this). My end result looks like this:
tried all other options like linear to sphere, smart to flat etc. matching it with different type like point, vector, texture etc. . can get to get rid of that warping of the image.
All right, that looks good so far! Mine looks the same.
The only difference in your first and second image is that in the first one you are in Edit Mode and the Cast modifier is not displayed there by default. If you want you can toggle this little button here to see the effect in Edit mode aswell:
Hi Zebrahead, sorry, but do we delete what we just did or do is there an option to hide it for now? I already applied all the modifiers and the scale as well. Thank you.
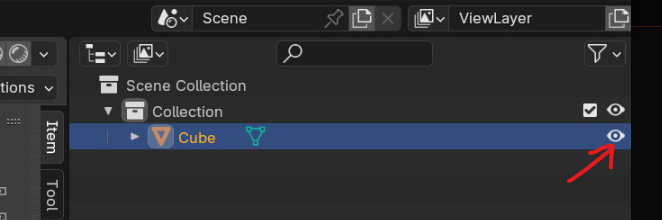
No! Don’t delete it! We need both objects for baking
See this little eye-icon on the top right?
You can click on it to hide the object in the Viewport (or select the Object in Object Mode and press H to hide it)
Got it! Done making a new one and unwrapped it as well. By the way, how come your unwrap on your previous post is arranged perfectly. Like you know which is the middle panels or the side panels.
Because i rearranged the UV islands (on the left side of your screen) like that
Well done! Now to the last step → Seting up the material and then Texture baking! For this particular case we only want to bake the emission so lets set up our materials that way!
Make sure to connect your original image to the Surface Output of the Material! This way, the cube object will emit the image texture like a light source.
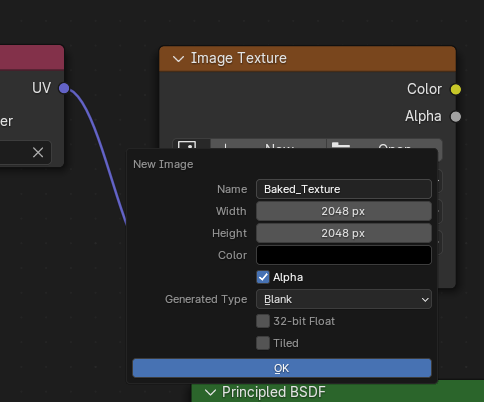
Select your Sphere object and create a new material. Inside the material you need to create a new Image Texture, which should be connected to the UV Map:
Click on that New button on the image texture node. Give it a name and the desired resolution and press OK:
The resolution should be squared. If its not, you have to unwrap the Sphere again because it will be distorted.
A VERY IMPORTANT STEP! Make sure that the newly created Image Texture node from the Sphere_Material is selected!!!
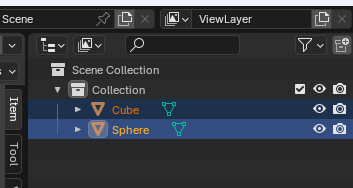
Unhide the Cube object, we now need both of them visible! When you have done this, FIRST select the Cube and THEN by holding Ctrl select the Sphere in the Outliner (top right of the screen):
Make sure that the Sphere is the last object you select because this will be the object that we will bake the texture on to!
Now to the final steps Go to the Render Properties → change the Render Engine to Cycles → go to the Bake tab and change the Bake Type to Emit → activate Selected to Active and increase the Extrusion by a little bit:
Also, how do I put like 2cm margin all around the baked panels. Another super newbie question how Ito save this baked panels so we can start printing it.
I’ll make sure to send you a photo of what we are trying to do here. Thank you so much.
Congratulation you can now plug the output from the Image Texture node to the Base Color of the Principled Shader for example to see how it looks like on the mesh (or just to the Material Output).
When you unwrap the sphere you can change the Margin at the bottom left panel that pops up:
Ahh, you’re not using the same Blender version as i am - that’s why it looks different than in my last post. You see this Icon with the three lines in the Image Editor?
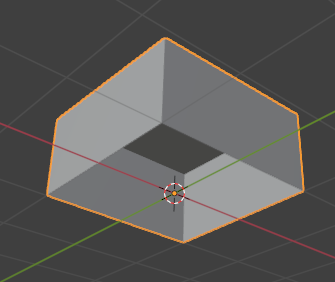
Got it Zebrahead. Now it seems though that the unfolded panels are cut for some reason. See image below. Also, when saving it as Jpeg it is not the same dimensions?
There are no images in your post? Can you reupload them please?
I’m just guessing here but i think you unwraped it and didn’t bake the texture again? If so, just repeat the steps after (and including) Step 4 from my previous post. You always have to rebake the texture if you make changes to the UV map.
Not sure why this would happen? Would need to see an image to know what’s going on!