Waiting for test renders of the Kata animation can be boring so I started in on a new project based on some of my favorite sci-fi novels, the Chanur series by C. J. Cherryh:
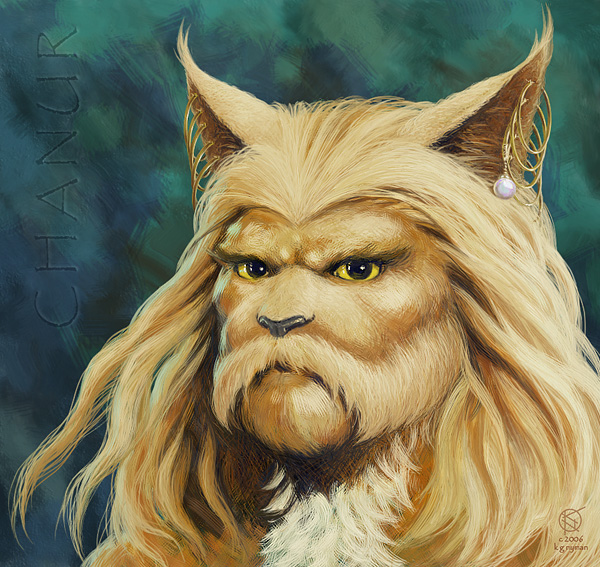
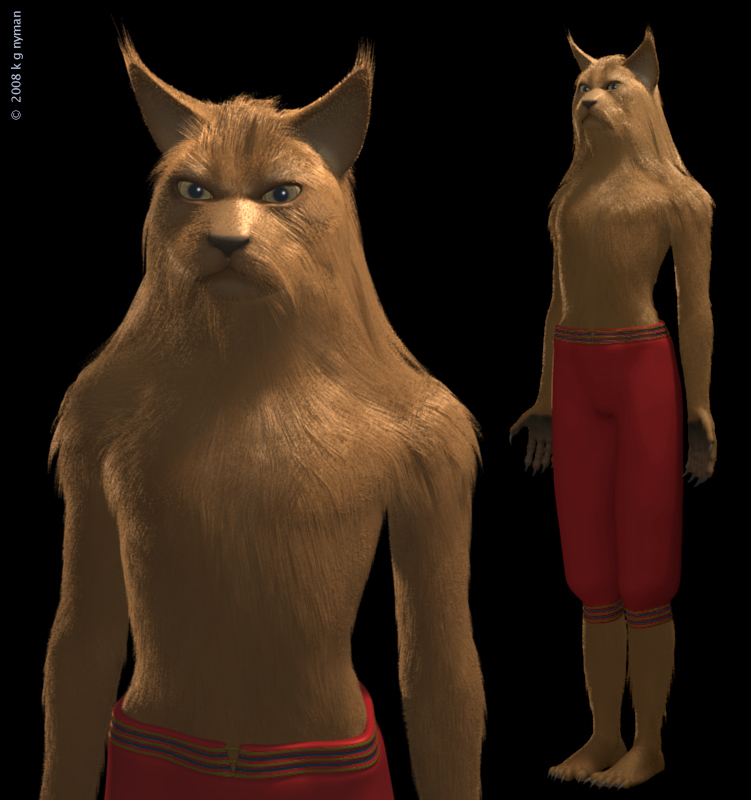
The hani are one of seven star-traveling species in the books, and are essentially cat-like mammals evolved to the same level as humans. Here’s some 2D art I did a couple of years ago that shows where I’ll be going with the fur/hair and other detailing:
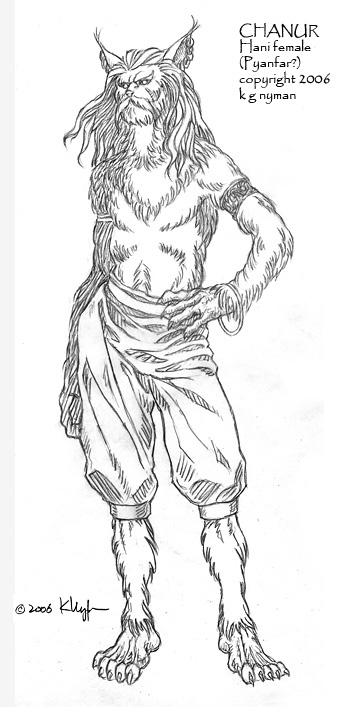
Most of the hani characters in the books are female due to the cultural norms of the species, so I’ve tried to add a sleekness to the figure to counteract not having the usual gender characteristics. This is sort of based on another early sketch:
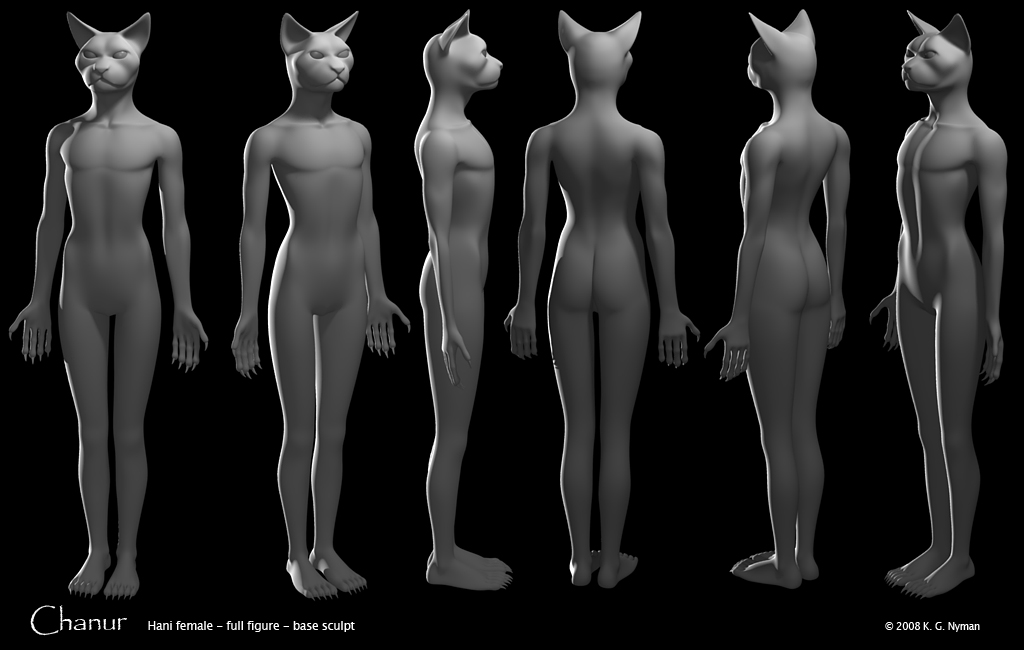
I’m wondering if the muzzle is too long, though, looks just a bit too canine, maybe? Or maybe the angle between brow and bridge of the nose is too acute? The hair & fur will make a difference, but I’d like to get the base sculpt really tight before adding the pelt. C&C appreciated.
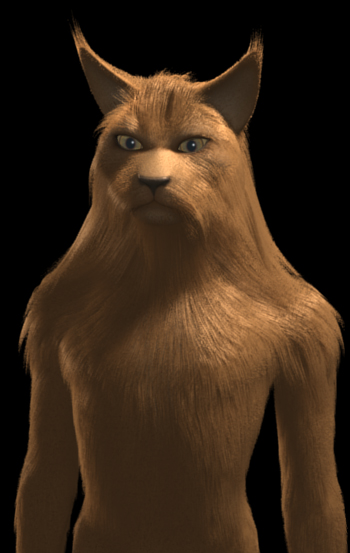
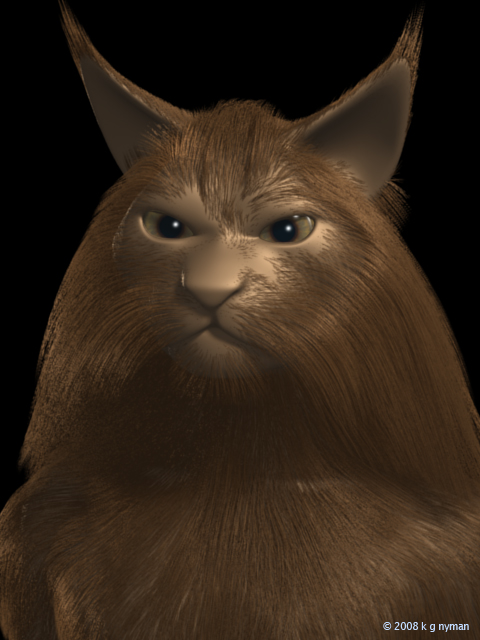
Got the eyes done and a good start on the hair/fur – I like the color and specularity, but am having some probs getting an even distribution using the “Faces” option for the child strands – even placing parent strands by hand doesn’t seem to fill in the bald patches, and some of the child strands are showing up in areas that are painted for no hair. I’m hoping that the skin texturing & shading I plan will help make it less visible through the hair, also, right now it’s too easy to see, but I can’t really afford more hair strands – 1.5 hours for this render as is.
Yep, definitely needs more work on the fur area, considering your work on kata, I’m sure you’ll work something out. :yes: Sorry, I haven’t got much experience in that area so I can’t help. Although you might want to work on the transperencies just a bit.
However, cats have fairly blunt faces so IMO your worries about the muzzle length are well founded, you might want to shorten it and widen the whole face a bit. Cat’s are somewhat lofty creatures, you’ve managed to capture that pretty well, but you might want to work on that area just a little bit more.
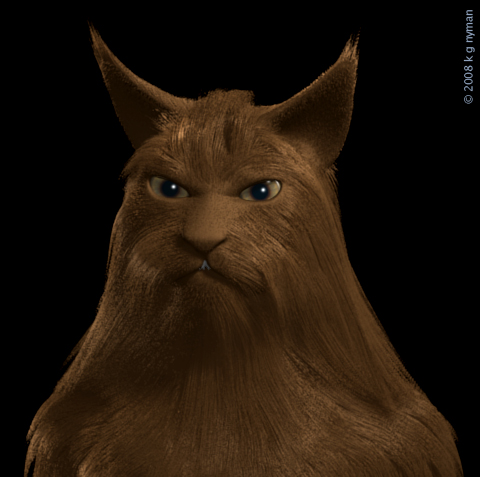
Thanks, Krayon, good comments. I did adjust the face somewhat though it may be hard to notice under all the hair. One major change is that the eyes are now noticeably smaller, they were looking too cartoonish before.
I solved some of the hair issues by recoloring the base skin shader to match the hair color (I’ll add variation later with textures and other shader stuff), and by adding a second hair particle system, a shorty “fuzzy” layer that helps break up the hard outlines of the base mesh and helps fill in some of the gaps in the longer hair.
I also added some slight clumpiness and other shaping to the pelt. She’s looking a bit too wookish right now, so I’ll be doing more hair-styling after I get the unwrap and texturing finished, models some accessories, and start working out a pose.
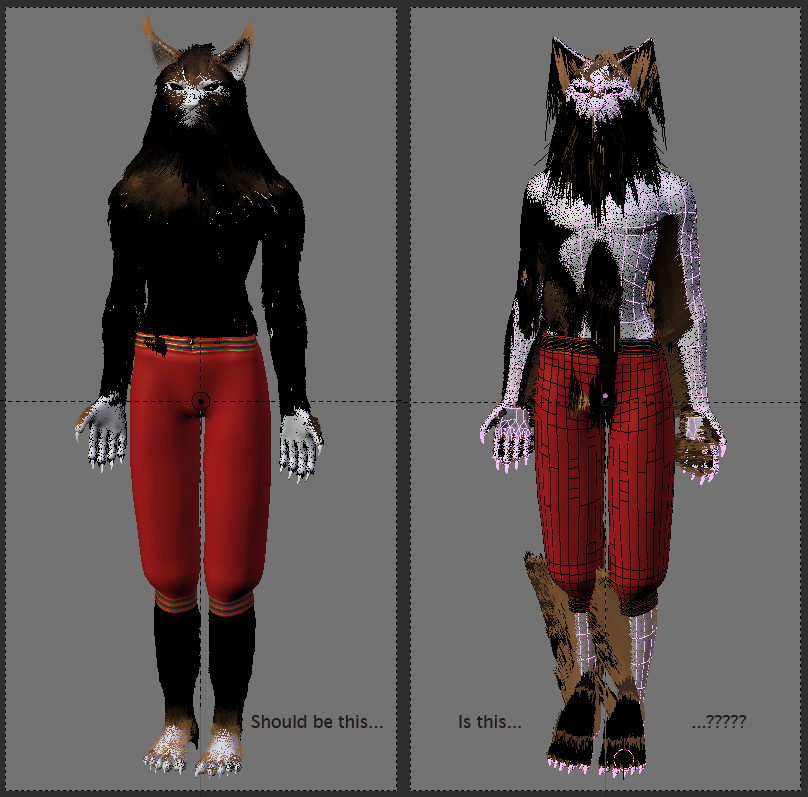
Thanks, Anayo. Unfortunately a gremlin seems to have crept into my file overnight because after rendering these edits to the base mesh and hair system last night:
I saved the file under a different name (for bug documentation, I suppose), but when I went back to the earlier file (that had rendered the above images), it also showed this, even though its last-saved timestamp was yesterday afternoon at 2pm, many hours before the renders were made. :spin:
I was able to reconstruct a usable file by appending (that’s the image on the left above), but using a much earlier hair system that has none of the painstaking corrections that took me hours to make.
Weird things happen to my hair when I close a file and then open it up later. After I get everything close to the way I want it, I render it, save it and close it. Later I open the file and the hair is going off in different directions, luckily, after changing to particle mode and object mode, and edit mode a few times everything seemed to snap back into place - very strange.
@scdelf – Good tip, dude! I opened the scrambled-hair file, popped the mesh in and out of Edit mode, and the hair seems to have gone back into place. Excellent. Many thanks! I never had this issue with earlier versions, so it may be a 2.48 gotcha only.
@ -[Killer]- – nope, no particle systems have been applied, they’re still on the modifiers stack.
The last render was looking still too canine , so I spent some time back with my big cats refs and revised the diffuse map a little, mainly the leather of the nose, and made the palms of the hand a continuous “pad” – the separate pads looked too contrived. I also made the eyes smaller yet again to avoid the “disneyfied” furry-critter look, I definitely do not want cute.
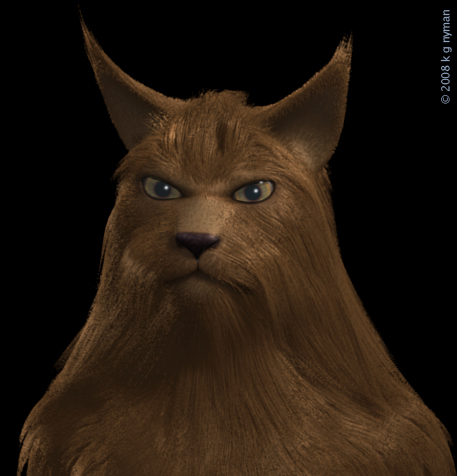
I like the facial proportions much better now, and feel it’s close enough to start making the final tweaks, leading up to a hi-rez sculpt of the head/face only to bring more detail into the features. The hair/fur from the shoulders up is getting real close – its very hard to “sculpt” the hair when the entire body is covered, very difficult to see groups of strands in the UI – but the chest looks too random, needs more grooming.
Also, the “Col” option in the hair system doesn’t seem to be operating as I expected – there are a few variations in color on the diffuse map that don’t seem to be picked up by the hair, but maybe I have to make them more obvious for it to be more visible. I also need to drop the extra specular on the top of the muzzle, the hair itself seems to have plenty.
Had some time to work on both this and my Blending Life submission thanks to a friend who gave me an old 'puter he couldn’t get working – I did, and now have a “dedicated rendering unit” – woohoo! It cranks stuff out about 3 times faster than my main machine, which I still use for most of the grunt work 'cause I’m used to it, but I hand the files over the new(old) machine for output. It pays to be mechanically reclined (apologies to Max Fleischer for the Popeye quote/ripoff )
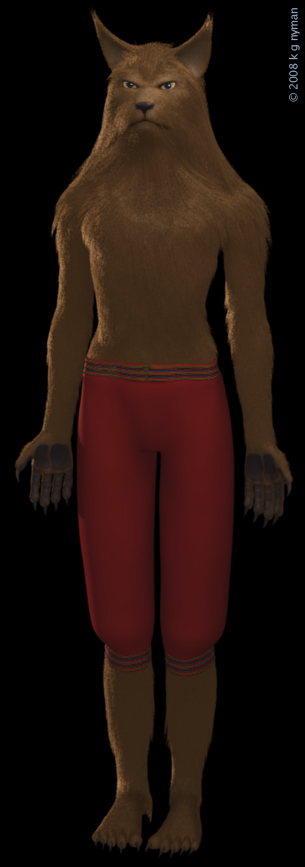
Lots of small tweaks to the eyes and nose, revised the spec map some, groomed the chest and abs hair a bit, also adjusted the lighting (which really made the render time skyrocket! – high sample rate on a soft Sun Lamp for the the rimlighting). Next I’ll be adding detail to the trousers – pockets & stuff – and adding jewelry and baubles and bangles (the hani are sometimes a bit gaudy), and doing the facial high-res sculpt for some character detailing, mainly on the snout & around the eyes. Then skinning the rig, which I’m still building – only for posing, though, the hair makes this model impractical for animation even with my new machine.
I also plan to build a full background – the Meetpoint space station where a lot of the action in the books takes place.


 )
)