Hi all,
I’m working on learning character modeling and texturing. Below is my first serious effort, and I would appreciate some feedback and advice.
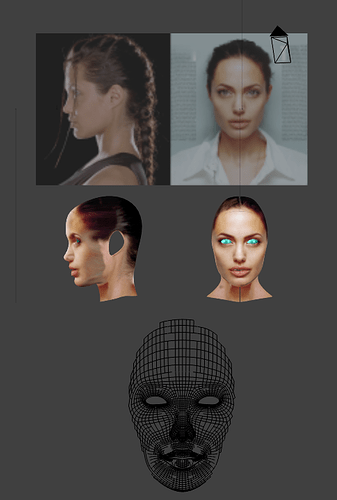
Below is the reference image I’m working from, and a front and side view of my preliminary textured model, and part of the wireframe.
The reference was taken from here: http://www.davidicke.com/forum/showthread.php?p=1059090820
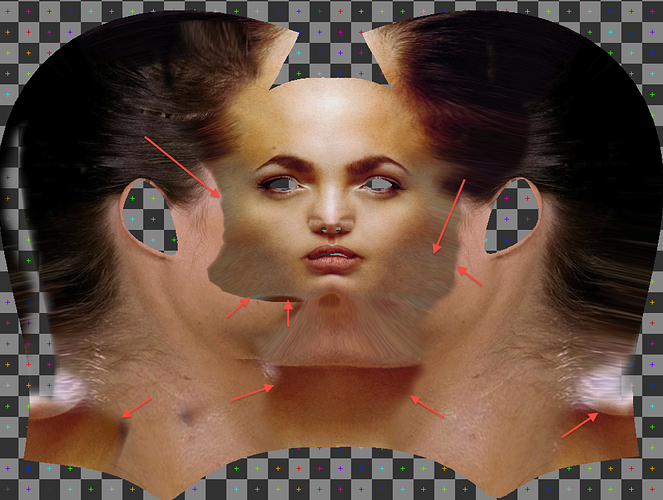
And here is the unwrapped UV texture, which I made by projection painting from the front and side views of the reference image:
Notice that this texture is sort of an ugly mess, because the front and side reference images have different lighting conditions and contrasts, such that there are sharp boundaries where the two images meet (arrows).
So I would especially appreciate any suggestions about how to make the texture transition smoothly from one region to another. Can this be done directly in Blender? I tried using the Soften and Smear brushes, but it didn’t seem to work very well. I’m sure this can be done in Photoshop or Gimp, but I don’t know how to do it. Can anyone suggest good tutorials for this?
Any comments or tips will be appreciated.
Thanks,
Matt


