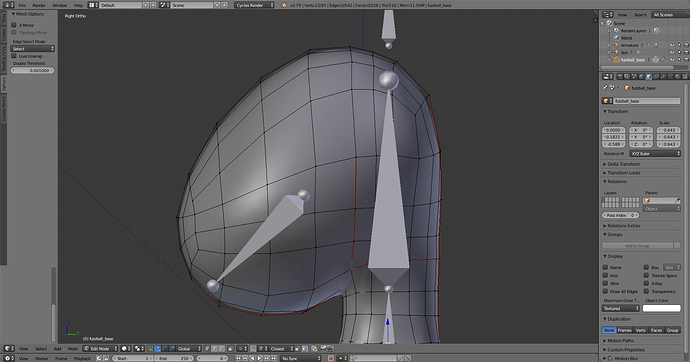
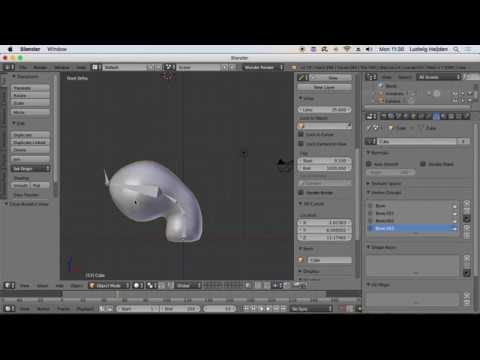
Help in animating a model with unusual anatomy

Does anyone have any idea on how I can animate this model’s walk cycle in a way that is at least somewhat convincing?

Due to the “unique” way that the feet are designed, I’ve haven’t been unable to find any references I could use to help me in figuring out how to animate this model’s walk cycle.

My main inspiration that I intended to use as an overall reference for animating this character is Kirby:


However, the problem with using Kirby is that his feet are attached as separate objects from his main body, whereas my model’s feet appear as small protrusions from the main body itself.

Further complicating things, is that the model needs to be able to perform other tasks such as running & jumping, since I intended to use model in a game project I’m working in Unreal Engine 4.

I’m not asking for any advice on how to make something overly fancy, just some help on how to make a simple & functional walking cycle that I can then use a base to expand upon. Also something to keep in mind, I have very strong, personal connection to this particular design that goes back to when me & my siblings were children, and thus I’m not willing to make any radical changes to the design itself in order to make it easier to animate.

I really hope there’s someone out there who can help me out with this particular challenge.

EDIT: I removed the Blend files, as they were out-of-date and because I felt that they were no longer necessary.

Well, first thing is rigging. Just google Blender rigging basics or sg like that.

1 Like

Well, first thing is rigging. Just google Blender rigging basics or sg like that.

I’m familiar with the basics of rigging, I have least two courses on Udemy that teach the subject, as well as a couple of YouTube tutorials that cover it as well, such as this one.

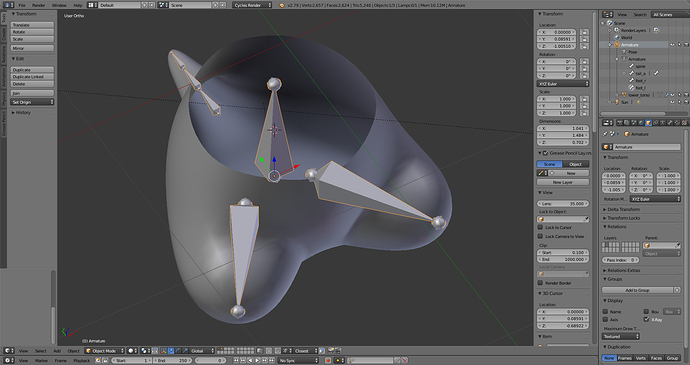
I guess I should have included a basic rig setup in the Blend file I provided above, so I reloaded the Blend file with one included, although it probably has a number of issues, since I put it together rather quickly.

Anyways, my main problem is not so much the rigging as its the actual animation process since I have no idea how to go about animating something that has nothing I’ve seen thus far that I could use as a reference point. Whereas, if I was rigging & animating a more conventional, humanoid-shaped character I could easily find a dozen or more tutorials, reference images, etc. to use to aid me.

It’s rather important for me to get this model working because as I alluded to above, I’m also been working on a game project in Unreal and I need this particular model in order to help continue working on the project. The reason why I need this model is because the default character model in Unreal Engine is a poor substitute for the character I intend to use, due to the vastly different body proportions between the models, causing issues with things like trying to setup the jumping physics and as well as issues related to hit box collision. Basically, I need to be able workout how the basic mechanics of how the player character moves & acts before I move on to other areas, because how a player character moves and acts serves as the foundation upon how everything in a game is built.

In a situation like this its probably best to look at the classic bag of flour animation exercise. There are really no legs so the character will need to squash or hop from one side to the other. In the same way the corners of a cartoon flour sack can be used as it’s feet in walking actions.

For rigging I would just keep the feet bones as separate and free floating from the body. Don’t try rigging legs or IK or anything. Not for something like this. So parent pelvis/Hips and Feet to a shared root node. As long as they are all parented to a clear root and your rig is a closed consistent hierarchy then it should all export to Unreal ok.

1 Like

Thanks a lot for this! I searched both Google and YouTube, coming up with a ton of references and tutorials, and after watching a number of flour sack animation clips I would say that using the flour sack as the basis for my model’s movement is probably the best approach.

Like this?

I reloaded the Blend file I linked at the top with a quickly cobbled-together rig, and I was wondering if this crude rig is good enough for experimenting with animating a walk cycle. In particular, I was wondering if the “foot” needs two bones or if one is sufficient for my animation purposes.

Sure that’s it. Nice and simple and it will allow a lot of flexibility and squash and stretch.

Possibly two bones for the feet yes. No harm in having them anyway. Looks like some toe bones might be good and would help make rounded rolling and toes up shapes in the walking action. It could give more expression to the movements.
I would still keep it all as simple FK for the feet. FK and counter rotation is normally seen as bad in foot and leg rigs. But situations differ and in this case a simple FK set up would be the easiest to set up and animate with I would think.

By parenting the pelvis and the feet all to the same root you will have a simple IK like set up anyway. You want to be able to move the pelvis without the feet moving. Probably best to have two root nodes. One full character root node to move everything. And another character body root node to move the whole body and feet in case you want to. Always good to have another option.

1 Like

Does anyone know why my IK rig isn’t working?

When I try to move the controller bone, it doesn’t move the rest of the bones in the chain like it’s suppose to. Whereas if I try to move the second bone in the chain, its seems like the other bones are trying to move but cannot due to some unknown restriction on their movement.

Never mind, I think I got it working properly.

Recently I’ve been working on weight painting, and I’ve run into a couple of issues that I’m hoping that I can get some help with.

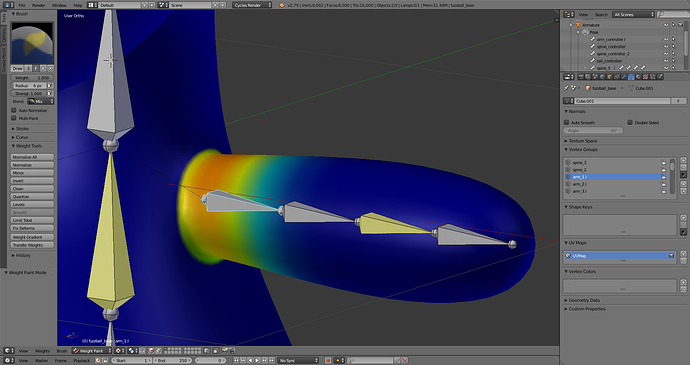
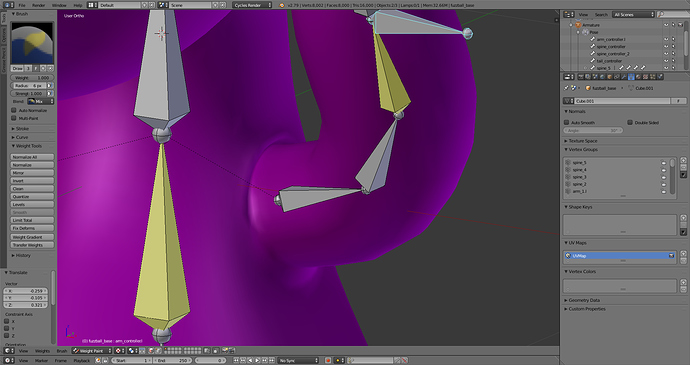
The first issue is with the arms, and how I can get them to move without affecting the main body at all. In the online video course I’ve been following, the video showed a little trick that enabled me to immediately weight paint the arm area in a way that it doesn’t affect the main body. It actually worked fairly well, except for the fact that now when I move the arm, that while the arm doesn’t affect the main body like it’s suppose to, the arm itself gets some rather unpleasant-looking distortion around the area where the arm connects to the rest of the body.

According to a different video I found on YouTube, you need to have the weight painted area shift gradually from one colour to another, rather the sharp divide I certainly have. The video recommended using the Weight Gradient function to accomplish this, but unfortunately I can’t seem to get it working properly.

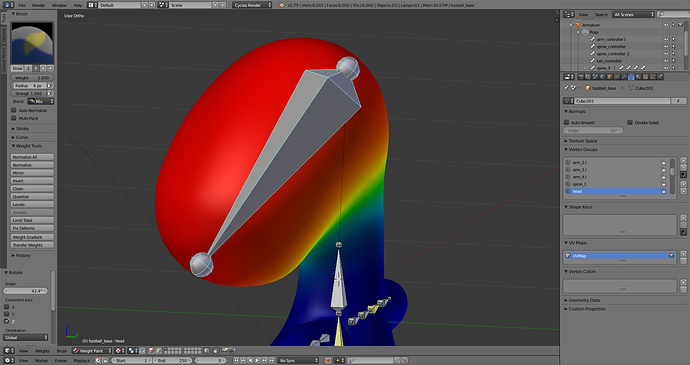
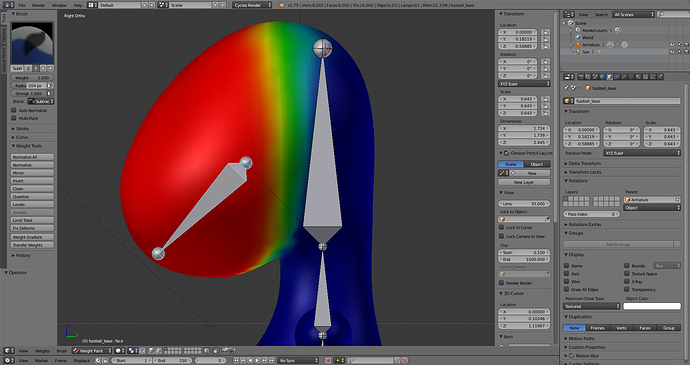
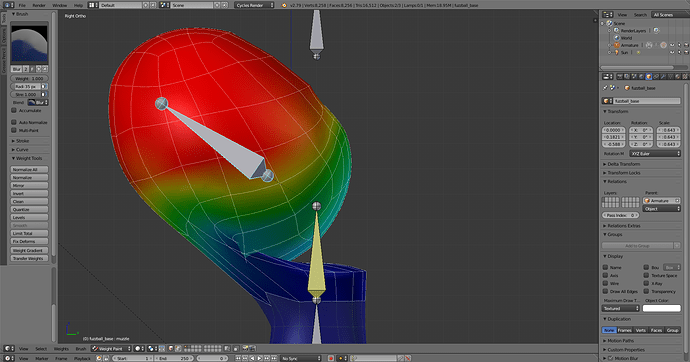
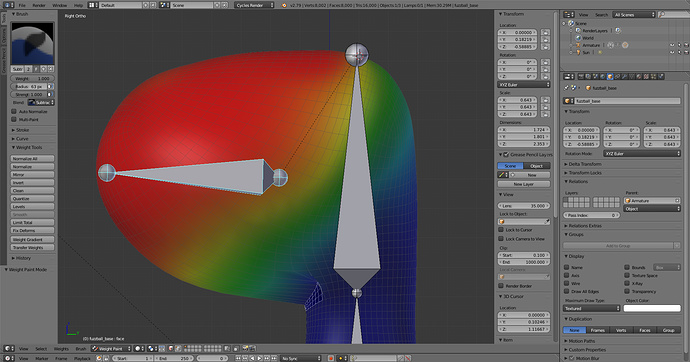
The other issue I’m also having trouble with, is the weight painting of the head. As the shape of the head distorts when it turns left or right…

…and also problems with the getting the head to tilt upwards properly, as demonstrated in the screenshots below:

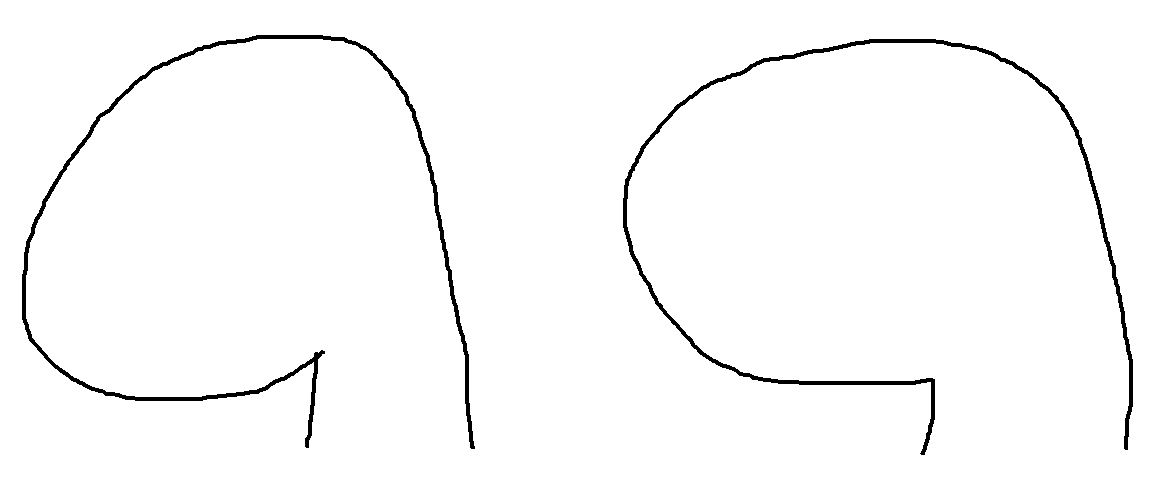
The head looking upwards should ideally resemble the drawing shown below:


Forgive the poor quality of the reference drawing, while I’m quite capable of drawing on paper with a pen or pencil, those skills don’t translate so well to drawing in MS Paint with a computer mouse using my non-dominant hand.

I’m not sure if I need to change the bone rigging to get it to work properly, or if it’s simply a matter of figuring out how to weight paint the head in a manner will be able to move properly.

Is there anywhere out there who can please, please help me? As I have been unable to make any real progress since the last time I posted, and I have no idea on what to do now :anguished:.

I’ve been experimenting with weight painting, to try and see if I could fix the aforementioned problem areas of my model, but alas nothing so far has proven to be ineffective. In particular, I can’t seem to figure out how to get the feet to work correctly, as when you try to rotate the feet downwards, they end up stretching out way too far from the main body, as well as deforming the entire lower area of the model.

I tried watching a number of videos on YouTube covering the subject of weight painting, but nothing so far has helped in resolving these issues. Unfortunately, as I stated before, the unconventional nature of my model’s geometry has made it pretty much impossible to find any references I could use to work out my problems.

I just don’t know where to go from here, and so I’m becoming rather desperate for any help whatsoever.

I also decided to update the Blend file I included in the link in my original post so that it now contains the full model with a armature attached. I hope this will help out in getting some feedback on how I can fix these extremely vexing problems that have been plaguing me for a while.

Hi, I’m not sure if what I’m about to say will help or even be relevant. I’m not a rig artist, or an animator, and I’ve never made assets for a game, so I’m not sure if the following can even be used for what you plan to do…

Have you tried rigging this with bendy bones?

They are bones that deform in the way a curve does. They seem to be really good for animating flexible, squishy, and stretchy character parts that are hard to rig. This is a feature that is exclusive to blender, so I don’t know if they are any good for in game animations. Can the game engine you want use animations baked to some sort of point cache format like alembic?

I’m seriously outside of my comfort zone when it comes to rigging and game assets, so I hope this info was at least helpful.

1 Like

Hi Hungry

I really don’t have time to go through the file but from the pictures you put up these are really very simple and basic issues. I know it can seem daunting when just starting out. Character work is very complex. Probably the hardest thing in 3D. And Blender is certainly not an easy beginners software. It is a very advanced and very high level 3D animation app which is now fast getting up there with the best in the industry. So try to be patient.

The problem with the shoulder deformation on the body is simply because the edges of the weights are too sharp. There is a blur brush now in weight painting. You need to just soften the weights between the last bone in the arm chain and the body weights until the deformation becomes acceptable. You will find this issue always in weight painting and its part of the art of it to judge things like this. It just takes practice. Every joint will be a bit different.

The problem with the head and neck bend is simply because there is not an upper neck bone connecting to the head. If you want a clear joint and angle created there then you need to have an actual joint in place to make it happen. If the bone is not there for the base of the head bone to pivot on. Then there is nothing to paint a clear weight to create the angle and shape you desire.

With regards the foot problem. This would simply be the placement of the bones. If the foot seems to stretch out to far when bent then the toe joint needs to be placed in a different place to create a different type of bend. This is very hard to judge as the anatomy is so un-typical. So many people could see your picture and think it’s supposed to bend that way. So really this is a personal and artistic choice, But if you want to change how the foot bends you will need to move the joints.

Also I would try to avoid anything that offers itself as a quick solution or shortcut. It’s really best in the long run to learn properly how everything works and to go through it all carefully. Especially when just starting out. This way you are able to find your own solutions more and more.

Hi Zanzio. The new bendy bones are very cool. But this probably needs more simple and straight forward solutions just now. Also this is aiming to go into Unreal Engine as a final step in the project. So Blender bendy bones would likely be an unnecessary extra hurdle and complication in that process.

1 Like

Yeah, I kind of half figured it wouldn’t be easy to export to a game engine. I just thought it was worth mentioning in case exporting the animations wasn’t a big deal. As I’ve said, I don’t really have any rigging experience, so it was hard to say if bendy bones would be useful or not.

I’ve opted not to use Bendy Bones because I read somewhere that Bendy Bones don’t transfer very well to outside programs like Unreal Engine 4 and also because experimenting with Inverse Kinematics has shown that it will work perfectly for purpose of rigging my model’s spine and arms.

Regardless of whether I decided to use Bendy Bones or Inverse Kinematics, thanks anyway for going to the effort of responding to my query.

I tried redoing the bones in the head by instead sticking a shorter bone in the muzzle area rather the original longer bone than through the whole head, as well as a neck/back of the head bone intended to allow the model to turn its head left or right.

Unfortunately, while the addition of the muzzle bone seems to be a step in the right direction, I’m getting jagged distortions in the mesh when I try to move the head. I’m also continuing to have problems with trying to get the head to turn left or right without its shape distorting, despite the addition of the neck/back of the head bone.

I’m not trying to take shortcuts, when I started learning Blender I took an 50-hour online course from Udemy that slowly eased the student into Blender by introducing them to extremely simple concepts like how to add a cube to the scene, before building off of those simplistic concepts into much more complex tasks. I particularly liked how the course taught not only taught you how to build things, but also what to do in problem scenarios that would inevitably crop up. Unfortunately, the course was intended as more of a general, starting course to teach the student the basic functions of Blender before moving onto much more complex character modelling, animation & rendering. Since then, I haven’t found any other tutorials on other subjects as good as that one on Udemy, particularly since I am extremely reluctant to fork out money for courses that I’m not sure are going to be worth it, and searching YouTube can be quite problematic.

In short, the problem is less of trying to take the shortest, easiest route and more of a general lack of structure or knowledge on how to progress forward, and in fact, I would say that based on my current trajectory that it is probably the slowest, most inefficient manner of going about it. If I keep randomly fiddling about I’ll eventually figure it out, like a million monkeys randomly typing away on a million typewriters in the hope that one day they will reproduce the works of Shakespeare, but it will end up taking way longer than if I had more structured and thorough approach to learning the necessary skills.

Everyone who ever got proficient at anything has had to go through this difficult learning process of trail and error. And all of us here coming on to this forum to try to help out undoubtedly have. The key is to learn the central philosophy of any method, workflow or program.
Most of us have spent years getting reasonably proficient at this stuff and you never stop learning either.

I didn’t mean to imply to not look at tutorials anymore and only really on trial and error. I was meaning … be careful of any tutorials that promise a quick way around or short cut. Because this will not often lead to greater understanding and most likely simply lead to greater confusion.
But the more understanding you gain the more you will become self sufficient and find your own solutions. Every case will be a bit different and ask for a slightly different approach. There can also often be more than one solution. As you can see from so many of the reply’s on this forum.

It would make your demonstration images clearer if you switched the character mesh into edit mode while in weight painting so we can see the wire frame on top. Otherwise it’s hard to see clearly. Both for us here and you too.
From all these last images you have posted this still looks to be mostly simply a task of refining the skin weighting.
It’s like painting with actual paint. You need to soften, blur and overlap the ares between joints. You need to blur the vertex groups for each bone. This is not a technical problem with a quick fix. It’s simply careful and precise weight painting that’s required for most of these issues. In that neck and muzzle case. You simply have to paint the muzzle weight into the neck area a bit more and blur between the muzzle and Neck vertex groups.

I took a quick look at your weight painting on the first blend you posted. It has weight on five different bones on one of the vertices under the arm. You have some issues that I see. Your weight painting is an issue so that may be your workflow. The second issue is the interaction between topology and your weight. Another correction you may be able to do is use use some deform bones to “hold deformations” in your rigging.

Take a look here and follow along. https://www.youtube.com/watch?v=_y8mOQBOHxA

This is just the specific area that I think you need to understand. The series is on rigify, but don’t let that stop you from learning because what he says for this armature applies to most armatures. Well worth going over the entire skinning sections. Bones and bone position are key like Toka mentioned above. Have you played with moving those around yet? Then you can try to also understand your weight painting in Blender. It’s not that hard once you understand the interaction between weight painting, topology and rigging joints.

Have you tried CG Cookie? They have a good mix of “learn on your own” and structured education. They have lessons on a wide array of blender related subjects, and you can choose to learn them in a sequential order called a “learning flow”.

When you sign up with them, they should send you a free one week trial. I tried it, and I have to say I was happy with the setup they use. I think a subscription there is 30 dollars a month, so it shouldn’t be too expensive to learn everything you want to learn.

There is also the blender foundation’s official training. Its all creative commons licensed so its legal to download for free (just hard to find sometimes). Here is a playlist with some rigging related foundation material.

Hello again, it’s been a while since I last posted here and since then I’ve made little progress on the model I have been working on. The partial reason I haven’t much progress was due to other things coming up or just getting side-tracked by other projects, but mostly its been due to the process of trying to figure how to weight paint the head degenerating into a time-wasting, maddening slog.

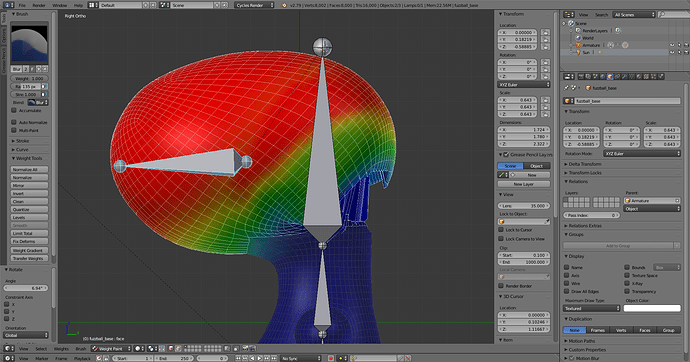
During all that time, this version of my model shown below is probably the best one so far in that when the face bone is rotated upwards, the mesh area around where the head and neck are connected deforms in a smooth manner with no noticeable problems.

Unfortunately though, there are two major problems that I haven’t been to fix no matter how hard I’ve tried. Firstly, is that when the face bone is moved upwards the mesh of my model’s head begins to deform near the top causing the head to become lumpy and uneven. This problem as far as I can tell seems to stem from when I moved the position of the face bone slightly, as this issue isn’t present in the older model where I didn’t move the face bone.

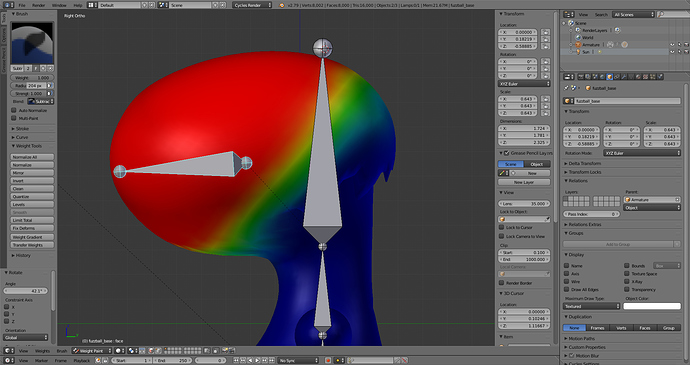
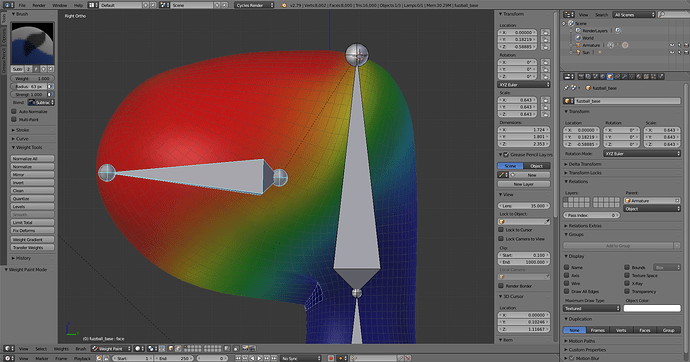
For reference compare these two screenshots: the top one is the revised version with the problem.

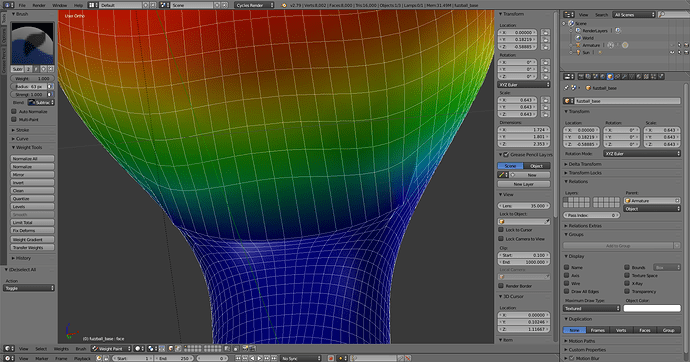
While the second one is the original that retains its shape when you rotate it upwards.

Ideally, I’d like to get the best of both worlds, with the head generally retaining its shape when moved like in the second picture, but also for the neck/head connecting area to deform like in the first picture. But alas, my efforts at trying to weight paint the neck/head area in a similar manner as the first picture haven’t worked out.

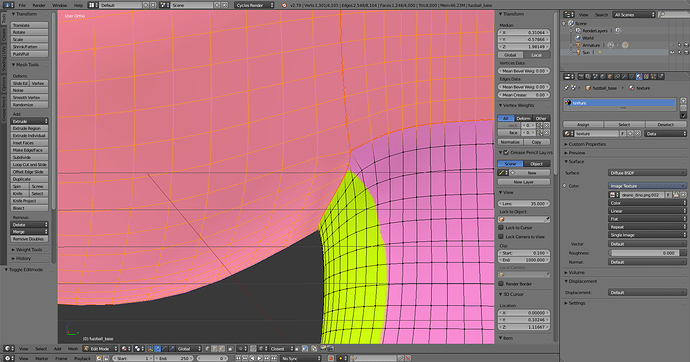
The other major problem I’m having is that I can’t seem to figure how to weight paint the area under the chin so that when the head rotates upwards, it will retain the sharp crease in the area where the neck meets the head.

If I try to make a hard crease by painting the crease area a dark blue, I end up with this really nasty-looking stretching that ruins the model’s appearance. This deformation is also visible in the first screentshot above in the area under the chin.

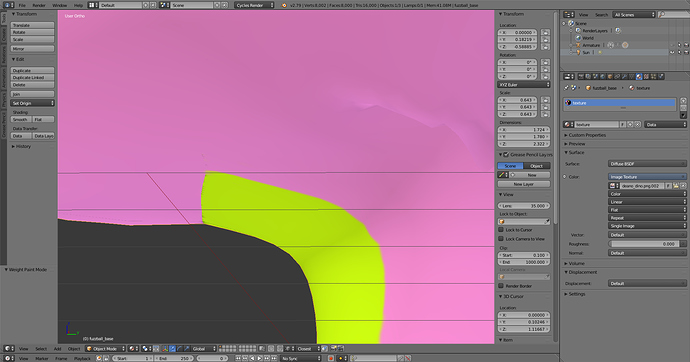
However, if I don’t paint the under chin area with a hard crease then I end up with the yellow underbelly texture that is suppose to end where neck and head connect stretching upwards into the area under the chin.

Can anyone please help me with this? I’ve been working on this blasted thing for well over half-a-year and this whole rigging and weight painting fiasco has resulted in my progress on it essentially coming to a grinding halt with very little having been accomplished since then. Keep in mind, this is just the head and I still have the legs to worry about, which will probably prove to be every bit as vexing as the head, if not worse.

I included two new Blend files containing the older model and the newer one for people to take a look at.

Old Model: https://drive.google.com/open?id=1W5W3EoXghu_zd0unyUzJYk60SebuSTTu
New Model: https://drive.google.com/open?id=1LeJQM03YgpedxWsQ0cK9IBQzJwaitYXW

Any help with this would be greatly, greatly appreciated.
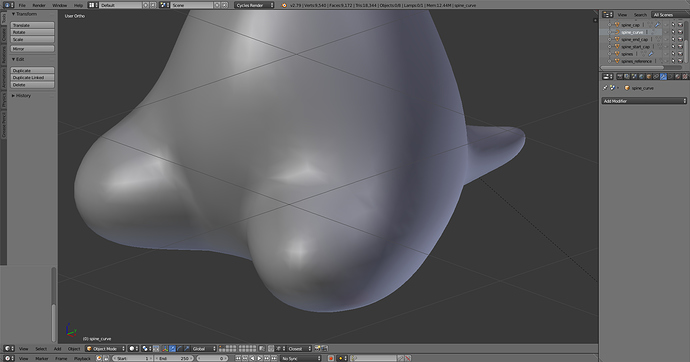
Okay, I’m officially declaring that I have absolutely no idea what I’m doing :worried:.

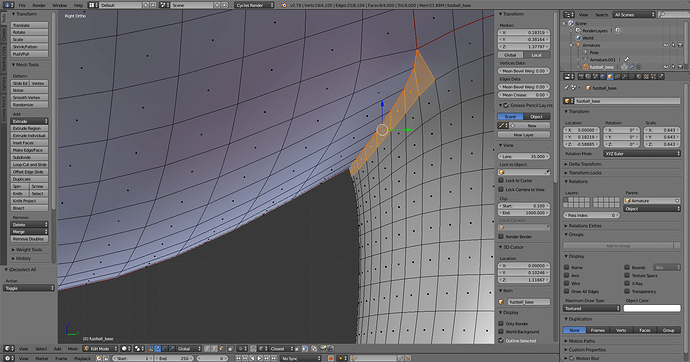
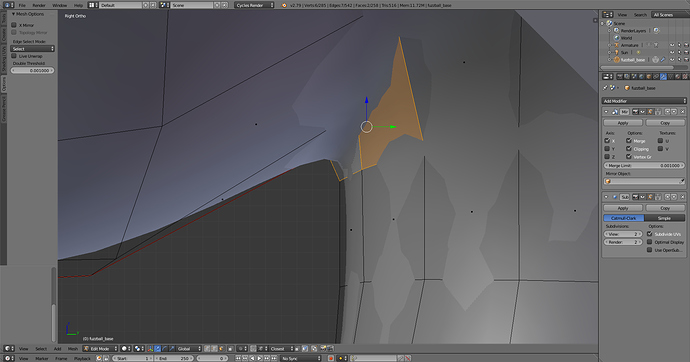
For the life of me I just cannot figure out how to rig and weight paint the head of this model. I’ve wasted hours and hours working on this thing and I’ve made little-to-no progress on it. I don’t know if it is a problem with the mesh itself or what, I tried making some alterations by removing the mean crease underneath the model’s chin…

Before:

After:

…in the vain hope that it would allow the head to tilt upward without this kind of distorting occurring…

image

…but alas things have not gone well as demonstrated in the first screenshot I posted.

When I started making the alterations to my model, I used an older version that still had the subdivision modifier unapplied, but the rougher, simpler geometry seems to be causing a lot of the problems seen in the initial screenshot.

Unfortunately without any sort of references to use as a guide for proper modelling & rigging, I feel like I’m just simply spinning my wheels in place. The frustrating irony is that if I was designing a human character, I’d probably wouldn’t be stuck like I am right now despite the greater level of complexity involved since I could easily find tons & tons of tutorials & reference images online to use to guide me through the entire process, whereas the character I’m making is extremely simplistic in concept but because of the character’s unique design I’ve have absolutely nothing to use to help me.

In my opinion the heads restpose is wrong. So the initial modeling. From what I understand you want it to look like a bend finger. Then have a look at how fingers are modeled. Make the head like it is pointing upwards with a slight bend. Make sure you have enough topology at the bending point. And then with the rig bend it to the angle you want.

Something like this:

Here is the example file:
CharacterRigExample_BA.blend (638.2 KB)

1 Like