Help me understand what's going on in this video (drawing in blender).

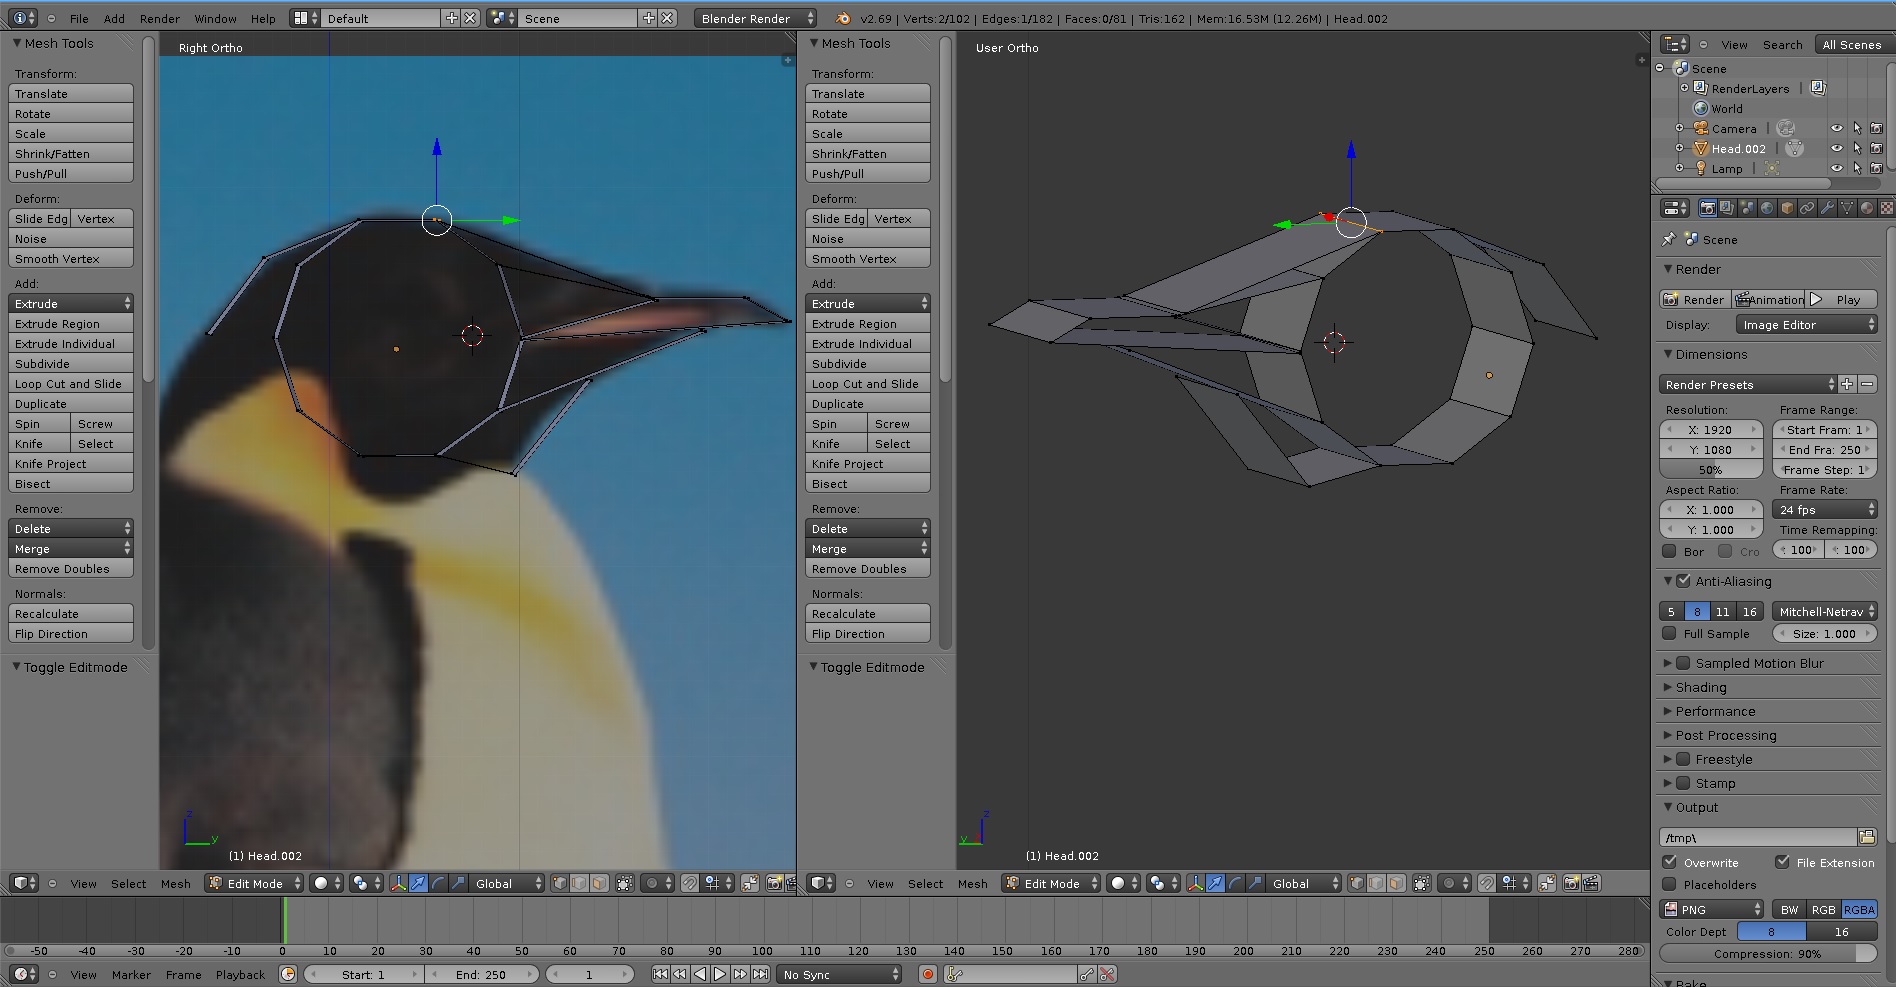
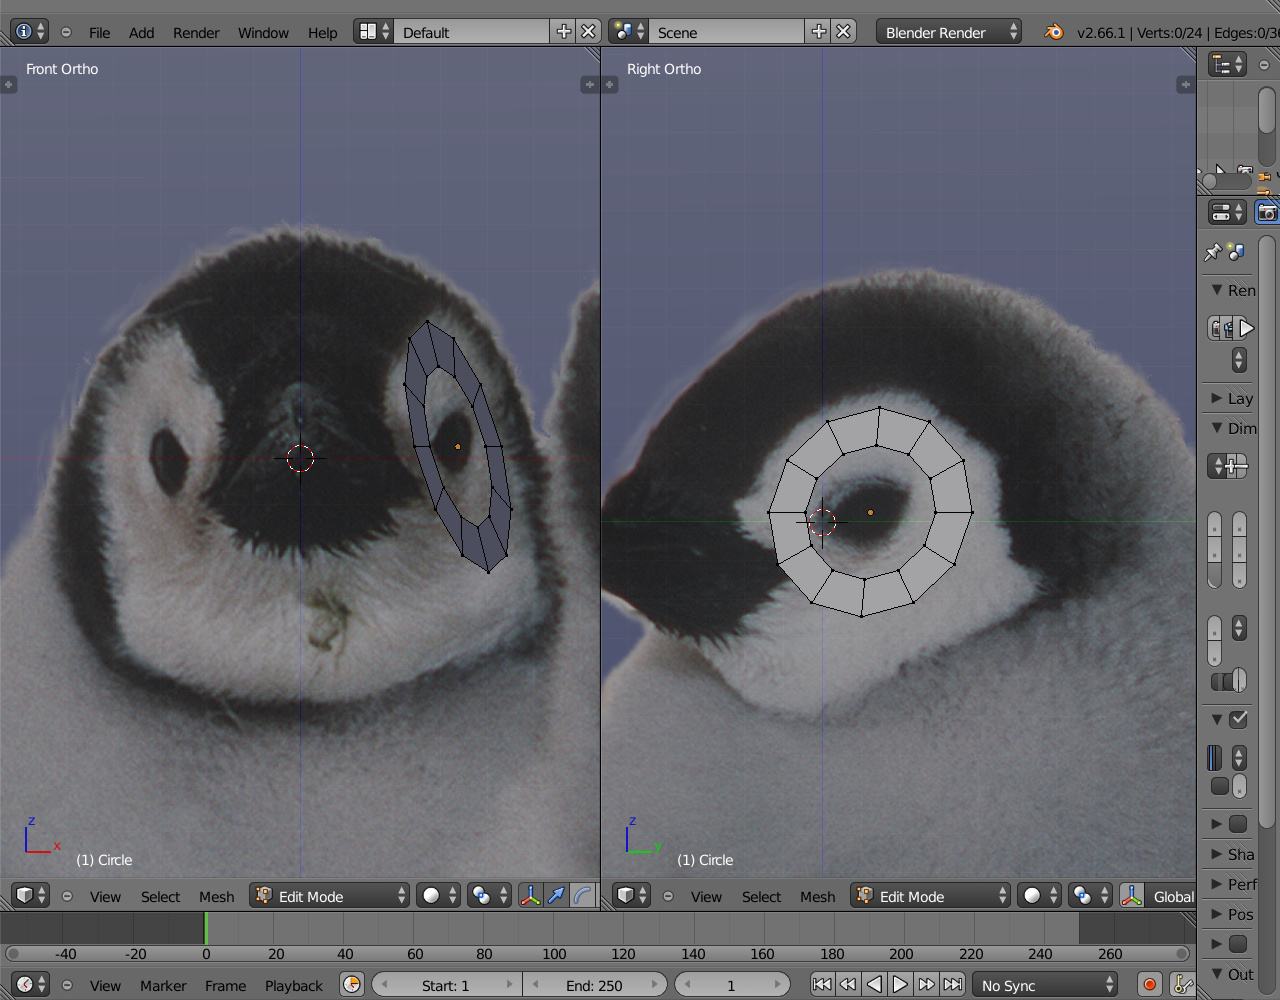
Okay I’m new to blender and 3D modeling, 3 days old to be exact, so I may use alot of therminology wrong in here, I’m the kind of person that likes to learn on the go as I need to learn something, I got to tell you I don’t like modeling much starting from cubes or spheres, so I found a video of a guy doing some awesome modeling, he pretty much drawn on top of some pictures and the mesh slowly came to the shape of his desired pictures.

The problem is, the video is some sort of speed-modeling so he doesn’t explain anything, there’s not even audio on it.

anyway here’s the video

So from what I understand he starts with a cylinder, then ??? and a handful of vectrices come out, he starts making these pretty even and responsive vectrices outlining the figure in front or side view depending to his needs until they eventually connect while using mirror mode

So I don’t understand much really, but I like this style, as it is like drawing in 2d, it’s low on vectrices thus the model looks simpler and cleaner which I like alot, when I try to draw lines they come usually by one at a time and if I try to pull 2+ they don’t come straight and are hard to move or unresponsive, I can’t make them snap nor connect to the next line/vectrice etc. and I get confused and a bit frustrated.

if anyone has a tutorial for this kind of modeling/drawing hybrid or can explain me what’s going on and how I could start learning this approach I would be very grateful.

Cheers! & thanks in advance.

He starts with a circle, with 12 segments (12 vertices).

Well, actually he starts with a front and side view of his character, set up as background images in the front and side views (see the N-Panel to set up background images).

Then he adds the circle and uses scale (hotkey s) to reduce the circle in size to the approximate size of the eye socket. The he grabs and moves the circle to it’s position over the eye, in both front and side views.

He’s got the whole circle selected, so he extrudes (hotkey E) and then immediately scales the newly created edges outwards to make the loop of faces surrounding the eye. Then he grabs individual verts (or pairs of verts) and moves them to match the curve in three dimensions.

Then he adds a mirror modifier (set to clipping) and extrudes the two inner vertices. He moves those to the left until they meet the mirrored pair moving from the right. Clipping stops the motion when they meet in the middle.

The key to extruding faces is to select two adjacent vertices, and thus selecting the edge between them. The key to drawing in 3D like this is to adjust the position of the new vertices in both views as soon as you make them. Also notice he occasionally looks at his mesh from non-standard angles, just to get a feeling for how it looks in the round.

Keep track of which view you are in when you extrude. (That is to say, which view your mouse cursor is in, which makes it the ‘active’ window.) The new extrusion will move along the plane of the viewport. So if you want your new vertices to move toward the back of the character’s head, use the side view. If you want your new verts to move left or right, use the front view.

There used to be a lot more tutorials using this method, because sculpt and retopology wasn’t as good as it is now. Now people mostly sculpt their heads, then use retopology to put a good, lower poly, animatable mesh on top of the sculpt. Or use box modeling, like the tutorials you’ve seen.

Here is a text explanationof the method. If you want to spend a few euros, Blenderella is an excellent tutorial.

Hope this helps.

Thanks alot mate, I’ll try hard to do this, I want to start with a simple animal, perhaps a penguin or a fish, I’ll try to follow your steps and see how it goes :slight_smile:

Cheers!

You might want to take a look at:


Though a bit dated it’s a long free series on exactly what you look for. However, you should probably take a look at some basic tutorial first about the blender interface, navigation, edit <-> object mode, and basic modelling by extruding. It will help a lot to understand what is going on in this and other tutorials.

Well, the simple ones are the ones you can find good side and front views for. Having references makes all the difference in the beginning.


Here is blocky head man, showing the planes of the face.


Although Andrea here is much nicer to work with. (I think it’s Andrea…) But, notice, in the side view she has that big toothy grin not present in the front view. It’s these little challenges that make life interesting…

Okay guys, after some hard work looking around what you guys suggested me, some natural struggles with the UI because of my noobness and such I finally achieved what I consider a fair basic head :stuck_out_tongue:

my problem now comes with this, take for instance both highlighted vertices on the X plane, I want to select and extrude them in such way that they would go to the outer side of the figure while moving in paralel, what would be the best way to achieve this to keep shaping up the figure and be able to eventually do a spheric and symetric grid for the sides of the head?

I checked Orinoco’s link, and it does provide some insight on what I would eventually like to do but it doesn’t provide specific steps to achieve so :stuck_out_tongue:

And HiPhiSch tutorials seem rather long, I’ll eventually check them out but for now I want to discover a bit more by trial and error as it’s more interactive and leads to slower but more steady progress while getting familiarized with the UI, I think lol.

Anyway this is what I achieved so far, I know it’s not much but I’m glad to finally start in the drawing-modeling route I like :slight_smile:

Cheers!


Yikes! :eek: Start over! You want those faces laying on the surface of the penguin, not going inside his head. Your beginning circle goes through the head. This will create untold problems in working with the mesh later on, and is not what you want to do anyway.

Put the circle around the eye in side view, and move it into place (roughly) in front view, then do this:

In edit mode: Select the whole circle (A key) and extrude it, but do not move it! E key; LMB (Left Mouse Button click). Then SCALE the still selected vertices outward (S key and move the mouse away from the mesh). That will give you a nice flat ring of faces. You want all the faces to be in the same plane.


Then select the entire mesh, and in front view and top view, rotate it slightly so the faces appear to be laying on the penguin’s head.

Then go into object mode and add a mirror modifier. (notice the object center is at the origin point in this second image, where it is supposed to be to get mirror to work properly. Move the center when you are in object mode, then tab back into edit mode and move the mesh back to where it is supposed to be on the background image. Then go back to object mode and add the mirror modifier.


As you see, this little guy’s head was cocked slightly to the side, so the mirrored mesh doesn’t quite line up. We soldier on despite this.

Then Tab back into edit mode, and select the two vertices I’ve highlighted in the image below.


Then, with your mouse cursor in side view, Extrude this edge, and this time you do move it, to the front of the penguin’s head, just above his beak. You might need to rotate it a bit to get it to line up with the background image.

Then go to the front view, grab the vertices (extrude will automatically select the NEW vertices – not the verts I show selected) and move them to the middle of the penguin’s head. If you have ‘clipping’ on in the mirror modifier, the verts will stop moving when they touch. If you have ‘merge’ selected, they will stick.

You really need a front and side view to make this work. Here is the image I’ve used.

Oh, yes, to answer your original question. You can’t do that with the edge you have selected (the one crossed out with the big red X) but you CAN do it with the yellow highlighted edge.


However, the faces with the little red x’s on them will make your mesh unworkable, so you’ll have to delete those, without deleting the outer edges but with deleting the crossways edges. It’s possible, but tricky. At this point, it’s better to start over with proper work flow.

Wow Orinoco, that was epic mate, you rock :smiley:

yeah I think I’ll start over, but I’m cool with it, it’s the way to learn and have fun while at it, I’ll read and carefully follow your instructions, hopefully tomorrow I’ll have some more spare time to start over again and fiddle around the program, you should try to make your own series of tutorials mate :smiley: you seem to have a vast knowledge of modeling techniques.

Cheers! and thanks everyone for all of your help :slight_smile:

Btw if you look at the top of this forum page there is a small permanent banner to a cgcookie introduction course in blender (Blender Basics). These tuts could just be the starting point you need. :slight_smile:

forget about trial and error. its just going to be 99% error so just take a little time and work through some of the tutorials first, that will familiarise you with the UI as well as showing you good technique to get results

It’s also a good idea to use high resolution reference images, and brighten/darken them to see what shapes low/high values hide. Small jpeg images are useless when the artifacts are bigger than the detail.

Also knowing the subject matter helps. I’ve scaled this image down, but the original clearly shows emperor penguins have brown eyes, long dark brown hair, and a beautiful smile. No, wait.


That’s not even an emperor penguin but a king penguin, got a bit distracted there.

Since you’re making the head, these kinds of references are detailed enough (5 184px × 3 456px)

Nothing major. One thing to note is that if you’re going to animate it, head position can make the thick skin deform all kinds of ways, and when the beak opens, it creates a chin under the beak. I didn’t find a good reference image so I made one in Gimp. Probably can get away with both by having good polygon density.


I should rename this thread to “assisting a noob step by step” :stuck_out_tongue: lol

Anyway, I went for the start up again, I worked on it for like 3 hours and even so I still got it wrong ._. 3D graphics and planes sure become intimidating, anyway, seems like I can’t get mirror mode to work properly, 99% of the time I get the mirrored object overlapped with the normal one and I struggle alot to get them separated, then my problem became that all tutorials on youtube regarding the mirror modifier become a “uhm…this is a mirror modifier and it does this”, I tried to follow orinoco’s steps but the objects ended up overlapped/glued and moved as a unit, I tried this video’sand the wiki’s step by step for aligning objects and the best I could achieve was very very laughable :stuck_out_tongue:

anyway I drop the image so you guys get a good laugh and hopefully point out my mistakes, I hope after overcoming this issue everything becomes easier (Ha! I wish :p).


OK.
one: that is not a mirror modifier. I think it is solidify. You have to use the correct modifier.

two: mirror uses the object location to mirror, so that largish orange dot (the object center) should be positioned (in object mode) so it is on the centerline of the penguin’s head in front view, and somewhere in the middle of the head in side view.

three: I didn’t mention this, so you probably didn’t do it, but your front and side views need to be adjusted (using the x and y offset values in the background image panels) so in the front view, the front facing penguin is centered on the z axis, and in the side view, the side facing penguin is centered on the z axis. It’s also helpful if the top of their head and their chin is the same z-location in both views. One way to make the adjustments is to snap the cursor to center (Shift+s), add a cube, and go into wire frame view (z). Then start playing with the background image offsets until the heads are inside the cube from both views. (you can scale the cube to adjust its size, but don’t grab and drag it anywhere. You want that cube to stay centered. Once the images are adjusted, you can delete the cube.)