Hi,
newbie question alert
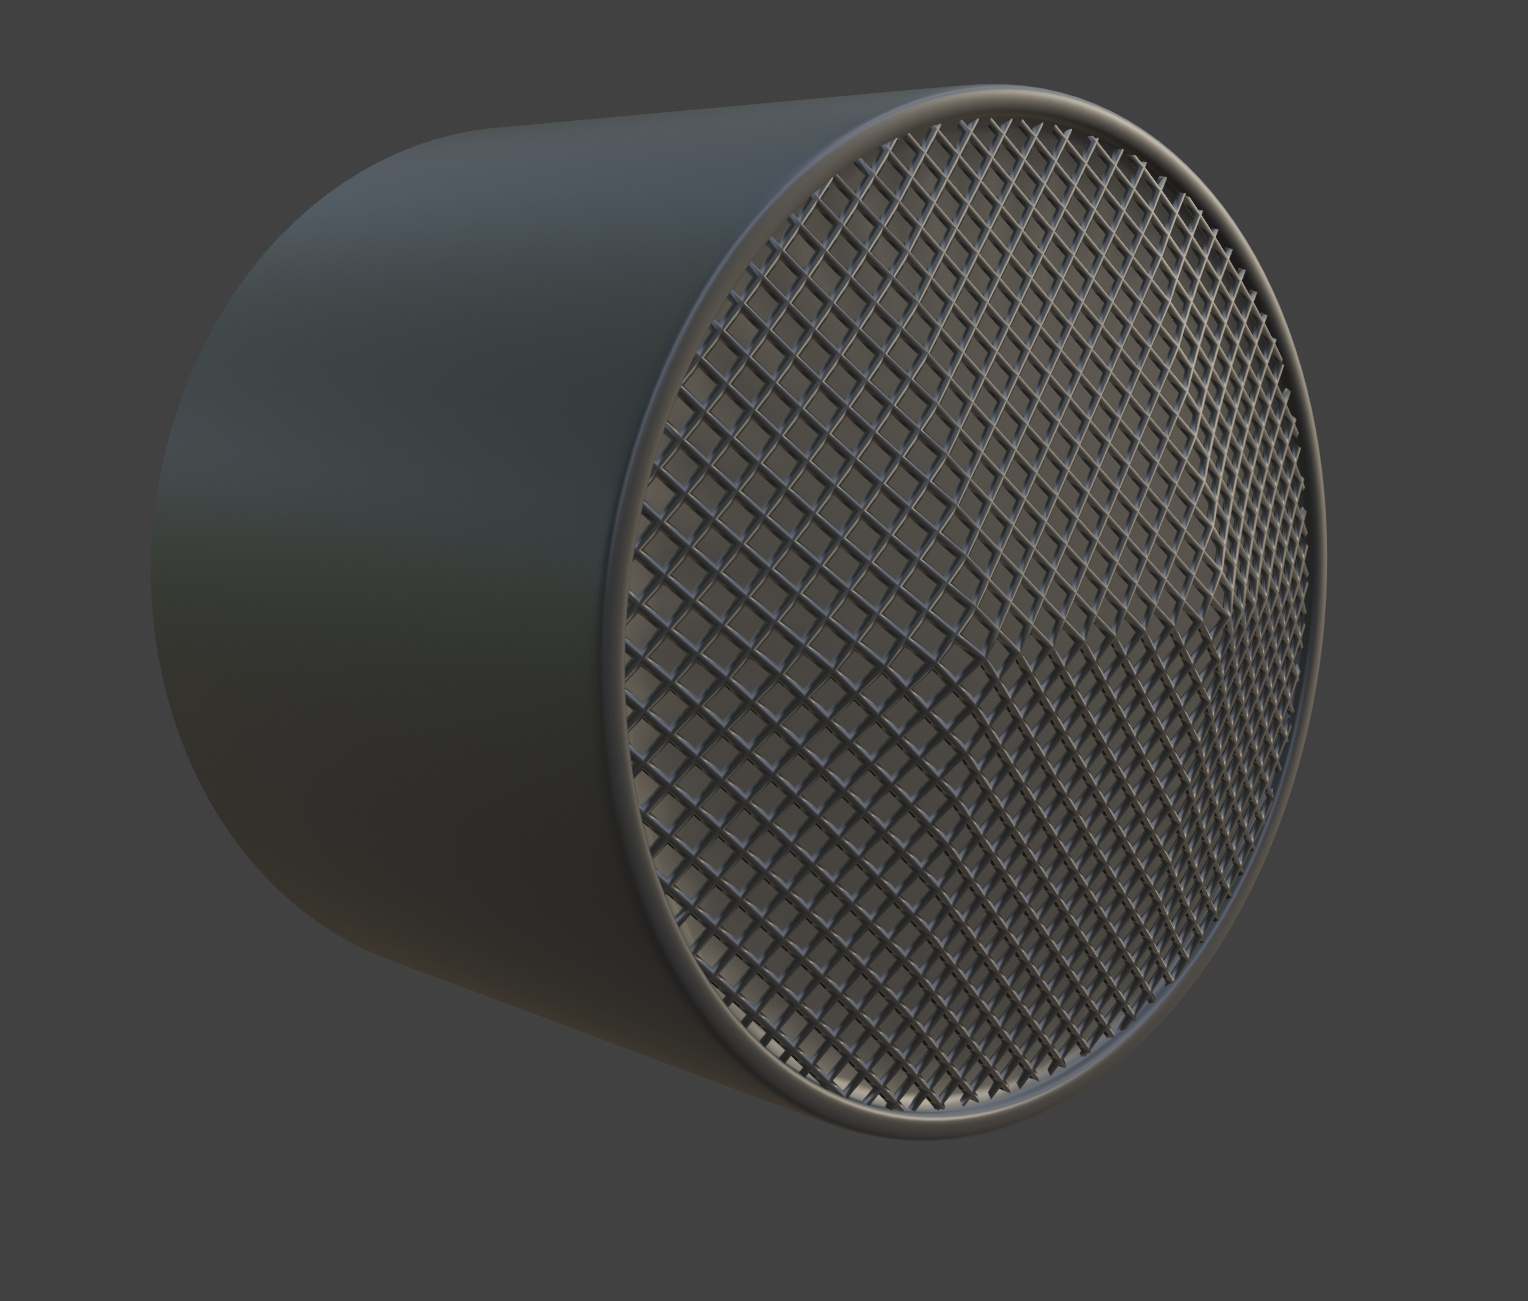
As the title said i want to make a speaker grill with curved edges like this one here:

making the grill itself is not my problem, it just how to make it take the actual shape of the cover mesh.
I also found an old thread here with a solution about faking it with textures instead of modeling.
it’s from 2007 so the link is dead and I couldn’t find out how, I’m open to that too if it’s easier to explain.
Thanks in advance
Try this approach https://www.youtube.com/watch?v=Q1A22jfG-sc&feature=emb_logo
- Model grid with array and modifiers
- Create shape you want it to be and unwrap it
- Use addon to flatten the shape and bind your grid on it
- deform it back to its original shape
other option would be to use the shrinkwrap modifier technic over a subdivided shape base.
Maybe there is smarter ways to do it but dunno…
Thanks alot for these solution, could make it with the first 1, here’s the closest result with shrinkwrap method: https://www.dropbox.com/s/zlboome5jy1ean6/Untitled.png?dl=0
idk exactly why it’s not curved with the mesh (tried to add a couple more cut loops but nothing happens)?!
it’s just a simple little curve as you see nothing like your attached video example.
The problem with using shrinkwrap is that it distorts the mesh because the deforming object needs enough matching verts/edges to acommodate the verts/edges of the object you want to deform. So you can either try to get it to match well enough that it doesn’t distort any of your holes, or you can use the other idea you mentioned, and that’s texturing.
Texturing will save you a lot of time, trouble, and memory, and the effect will be just as good.
A simple draw program can be used to create the bump map that will be used to create the appearance of holes. You can easily find something online that will work as an image. All you have to do is turn it into a greyscale in any image editor program. Something like GIMP or Krita will probably already have patterns that you can use for this.
When you have the bump map, just add a bump node to a Principled BSDF node and then attach an image texture node to that and point it to the bump map image you created.
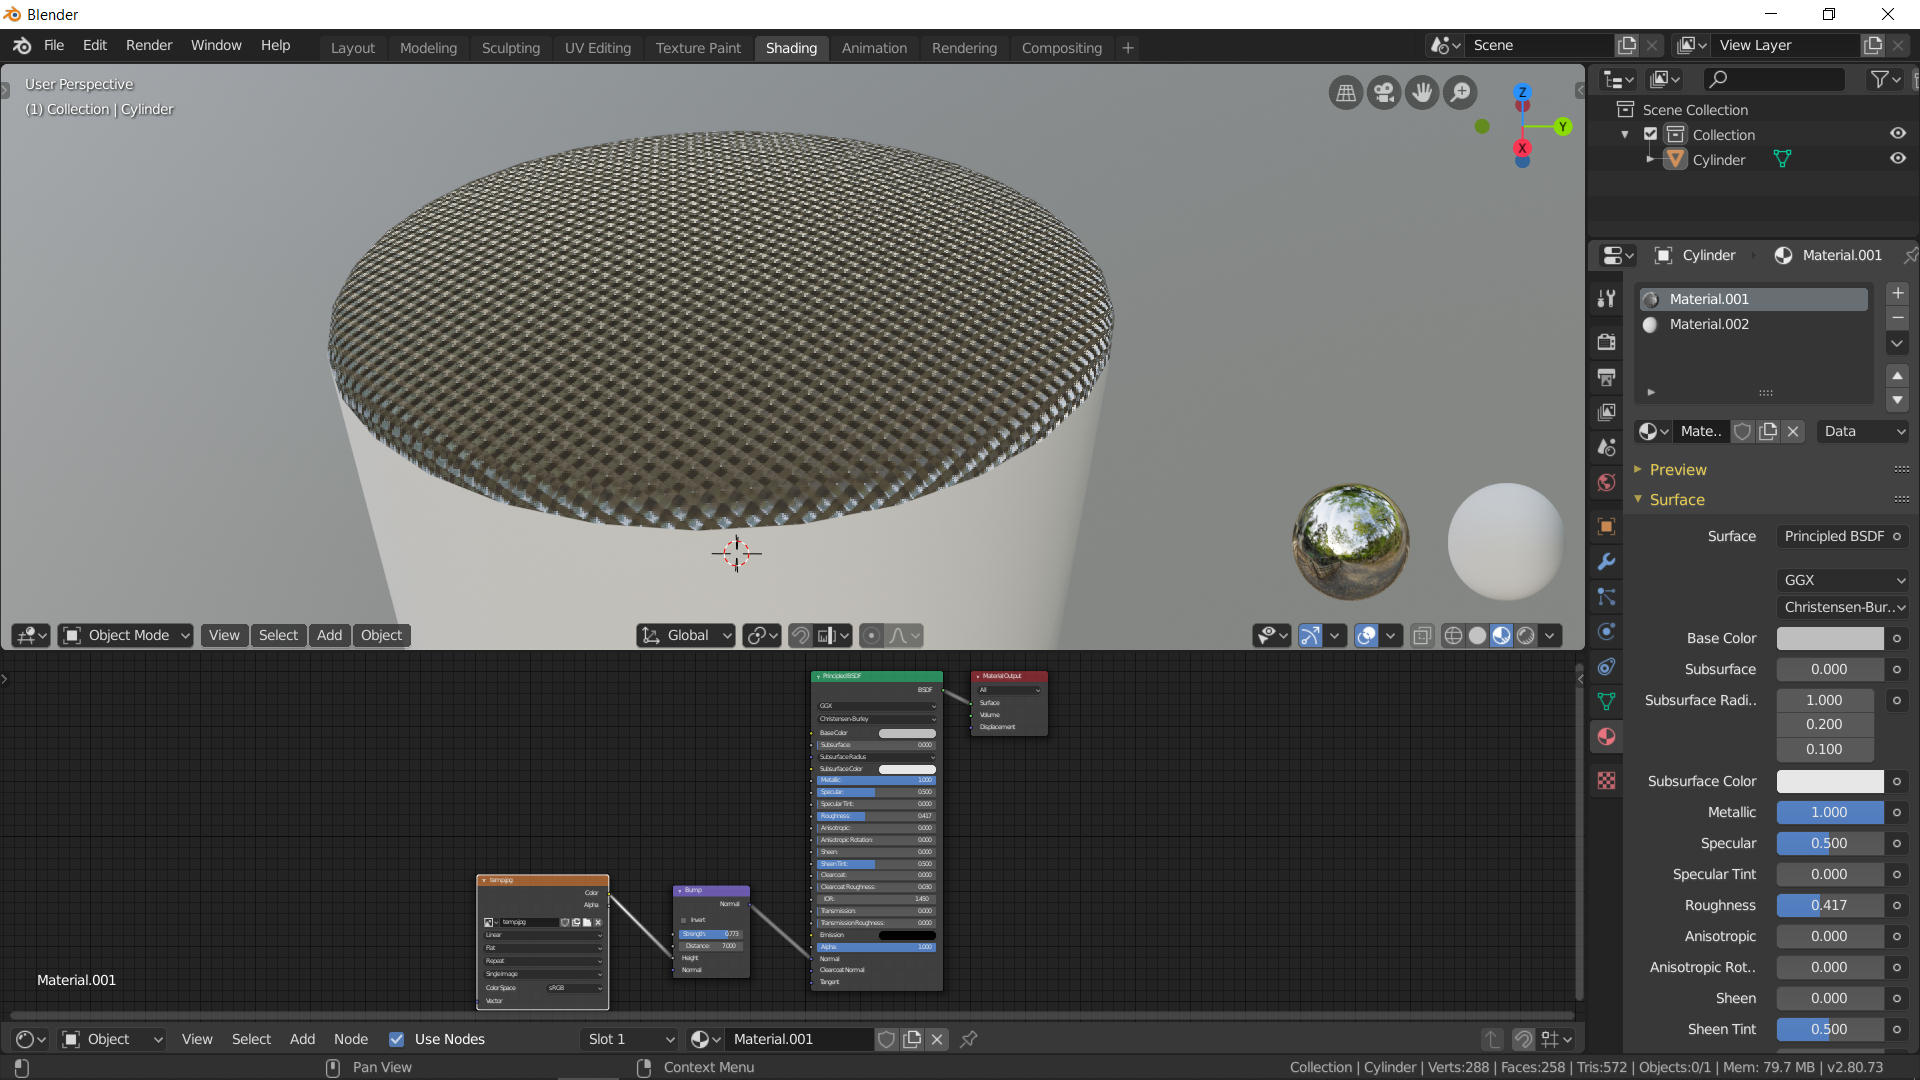
Here’s something I put together in about 15 minutes, using a pattern from Krita:
Great I’ll try that and let you know, I already got these textures but couldn’t make it before:
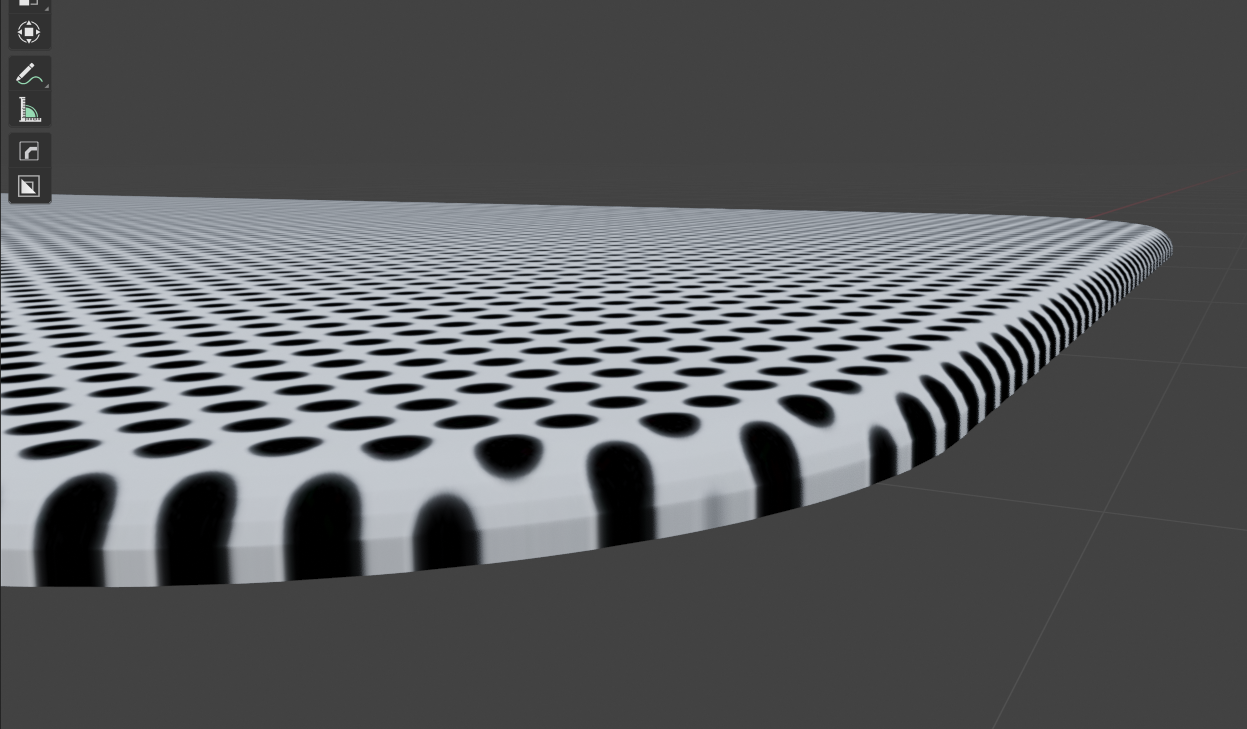
well it’s working, but the problem now is that it’s stretching around edges!
I think it might not too visible at the end but I’m curious to solve it.
Just adjust the uv map, or try a different uv method. I used plain old unwrap and got a good layout.
1 Like
With a simple structure you can always subdivide, decimate, and use a wireframe:
1 Like