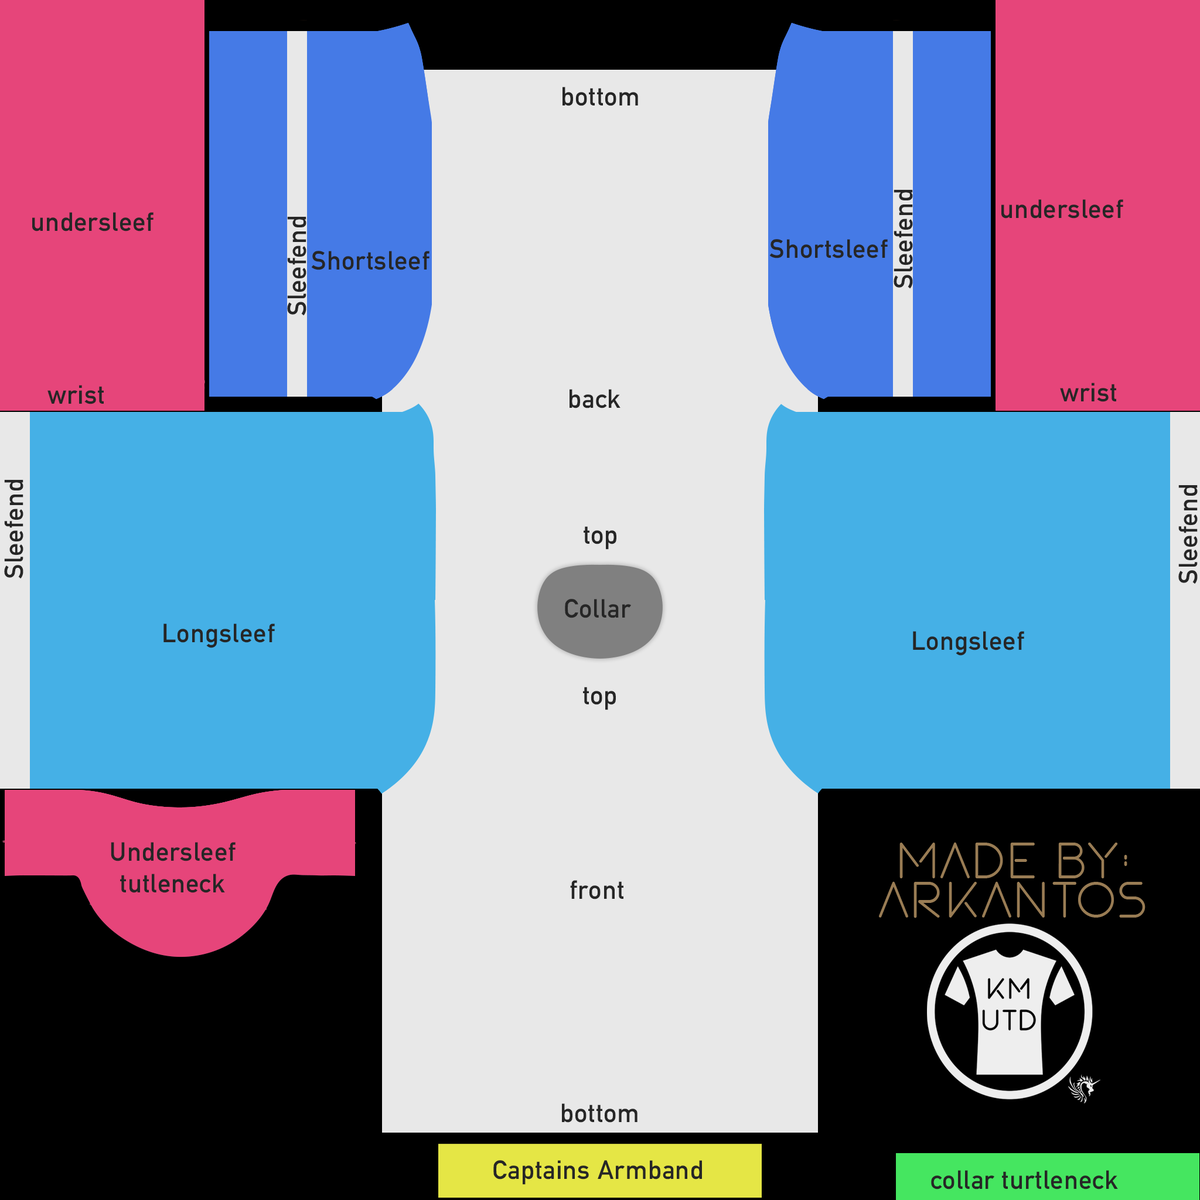
Hello all, I already know how to model for some time now, but I never had to follow an specific requirement regarding unwrapping, it happens that I’m working with a sport jersey for my game now and I would like to unwrap it in a, let’s say, contiguous way and without stretching. The unwrap organization that I would like to follow is this:
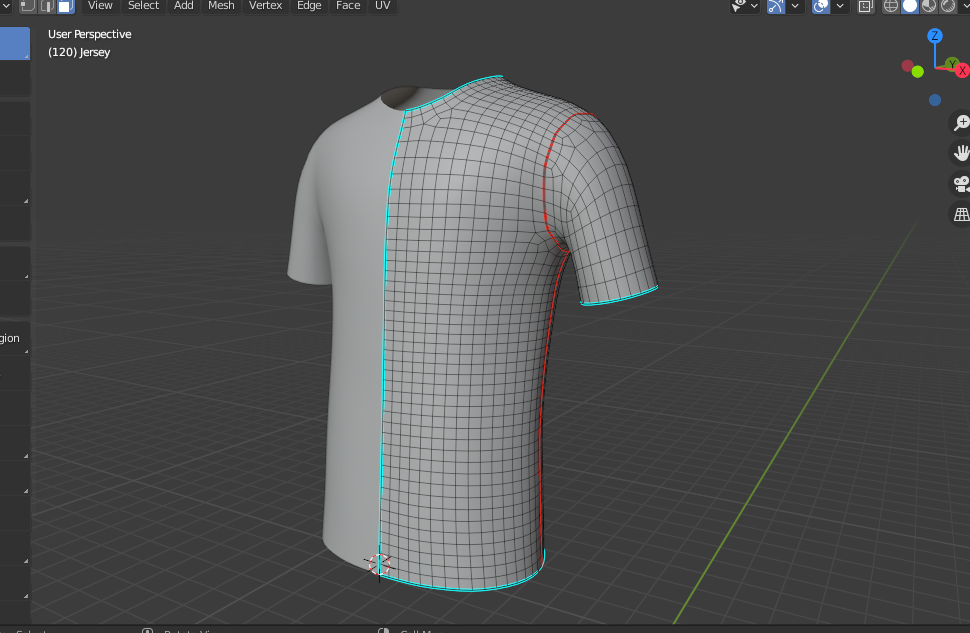
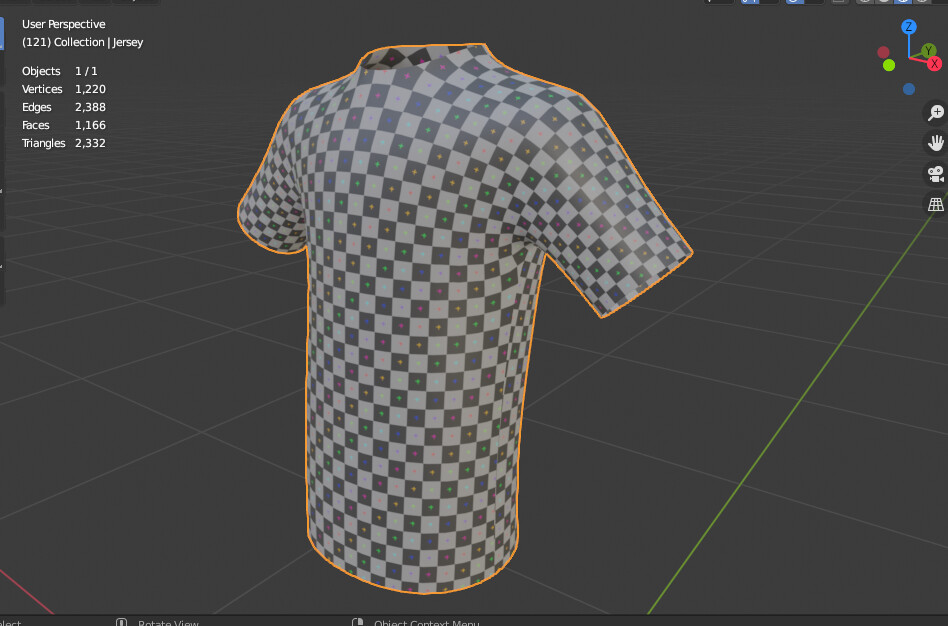
It happens that I’m facing a hard time build a UV like that without stretching, my main problem is with sleeves, but even the torso part is presenting a few parts with little stretching. This is my model:
The .blend file is attached if anyone would like to take a closer look.
Not sure if the result I want is possible with the current topology. I don’t know what I’m missing here, so after watch some videos about unwrapping and lose some days trying different things and improving the model’ topology here I am, looking for some helpful insights…
Thanks for the answer, but I already tried this and the stretch still happened, mainly on the sleeves and shoulders. Maybe the only way to get the UV I need without stretch is to re-work the topology, making straight edges everywhere its possible. I’ll try again just to confirm and post an image here to show what I meant…
I don’t think the issue is necessarily the topology of the mesh but rather its geometry.
Surfaces need to have certain properties so they can be unwrapped onto a flat plane without distortion (e.g you can’t flatten a sphere without distorting it. See Wikipedia’s entry on Developable Surfaces if this interests you, but I suppose that alone wont help you much).
Especially the area around the shoulder and under the arm pit are problematic in this regard, because it has strong curvature in both axes.
As for solving your issue: I’m not really experienced with modeling clothes but an approach I’ve seen used is that you model the flat pattern and then sew it together with a cloth sim. This mimics the actual process and seems to create good results without too much effort. It’s probably the easiest way to model a mesh that could be unwrapped without distortion. You’ll find several tutorials on youtube explaining the approach - maybe you can find one helping you with your specific issue.
After some tests the results using follow active quads are pretty bad. This is the UV after a normal Unwrap. This is the UV after normal unwrap, then follow active quads in the whole model at once.
Finally, this is the UV after a normal unwrap plus a follow active quads of the jersey’ front only.
I did like the video shown, but the command doesn’t seems to be useful with this kind of model.
I know that some kind of stretch is expected at the parts you mentioned, but even some torso parts doesn’t get too good. The key areas that I need to be without stretch as possible are the entire torso plus the upper part of the shoulders and sleeves.
I’m not sure what technique is this, does it have a name or something? I could look into to see if it solves my problem…
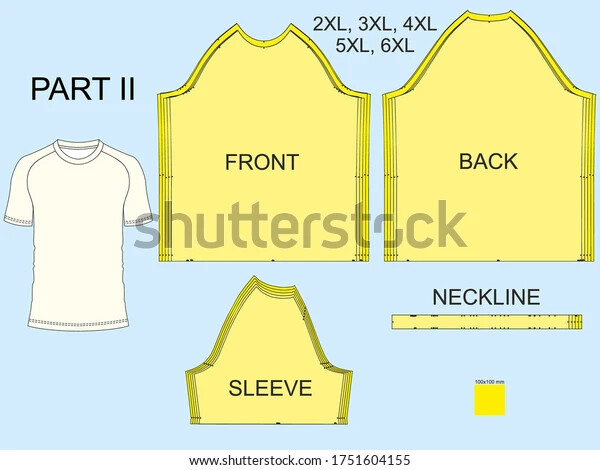
I think the main problem comes when you look at how the actual items are made in real life. Clothes are one of the few things which, like UV unwraps, have seams. Why not simply put the seams where the seams are in real life and unwrap that way. You should be left looking at an unwrap that looks very similar to a sewing pattern.
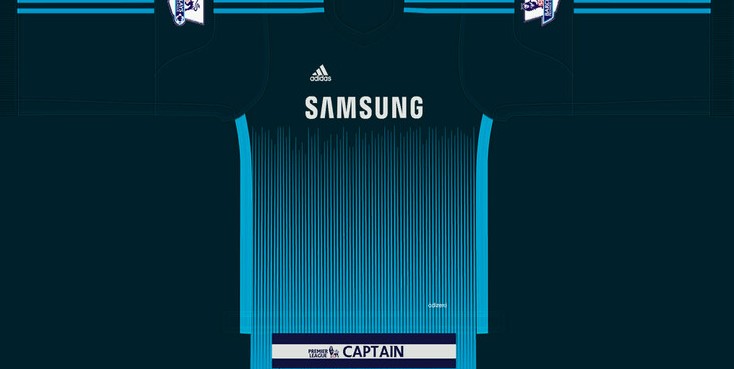
I’m not sure how they made, but football games use a similar UV structure of the first post. The point is to make UV compatible with image editing regarding kit creation. So front, back and shoulders must be connected in order to doesn’t make the kit livery creation a nightmare when it comes to sponsors, symbols and lines. This is an example of what I mean:
Unless they make some kind of UV conversion under the hood, using this kind of texture only for creation, I believe the UV have a structure similar the one I mentioned…
you can try to hide all parts that have curves mesh as expected ,and only flatten the part for the main front logo etc.
you can even pin uv vertices,and grap the uv mesh with proportional editing in shape.
the samsung pic looks like the uv mesh for it has the seam at the side of the main front to the underside of the sleeve
i guess the shirt model looks like a model in jesus cross position,if that makes sence (wide arms)
Imageing the lower half part of samsung pic over the mesh in front
here like this (the upper part (in your whole image before)seems to be the back part of the shirt,with design parts of the sides?)
I can’t hide torso parts, cause there are many shirts that have details and stripes on it.
Already tried to pin vertices, using different ways, but the stretch still happens.
You’re right about the seam positions, already tried some different strategies there too, but lateral and underside sleeve seams are the correct ones considering the result I need.
About the model position, I’ll try to apply this wide arms position, maybe this is the only way to get a more even UV. It happens that a “natural” position for jerseys are kinda like the position I modeled, so the wide arms position may cause other problems when the sleeves follow an animated character, but considering I’m stucked on this issue, it’s a valid attempt.
I don’t understand very well what your meant about my UV. The seams I used are like you mentioned (on the sides and on the underside of the sleeve), I’ve just marked the side seams leaving the front part bigger than the back one.
Thanks for the example, I’ve tried to unwrap a quarter of the shirt using that suggestion. This the UV and this is the texture distribution. As you can see, the distribution is OK, but the orientation is a problem, cause as the texture goes up, it gets curved…
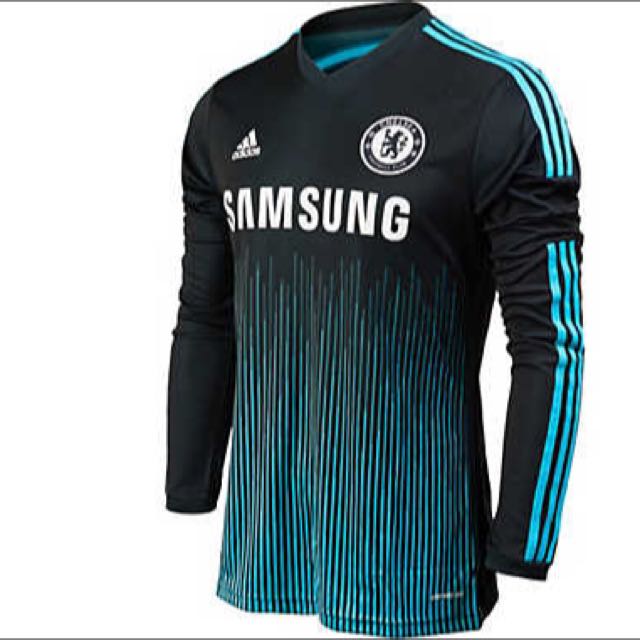
Just for reference, the uniform represented by the texture I’ve showed is this one.
ok,its long arm sleeves.then i guess the upper parts for short arm sleeves.
It would be even more easy if you model your shirt with less dense mesh.you can increase the mesh density,if you want, afterwards with the subdiv modifer.
with less vertices you can move and place parts quicker with less distortion.
Sorry, the only jersey with some lateral view was the long sleeve one. The texture example actually has both sleeve versions on the same UV, one at the center of the template and another at the top of it, but this is not the point anyway.
Yes, I’ll try to change the model again and experimenting some different sleeve positions. I’ll post my result here, hopefully I’ll manage to solve this sooner than later.
Analyzing more complex jersey textures, I noticed that even the EA version has some textures distortions to fix some UV imperfections. Considering this, I’ll go with this version, already lost a too many time with such a simple thing.
")
