Help Understanding How Animation Works

Hi there, I’m wondering if someone is able to help me understand how NLA Tracks, Actions, “Animations” (?), Action Clips, etc all play together. I’ve never used the animation system this deeply to animate anything, and I decided to throw myself in the deep end here and learn how to use Rigify and the entire animation system to it’s fullest. I’ve learned a good amount from doing this, like what NLA Tracks are in general but I’m not really understanding the workflow as a whole.

I’m working on animations for Unity and I want to try and understand this the best I can while working on it. Honestly the tutorial videos are extremely lengthy and I can’t wrangle my ADHD enough to be able to focus on them well. So I figured I’d post and see if anyone is willing to give me some explainers/pointers here. Here’s screenshot of my project, with the Action Editor, NLA Editor, Data tab for the generated rig (Animations tab expanded), and the Scene Collection.
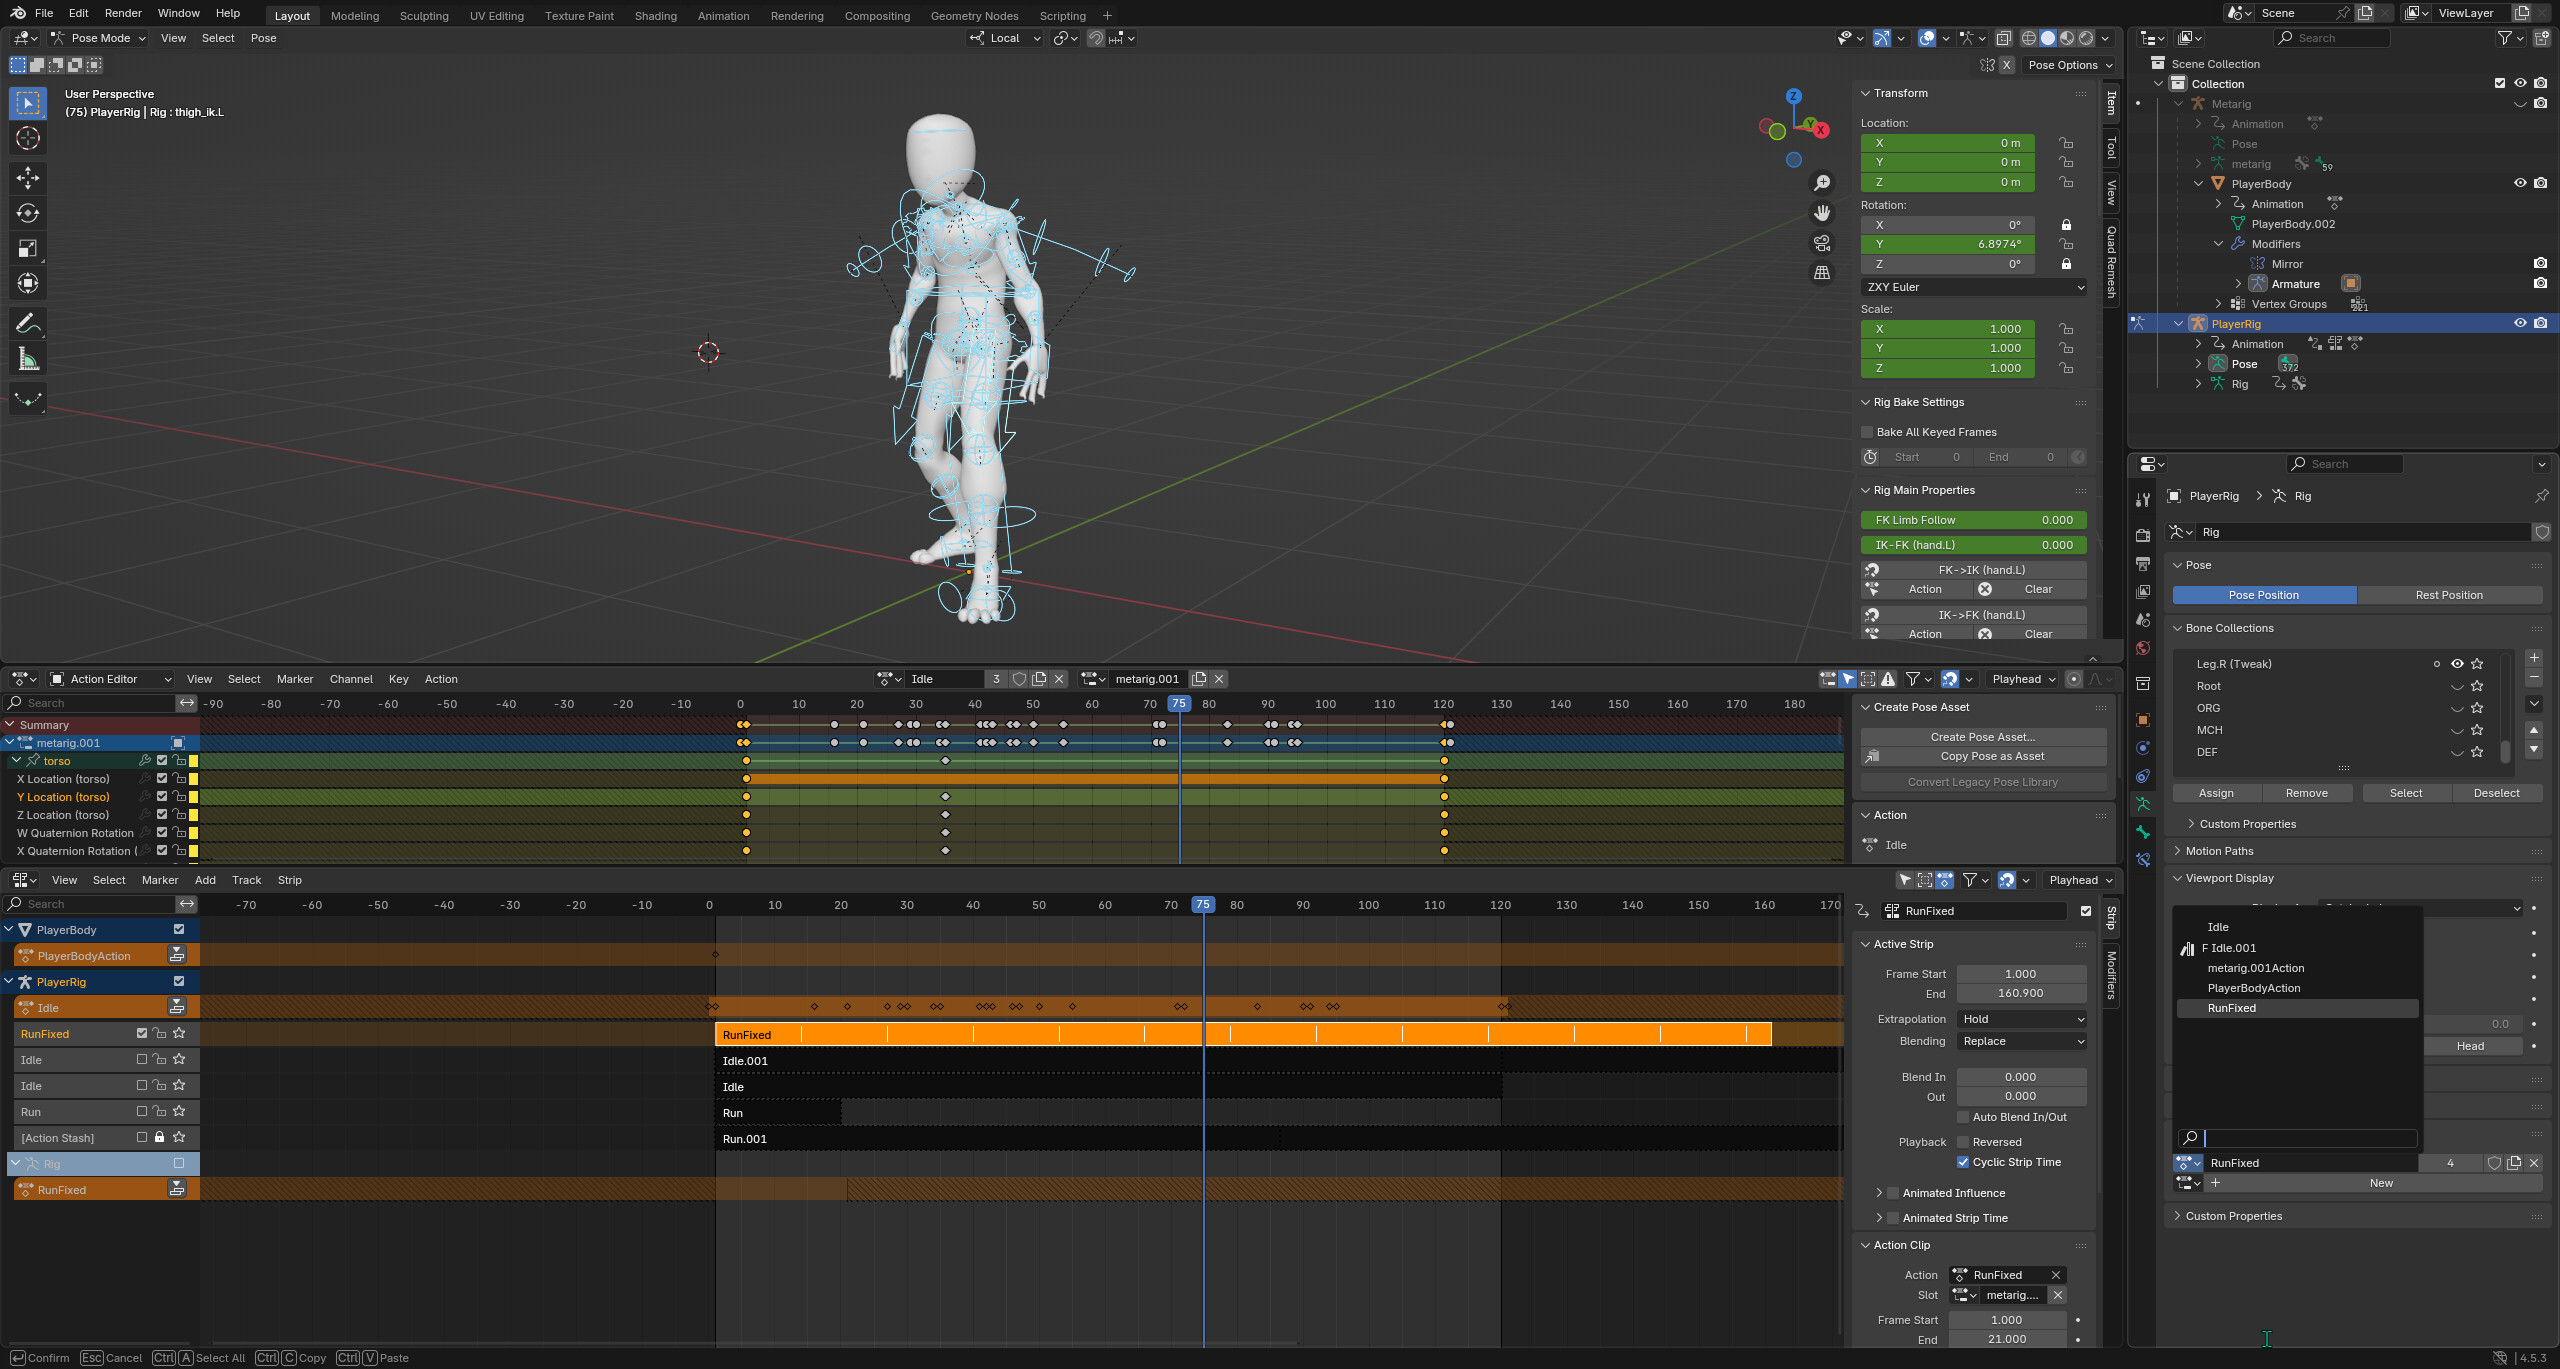
More helpfully, I can also provide a .blend file on request :+1:

So I had some questions:

  1. What is the Timeline view even for? And within the Dope Sheet what’s the difference between the Action Editor and Dope Sheet tools

  2. I’m not sure what the heirarchy is between Actions, Action Clips, and NLA Tracks is. I kinda understand how “Push Down” makes your action into a… “defined” action but I don’t know there’s something I’m misunderstanding.

  3. Why is there both a PlayerBody and PlayerRig section in the NLA Editor? I kinda understand the PlayerRig part but the body? Not getting it. There’s also just a “Rig”

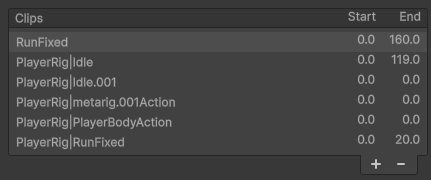
I guess I’ll just start with these three questions. Mainly trying to figure this out for organizations sake-- I’ve successfully gotten my two animations into Unity and working fine, but I don’t think me just “phoning it in” is really sustainable long-term. Like what is going on here in Unity
image

Whew… if anyone can throw some explainers my way I’d be very grateful.
For the general data structure.

  • Keyframes are contained within F-Curves
  • FCurves are contained within an Action and are grouped into Slots
  • An object can reference a slot in an action to be animated by it

An object can also have an NLA setup, each strip in that setup also references an action.

The timeline is a very basic tool for viewing keyframes, honestly I wouldn’t use it if you are animating (unless you are using 4.5 and earlier in which case you may need it for the buttons it has). I would use the Dope Sheet or Action Editor. The unique thing about the action editor is that it only shows a single action (of the active object). The dope sheet is less restricted and just shows data of all selected (by default).

Push down removes the reference your object has to the action and hands that to the NLA.

Why is there both a PlayerBody and PlayerRig section in the NLA Editor?

In that case you keyed something on the mesh, which created an action which is what you can see in the NLA. When you key something, a new action is automatically created and assigned to your object.

Like what is going on here in Unity

as far as I remember the fbx exporter has the ability to export all animations in the NLA separately.

This helped a ton, thank you very much

Follow-up question, is there any relationship between the NLA Editor and an Action Slot? Since both can contain “Actions” do these two have any interactions with each other?

hmm define interactions. Both animate the object in some form.

The NLA lives on the object itself and has strips that point to actions in the blend file. If an action is assigned directly to the object it appears as a track in the NLA as well and you can set the blend and extrapolation modes.

My understanding of action “slots” is that they are intended to group related sequences together into one umbrella “action.”

As the documentation page describes, consider an object’s “movement” and simultaneous “changes to its material.” Both of these are separate animations, yet both of them are directly related, because they are to occur at the same time. Hence, “slots” allow you to conveniently express this relation, grouping them together “under one roof.”

A single “action” captures both, and keeps them precisely in-sync.

I think that it’s also worth noting that, even when you “push down” an action to the NLA strip, you can still get to the action. It’s still in the drop-down list of all actions. You can also “tweak” within NLA.

I would say, you are maybe diving in a bit too deep than you need to be at this stage.

There are a variety of tools available. But you don’t need to use them all. And in fact it is better to keep it simple mostly.

You can start out with a simple interface with these tools.

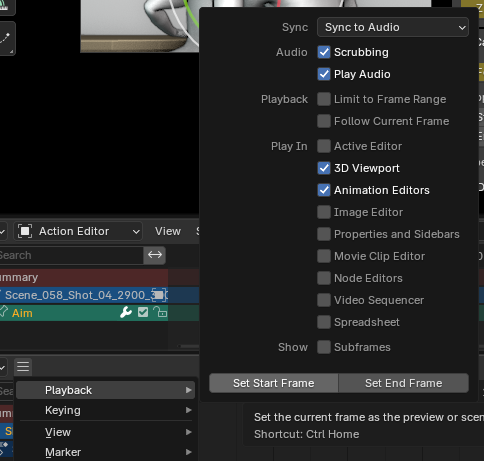
Timeline:

Helps you manage the playback, playback sync/etc.

image

Yes you can move keyframes around at a high level here and as you can see there are some duplicate functions.

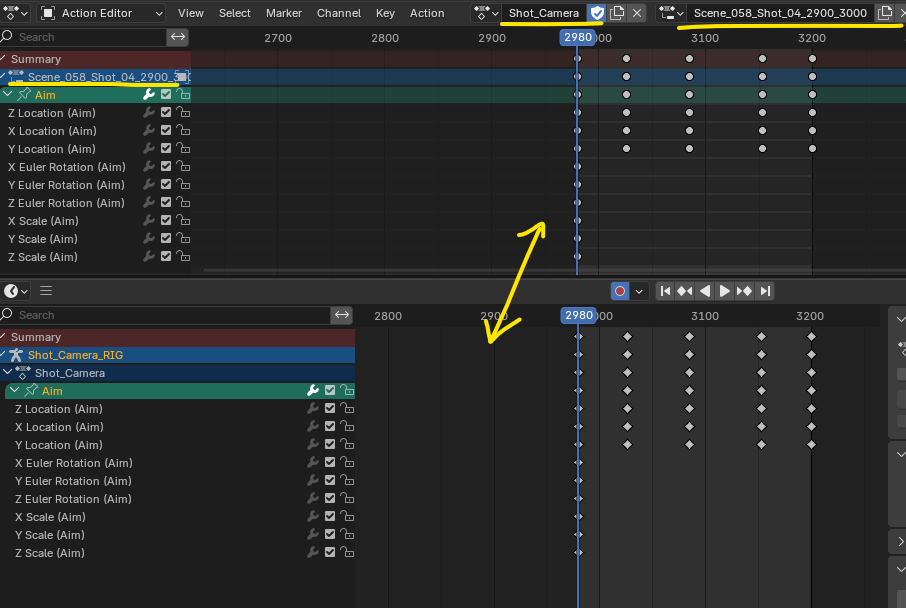
But the Action Editor allows you to rename/duplicate and edit Actions and Action Slots.

image

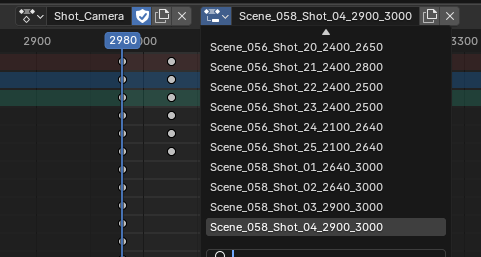
One way I work, as you can see, is I have one action for the Camera and several Slots. One for each Shot, where in the name of the slot I also store the scene, shot number and frames the shot is supposed to cover.

For a character, I might do this.

image

And if there are more actions I need, I will make a new slot for them.

So basically, a senior Action that can contain multiple Slots. There is no rule here. You can use these how you want.

And finally the Graph Editor.

Here you can dig deeper into editing each channel curves.

So that is really all you need.

Timeline
Action Editor (From the Dopesheet)
Graph Editor.

Spend your time learning those tools and the variety of settings on the rig.

For character stuff, you won’t need much more.

And leave the NLA alone and do yourself a favor by eventually just buying the Animation Layer addon as the need to layer animations arise.

I was mainly trying to figure out what the difference was between the pieces but I think now I get it-- thanks to everyone’s help. At least more than when I started

So the NLA Tracks are more for mixing animations? I’ve actually not really found out how to overlap actions at all but I haven’t much looked into it either.

These have been very helpful replies. I’ve been working on animations for a bit now pretty much every day and trying to get them to work well within unity and it’s going pretty good now. The tools are still a bit foreign but you’ve all been a great help.

I’m at the point now where I can "do it " but I’m kinda hoping for the best usually. But there’s things like locking a bone to world position (something my Maya friend said would help), figuring out how to overlap animations with either the NLA editor (I will take a look at that asset thanks!) anf stuff I’m still slowly getting the hang of.

(Sorry if this reply is sorta all over the place, I’m sick atm and thinking is energy extensive lol)

It’s that and more.

By default, Blender creates what I guess you could call “inert” NLA tracks for every action.

So you can start using them as clips by opening the NLA editor and pushing them down as clips to use in the Track editor.

You never have to open this editor for day to day use.

But NLA stands for Non Linear Animation.

This means you can edit actions as clips. Just like video editing. Cut them stretch, them, copy and paste them.

Stack them on top of each other, etc.

And probably more.

But from a practical point of view for most character animation you won’t ever have to touch it.

The stacking or “layered” function Animation Layers in Maya for example, is of good use.

For example a character walk cycle and you want that character to also point a weapon around independently, or wave, or turn its head etc.

As just the basic function of animation layers.

Or to take an animation that you have and tweak one part of it etc.

Animation Layers are a god send.

But in Blender don’t use NLA for this.

Spend for the Animation Layers addon.

This will be much better for you. It is designed to be used similar to Maya.

“Just be patient” when you feel like Blender is asking you to “take a sip from a fire hose!” :slight_smile:

I use NLA a lot in my projects, and I use it in this way.

First, I define individual animations, or any other changes that I need to do, one-at-a-time as “actions.” (Carefully giving each one a meaningful name.) For example: a smile, a frown, a hand-wave. Each one is first worked out individually.

Then, to put together the actual movements for a scene, a shot, I use “NLA.” This lets me sequence the actions, create transitions between them, and to layer them. So that my character: smiles, waves at someone, pauses, and then her smile turns into a frown as (presumably …) the object of her affections doesn’t immediately wave back.

Same for me, i use NLA daily. everything like sundialsvc4

I think it is true for some people.

But I still would caution against painting it as a must-use tool for new animators coming to Blender experience overwhelm of all the options. (as expressed here by the OP)

It’s just another tool that for the most part can live in the background.

After you have mastered everything else, yes add it.

If you are planing to use it for layered animation, however…

Use the addon instead.

This has been great info! I haven’t needed layering yet but I suspect I will, so I’ll pick up that add-on for simplicity’s sake. I’ve been of the mindset that “you need to use NLA tracks to safely save/export animations” but I think I could’ve just given them fake actors and left it at that :thinking:

I very much like this quote haha

@tealtxgr: There’s actually a story behind that quip. Way back in the earliest days of the personal computer, there was an extremely important magazine called BYTE. (RIP …) It was positively intense, and I miss it greatly.

One of its popular regular columns was entitled, “Taking A Sip From the Fire Hose.” The columnist was a great writer, and the quintessential electronics tinkerer. Everyone immediately understood what he was referring to . . .

Talk about a timeless line- it’s instantly relatable, and I’ll definitely be helping to keep the legacy of it alive by spamming my friends with it :joy:

Yes. In fbx export settings you can leave NLA tracks off and make sure to select “all actions”.

This will bring all animations for that rig into the game engine.

You can manage, rename, delete etc all actions in the Outliner using the Blender File view under Actions.