Well Lancer I hope you have time to add some more random stuff to your file. I decided to make a Blend with several random pieces. Since Blender has 20 layers, I decided to make one model for each layer. Some of the items are extra robot parts. Some are totally random accessories that the kids can add to their robots. The most random being a bowler hat, LOL. Here is the list:
Layer: Model
1: Alien Head
2: Wheel and Tire
3: Rotating Wrench
4: Rocket Motor
5: Sphere Robot Head
6: Articulated Wings
7: Fixed Wings
8: Flag and Poll
9: Surfboard
10: Dvd drive w/ sliding tray
& DVD
11: Bucket Robot Head
12: Electric Socket (I hope the one you use in NZ)
13: Bowler Hat
14: Set of 2 Cogs (IPOs are set if you care)
15: Robot Leg
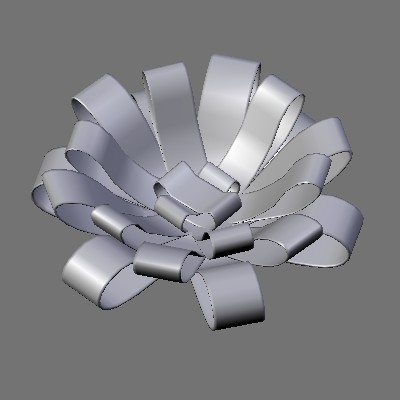
16: Spiral Antenna
17: Flex Tube Robot arm
18: Jet Pack
19: Satellite Dish
20: Kiwi Control Pod (See below)
Here is the total package image:
Here is the layer 20. The Kiwi Pod. Once I realized you were in NZ, I figured the best way to control a robot, would be with a super intelligent Kiwi. So, here it is in its own protective pod.
Note: The Kiwi uses hair particles, so I will understand if you do not want to use it for the class, but it was fun to make anyway. That said, I did all of the modeling and rendering on my older PC which is a Celeron 2.4 GHz with 1.25 GB ram and it did fine with the number of particles in use.
Wow! You’ve completely blown me away on this one. I was wanting to finish a certain model I was working on today, but the director called and emailed me that she urgently wanted to know what I thought of a certain 2D games creator also being looked at withing course time, so I spent today looking into that. My own model hopefully will use particle hair as well.
…but thanks. Thanks a heap for all the work you’ve put into this. I’m thinking you need a medal or something… and you’ve made much what has been made so far. Going to sleep now. Tomorrow: I tidy up around here, pull everything together and try to contribute something myself into all this.
Thanks, but no medal needed. It is fun to have something of value to work on. When you are done with the class make sure you show us some of the kids creations. BTW: If there is an item that you wanted to have for the class that you do not yet have, let me know. I can try to through a quick model together tonight.
I’ve been really busy, especially with everything else I’ve had to plan for towards next weeks courses. Still, I’d feel guilty if I didn’t put some effort into the models for this as well. I thought it might be a good idea to make something less “boy” centred and would put a plastic doll character in there as well… not finished yet, but here she is so far…
Okay - I definitely need to put at least a bathing suit on her before I get called up and accused of bad things when students take their work home.
Still… along those line, if there’s something missing, how about maybe some “cute” character for sensitive students… maybe a dog or a cat? Most young students thing it’s funny to give pet animals robot heads etc.
…off to bed for now. Must give the doll something to wear tomorrow (and finish her hands/feet etc). Thanks again those who have been helping out.
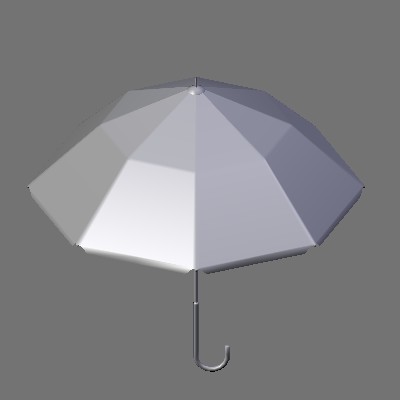
If I find time I will try to make model some cuteness. While I was modeling that last set of random stuff, I realized that everything was sort of slanted toward boys. In my defense I was using my 5 year old son as a focus group, so that might have something to do with it. I should at least be able to make some girly accessories like a purse (pocketbook) maybe a parasol. Granted no one uses parasols anymore but they always show up in cartoons. Like I said if there is an item you want that you don’t think you will have time to make, just let me know.
No problem. I’m thinking of doing a Mech Warrior if I have a little more time.
Oh - being on dialup here, I’ve had major problems with the uploader site lately… had wget trying all night to get your latest, though I finally got it on a friends DSL connection today. That Kiwi is very cool.
Your 5 year old son might be a good tester? I was thinking of also making a Blender Ktuberling (potato guy) similar to the one often seen on Linux. If directions were locked correctly I think kids could easily use it with minor adult supervision.
My last Blend was pretty big, so I can understand why your dial-up was chocking on it. If I post anything else I will try to keep each model in it’s own blend and just attach them here.
As for Ktuberling or Potato guy, my son loves playing with that on my Linux box. He would definitely get a kick out of something similar in Blender.
Edit: Just realized it is almost 2am there. So go to bed allready.
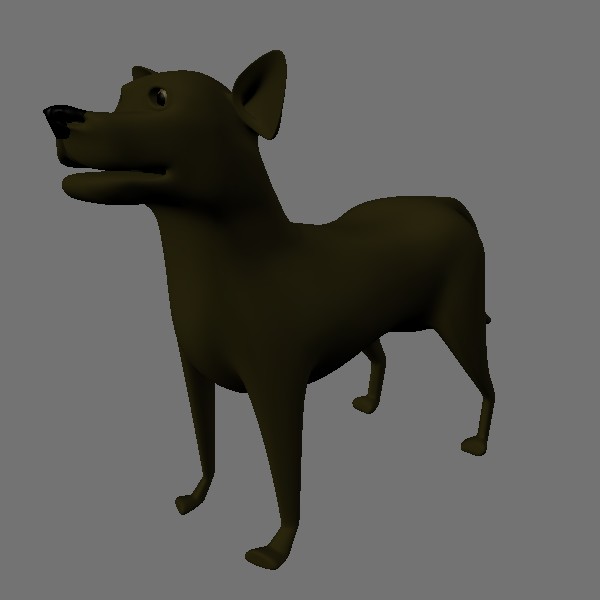
Okay for something cute here is my attempt at a dog. Note: I am not the best organic modeler. I tried to keep the edge loops around the mouth, eyes, and ears decent. However, the topology probably isn’t the best it could be. But, hey it looks like a dog (I hope). I did not try to add a particle system, I wanted to keep the Blend as small as possible. He sits at ~3100 polys without Subsurf.
Dog.blend (108 KB)
p.s. I did not use any reference so I have no idea what bread this thing would be. We can just call it a mutt.
p.p.s. I almost forgot, this is one single mesh (less the eyes). I could not figure out how to cut the doggy up to make usable parts to mix and match. Since you all all the pieces together, maybe you can find good spots to slice him up.
Heh - thanks again. That dog is so cute when downloaded - your screenshot doesn’t give his sticking-out ears cuteness justification! :o
I wasn’t going to post this yet until it was more finished, though here’s the one I’m working on right now. I decided to post when I noticed you were still busy…
…and all those extras for the miscellaneous layer! Thanks again.
Not long to go now… I’m planning to leave the day after tomorrow, so I’ll need to get things packed and I still have a few activities to get sorted. Looking much better thanks to people who have helped out. I’m going to see if I can get that robot Dudebot13 tried to send in. Hopefully I’ll be able to get it (pretty bad connection here).
Thanks everyone… I really appreciate this. I will try to post an update completed file asap, and later (after the course in two weeks?) I will update if I decided to make any significant changes (happens when you finally put files in front of a class)… oh, and most likely some student examples as well.
Open Sourcing learning resources really works!
In edit mode, select all faces you want to separate and push “p”. Your topology is pretty good by the way.
Good Luck with that class. As for my p.p.s., I know how to separate the items, I just could not think of a good way to slice up a dog to match what you are doing with the rest of the robot pieces. : P
I thought that might be the case. :rolleyes:
Hopefully before we know it, students will be able to edit the mesh shapes directly, sorting those issues for themselves. Okay… onto getting things sorted…
I don’t have any of those kind of models handy, but maybe you could also let them pose some of the available character rigs? it won’t enable them to mix parts, but still they could easily strike some good poses and get a basic idea of animation. If mancandy is to complex, you could use my stickman rigs, or delder or ludwig. Another excellent rig (not to hard for newbies to understand) is the generi rig, ported from maya.
And what about simple houses (cuboid shapes) to allow them to construct a “street/town”. should also be quite doable.
Yes FreakyDude, those are good ideas. I’m teaching lots of different activities of course, though this is one of those ones that just happens to create a problem in terms of preparation. I’m planning that advanced students will get to UV unwrap characters like Ludwig, rig and weight paint etc. This activity is for very beginner students who have never used Blender. It allows them to create something without having to go into editing mode at all, which is the next step.
…Great idea to include some of those already available characters though. I’m fighting a headache at the moment and have only tomorrow left to pull everything together. Hope I can get a file posted up here before I go, as opposed to waiting for when I get back. (Not sure of whether I will have internet access when I am away).
Okay then, this is it. I should be driving up the country right now except apparently there’s very bad weather forecast in the middle of the eight hour trip, and I’m not completely packed as I’m still putting together a few blender files, lesson plans and so on. :ba:
So thanks again for everyone who contributed. I said I would make this thing publicly available for your efforts. Here’s the file “as is” ready to give other tutors to use on the course.
(Me playing with the file. Kids will do better)
Here’s where you can download the file as it is at the moment… Upload here:http://tinyurl.com/openfactory2
Here’s a render showing the complete set of toys contained in the file (click to enlarge):